How to Secure Erase an SSD or HDD Before Selling It or Your PC
If you are planning to sell/give away your old PC or just the drive inside, you need to securely erase your SSD or hard drive so that the next person doesn’t get access to your files. It almost goes without saying at this point, but simply deleting a file doesn’t completely make it go away. The operating system simply removes a pointer to the file, leaving all the bits in place until the drive needs and overwrites that space for new data. But that can take years or, if you have a lot of free space, never happen.
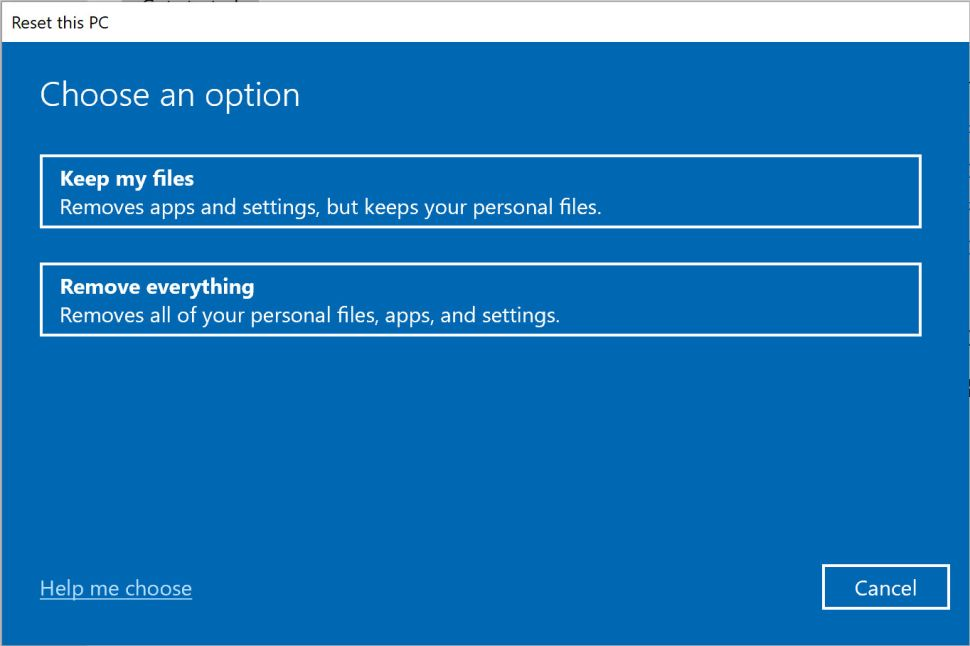
You might think that a simple Windows 10 or 11 reset with the option to delete your files enabled would get rid of all your personal data, but that’s just not the case and we ran a test to prove it. I was about to donate my old Windows 10 PC, so I used the built-in Windows reset feature and clicked “Remove everything”, which will erase all your files and leave you with a factory default OS install.
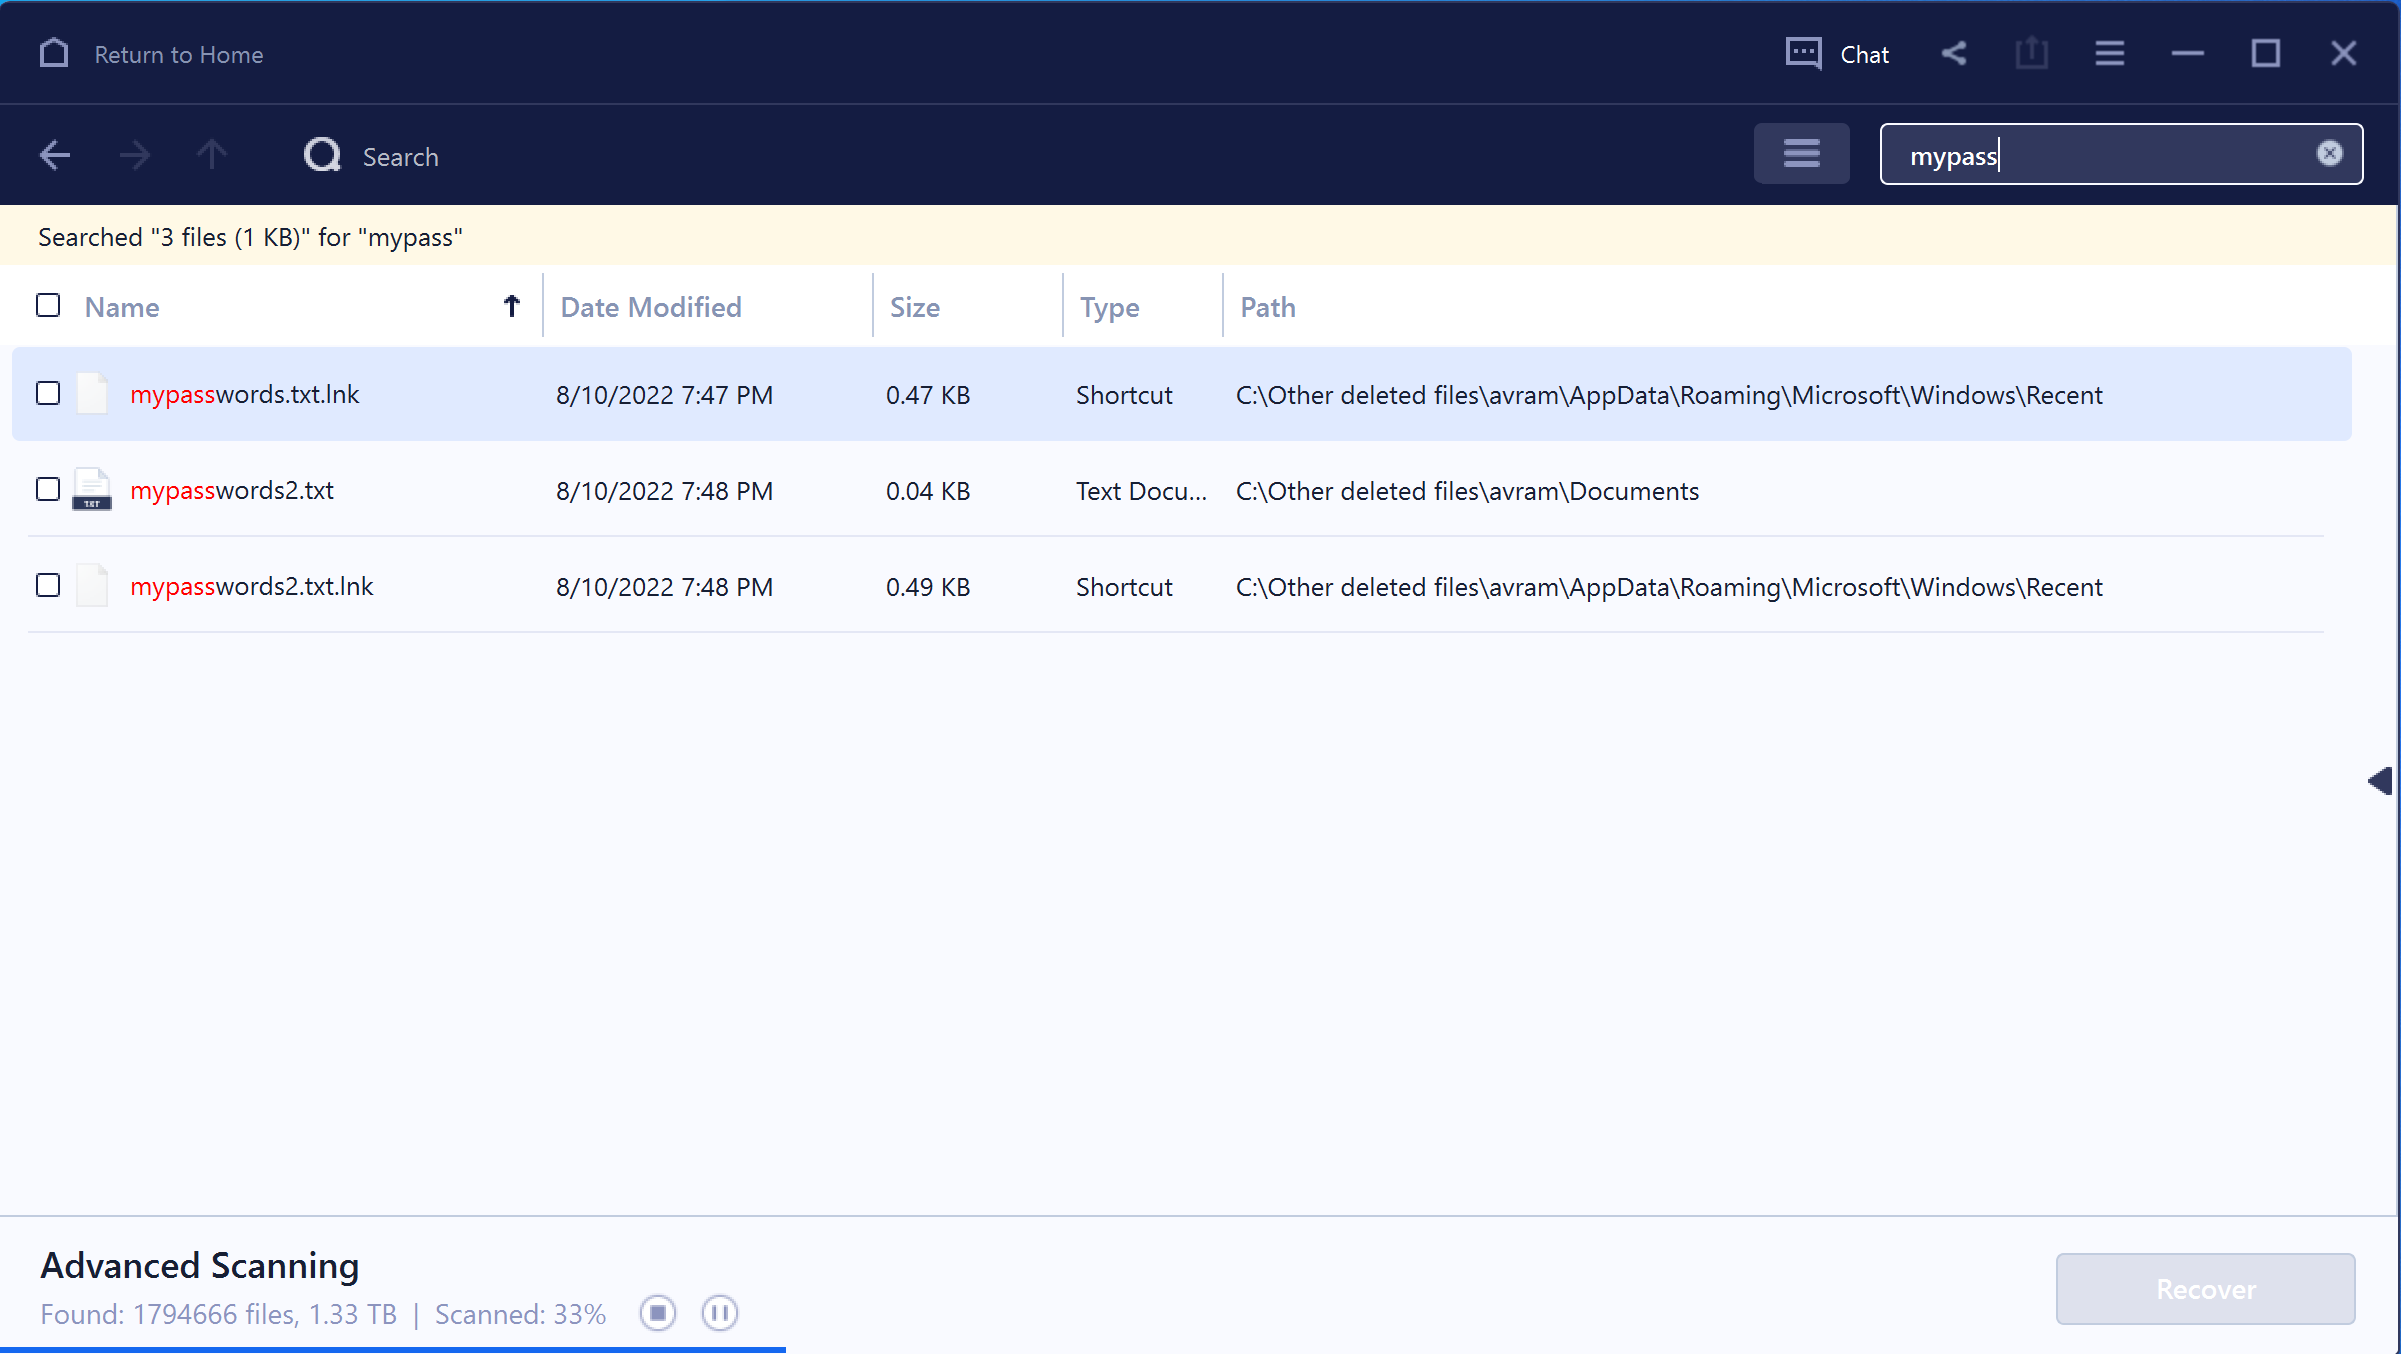
After the reset process was complete, my personal files were actually erased, as was all of the software I had installed. However, after I install and run EaseUS Data Recovery Wizard Free (opens in new tab), a utility that finds and restores files, I found all my old files. To prove my point, I recovered a file called mypasswords2.txt that was in the Documents folder and I was able to read everything in it.
No matter how nice a person you sell your computer or bare hard drive to, you can’t trust them not to see what deleted files they can recover. Below we explain how to securely erase an SSD using Windows and then explain how to do the same with a hard drive as the process is slightly different.
How to securely erase an SSD
Securely erasing an SSD differs from the same process on a mechanical hard drive. The best way to erase a hard drive, which we will discuss in more detail below, is to use a program that will write random data across all sectors multiple times, leaving no remnants of the old files behind.
This brute force overwrite method does not work for SSDs. Because all SSDs have a finite number of write cycles, they use overprovisioning to extend drive life and replace any blocks that fail over time. So it can happen that 5 or 10 percent of the blocks are unavailable to the operating system at any given time. A full drive overwrite would not touch these blocks, which could contain important data.
What you need is a utility that can get at all data. Some SSD manufacturers offer free secure erase utilities, and some motherboard BIOSes (see How to access your BIOS) have a built-in secure erase feature. However, an inexpensive and universal way is to use Windows 10 or 11’s built-in Diskpart utility on command prompt. You can use this method even if the SSD you want to erase is the computer’s boot drive. Here’s how.
1. If the drive to be erased is the computer’s boot drive, Boot the computer from a Windows 10 or 11 installation disk (See How to perform a clean installation for instructions on creating the disc). If the disk to be wiped is not the boot disk, you do not need to boot from an installation disk and can perform this wipe from within Windows.
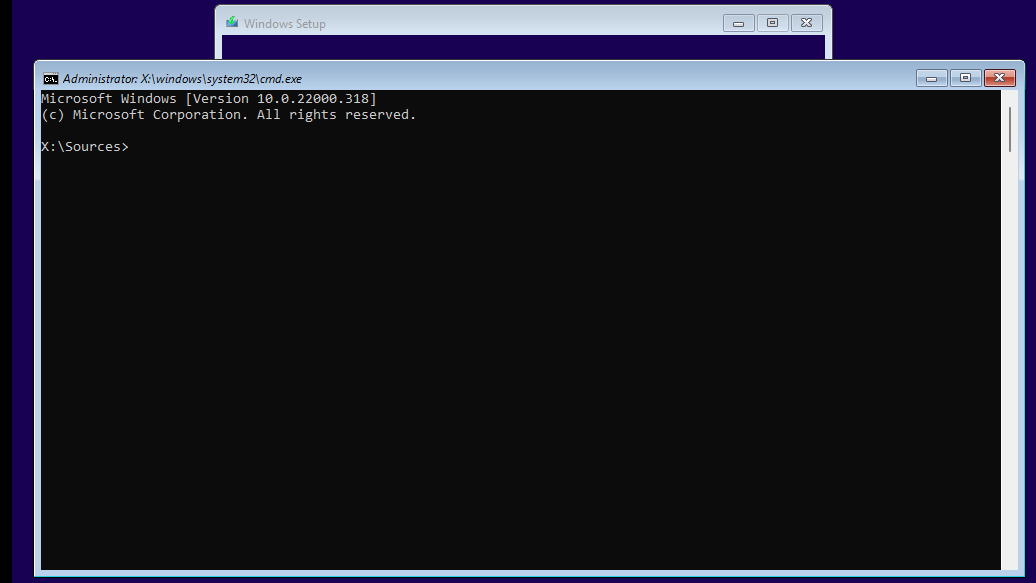
2. Start Command Prompt. If you booted from a Windows installation disk, press Shift + F10 to get the prompt above the installer. If you’re using your regular Windows installation, just search for “cmd”, right-click the top result and select “Run as administrator”.
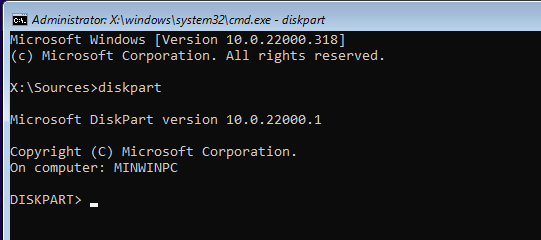
3. Enter disk part. The command prompt is now DISKPART>.
4. Enter List disks to see a list of all hard drives connected to your PC and their numbers. If you only have one drive, it is Disk 0.
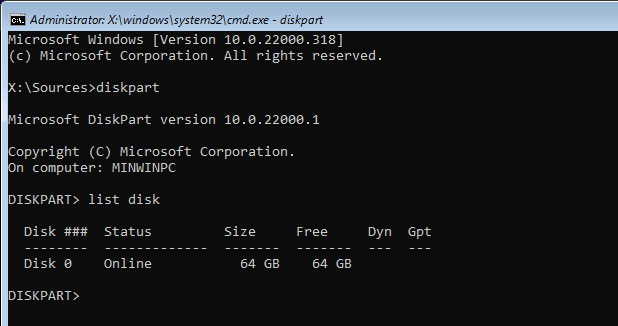
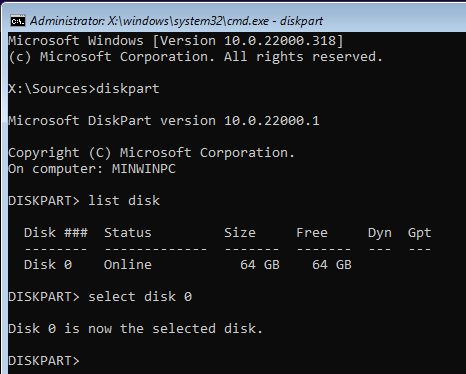
5. Enter Select disk [NUM] Where [NUM] is the disk number, probably 0. So if it’s disk 0, type Select disk 0.
6. Enter clean everything. After a few seconds or maybe a few minutes, you will see a message telling you that the process is complete.
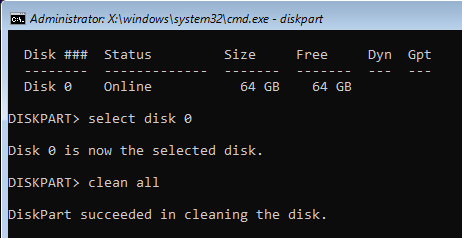
Your drive should now be securely erased. If you plan to give the computer to someone else, you can reinstall Windows on it. When I used “Erase All” to securely erase the SSD on a PC that I donated to charity, I couldn’t see my deleted files on it with EaseUS Data Recovery.
TRIM does not securely erase SSDs
Some experts claim that SSDs with TRIM enabled – most modern SSDs – don’t need secure erase, as the process wipes erased data in the background. Unfortunately, you cannot rely on TRIM to erase all your blocks, even if you try to force it using Windows 10 or 11’s Optimize Drive feature. I took the drive that I had erased using Windows 10’s reset function and then ran Optimize Drive on it, but my confidential files could still be recovered using EaseUS Data Recovery.
“This is an expected result from experience,” said Mike Cobb, Director of Engineering at DriveSavers. “TRIM doesn’t always work with all devices. Because of this, TRIM cannot be trusted unless validated with the system and actual drive model.”
DriveSavers is a leading data recovery service that uses its own proprietary tools to erase deleted data from customers’ SSDs and hard drives. For companies that are particularly concerned about the quality of their secure erasure operations, DriveSavers offers its Data Erasure Verification Service (opens in new tab)”, where experts will check if nothing can be restored.
How to securely erase a hard drive
The best way to ensure that an old-fashioned mechanical hard drive is securely erased is to overwrite it multiple times with dummy data. There is a popular freeware app called DBAN (Darik’s Boot and Nuke) that writes to all sectors using safe cleaning methods.
DBAN is a proprietary boot environment (no operating system required) so you can use it to securely erase the boot drive on a computer without removing that drive and plugging it into another PC. However, if the disk to be erased is not the boot drive, you must be very careful when using DBAN so that you don’t accidentally erase the wrong drive.
1. Download the DBAN ISO file (opens in new tab).
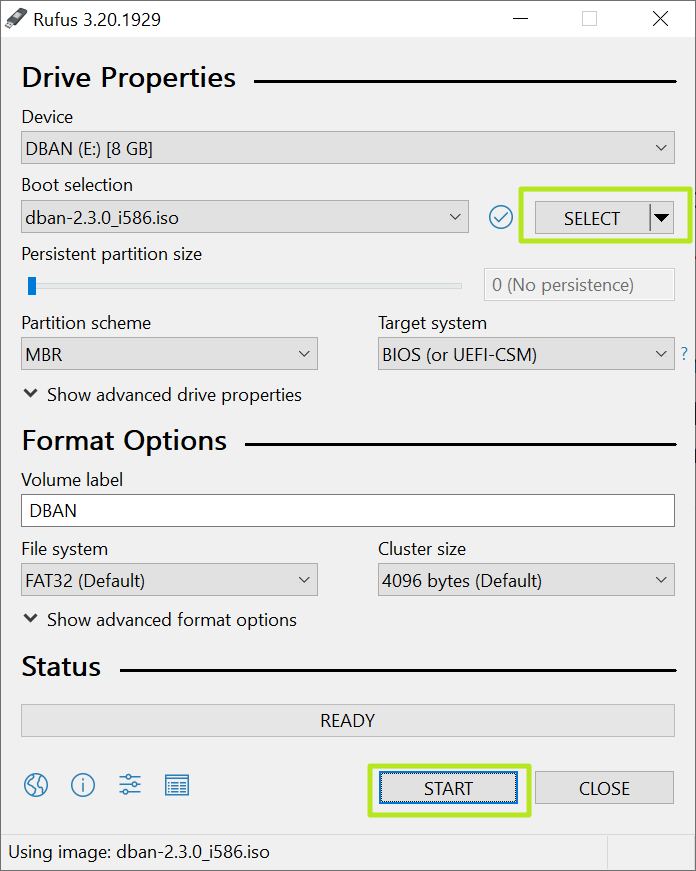
2. Write the ISO to a USB flash drive (it only needs 20MB disk space) to make it bootable. The easiest way to do this is to use Rufus (opens in new tab), a free USB burning tool. Start Rufus, click Select, choose the ISO, then click Start.
3. Boot from the DBAN USB Journey. You will see a menu with a blue background and gray text.
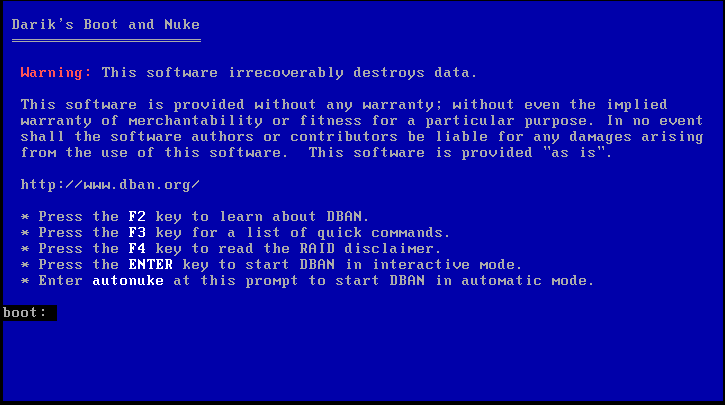
4. Press enter to start interactive mode. The system takes a minute or two to recognize your storage devices. A menu screen will appear, showing all of your drives and a few other options.
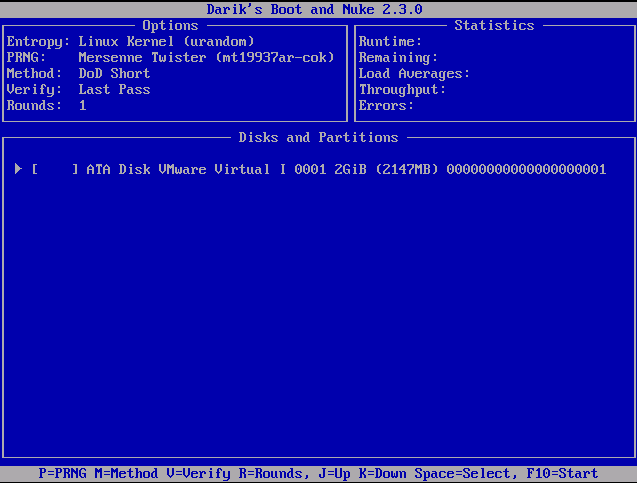
5. Select drive(s). You want to wipe. Use the J and K keys to move up and down and press the spacebar to select the drive which will now say “Swipe”.

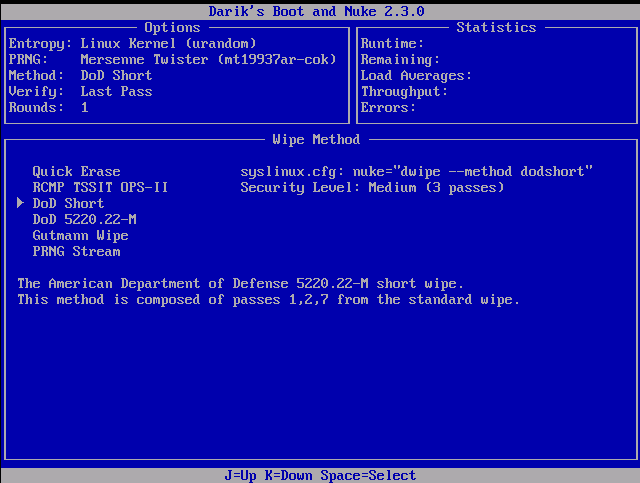
6. Choose the method to erase the drive by pressing M if you want something different than the standard DoD Short method. DoD short is a 3-pass version of the American Depart of Defense 5220.22-M wipe process. It overwrites all sectors with zeros on the first pass, overwrites them with ones on the second pass, and then uses a random pattern on the third pass.
A standard DoD 5220.22-M erase is 7 passes. The more passes that are performed, the longer the secure erase takes. The DoD shorthand method should be fine for most people, so feel free to skip this step if you’re ok with it.
7. Press F10 to start the process. Depending on the number of passes, the capacity of your drive and its speed, this can take a few minutes or several hours.
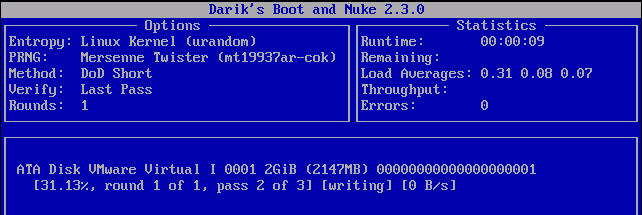
When the process is complete, DBAN will show you a message stating that all drives mapped to it have been deleted.

Your hard drive should now be safe to give away or sell. If you are going to give away the computer with the hard drive inside, be sure to reinstall the operating system.