How to get started with new Photos app on Windows 11
On Windows 11, Photos is the default app to organize and manage your pictures and videos. The app has previously received a refresh to update the aesthetics for the new version of the operating system. However, Microsoft has released yet another update that further updates the design and makes it easier to view, find, organize, and edit all your media files, whether locally stored on your computer or in the cloud.
The only caveat is that starting with this version, Microsoft is removing the video editing capabilities as the company now wants you to use its Clipchamp app. However, as the company removes legacy features, it’s also bringing new ones, such as integration to iCloud in addition to OneDrive to allow iPhone and iPad users to manage their pictures from a single experience.
This guide will help you to get started with the Photos app on Windows 11.
How to navigate the Photos app
The new Photos app comes with a new interface that implements the new design visuals available on Windows 11, such as mica material, rounded corners, a centered search feature, and a navigation pane on the left side with the option to collapse or expand the menu.
Navigation
In the previous version, the navigation pane was at the top. Now, the pane is on the left side, allowing you to quickly navigate your media files available on OneDrive, iCloud, or locally stored on the computer.
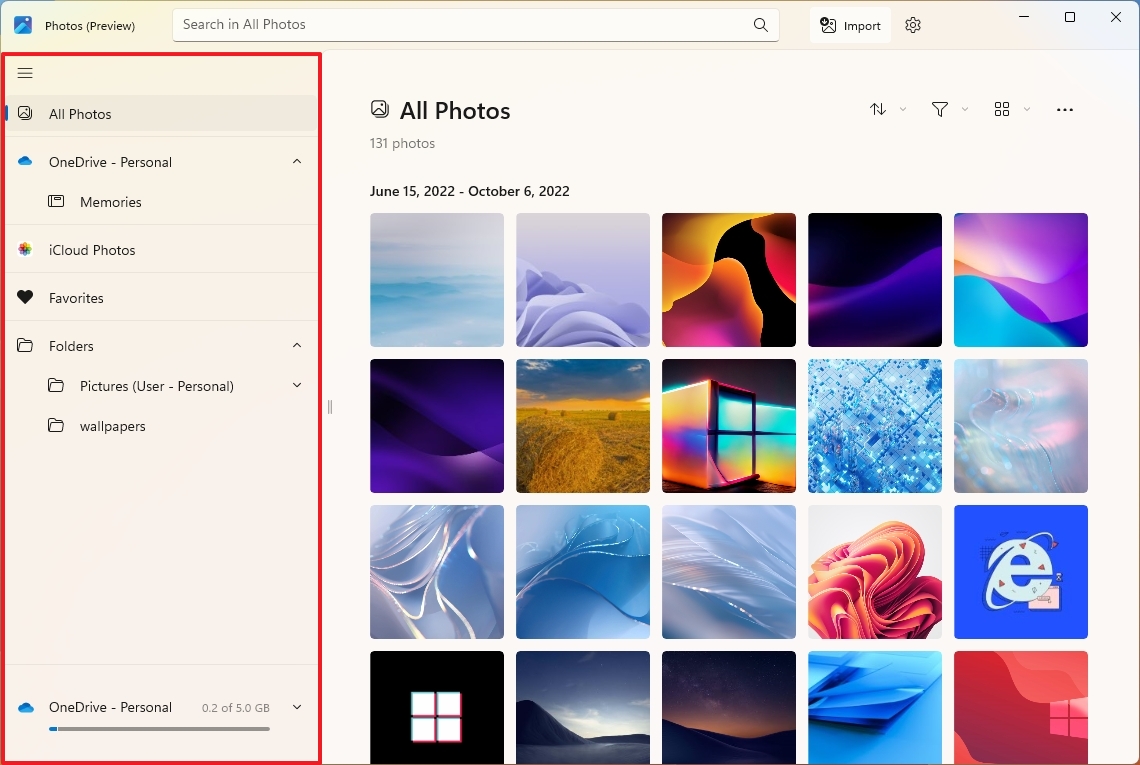
You can also find an option to view all the pictures you marked as favorites.
At the bottom-left side, you will notice information about your OneDrive account, including storage usage and an option to lure you into purchasing more space.
If you have any external storage, they will be listed under the “External Devices” section.
Finally, if the navigation pane is taking up a lot of space, you can use the gripper on the right to change the size. Or you can click the hamburger button on the top-left to collapse or expand the pane.
Search
At the top, the Photos app has its search function that looks and works pretty much the same as the search feature in the Microsoft Store app. However, this feature doesn’t seem to support search preview, as you need to press the “Enter” key to see the result.
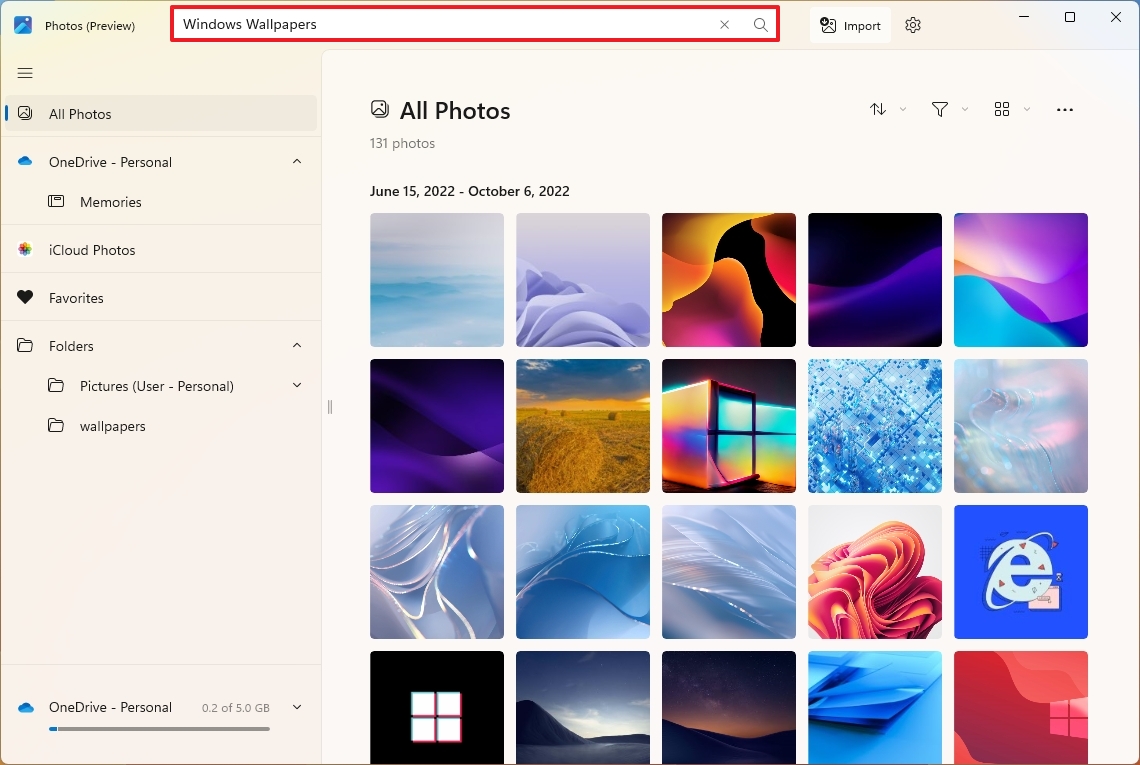
Next to the Search box, you will also find two options, including Import to import images from external devices and the option to access the Photos settings.
Toolbar
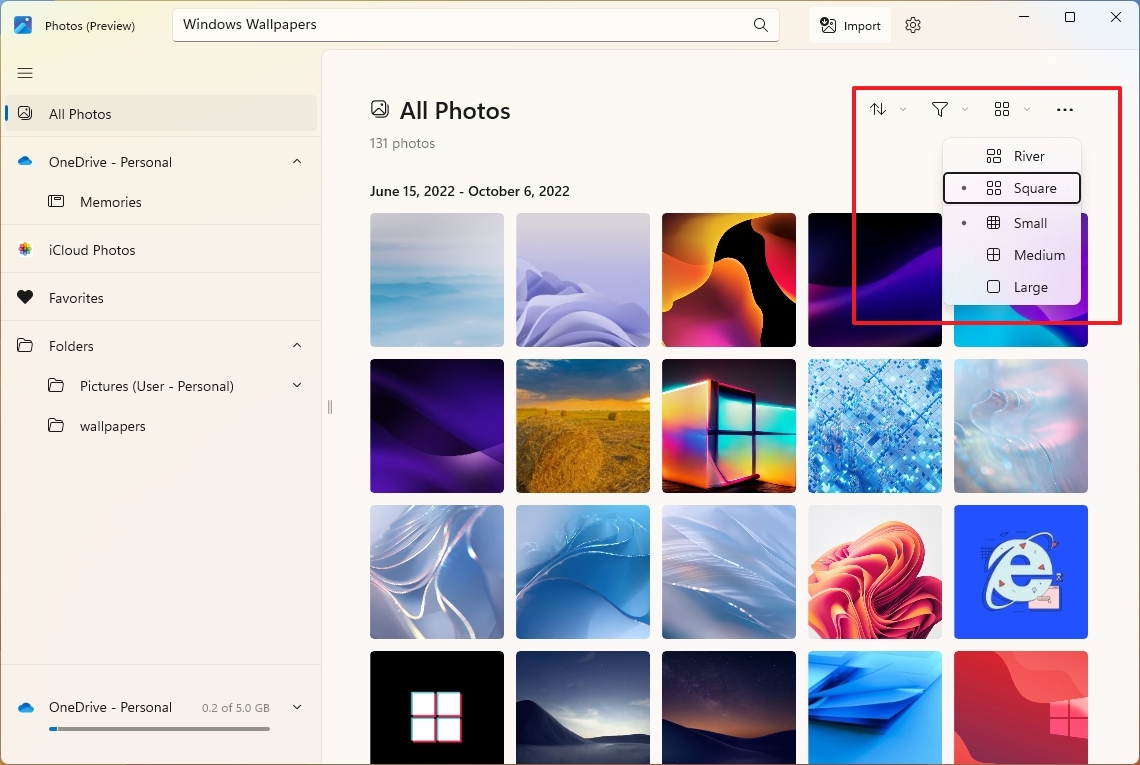
The Photos command bar includes options to sort by criteria like recently added, date taken, date modified, and name. You can filter your media by photos and videos, change the preview size, and select settings.
Pictures
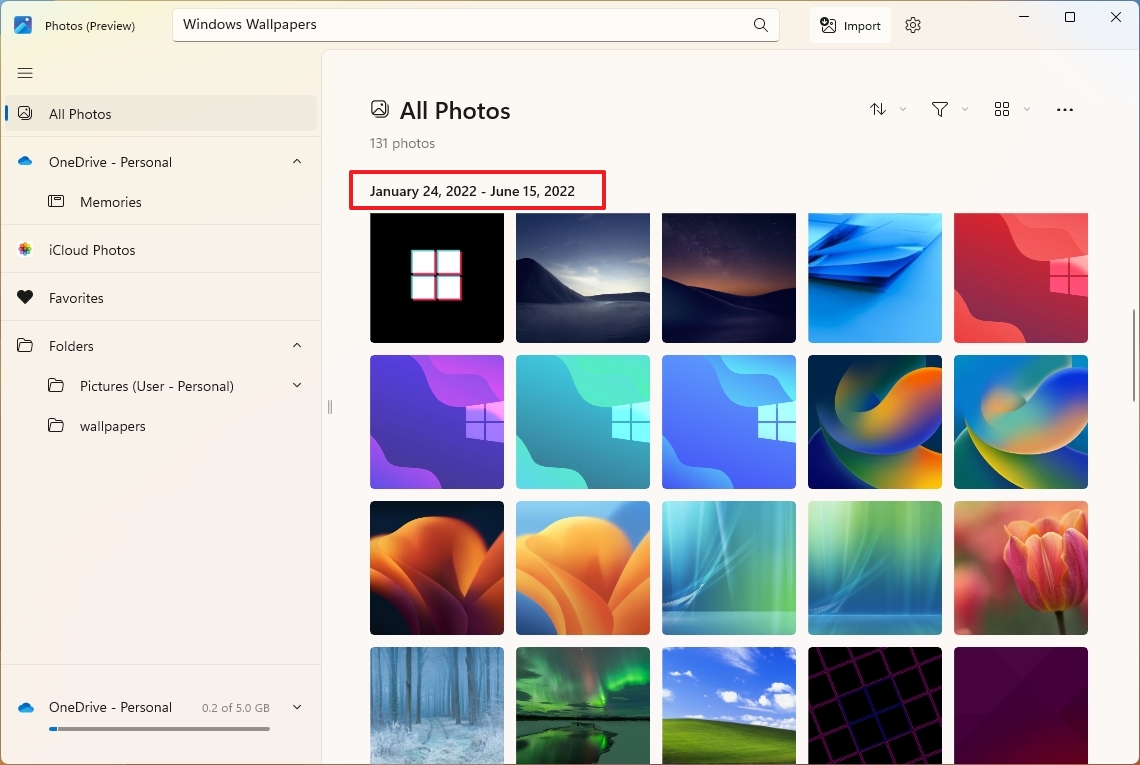
The app no longer includes a timeline scroller on the right in this new version. Instead, as you scroll down through your library, in the top-left, you will see a sub-heading with the time range of the images you’re viewing.
By default, the images include attributes, which are icons that indicate some basic information about the file. For example, you will see a badge icon in the top-left corner of the preview indicating if the file is a video format or the item is stored in a cloud service like OneDrive or iCloud.
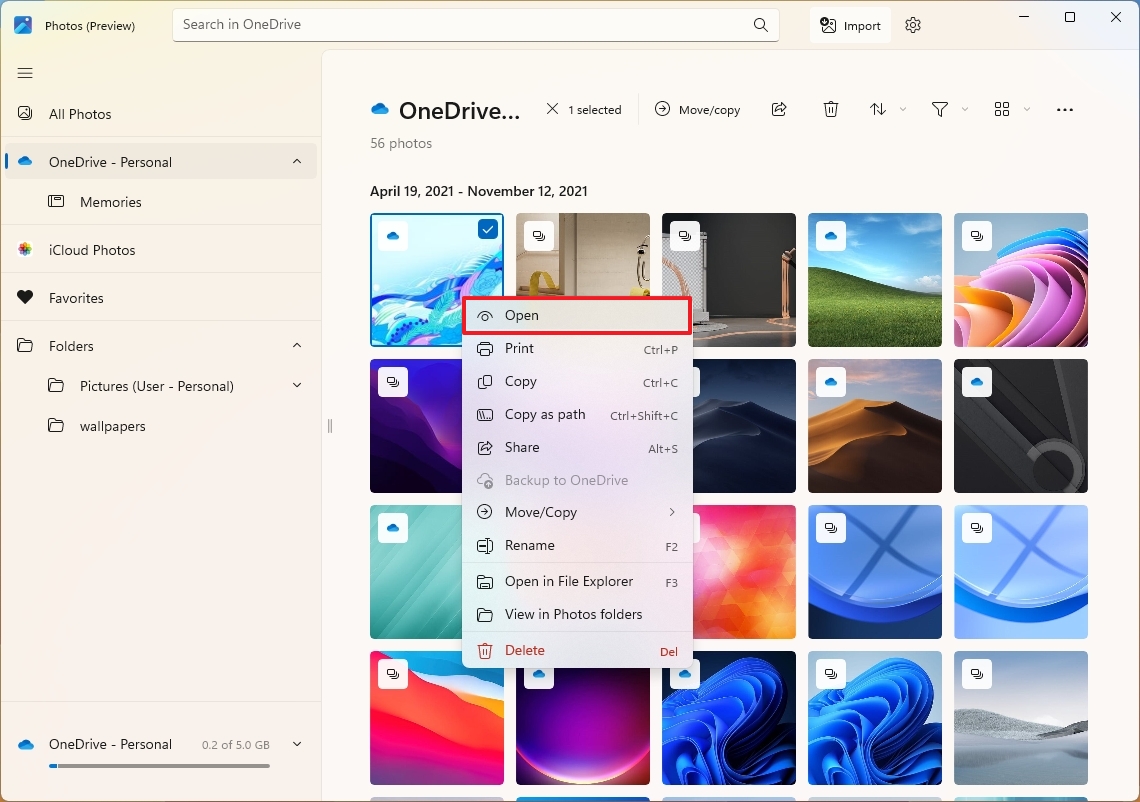
You can always right-click an image to access the different actions through the context menu, such as open, print, copy path, share, move, rename, and delete.
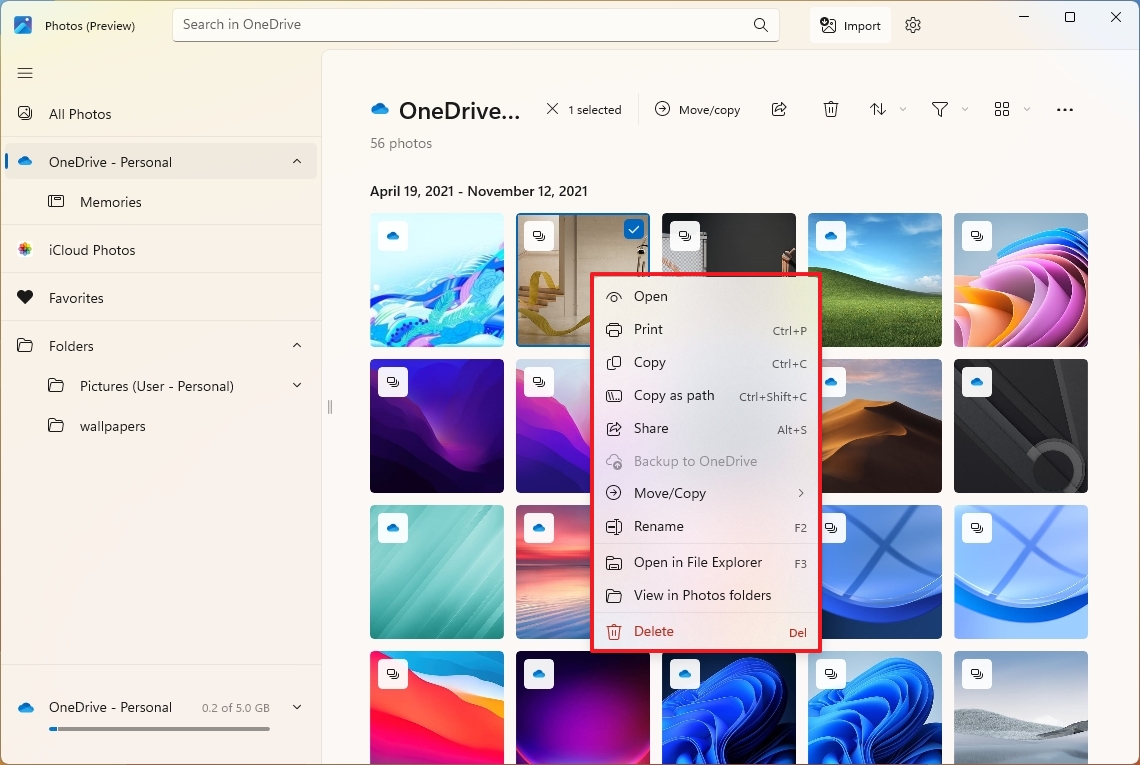
Alternatively, the command bar will show additional actions as you select the file, such as undoing the selection, uploading the file to OneDrive, moving, sharing, and deleting.
How to show or hide OneDrive images in the Photos app
On Windows 11, the Photos app can show your image gallery from OneDrive, but you can always decide whether to hide or show your cloud gallery.
Hide OneDrive
To hide your OneDrive pictures in the Photos app, use these steps:
- Open Photos.
- Click the Settings (gear) button in the top-right corner.
- Under the “OneDrive Accounts” section, turn off the OneDrive toggle switch to stop showing cloud pictures.
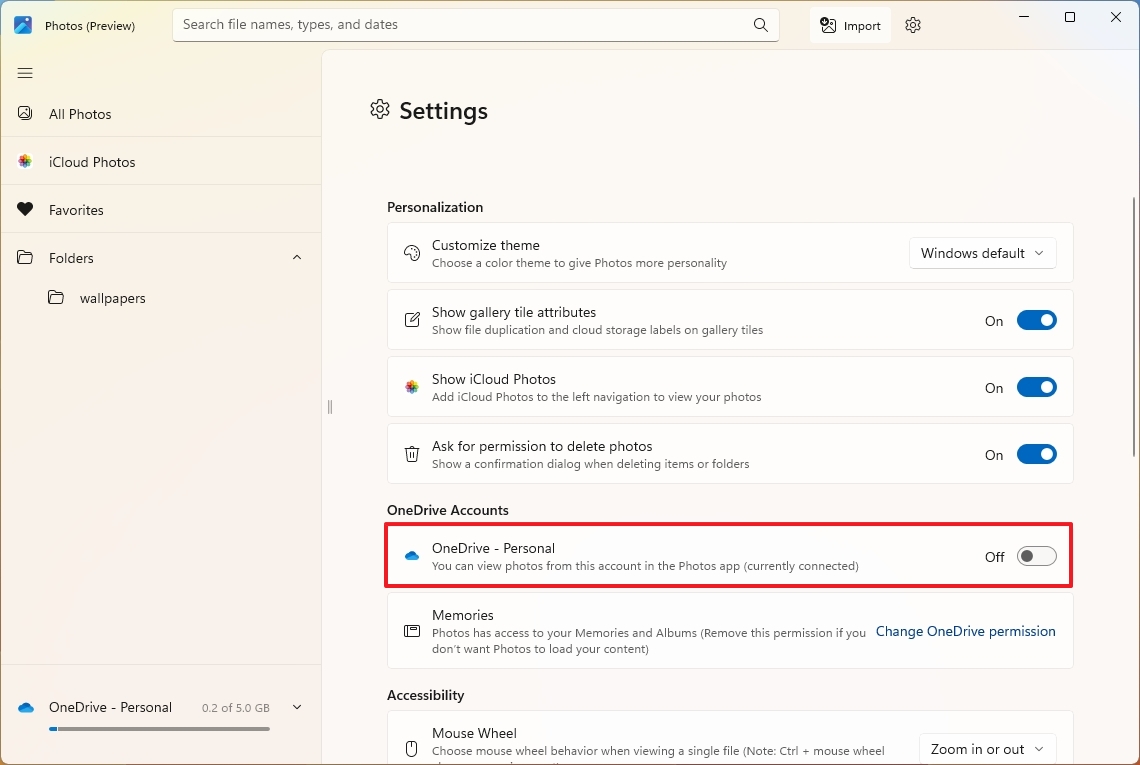
Once you complete the steps, you will only be able to view the images locally stored on your computer.
Show OneDrive
To show your OneDrive pictures in the Photos app, use these steps:
- Open Photos.
- Click the Settings (gear) button in the top-right corner.
- Under the “OneDrive Accounts” section, turn on the OneDrive toggle switch to stop showing cloud pictures.
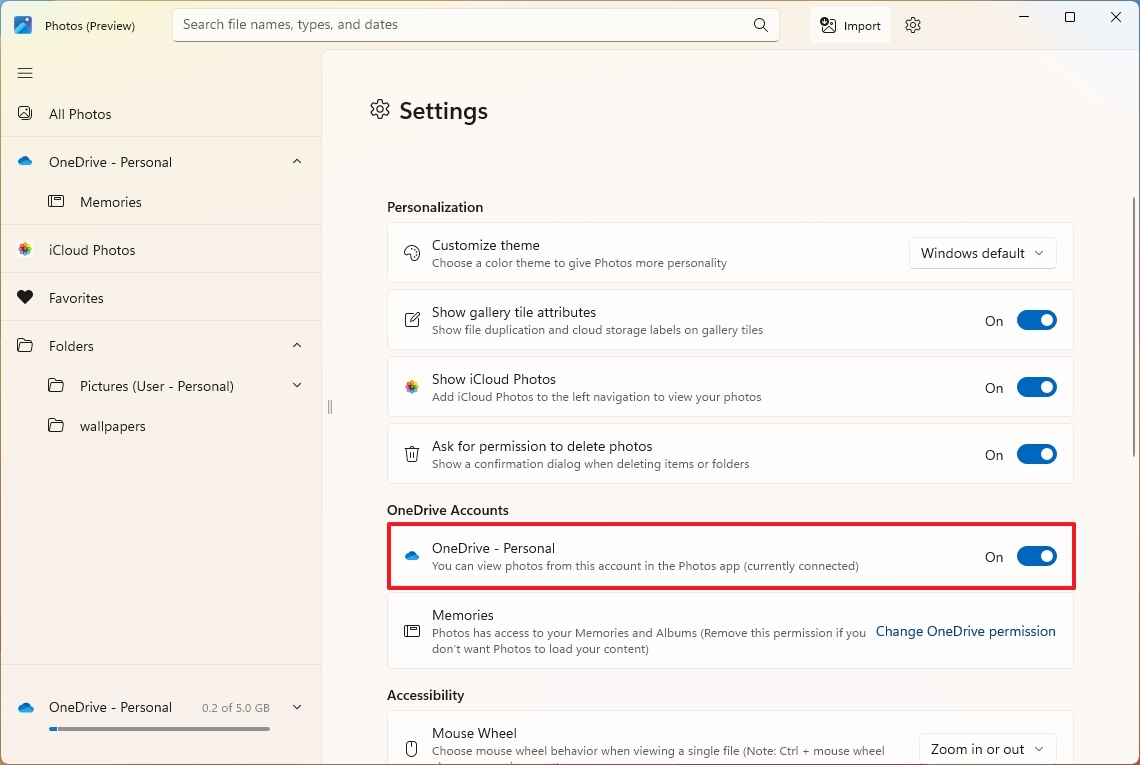
After you complete the steps, you will be able to browse your pictures stored in OneDrive.
How to add or remove local folders in the Photos app
Instead of using the settings page, the Photos app now includes a separate page to add or remove local folders with images.
Add a folder
To a folder with pictures to Photos, use these steps:
- Open Photos.
- Click on Folders.
- Click the Add a folder button. (The big button or the option in the top-right.)
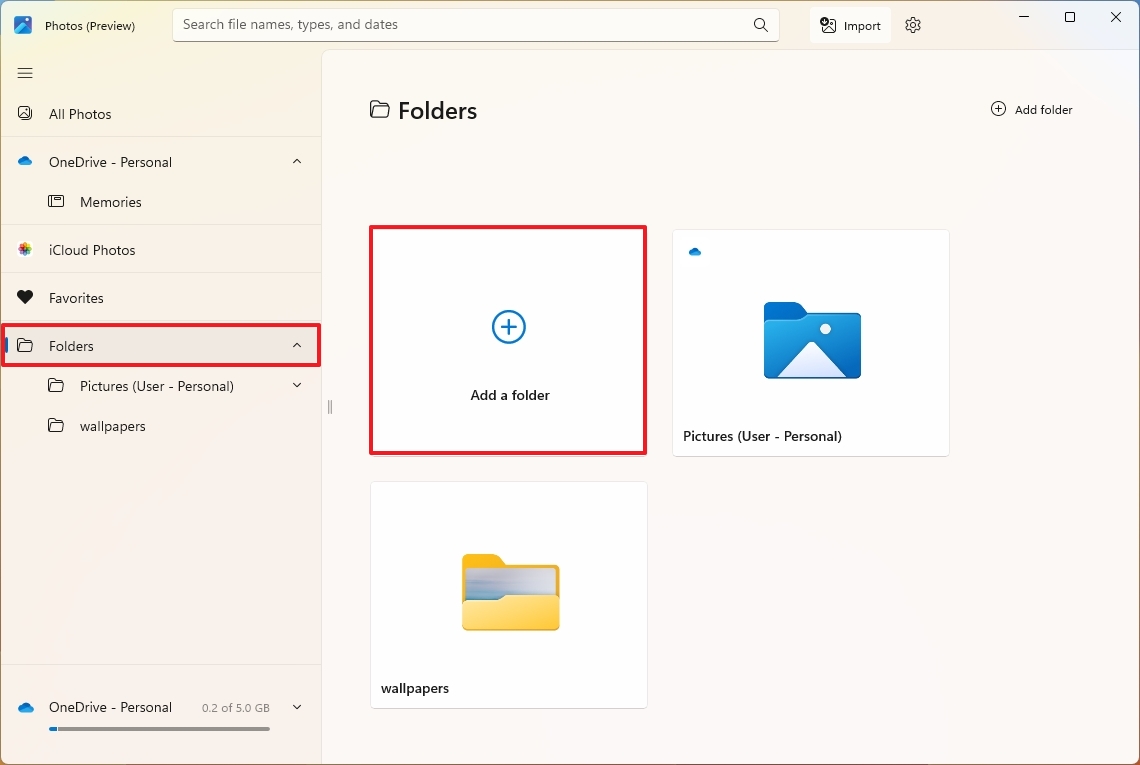
- Select the folder.
- Click the Select Folder button.
Once you complete the steps, the folder will be available under the “Folder” section from the navigation pane.
Remove a folder
To remove a folder location from Photos, use these steps:
- Open Photos.
- Click on Folders.
- Right-click the folder and select the Remove folder option.
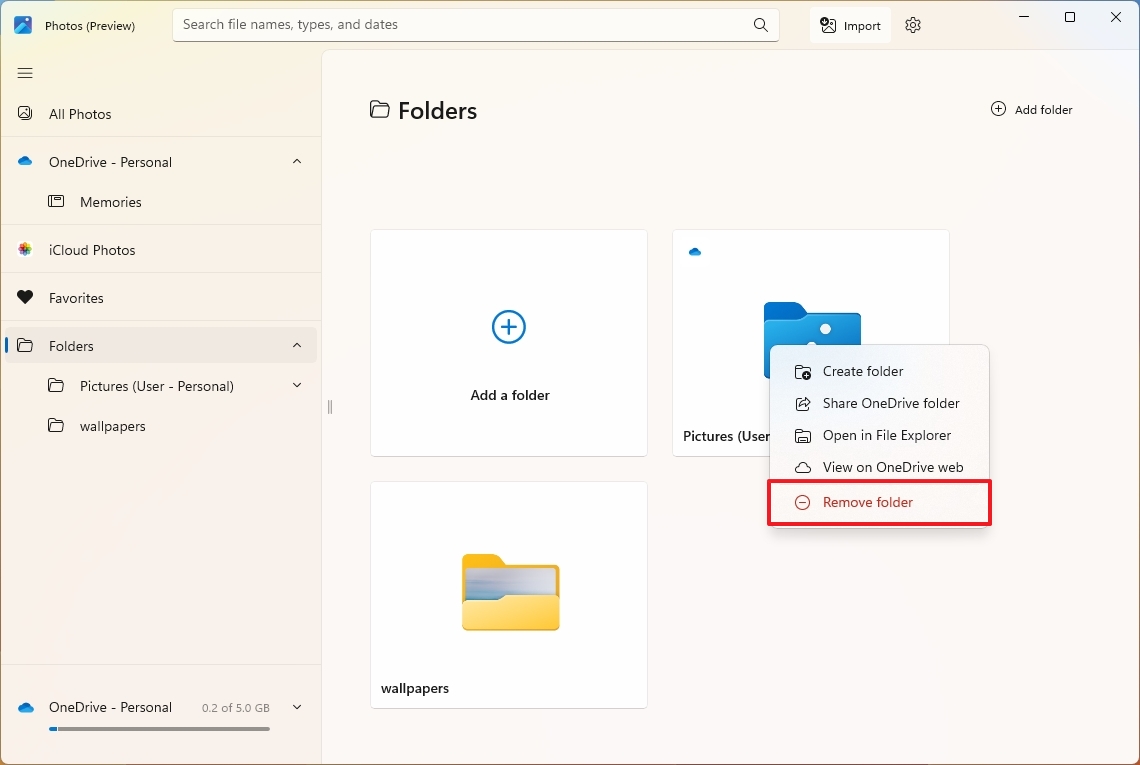
After you complete the steps, the folder will no longer be available in the gallery.
How to import images from external sources in the Photos app
The Photos app can import images from other devices, such as your camera, phone, and memory cards.
To import images from external storage, connect the device to the computer, and use these steps:
- Open Photos.
- Click the storage from the left navigation page. (You can also click the Import button in the top-right corner.)
- Select the images or check the Select option.
- Click the Add button.
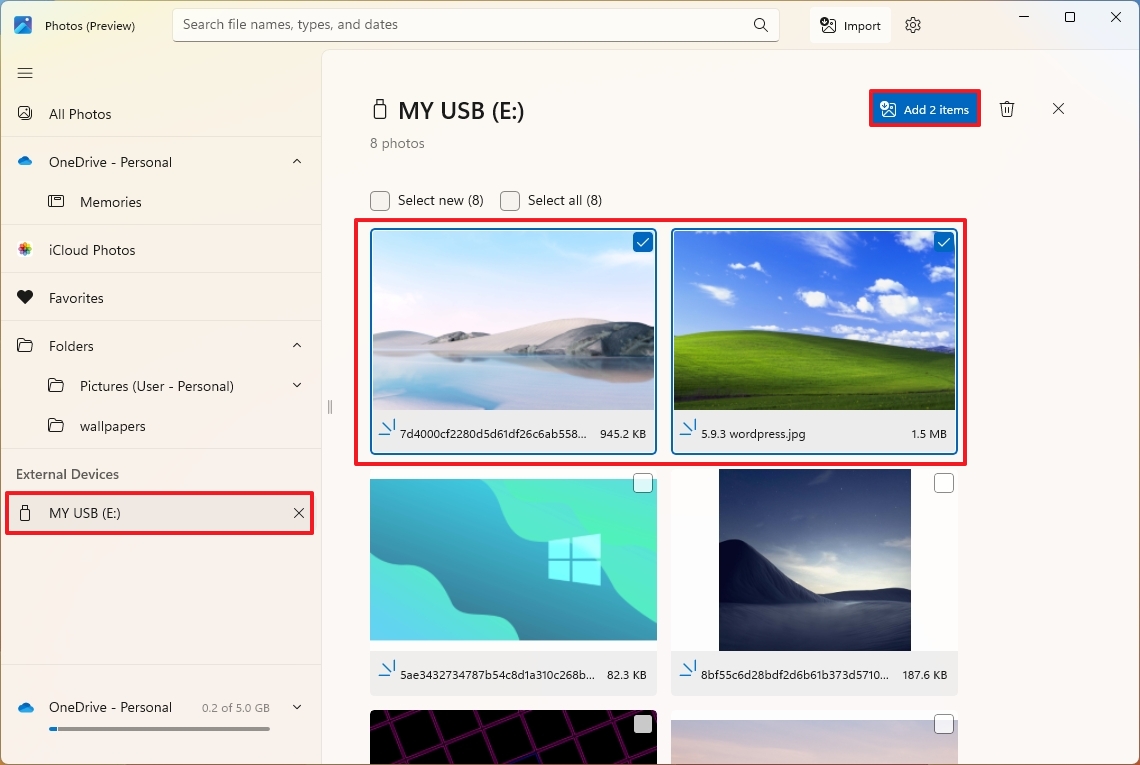
- Click the Change button.
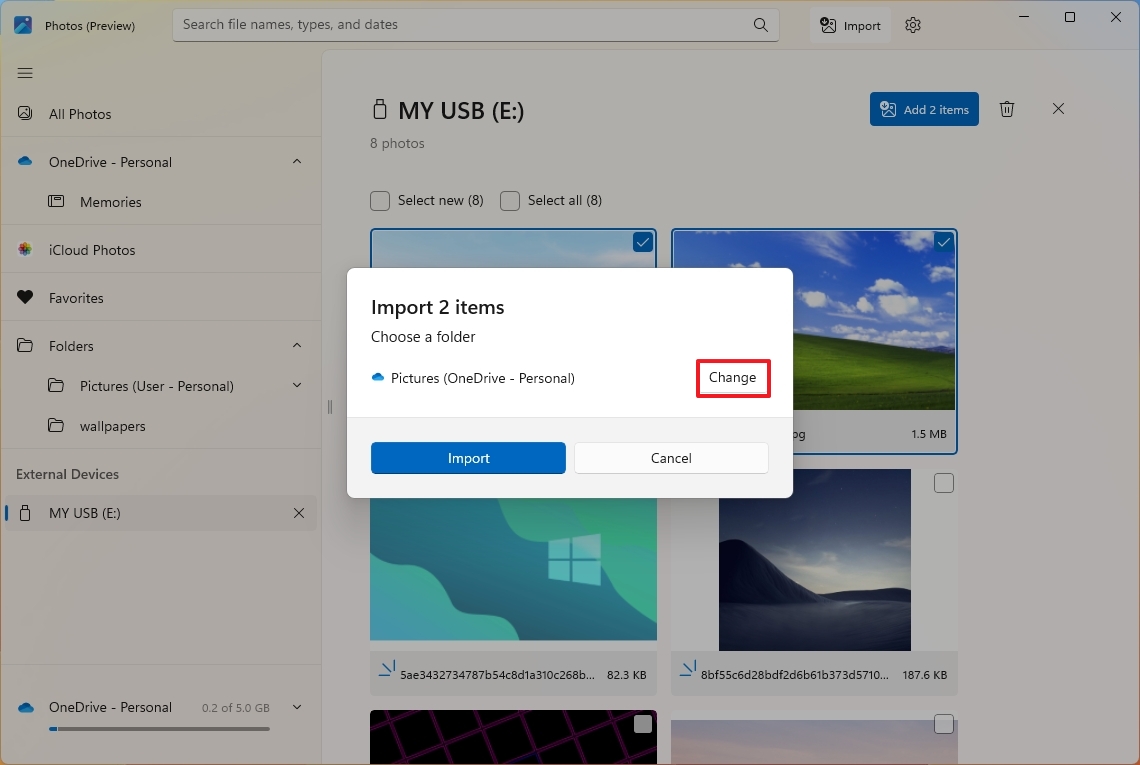
- Quick note: This step is important because, by default, the Photos will upload the images to OneDrive.
- Select the location to import the files.
- Quick tip: You can use the “Create folder” button to keep the newly imported images separate.
- Click the Confirm button.
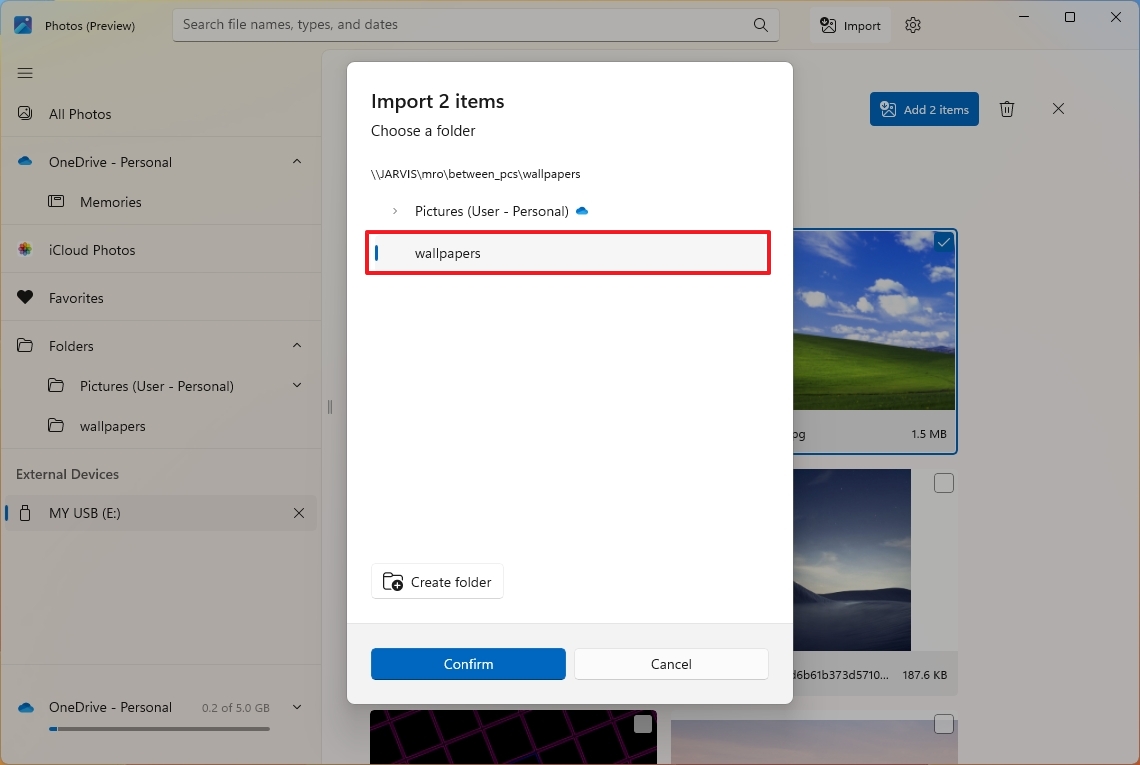
- Click the Import button.
Once you complete the steps, the pictures will import to the location you specified.
How to customize the experience in the Photos app
As part of the customization options, the Photos app allows you to change the color mode, disable attributes, change deletion preferences, and add codecs for new video and image formats.
Change color mode
To change the color mode of the Photos app, use these steps:
- Open Photos.
- Click the Settings (gear) button in the top-right corner.
- Under the “Personalization” section, use the “Customize theme” setting to change the color mode to Light or Dark.
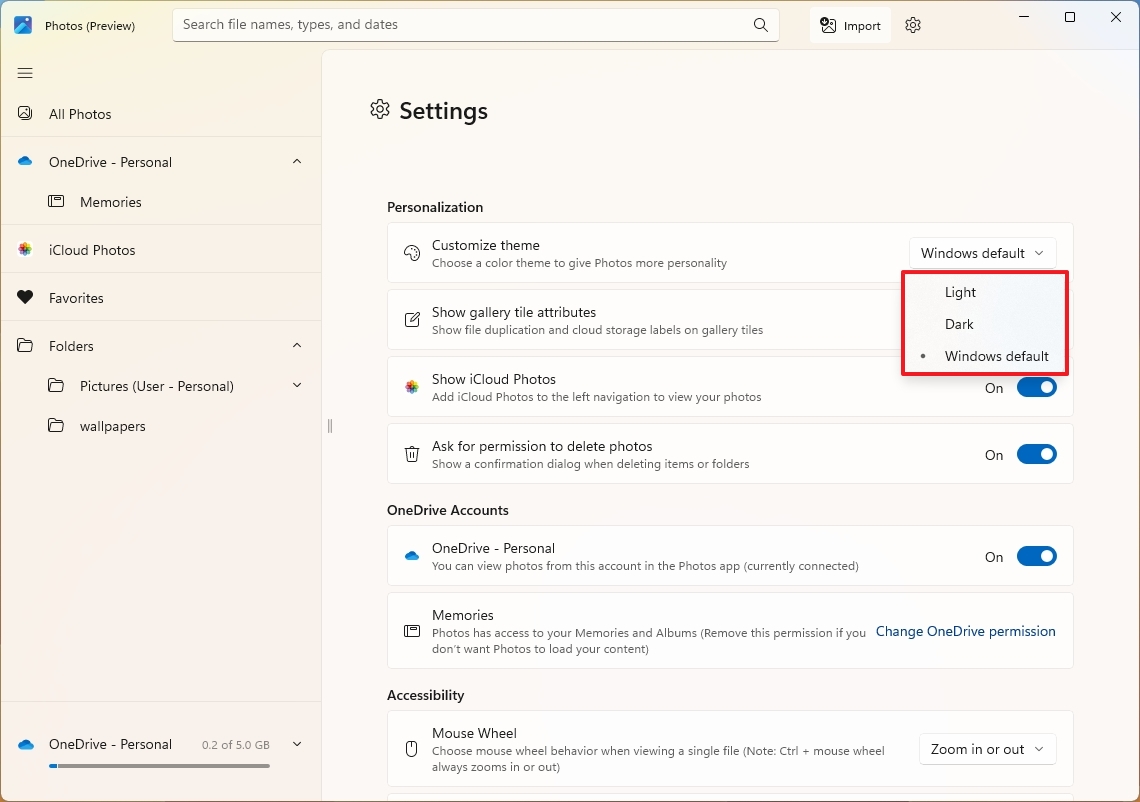
After you complete the steps, the app will change the color mode to the selected color.
Hide image cloud icon
To hide the attribute icons (video, OneDrive, and iCloud) from the image preview, use these steps:
- Open Photos.
- Click the Settings (gear) button in the top-right corner.
- Under the “Personalization” section, turn off the “Show gallery title attributes” setting to hide the image attribute icons, such as OneDrive, iCloud, video, etc.
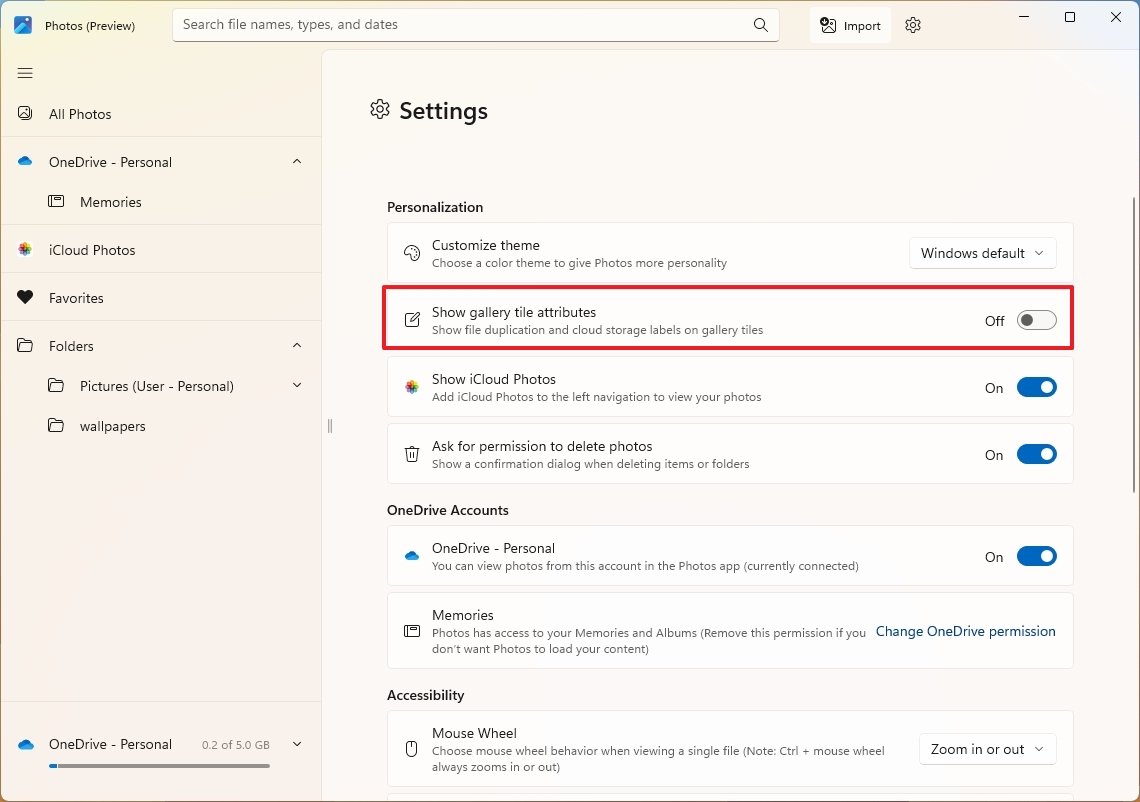
Once you complete the steps, the image previews will appear without attributes.
Disable delete confirmation
To delete images without confirmation from the Photos app, use these steps:
- Open Photos.
- Click the Settings (gear) button in the top-right corner.
- Under the “Personalization” section, turn off the “Ask for permission to delete photos” setting to delete images without confirmation.
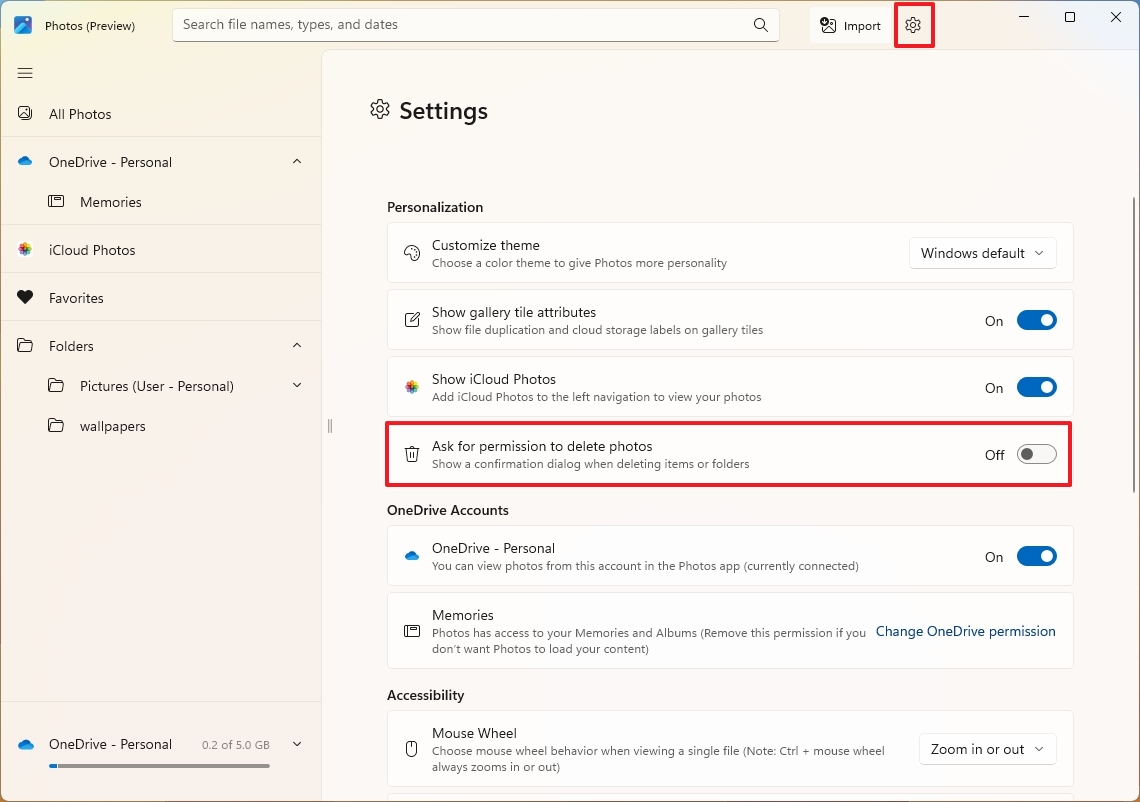
After you complete the steps, you won’t get the confirmation dialog every time you delete a picture.
Install the HEIF extension
To view the new generation of images, you will need to download the HEIF extension with these steps:
- Open Photos.
- Click the Settings (gear) button in the top-right corner.
- Under the “Accessibility” section, click the “Get HEIF media extension” button.
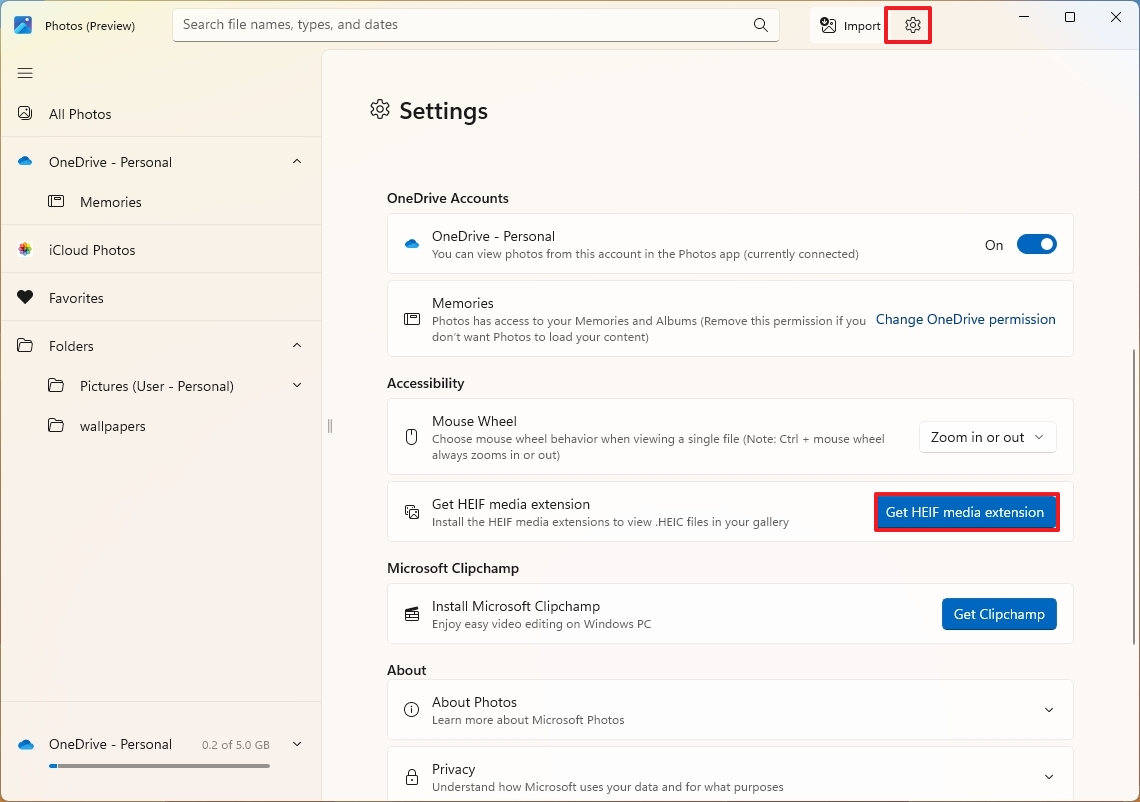
- In the Microsoft Store, click the Install button.
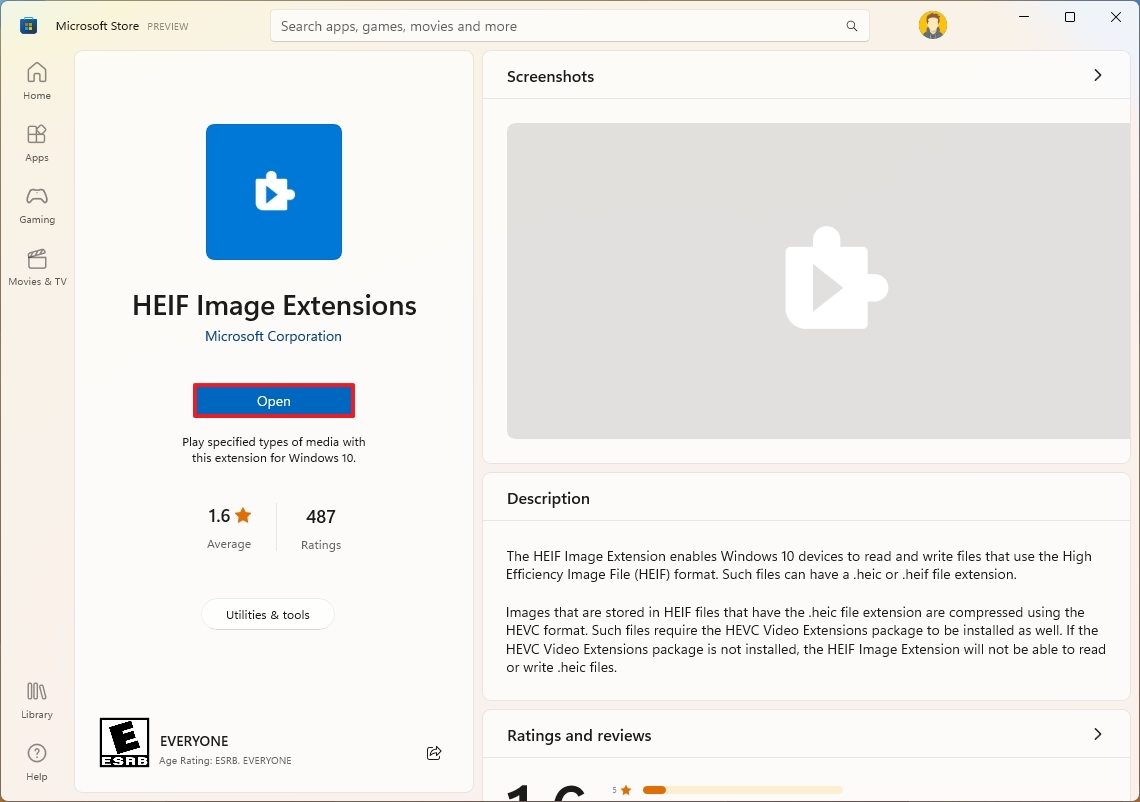
If the Microsoft Store shows the paid version of the HEIF, use this link to the HEVC extension (opens in new tab) that installs the codes to view .heif images and H.265 videos. If you still can’t view the .heif photo, use this Microsoft Store page to install the extension (opens in new tab).
How to switch to the legacy version of the Photos app
If the new app is not for you, it’s possible to switch to the legacy version that includes video editing capabilities.
To switch to the legacy version of Photos, use these steps:
- Open Photos.
- Click the Settings (gear) button in the top-right corner.
- Under the “About” section, click the “Get Photos Legacy” button.
- Continue with the on-screen directions (if applicable).
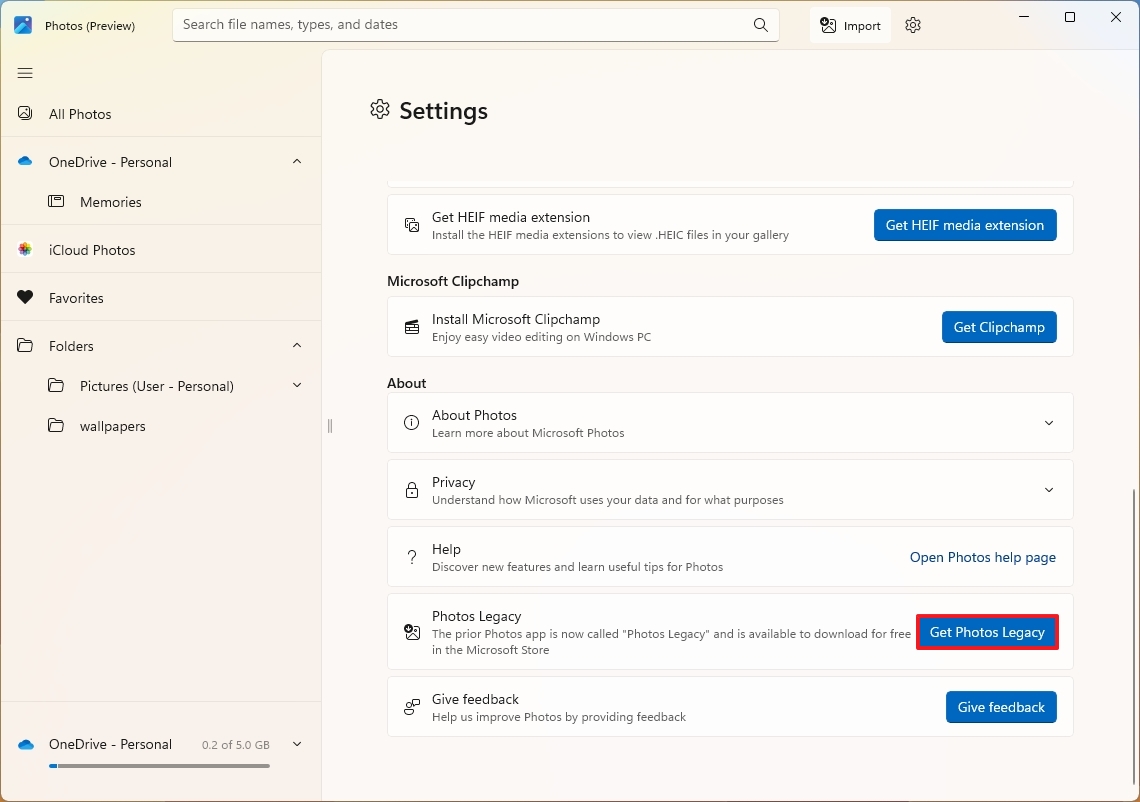
Once you complete the steps, the legacy app will install and replace the new version.
How to connect iCloud to the Photos app
In addition to showing images from OneDrive, the new version of the Photos app also integrates with the Apple iCloud service.
To connect your iCloud account to the Photos app, use these steps:
- Open Photos.
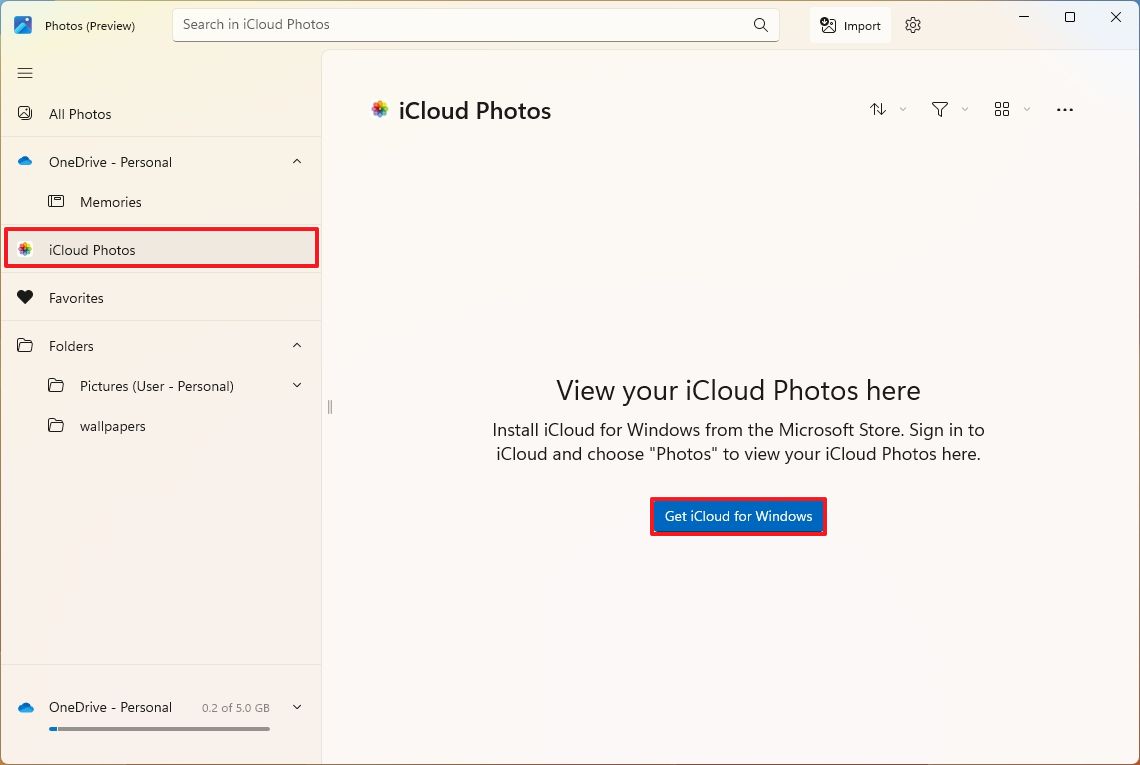
- Click on iCloud Photos.
- Click the “Get iCloud for Windows” button (if applicable).
- Click the Get button.
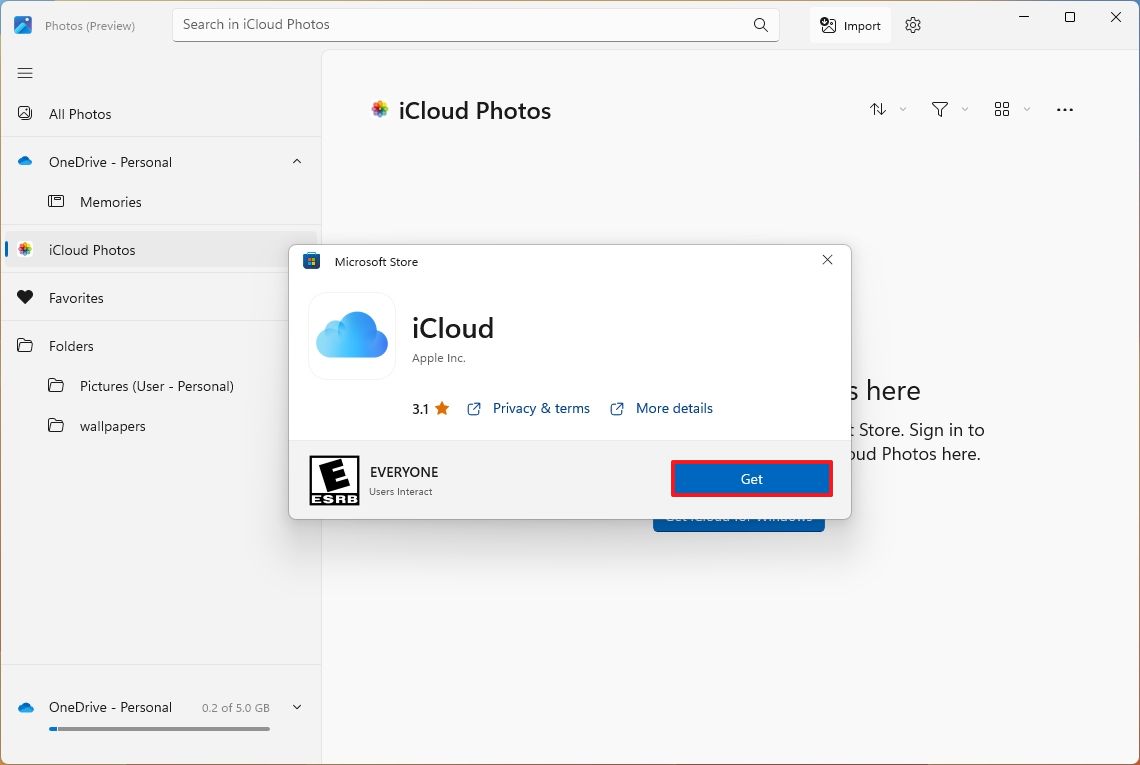
- Click the “Open iCloud for Windows” button from the Photos app.
- Sign in with your iCloud account.
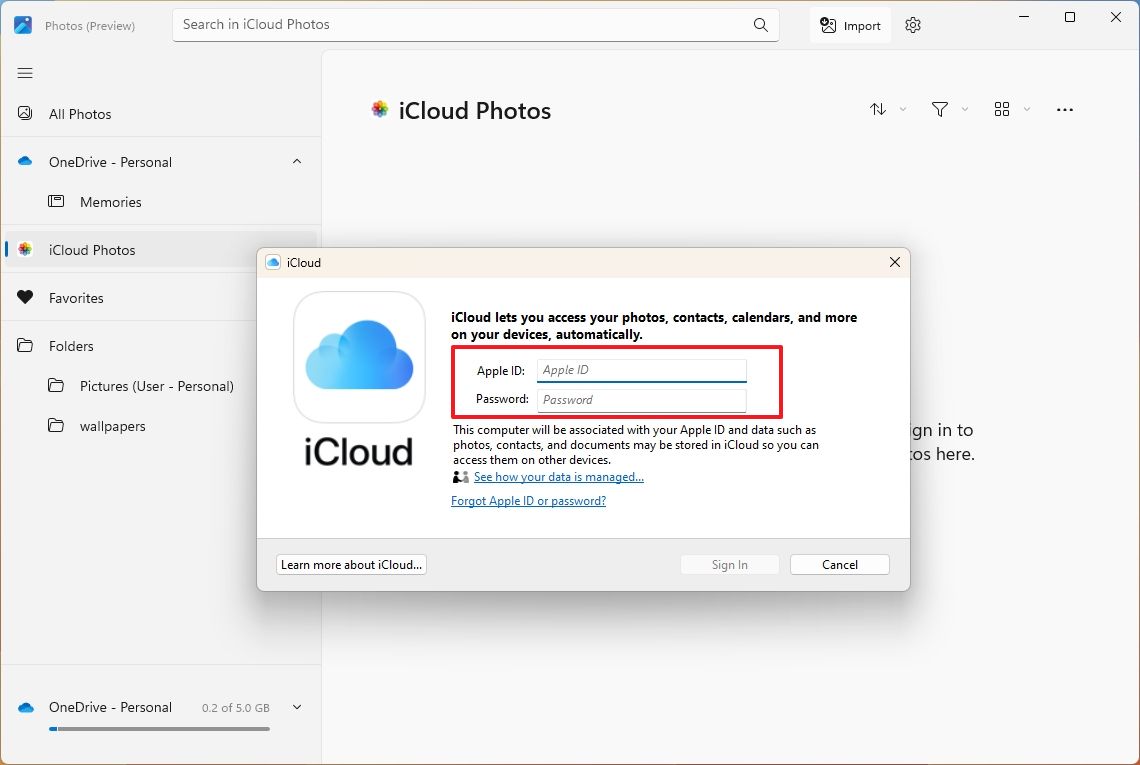
Once you complete the steps, your photos and videos from iCloud will be available from the Photos app on Windows 11.
Hide iCloud from Photos
If you don’t have an iCloud account or this feature isn’t for you, it’s possible to remove (hide) iCloud integration from the Photos app.
To remove the iCloud integration from Photos, use these steps:
- Open Photos.
- Click the Settings (gear) button in the top-right corner.
- Under the “Personalization” section, turn off the “Show iCloud Photos” toggle switch to hide the feature.
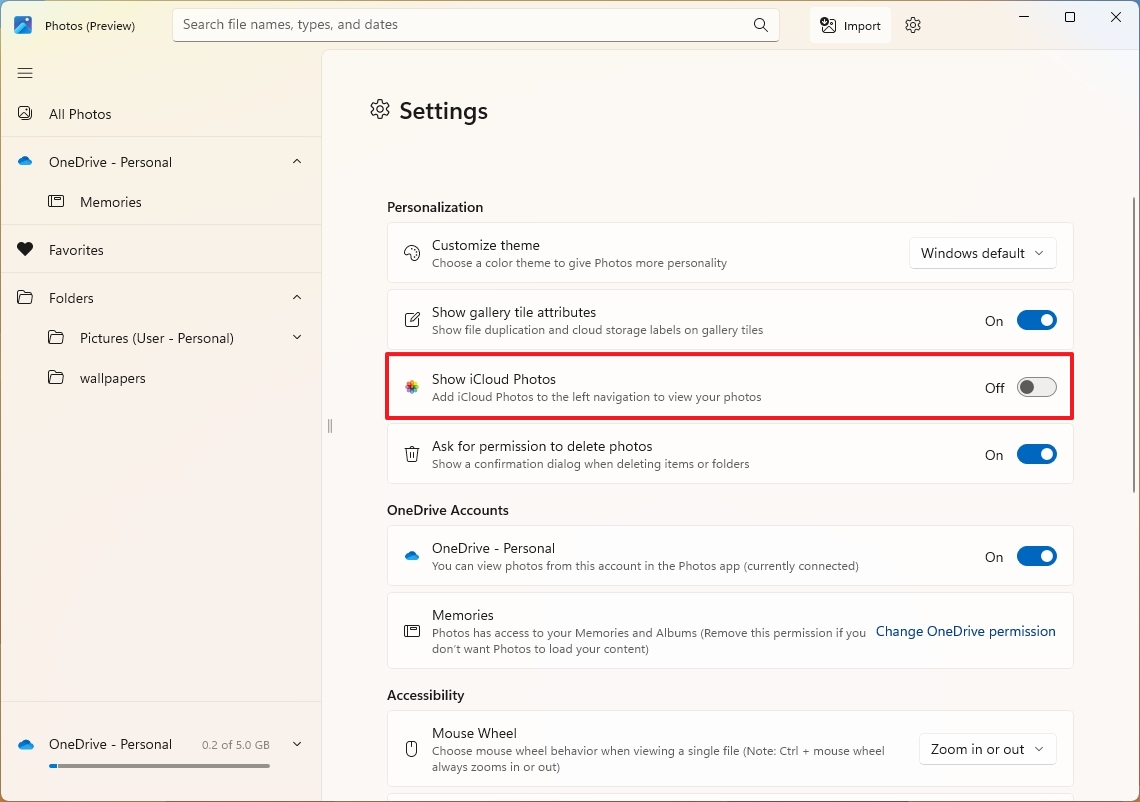
Once you complete the steps, you will no longer see the iCloud option in the navigation pane.
How to view and edit an image in the Photos app
To use the basic editing tool from the Photos app, use these steps:
- Open Photos.
- Open the location of the image.
- Double-click the picture or right-click the file to access the Open option from the context menu, which includes other options, such as opening the file with File Explorer, sharing, copying, printing, and more.
- Click the Edit button.
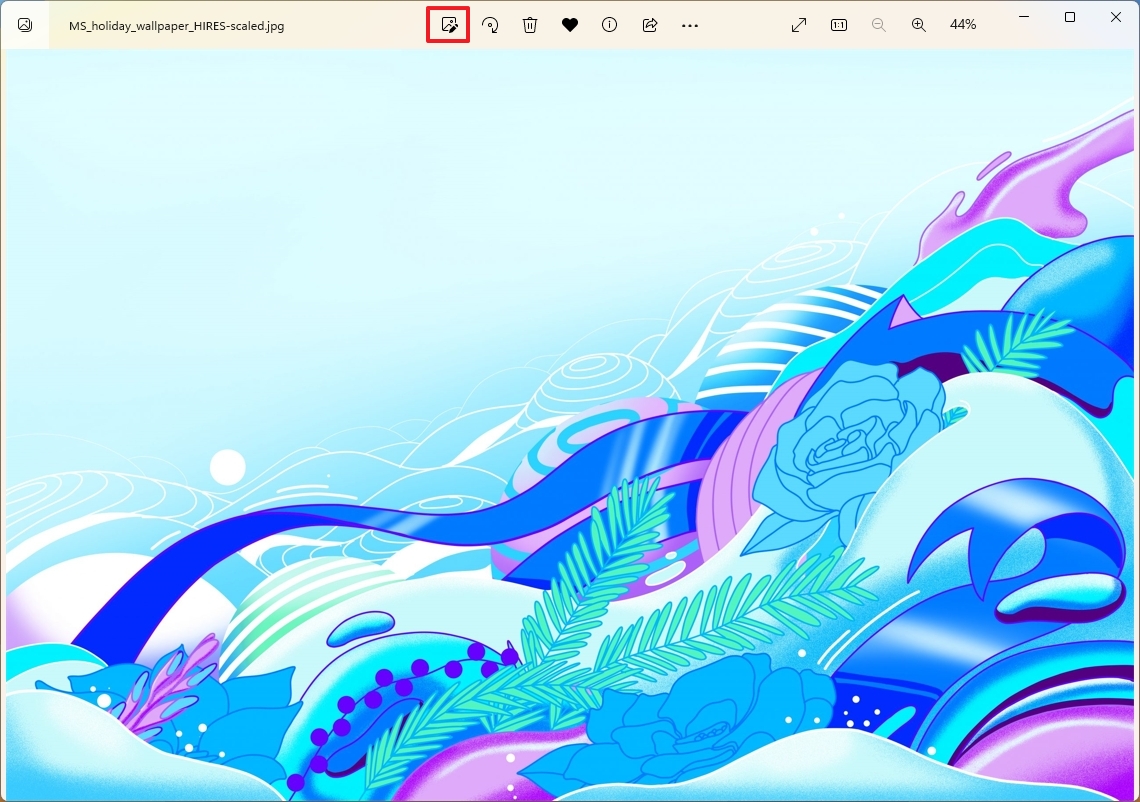
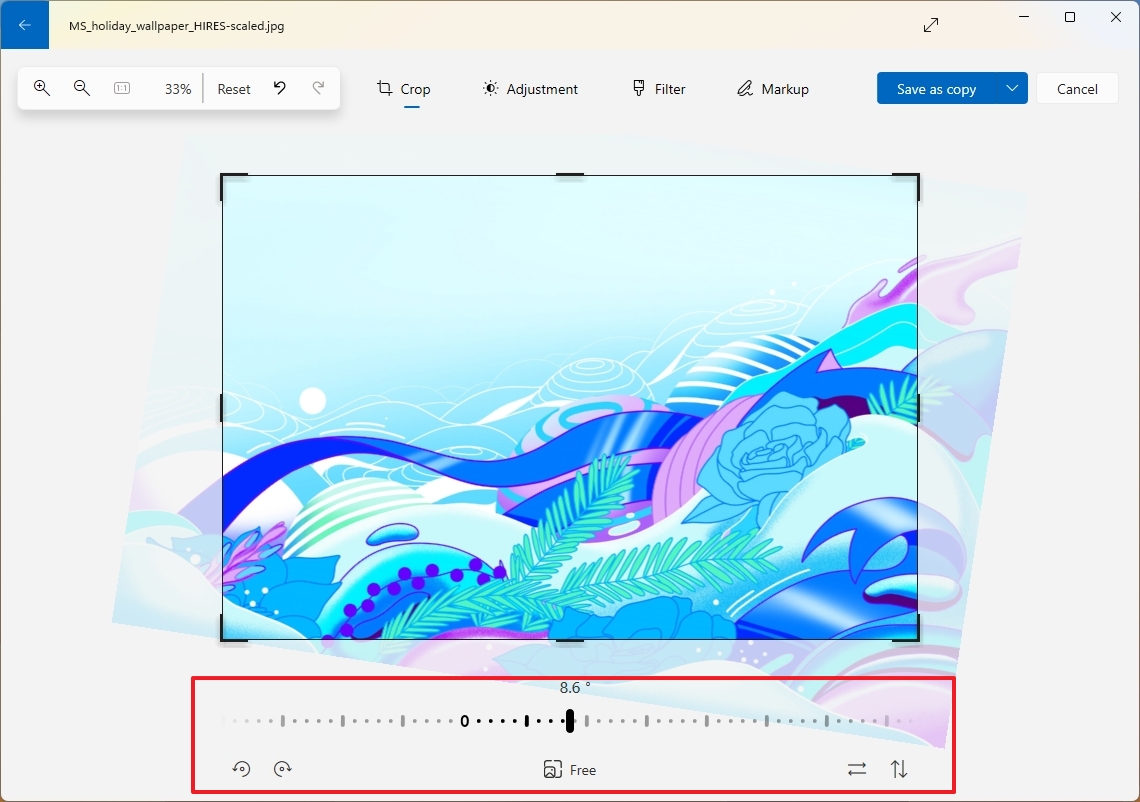
While on the editing page, you can use the rotating tools (including the slider and buttons) at the bottom of the app to rotate or flip the image. You can use the cropping tool to crop a portion of the image.
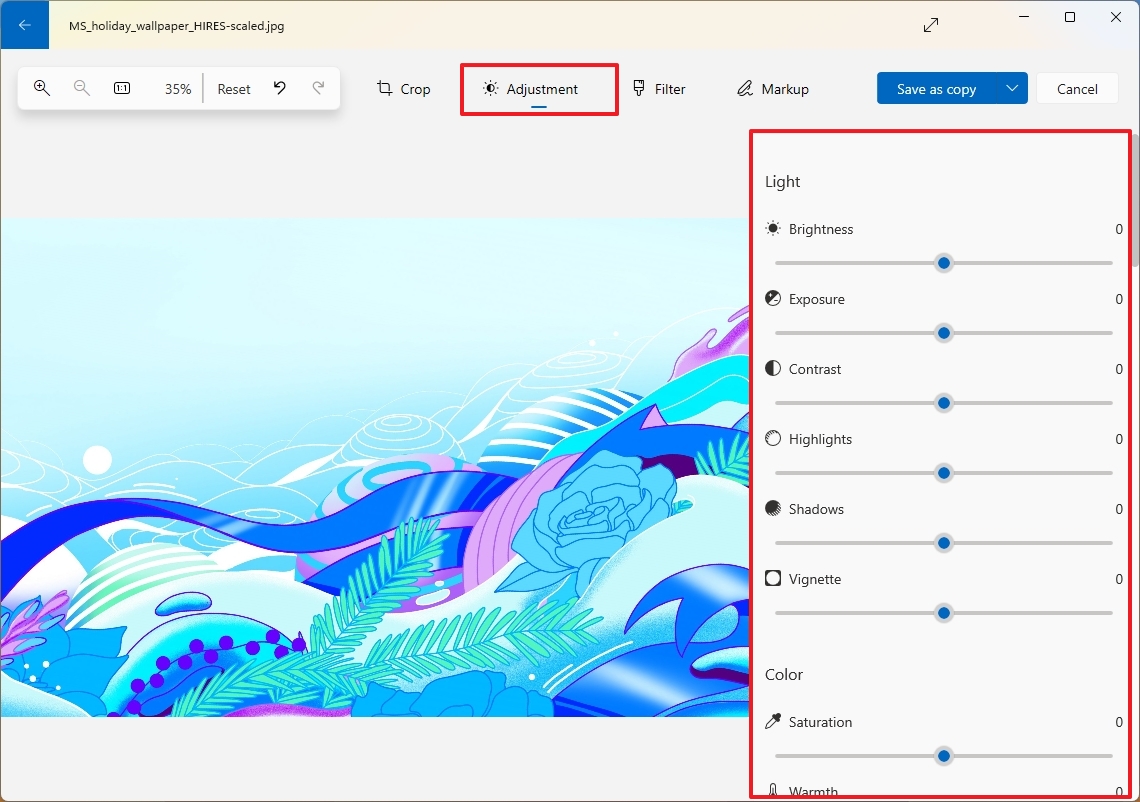
The Adjustment tool lets you control light (such as brightness, exposure, and contrast) and color (like saturation, warmth, and tint).
Similar to the legacy app, you have access to the Filter tool, which includes many filters with predefined styles you can apply to each image.

Finally, the Markup tool allows you to use digital ink to draw on the image. The available tools include two different pen styles, a highlighter, and the option to delete or clear all the markup.
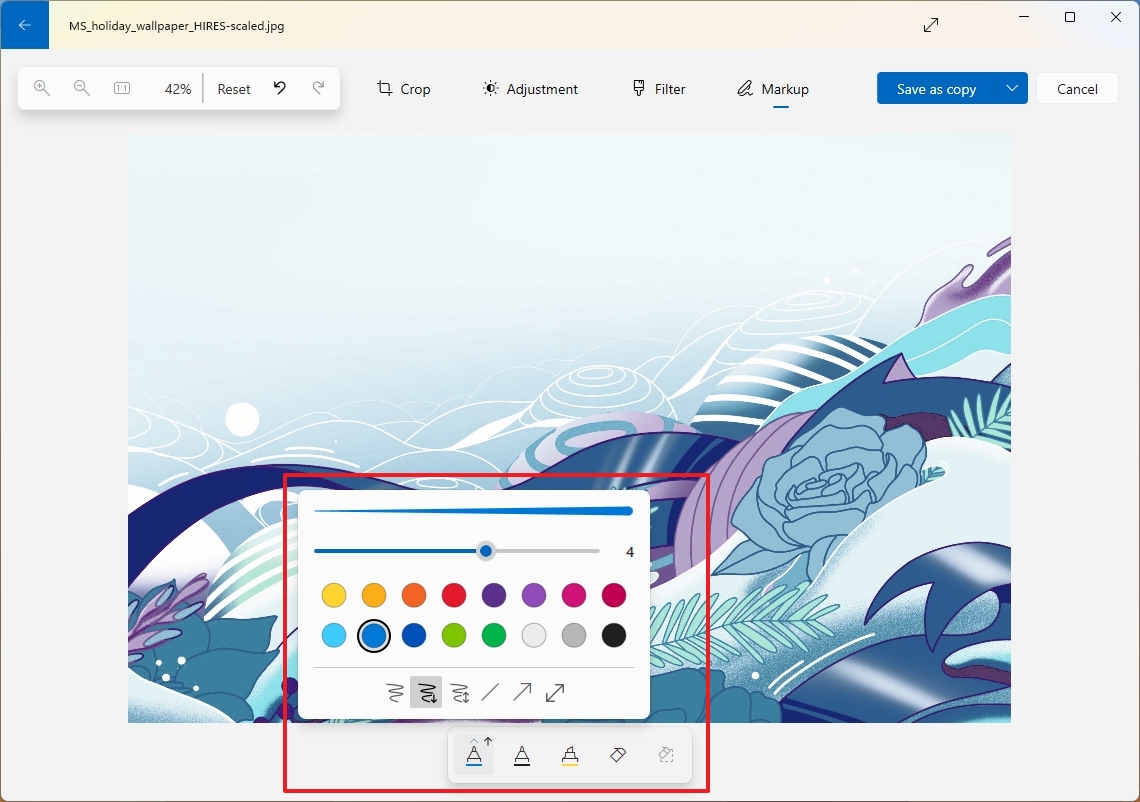
Once you are done editing the file, you can save it as copy or replace the original image.
Outside the editing page, you also have a few options while viewing the image, such as rotation, delete, favorite, and share. If you click the See more (three-dotted) button, you can access other features like resize, fullscreen, and set the image as background.
More resources
For more helpful articles, coverage, and answers to common questions about Windows 10 and Windows 11, visit the following resources: