
How To Beat The Selenite Of The Louvre In Steelrising
Shortly after destroying the boss of the unstable Statuary Ram, you will face the game’s second Titan: The Selenite of the Louvre. Obviously, Steelrising doesn’t have a cold. Unlike many of the other bosses you’ll fight in Steelrising, the Selenite can be quite fast and is more than capable of traversing great distances in the blink of an eye.
With projectiles, fast attacks with lunges, a shield and mastery both Flash and fire, it’s easy to see how the selenite can be a cause for concern. Lucky for you, Aegis himself isn’t exactly inept. We’ll show you how to disassemble this Titan train by train. When we’re done with him, they’ll have to sell him for parts!
The selenite of the attacks on the Louvre

First of all, we’re going to look at the wide range of attacks in The Selenite Of The Louvre. Unlike the Bishop before him, the Selenite has a pretty healthy arsenal of moves. Thankfully, all of these moves have tells and many of them leave him unprotected afterwards. Use this section as a reference if you are tagged by any of these attacks.
Backdash and lunge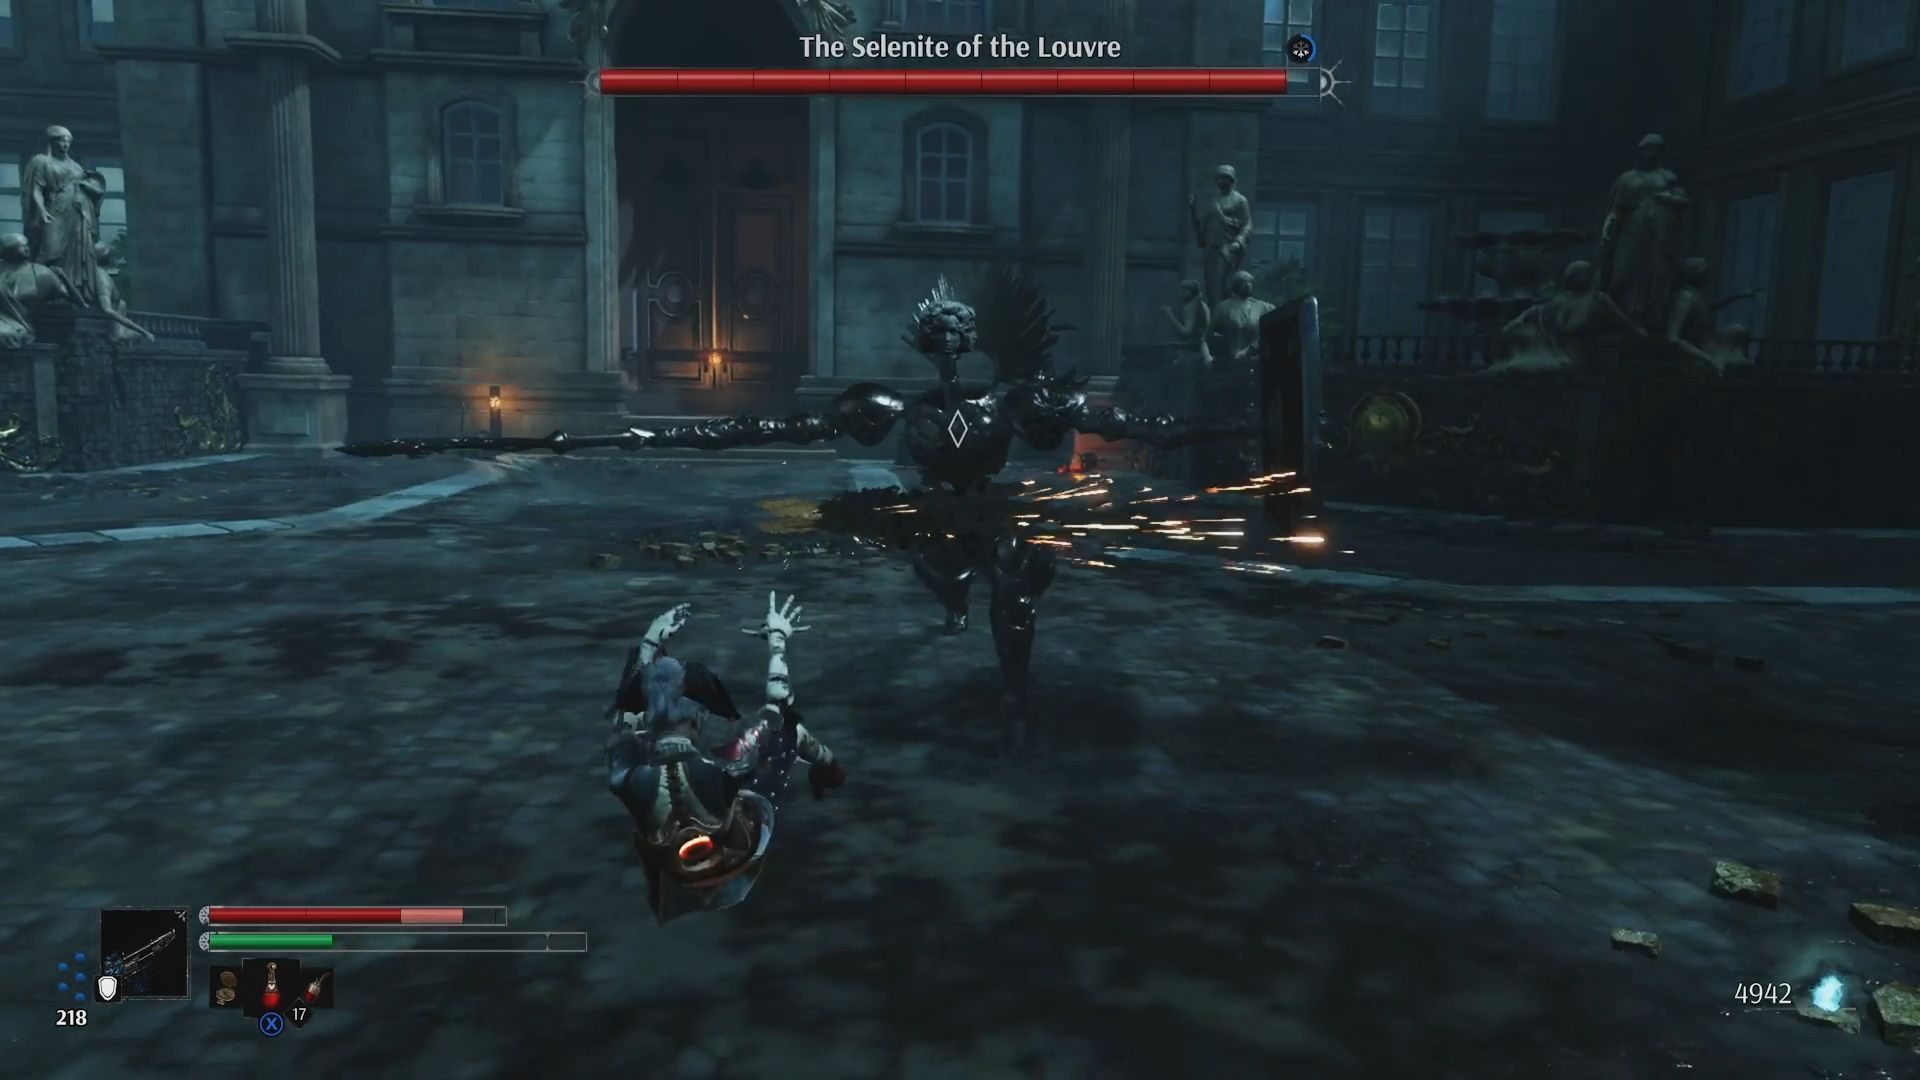
If the Selenite suddenly dashes away from you, this combo is guaranteed to follow. He will quickly lunge forward with a vertical slash, then pause briefly, launch an attack, and then spin his arms around as he lunges at you again. The first punch is easy to dodge once you know it’s coming. However, the spinning attack that follows is pretty lengthy. You’ll want to run backwards as fast as you can after dodging that first attack.
Shielded lightning strike

The Selenite will take a knee, shield itself, and then lightning will erupt from its shield. This attack is fairly slow, so you’re unlikely to be marked by it if you know what’s coming. If you can circle the Selenite fast enough, you can attack its back. Otherwise just keep your distance from him. We’ve only seen the Selenite perform this attack in its first form.
Blade swipe combo

In this attack, the Selenite will strike back and then leap forward with a horizontal slash and then perform an additional horizontal slash with its shield. He doesn’t move too far forward with this one, so be safe at a distance; otherwise just roll through it.
Spinning Blade Attack

The Selenite will not use this attack until it is in its second form. Before making this move he will stand tall and raise his sword over his shoulder. Then the Selenite will lunge forward, spinning his sword through the air and falling to the ground with his shield. The shield also creates a burst of flame. So if you’re in front of the Selenite when it lands, you’ll take Fire damage. The good news is that his shield gets stuck in the ground after landing. This is a prime opportunity for you to land a fully charged attack!
Stormy sword attack

The Selenite crouches, pauses for a moment, and then charges forward. This attack is super fast and travels extremely far. If you’re not looking for it, there’s a good chance you’ll get hit by it. Fortunately, to compensate for being So fast, it doesn’t do much damage. If you see the Selenite crouch, prepare to run through them, but don’t sweat if you get cut off.

The final phase of the fight combines the Dashing Sword Swipe with the Spinning Blade Dash. It has the same tell where the Selenite crouches before jumping, but it will involve moves of the other attack. However, the Selenite ends this attack by dropping (rather pathetically) on its stomach. So, dodge through it and prepare to land a big attack when the Selenite is down.
flash gun

The Selenite begins this attack once it enters its second form. He will charge the cannon before firing at you, giving you plenty of time to prepare to dodge. Just dodge to the side and you’re good.
In the final phase of this fight, he will fire multiple salvos instead of just one. Running sideways quickly will take you through this attack, but if you’re low on stamina you can do it could be predictably cut off.
Recommended Equipment

In all honesty, we wouldn’t say that one weapon type is a clear favorite for this fight. You can absolutely stagger the Selenite with a fully charged attack of a hard-hitting weapon, but the moments when the Selenite is vulnerable are shorter here, so it’s a bit harder to land that fully charged punch.
Additionally, unlike many of the bosses you’ve fought, the Selenite moves around the arena at quite a bit of speed, so charging up your attacks often results in snazzy attacks. If his shield is stuck in the ground or he’s fallen on his back, however, you have time to land the big punches and they do ton of damage. While battling the Selenite with the heavier weapons is a bit more frustrating at the end of the day, you really can’t underestimate the massive damage they can inflict in a single hit.

On the other hand, faster weapons are much better at marking the selenite during some of the shorter recoveries. You’ll also be in a better position to hunt him down since something like the fans or the claws won’t focus on charged attacks. If you’re bringing a lighter weapon, we recommend using a counterattack ability, such as B. the Nemesis Claws. Since the Selenite’s attacks are all clearly telegraphed, this makes the Counterattack skill very effective.
Ultimately, he probably is quiet Easier to fight with one of these higher-hitting weapons, but the lighter weapons allow you to pursue the Selenite more aggressively, as opposed to the more patient approach you need when using the higher-hitting weapons.
The selenite of the Louvre battle strategy

Similar to the first Titan fight This is another three-phase affair. The first phase is pretty simple. The Selenite will slowly come towards you while attempting to hit you with its Shielded Lightning Blast attack and occasionally using its Longing Sword Swing combo. You’re probably best off just hanging around near it and waiting for the Selenite to use its shield attack, then running around and attacking its back. They can also land scatter hits as they laboriously come at you. Repeat this step until The Selenite Of The Louvre enters its next phase.

In the second phase you get to deal with a much more mobile version of the boss. The amount of falls he takes is increasing. Pay close attention to what he is doing when he pauses for a moment as this will change your reaction. When the Selenite crouches, get ready to dodge through it, as it will charge at you pretty quickly. On the other hand, if he’s standing upright with his sword slung over his shoulder, he’s about to perform the Spinning Blade Combo, ending with his shield stuck in the ground. This is your prime time to deal damage!
Paying attention to these tells is key to efficiently beating the Selenite boss as he really telegraphs everyone Attack. During this second phase, he will also start firing his Flash Cannon at you, but a quick side dodge will render this attack completely ineffective. Keep dodging these dashing attacks and attack when his shield gets stuck. Eventually he will transition into his third form.

Once the Louvre’s Selenite has been reduced to about a third of its life, it imbues its sword with lightning and all its movements are enhanced. The Lightning Cannon now fires multiple salvos instead of just one, its fast attacks are faster, its attacks hit from a greater distance, and when it’s hit by its sword it now applies the lightning effect. The frequency of his dashing attacks will also increase. So, in this final phase, you’ll be dodging quite a bit.

While this all sounds pretty intimidating, the Selenite will now start to fall over if you dodge its (now greatly improved) Storm Sword swing. And he uses this attack quite often in the closing stages. So if his aggressive attacks don’t take you out quickly, he won’t last long himself. In any case, the battle will end soon after entering its third phase; either way.

Just watch out for him entering that crouching state, which means a dashing attack is coming, and prepare to dodge. As soon as he falls to the ground after missing you, howl at him with your strongest attacks. He probably won’t survive more than two repetitions of this sequence.
The easy way to kill the Louvre’s selenite

Our old friend the Shielded Musket is still your weapon of choice for reducing difficulty The selenite of the Louvre. It’s not quite as cheesy as previous fights, though. For starters, the Selenite is much better at chasing you, so you can’t just shoot it from afar without caring about the world. However, while you will you have to pick your shots a little more, it’s still the same old approach. Shoot them until they freeze, then hit them with a fully charged attack from your most powerful weapon.