
How to Free Up Google Photos Storage Space
For years, many users have trusted Google’s free cloud storage to back up photos and videos. This changed in July 2021 when Google account storage was capped at 15GB. Many users still rely on the free storage limit, but managing account storage with the 15GB limit can be difficult. Here are some helpful tips to free up space in Google Photos and back up all the photos and videos you want:
1. Turn off photo backup for messaging and social media apps
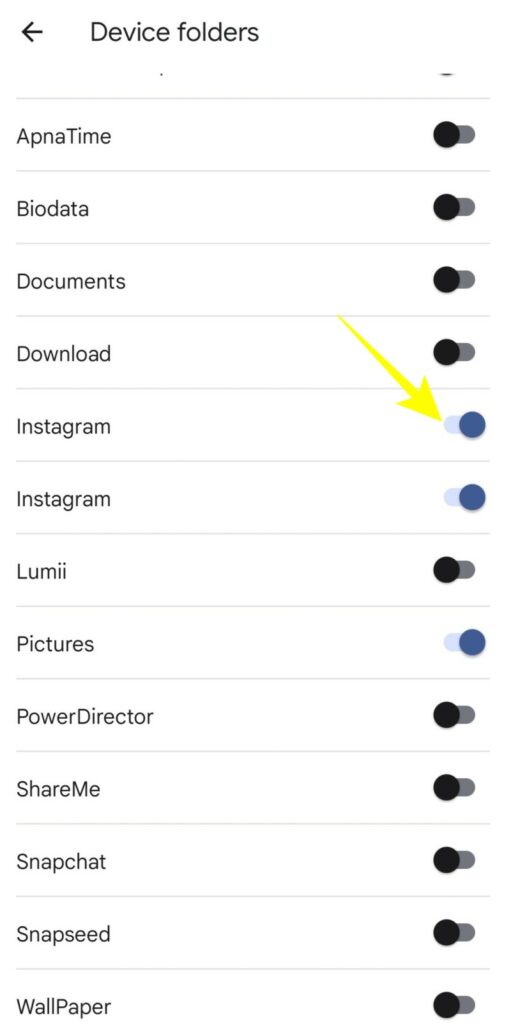
If you enable automatic backup, Google Photos will also back up many unwanted media files. These media files come from messaging app folders like Instagram, WhatsApp or other media folders on your smartphone.
Most of the time, these images and videos are junk media files that you don’t want to store or back up in the cloud. In such a case, you can turn off backup for certain folders that you don’t want to back up in Google Photos. Here’s how you can do it:
- Launch the Google Photos app on your Android device.
- Tap your profile picture in the top right corner.
- Tap on photo settings from the pop-up menu.
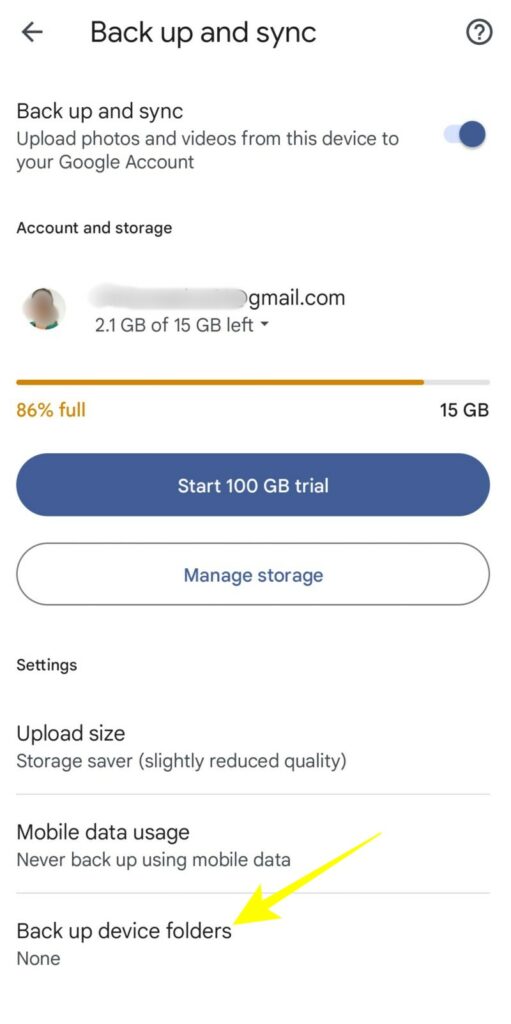
- In the settings menu, tap Backup and sync.
- Beat Backup device folder.
- Under device folderdisable backup for the folders you don’t want to backup to Google Photos.
-
2. Delete junk screenshots
Most of us frequently take screenshots that lose relevance over time. These screenshots are often backed up along with other media files on Google Photos, taking up unnecessary storage space. So deleting those junk screenshots is a good idea to free up disk space.
To get rid of these junk files, open Google Photos and type screenshots in the search bar. This will show all the screenshots that have been backed up over time. You can go through all of these screenshots and delete the ones you no longer need.
3. Delete unsupported media formats
Google Photos supports backups for various media file formats. This can be MKV videos, raw files from cameras, etc., which may not be in the supported format and take up storage space unnecessarily.
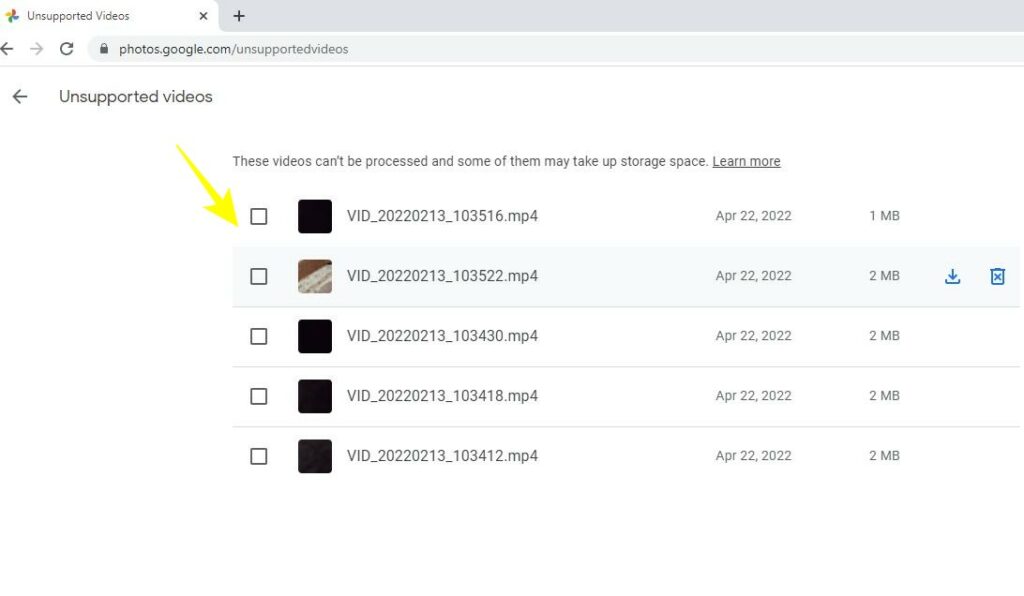
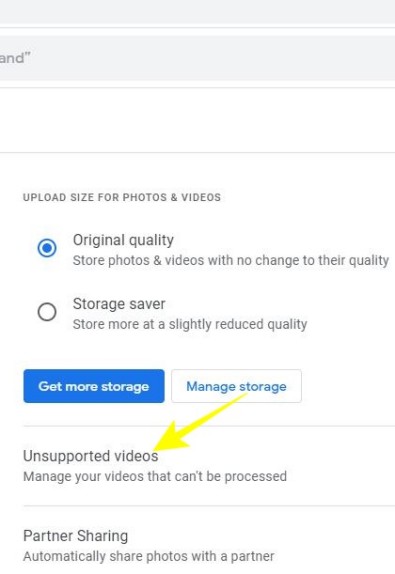
The Google Photos app does not provide an option to detect and delete unsupported media files. You can only do it through the internet.
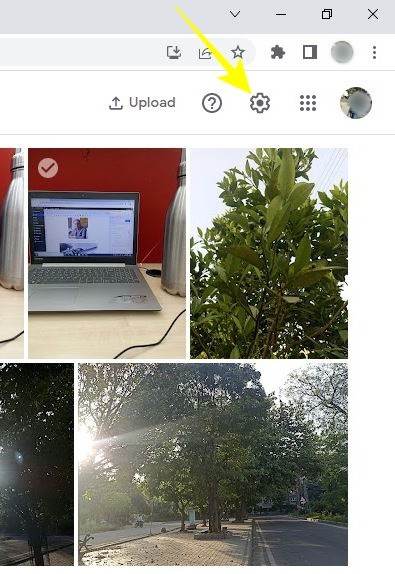
- Go to the Google Photos website on your PC.
- Click the settings icon in the top right corner.
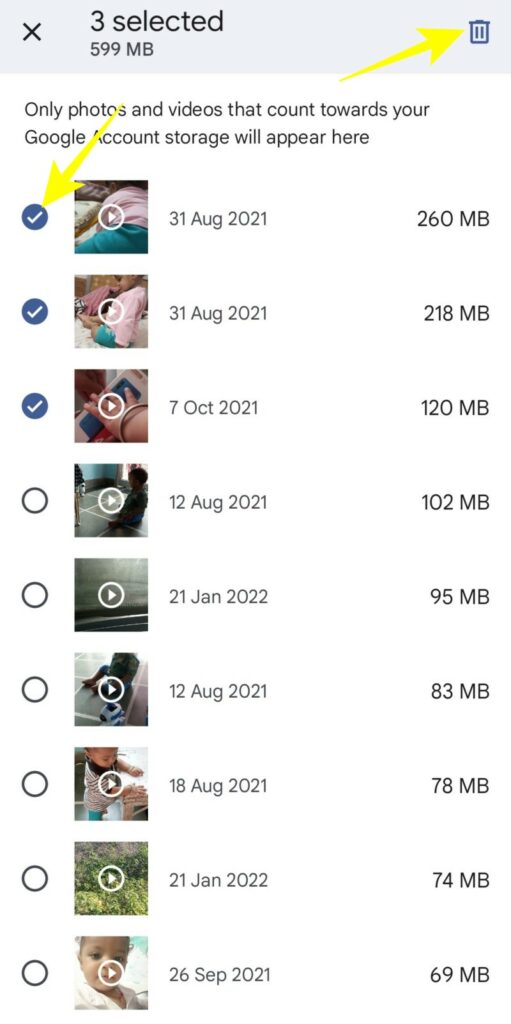
- Click on Non-Supporting Videos in the settings menu.
-
- On the next web page, select all unsupported videos that you want to delete.
4. Transfer large videos to local disk or hard drive
It’s virtually impossible to store all your pictures and videos on Google Photos while sticking to the 15GB storage limit. So if you don’t want to buy additional storage space, you need to switch to another reliable alternative.
This alternative can be your local drive or an external hard drive where you can store multiple media files without worrying about storage limitations. So switch to an external hard drive to transfer photos from your Android phone. After backing up all your media files, delete them from Google Photos to free up space.
5. Delete media files and documents from Google Drive and Gmail
Anything stored on your Google Drive, Gmail, and Google Photos collection increases your Google Account’s 15GB storage limit. For example, creating multiple WhatsApp backups on Google Drive can consume unnecessary storage space. So when Google Photos is running out of disk space, it can be a good idea to delete junk or unnecessary files from Google Drive. If you don’t want to delete some specific files from your Google Drive, you can transfer them to your secondary account’s Google Drive without uploading everything again.
You can also do the same for your Gmail account and delete old and irrelevant emails with large attachments. But before you do that, make sure you create a local backup of your Gmail account to avoid losing important emails.
6. Empty the Trash in Google Photos
Anything you delete from Google Photos or Google Drive stays in the Trash for up to 60 days. Because of this, you may not see a visible increase in free disk space even after deleting media files. So when you delete media files, empty the recycle bin to get enough free space. Follow the steps below to empty the Recycle Bin:
- Launch the Google Photos app.
- Beat library at the bottom right corner.
- Beat container on the next screen.
- Beat Choose in the upper right corner.
- Select the media items you want to delete or tap Delete everything to permanently delete all photos from the Recycle Bin.
7. Erase large and blurry photos
When backing up your camera photos, Google Photos often backs up blurry photos and screenshots. When you are running out of disk space, Scan and Delete option can help you get rid of such media files immediately to free up disk space.
The Review and Delete option separates large media files, blurry photos, and screenshots for you to review and delete immediately. Here’s how you can do it:
- Open the Google Photos app.
- Tap your profile picture in the top right.
- Tap on the pop-up menu Account storage almost full.
- Beat Great photos and videos under the Check and delete Section.
- Select the media files you want to delete and tap the delete icon on the top right of the screen.
You can do the same to get rid of blurry photos and screenshots at once.
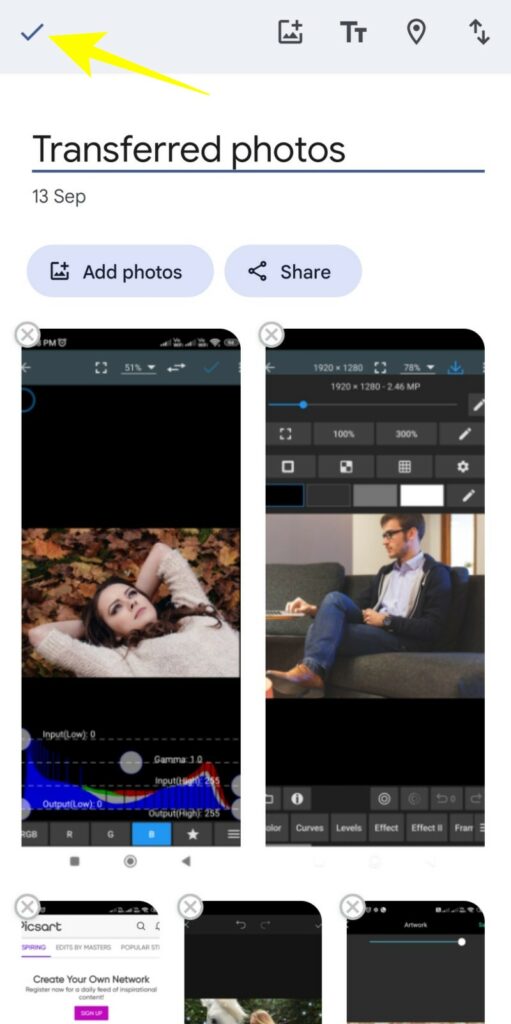
8. Transfer backed up photos to a secondary account
You can create a secondary Google account and get 15GB of additional storage without buying it from Google. Create a secondary Google account and transfer media files from your primary account to a secondary account. After the transfer, delete the media files from your primary account to free up space. Here’s how you can do this without creating a full backup:
- Open the Google Photos app.
- Beat library in the lower right corner of the screen.
- Open the album that you want to transfer to your secondary account.
- Tap three vertical dots (⋮) at the top right of the screen.
- Tap the Split option from the pop-up menu.
- Add the email address you want to share the album with and tap Send on the next screen.
- Sign in to the Google Photos app using your secondary account.
- Beat Split from the options at the bottom of the app.
- Under albums and memoriestap the shared album.
- Open the shared album and select all photos.
- Tap the plus icon (+) given above right.
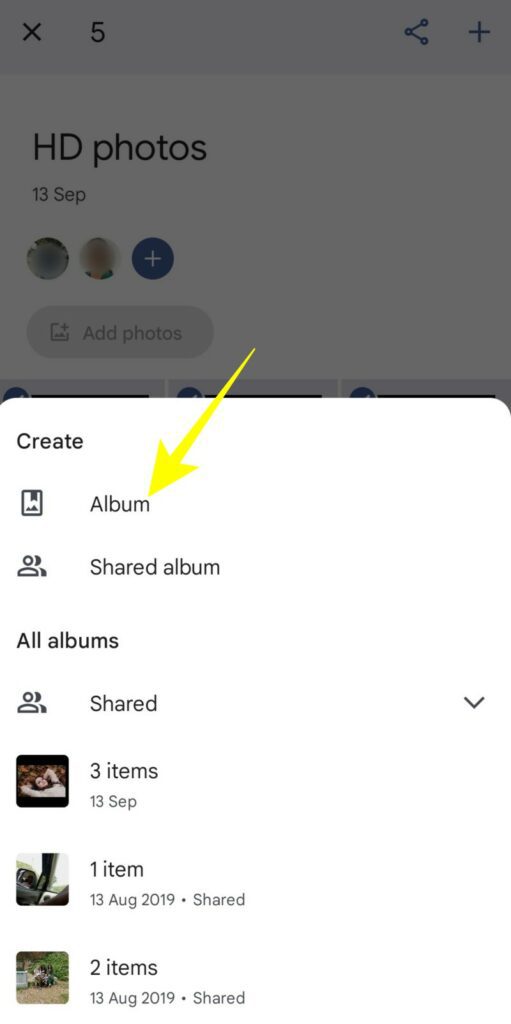
- Under Create, tap album to create a new album in your secondary account.
- Add a title for the album and tap the check mark option to save all selected photos to your secondary account.
-
- After saving, go to your primary account and delete all transferred photos.
9. Resize media files before creating backup
Whenever you back up high quality photos or videos from your DSLR camera or smartphone, it is important to resize them. Such large media files take up unnecessary storage space on your Google Drive that could otherwise be saved by uploading smaller-sized images. So, resize your DSLR and smartphone media files enough that they don’t sacrifice quality and help you save significant space.
Optimizing free space in Google Photos
These tips can help you free up storage space in Google Photos and backup more media files without paying for additional storage space. If you still feel like you need more Google storage, you can create a secondary Google account and start backing up your remaining media files. However, if you need even more storage space, you can always opt for Google’s paid storage plan.