How to send Nintendo Switch screenshots to your laptop
The Nintendo Switch offers the ability to take screenshots of a game so you can capture your breathtaking action scene in Zelda or your somersault jump in Super Mario Odyssey. However, transferring these screenshots from Nintendo Switch is not that easy.
While Nintendo offers the ability to wirelessly send screenshots to a smart device (such as a smartphone), how to transfer images straight to a PC isn’t as obvious.
Luckily, there’s an available method hidden in the settings, and we’ll walk you through the process. Read on to find out how to send Nintendo Switch screenshots to your laptop.
What you will need:
- Nintendo switch
- PC with available USB ports
- USB-C to USB-A cable or USB-C to USB-C cable
The short version
- On the Nintendo Switch, click System Settings
- Scroll down to Data Management
- Click Manage Screenshots and Videos
- Press Copy to PC via USB connection
- Connect your Switch to your PC with a USB cable
- Open File Explorer on your Windows PC
- Click This PC
- Click Nintendo Switch
- Click Albums
- Select your chosen game
- Find your screenshots and copy them to your PC
-
Step
1On the Nintendo Switch, click System Settings
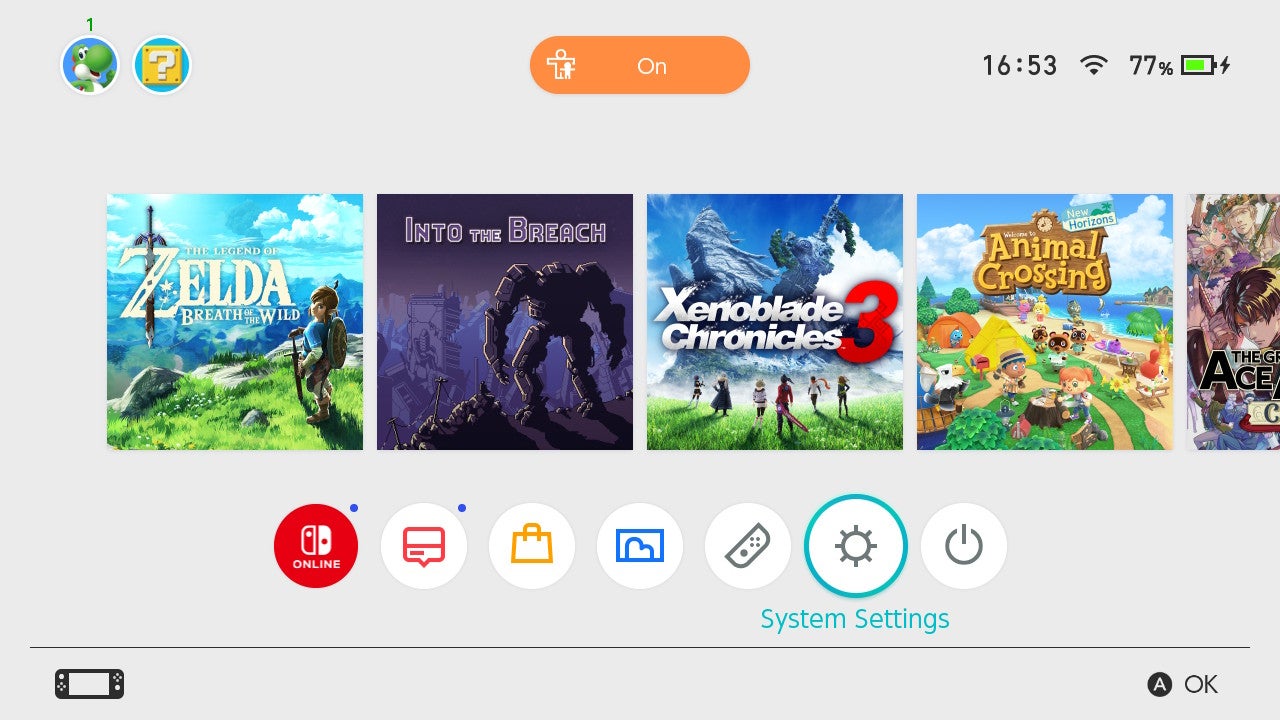
You’ll find this on the bottom row of the Nintendo Switch home screen. It has a gear icon and is to the left of sleep mode.
-
Step
2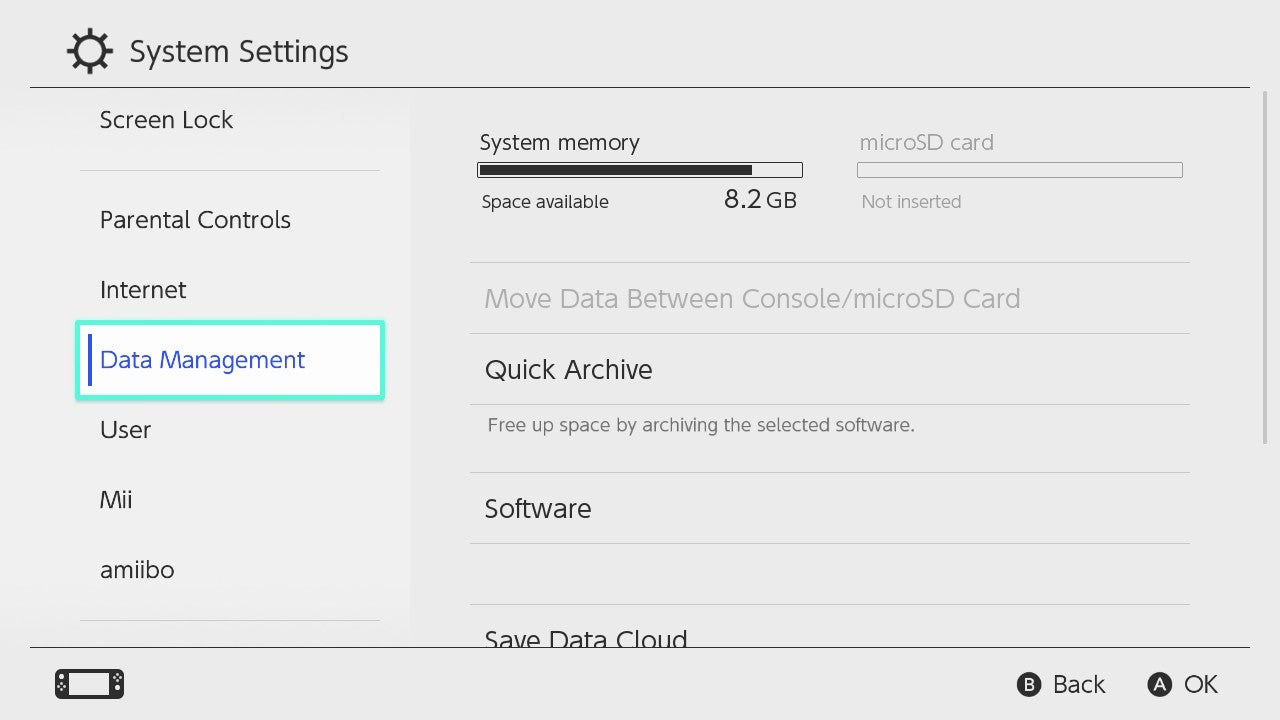
You’ll find it six lines down, just below Internet Settings.
-
Step
3Click Manage Screenshots and Videos
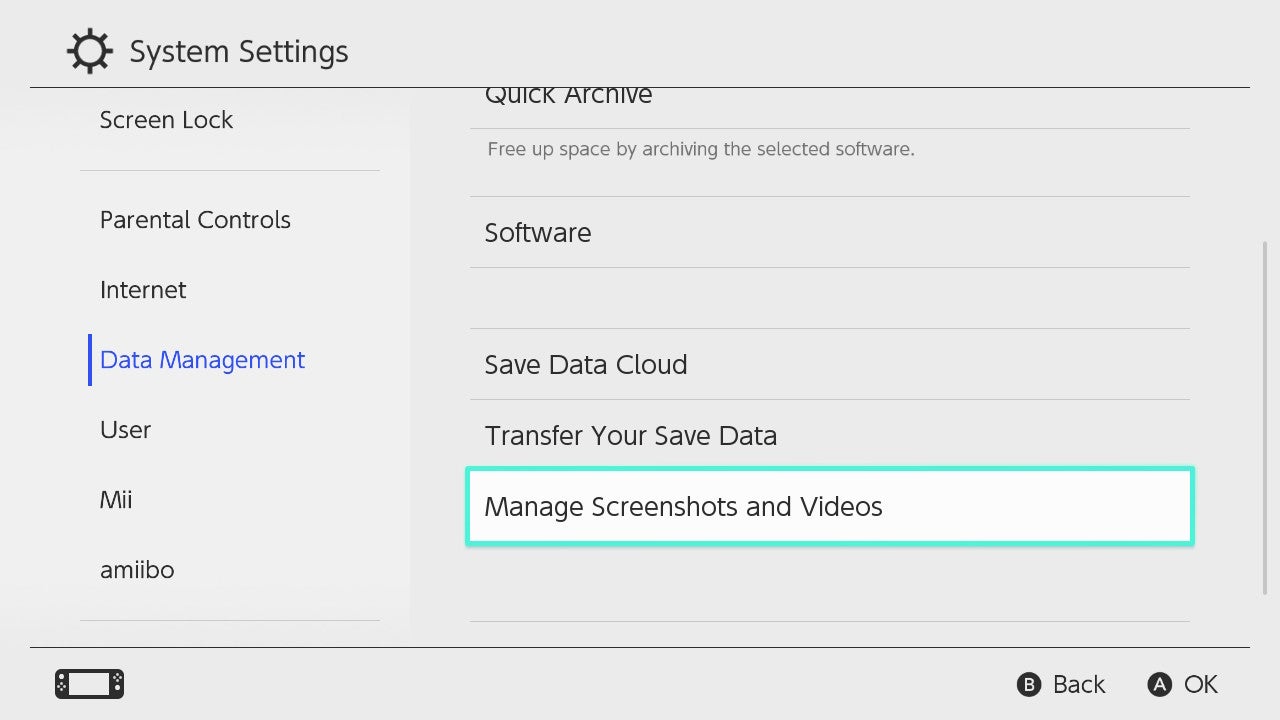
Go to the menu on the right, then scroll down until you find Manage screenshots and videos. You can find it just above Clear Save Data.
-
Step
4Press Copy to PC via USB connection
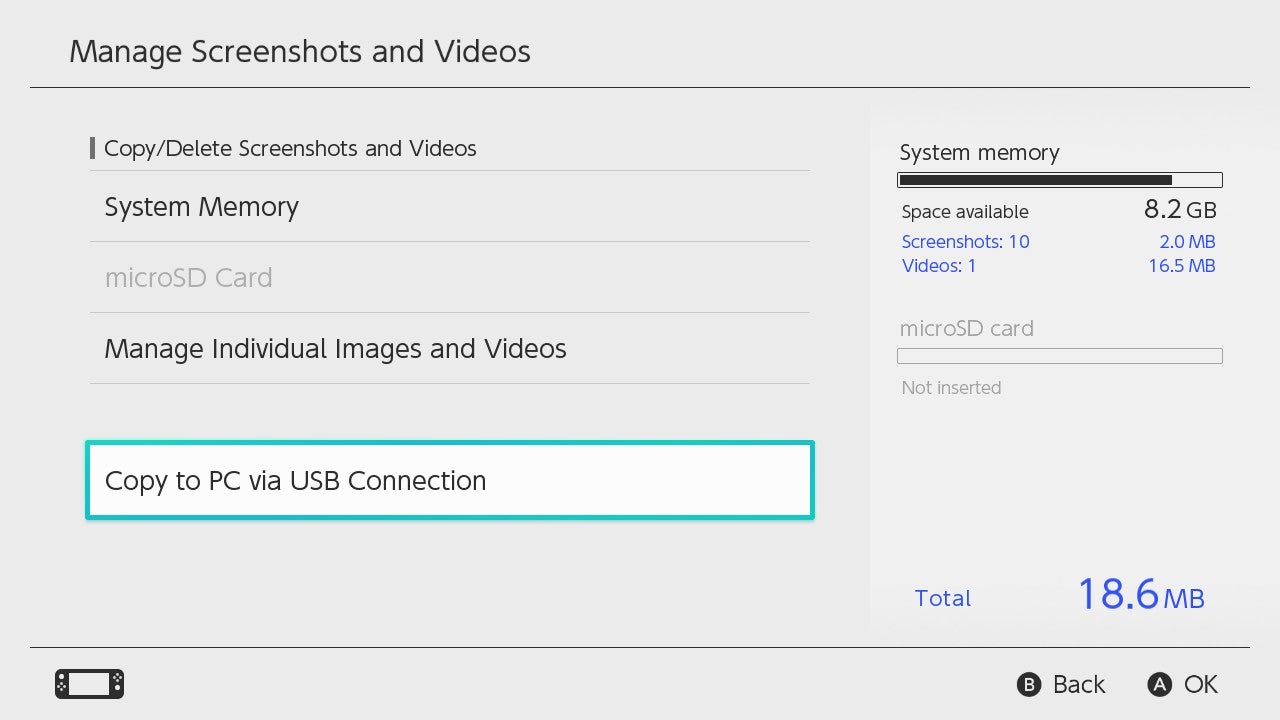
Scroll all the way down until you land on Copy to PC via USB Connection. select it
-
Step
5Connect your Switch to your PC with a USB cable
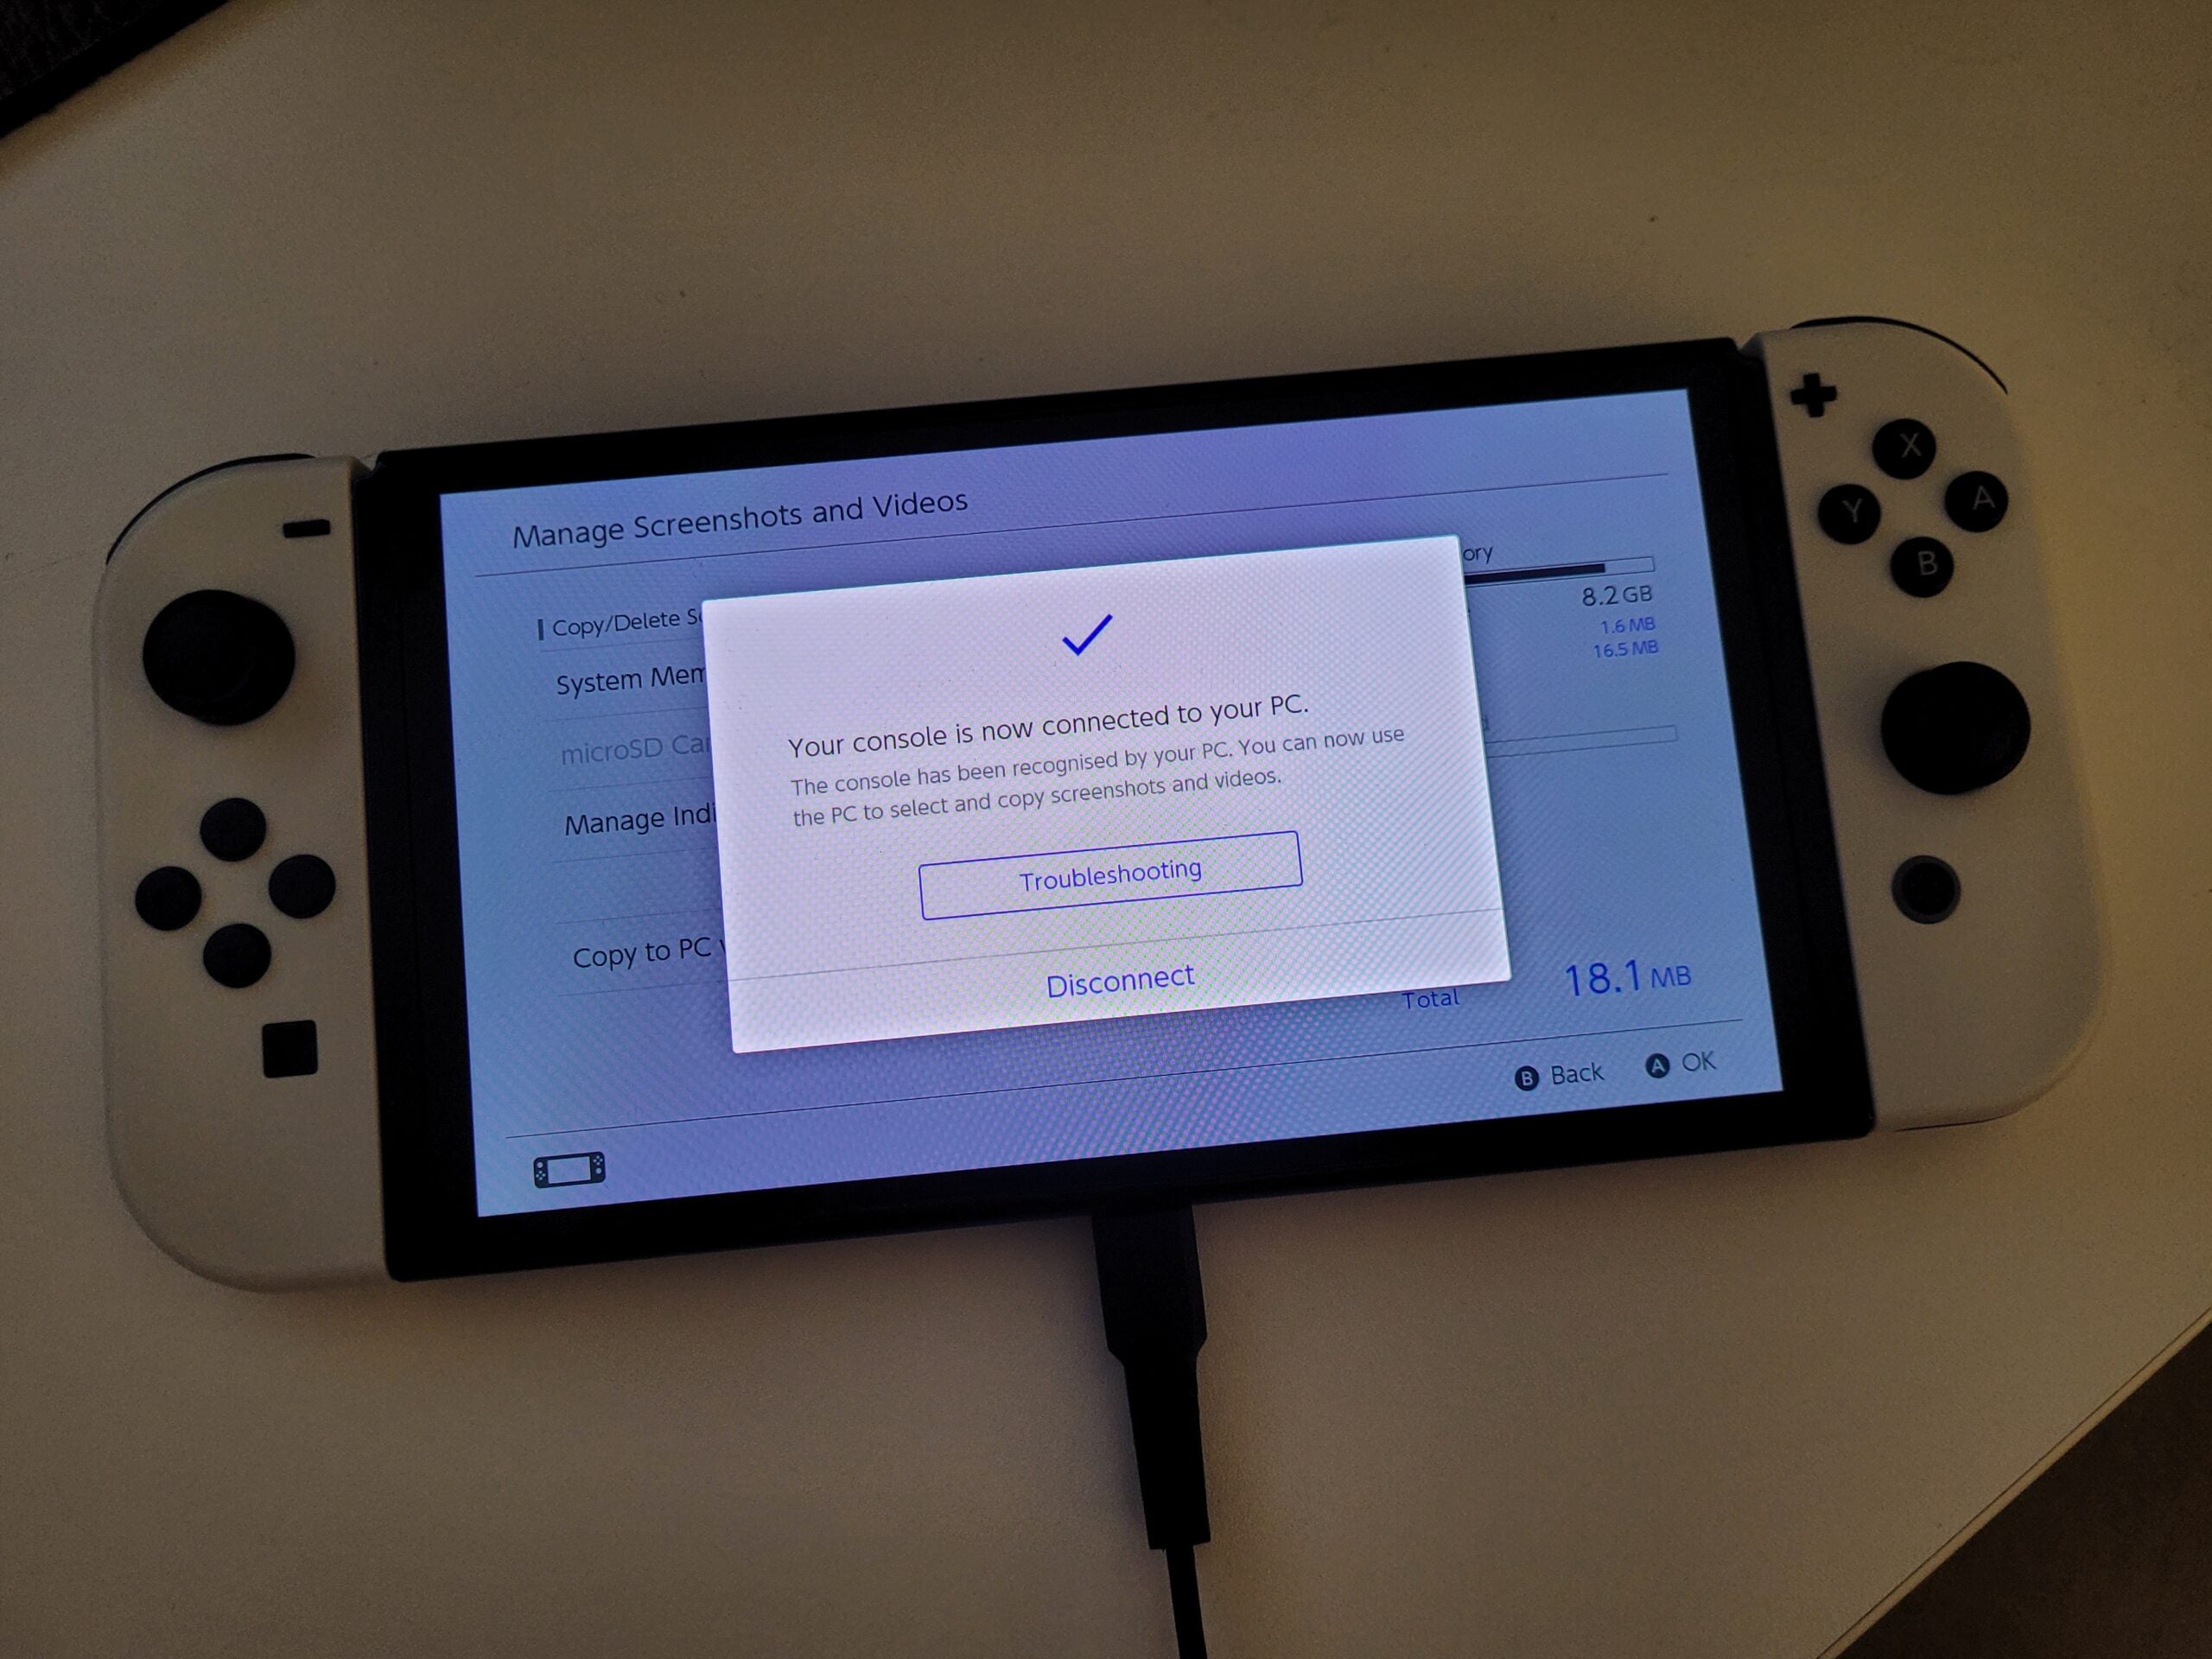
A pop-up message will then instruct you to connect your Nintendo Switch to your PC using a USB cable.
We used a USB-C to USB-A cable, but you may need to use a USB-C to USB-C cable instead depending on the ports available on your PC or laptop.
After successful connection, a blue checkmark will appear on your Switch screen.
-
Step
6Open File Explorer on your Windows PC
This should appear as a folder on your taskbar.
-
Step
7Click This PC
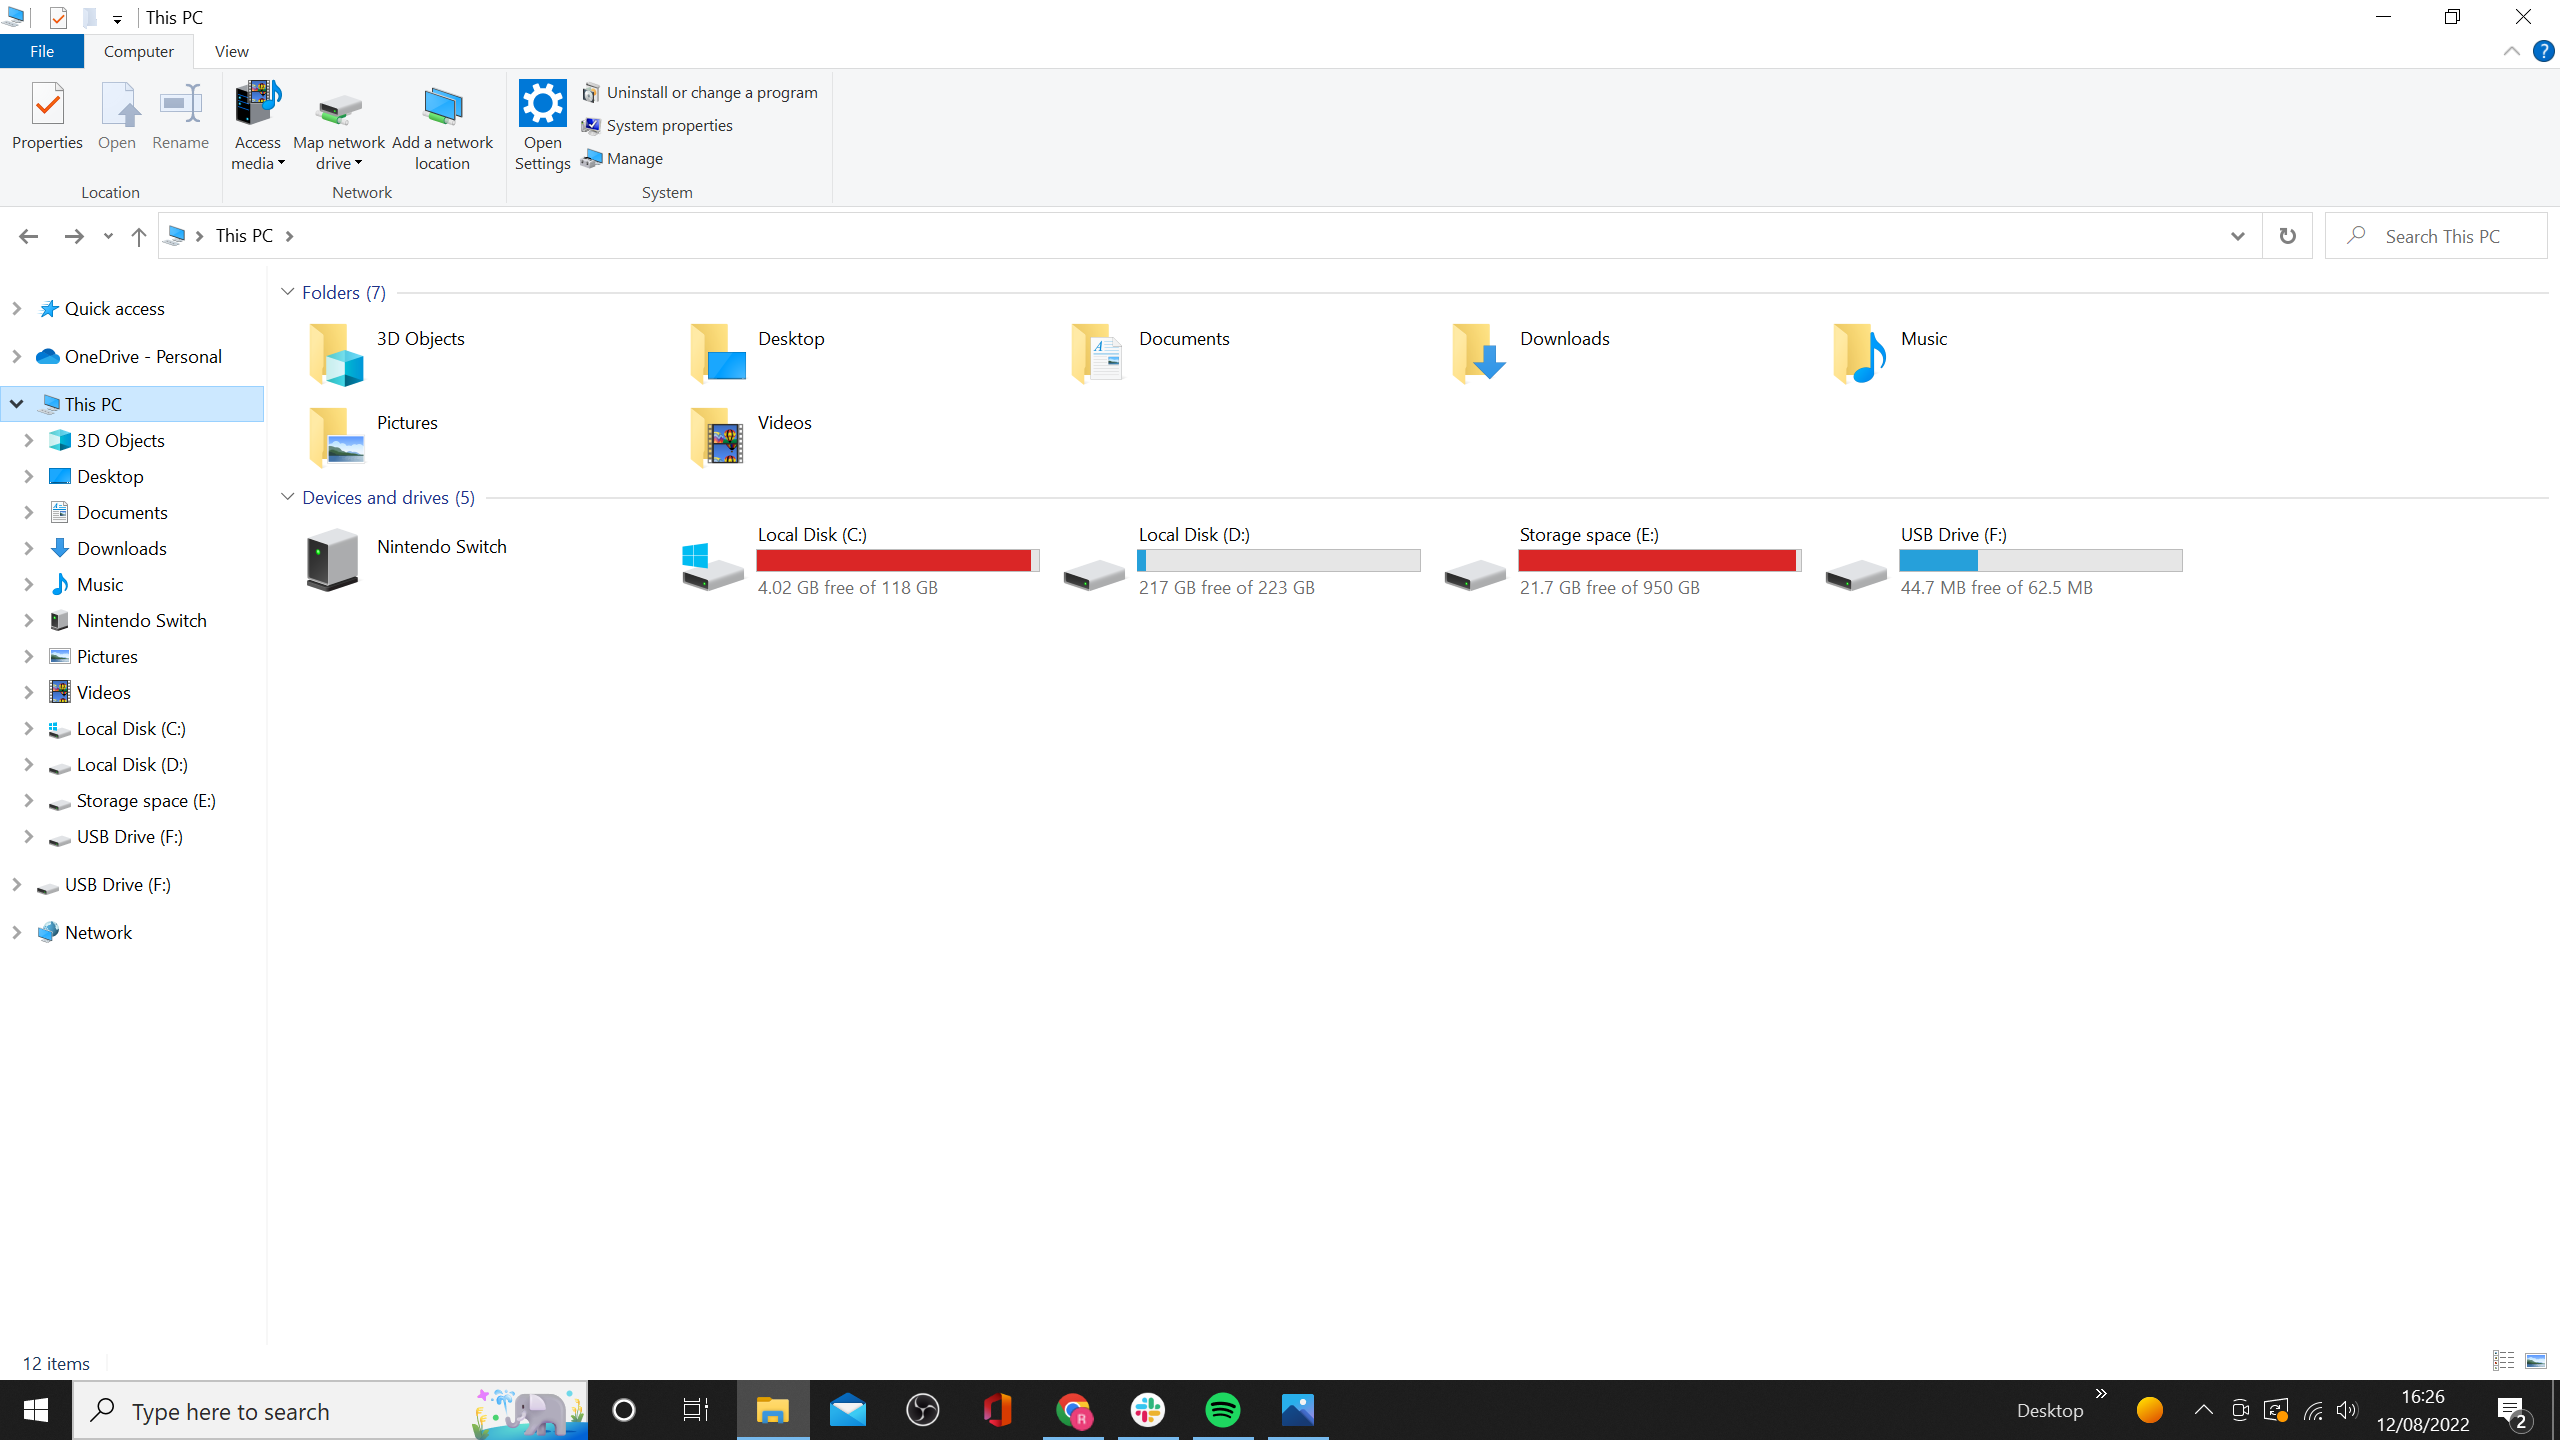
In the left menu you should see the option for This PC. click it Alternatively, you can type “This PC” at the top of the search bar.
-
Step
8thClick Nintendo Switch

You should see the Nintendo Switch option just below the Devices and drives subheading.
-
Step
9Click Albums
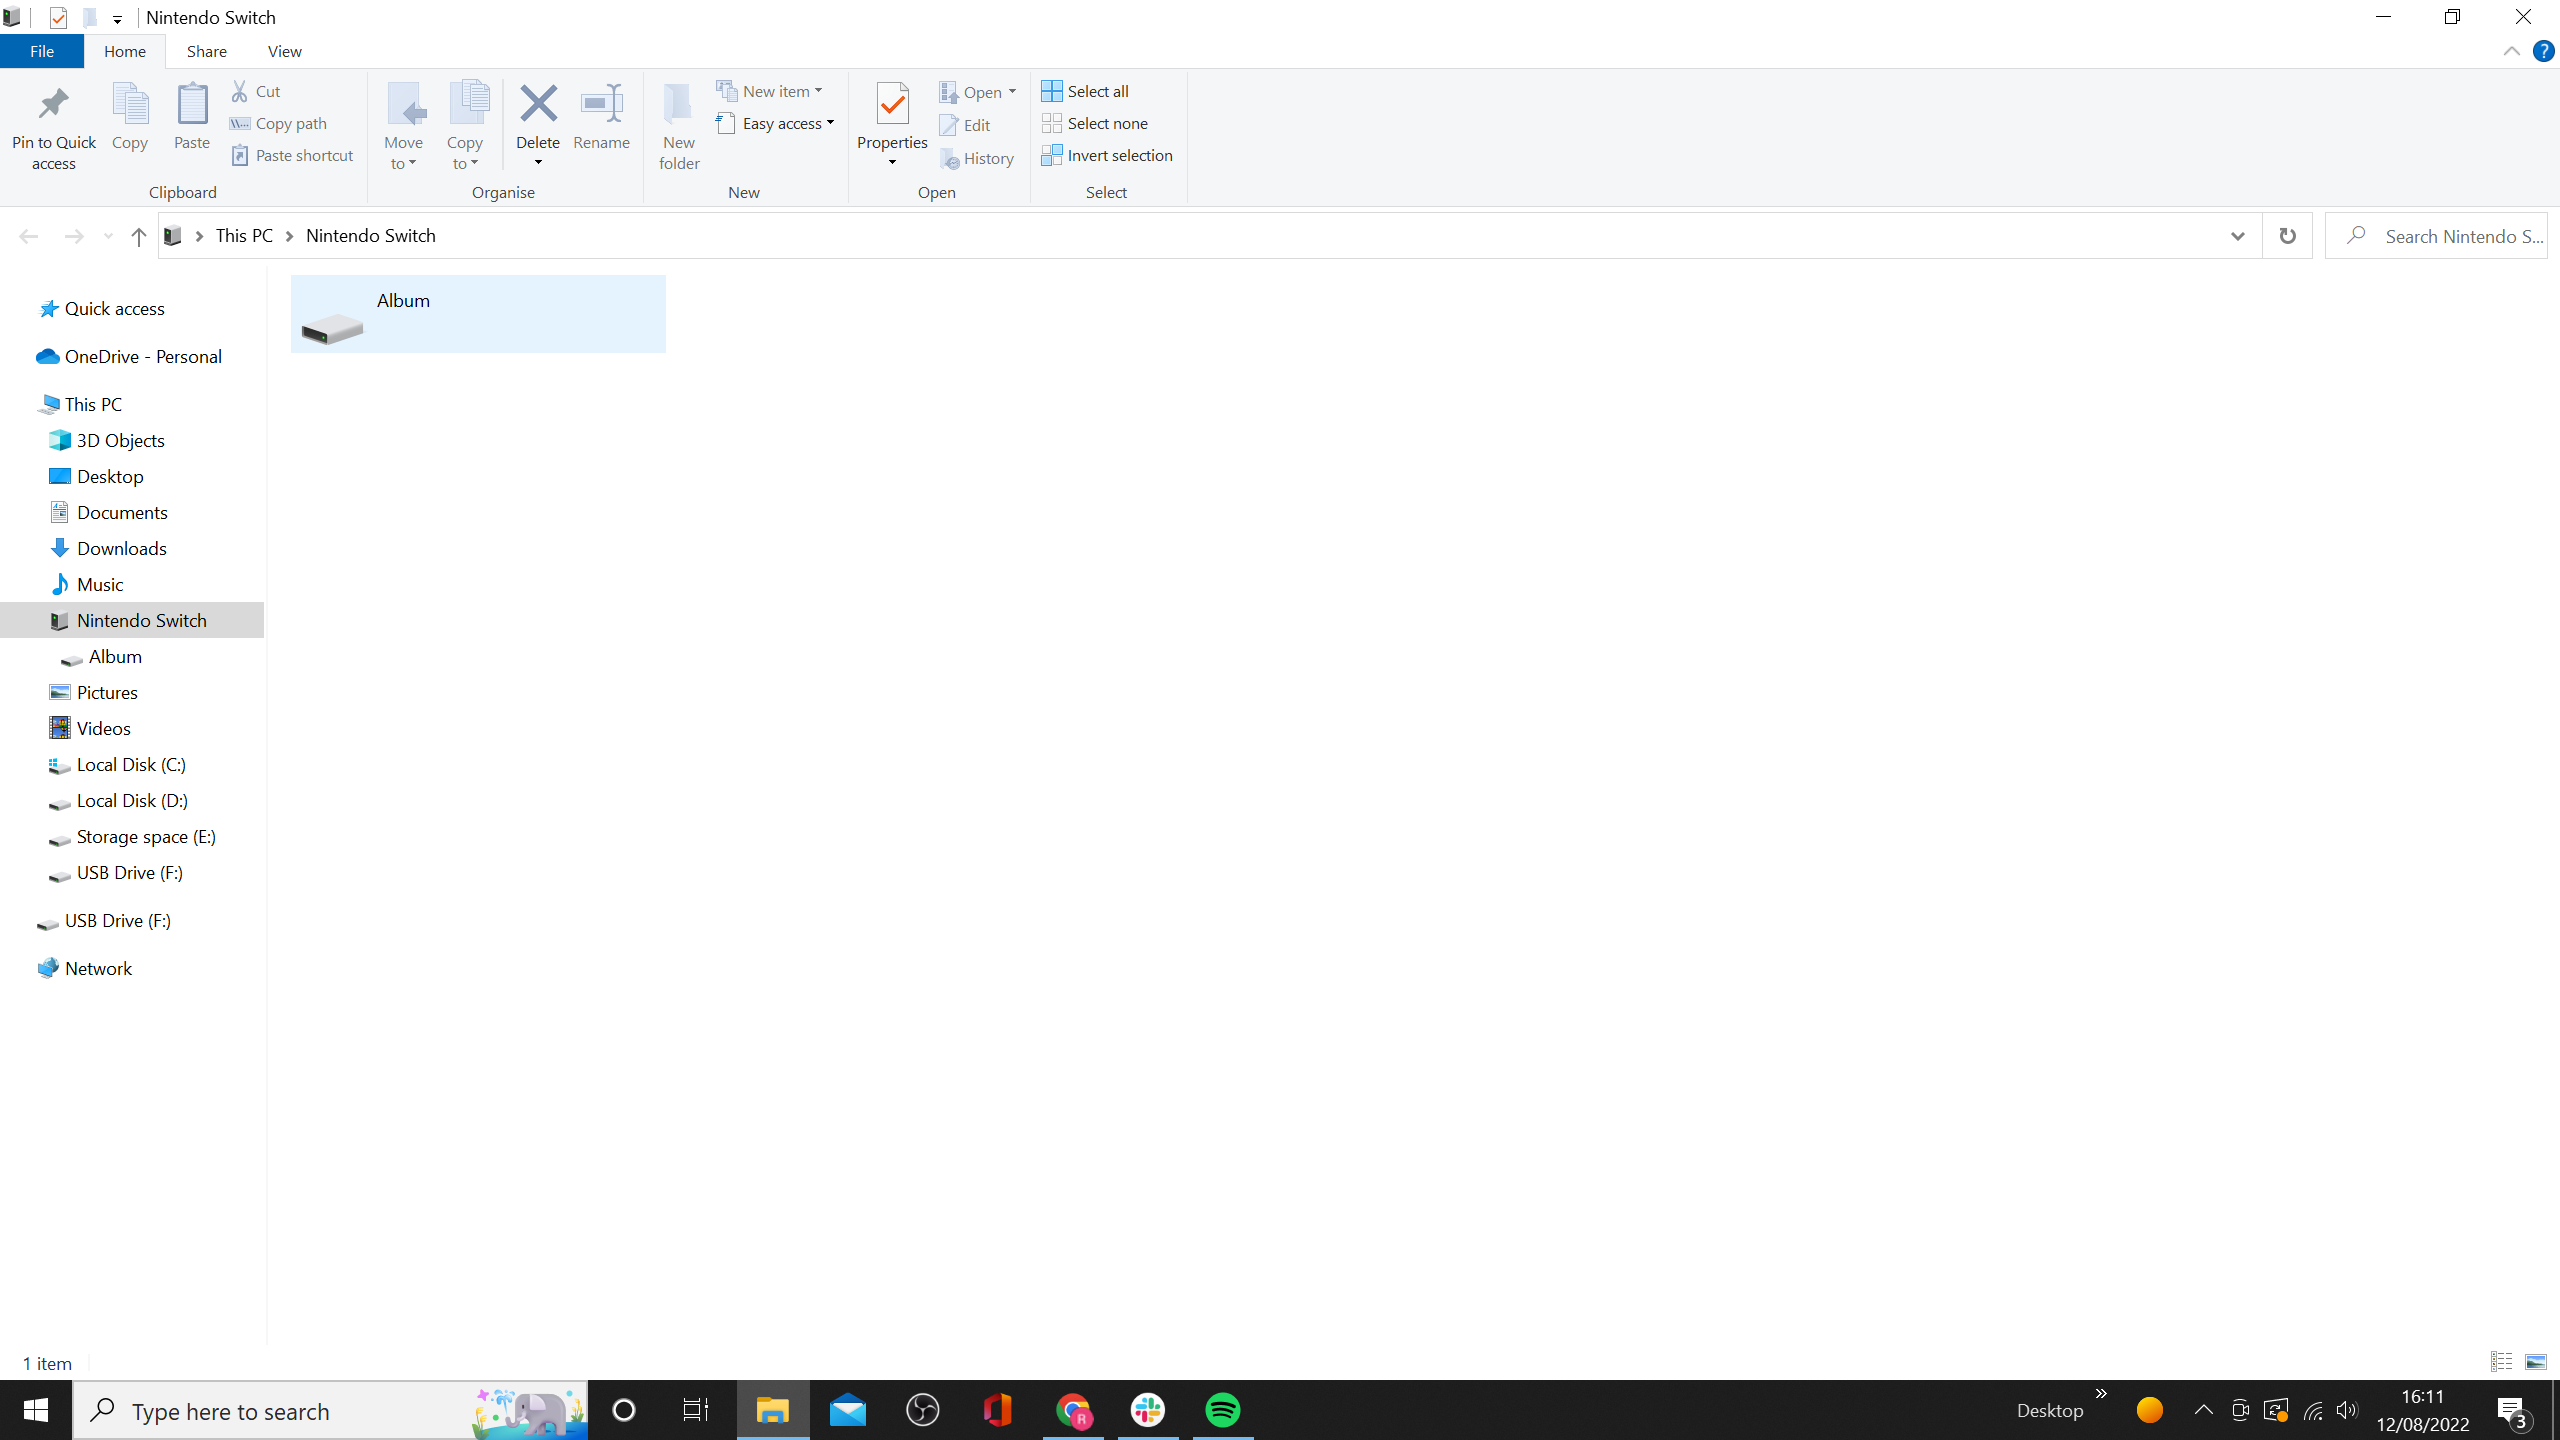
If you took screenshots on the Switch, you should see the option for Album. select it
-
Step
10Select your chosen game
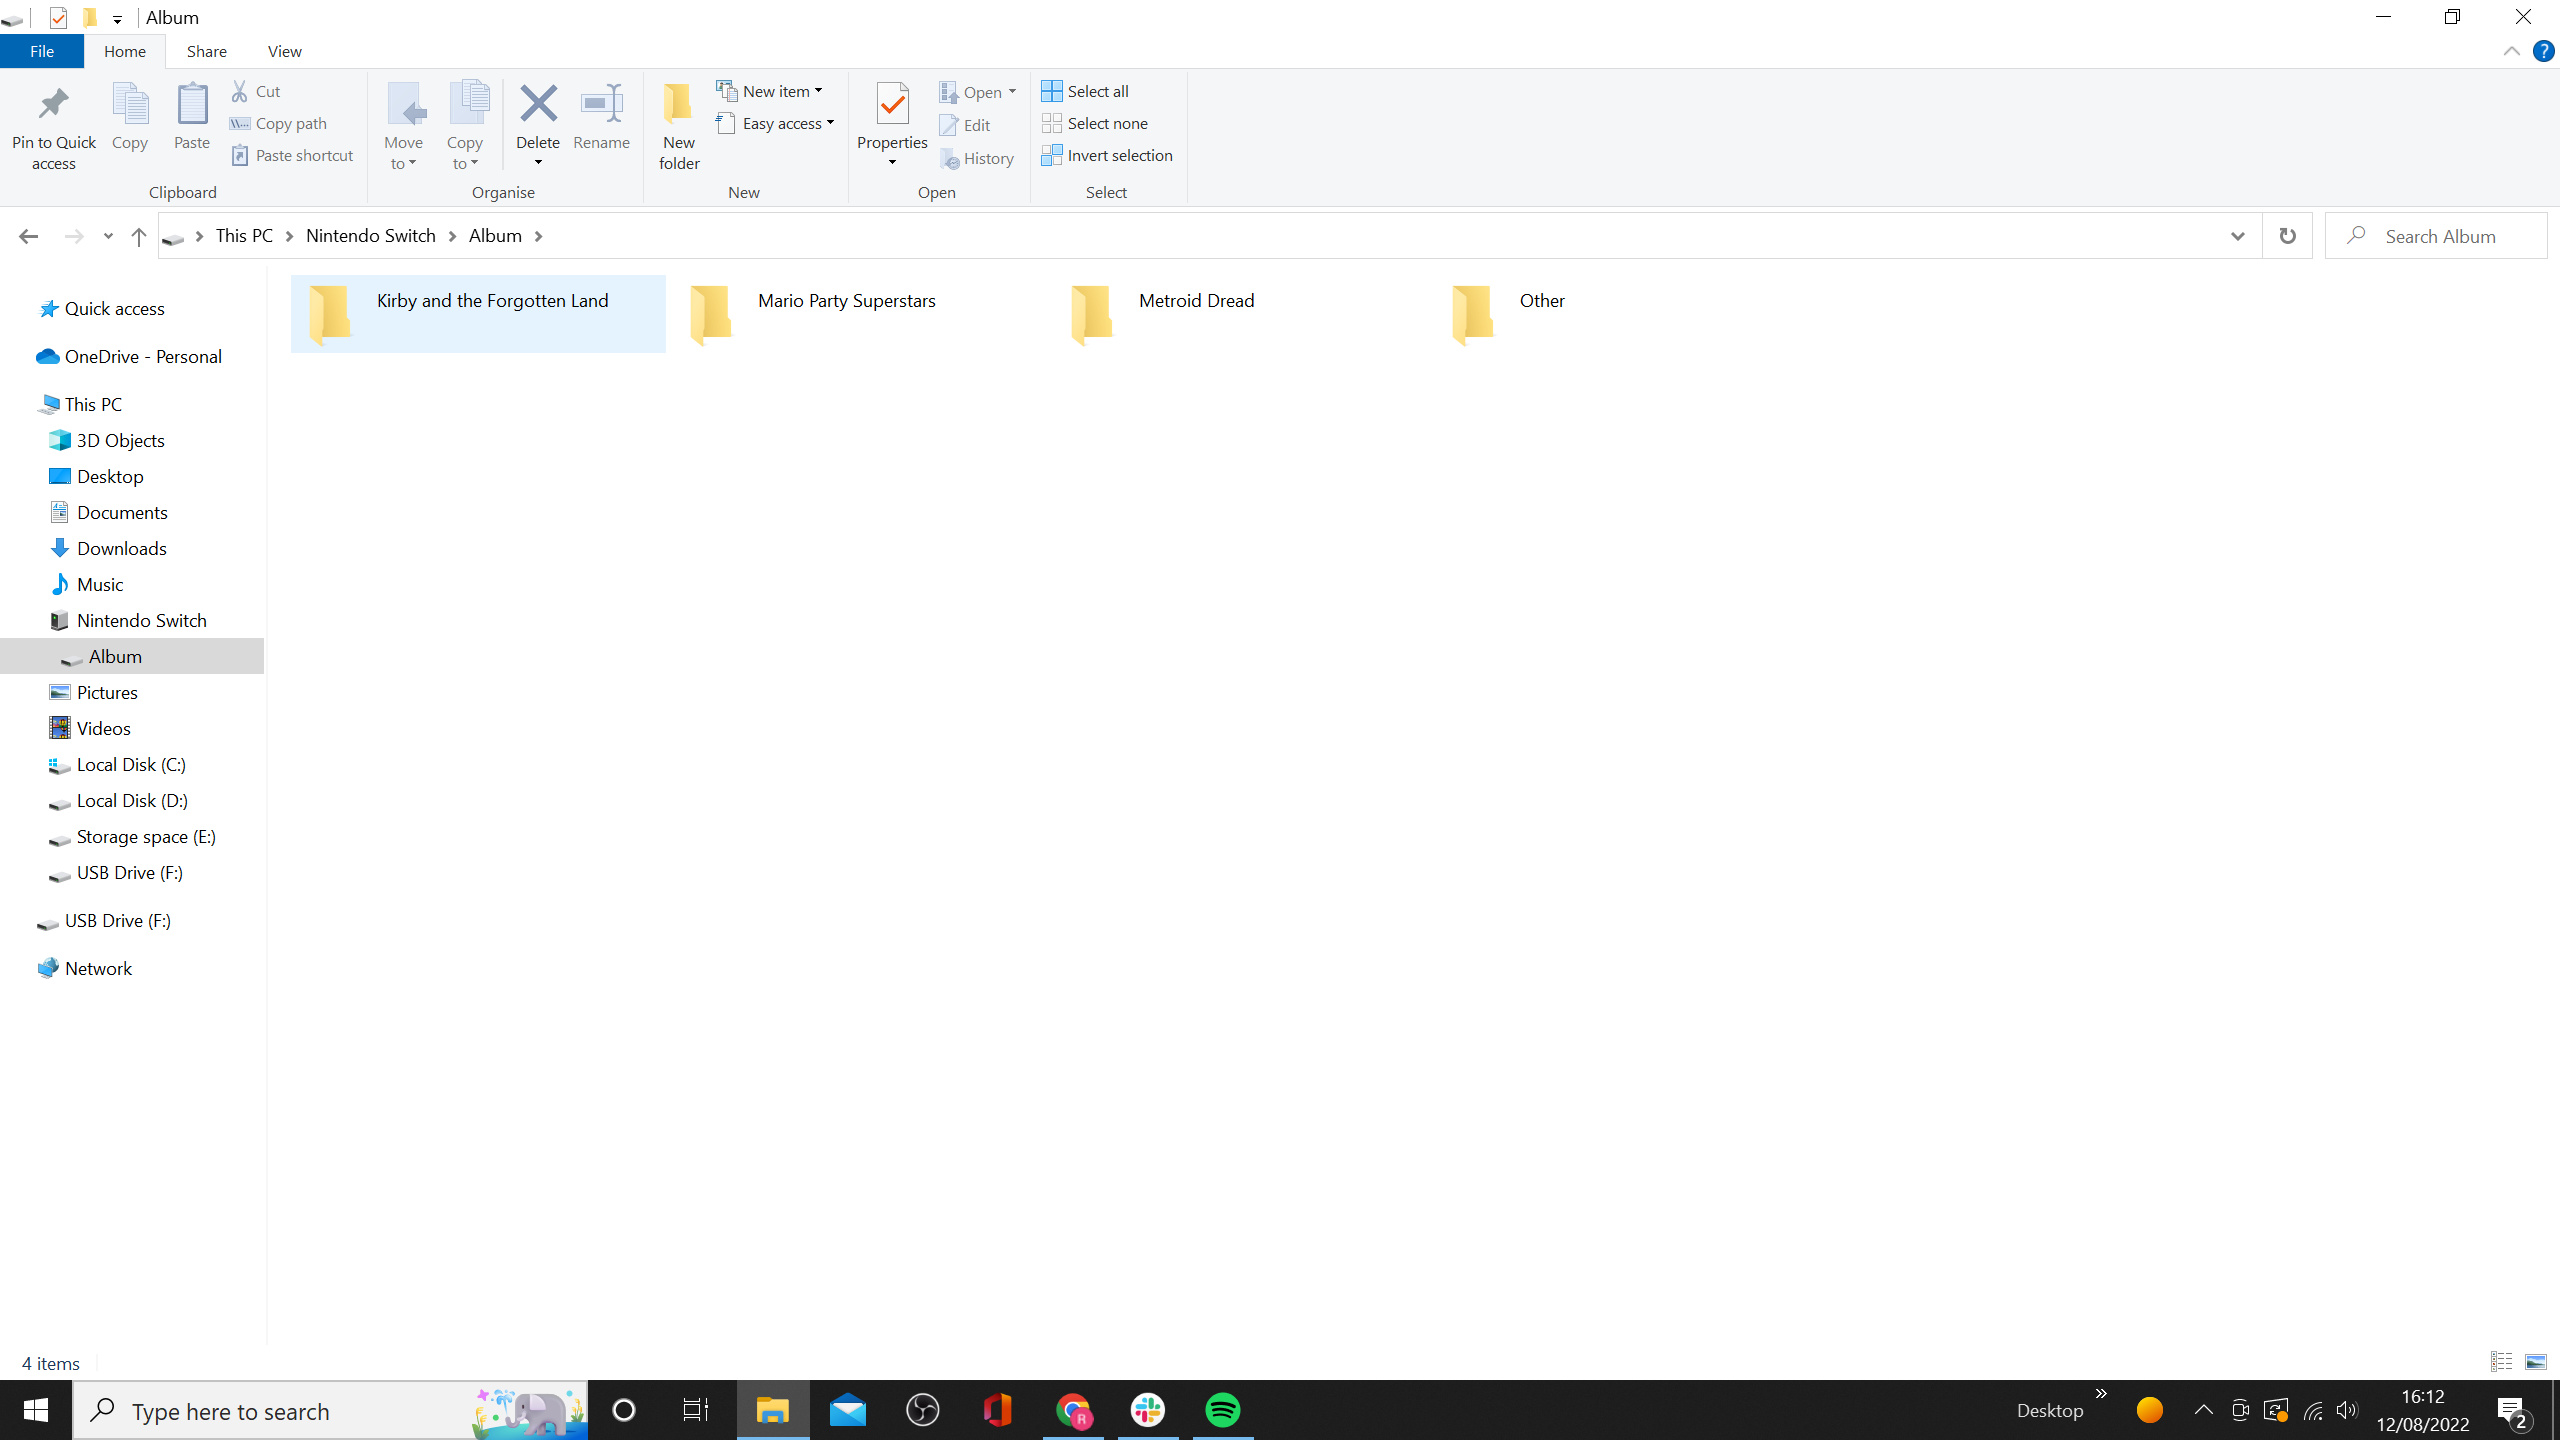
The Nintendo Switch sorts all screenshots into folders for the games they were taken in. Select the game you want (we selected Kirby and the Forgotten Land).
If you want to transfer an image of the Switch’s home screen or settings, the screenshots should be in an “Other” folder.
-
Step
11Find your screenshots and copy them to your PC
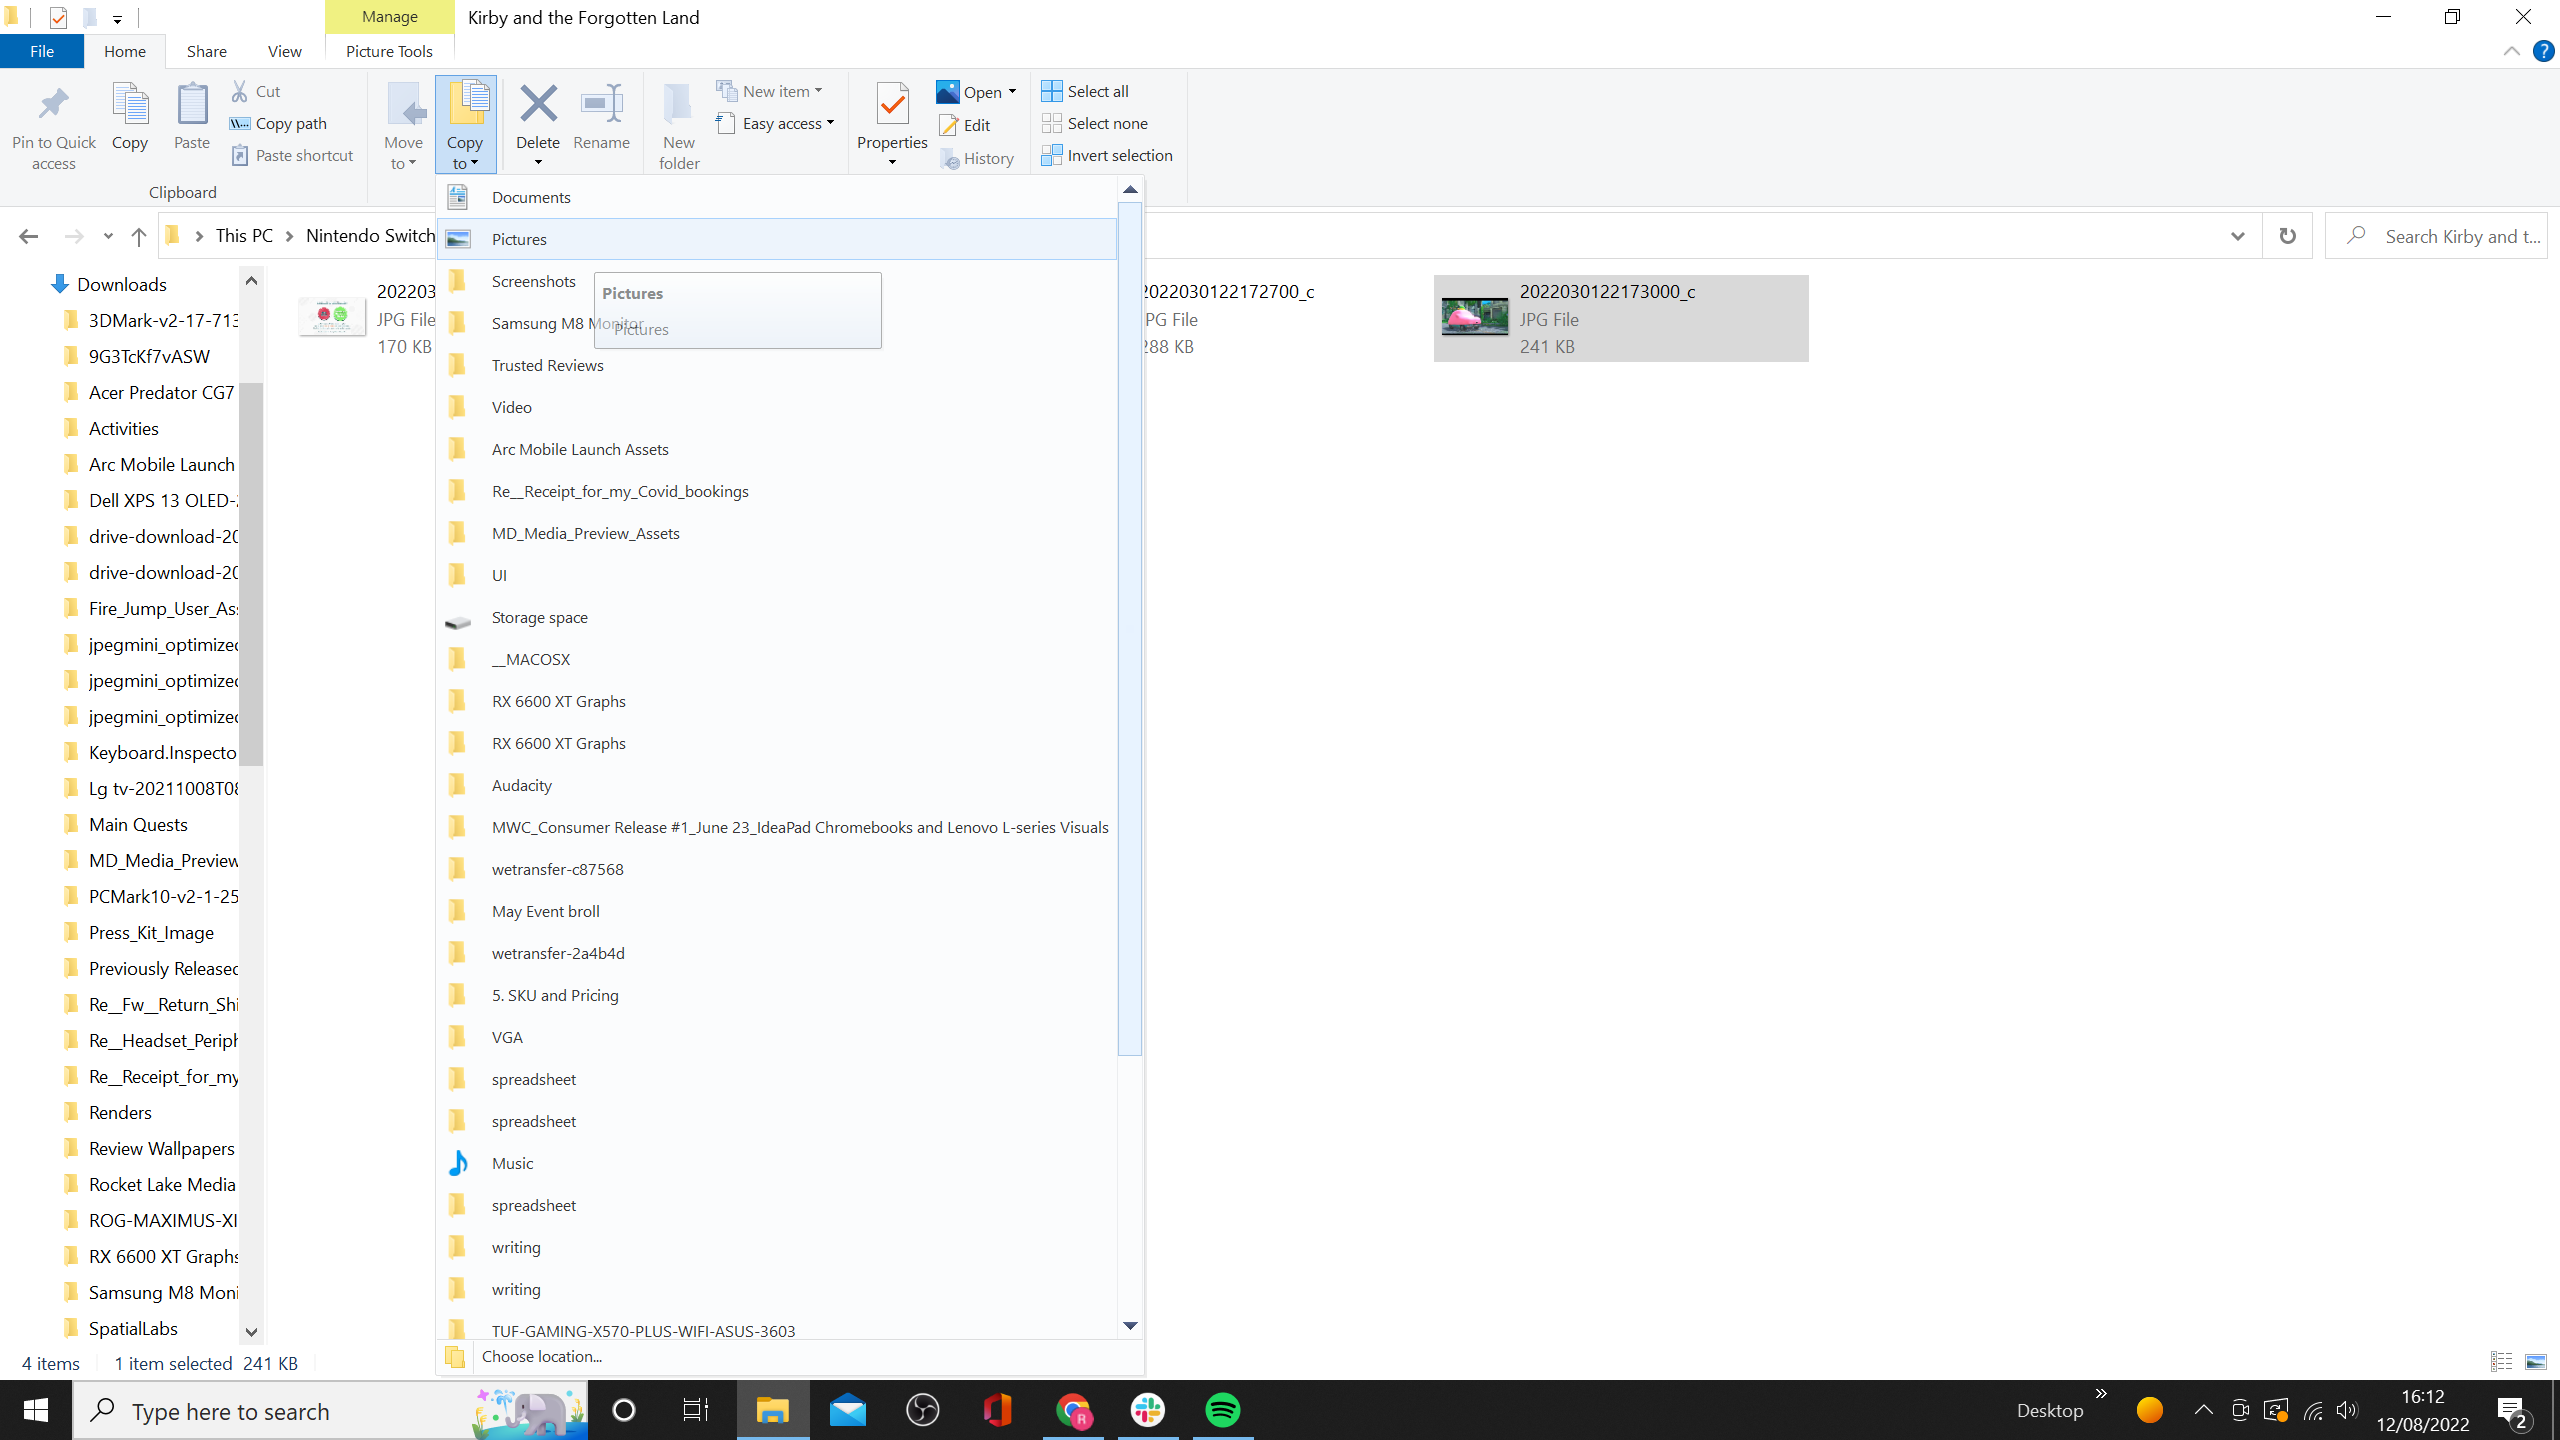
All of your Nintendo Switch screenshots for your chosen game should be saved here.
To save it on your PC, highlight the selected screenshot, press the Copy to shortcut on the top toolbar, and then select the location on your PC where you want it saved. You can also drag and drop the image to where you want it if you prefer. Once that’s done, you can disconnect your Switch.
Troubleshooting
Yes you can. Make sure the screenshots are saved on the microSD card, and then you can take it out of the Switch and plug it into your PC to transfer the files. In the likely event that your PC doesn’t have a microSD card reader, you’ll need to buy an adapter. So we think the above method is better for most.
Yes, and it’s arguably an easier process. On Switch, go to Album > click Screenshot > press A button > Send to Smart Device > Send One by One.
You can use the QR code to wirelessly connect your phone and transfer the images. Both your Switch and your phone must be connected to the same Wi-Fi network.
You might like…