How to Set a Custom Icon for a USB Drive on Windows 10
Give your removable USB drive an easily recognizable visual label in the form of a custom icon.
The thing about using different USB flash drives for different projects and files is that you might forget what’s on each drive. A quick way to know what a USB stick contains is to assign each a custom icon.
If you want to better organize your drives, learn how to assign an icon to a USB drive in Windows.
But first, where to find good icons?
There are some websites that are special libraries for computer symbols. We addressed this in an article on how to find and customize any icon for Windows.
Most of these websites have icon images in PNG format, and acquiring icons this way involves downloading image files and using another web service to convert them to ICO icon format. If this seems too much of a hassle for you, we’ve also dug up some nice Windows icon packs with ready-to-use icons.
How to assign a custom icon to a USB drive in Windows
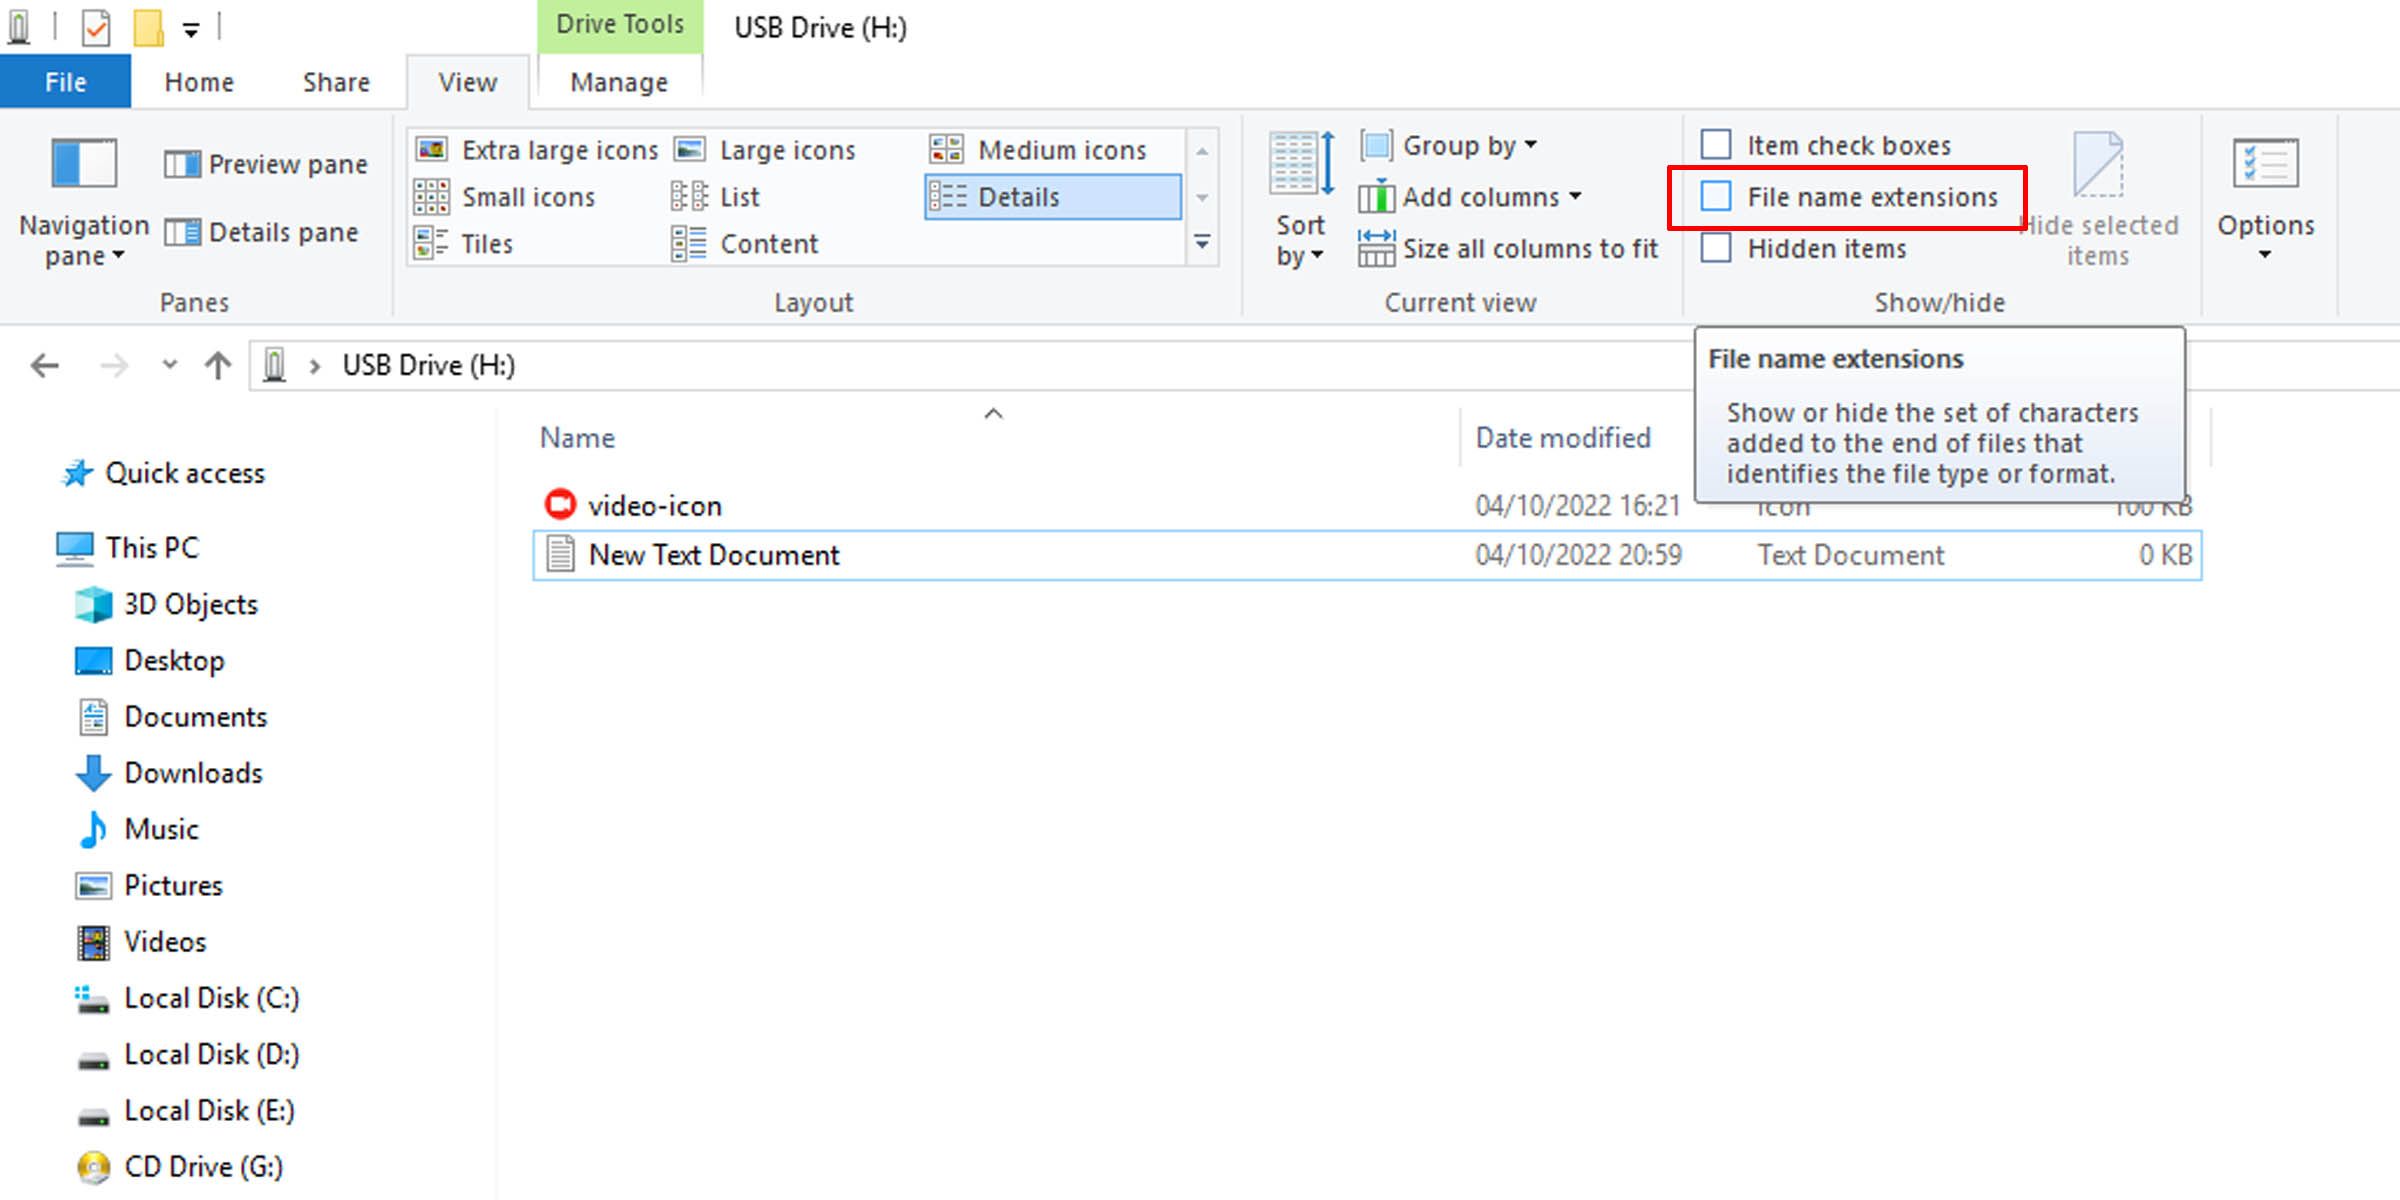
This method creates an INF file on your USB drive. You must set your system to display file extensions on Windows.
- Plug in the USB drive that you want to set a custom icon for.
- Using File Explorer, navigate to the flash drive.
- Copy the icon file you want to use for the drive and paste it here (the root of the drive).
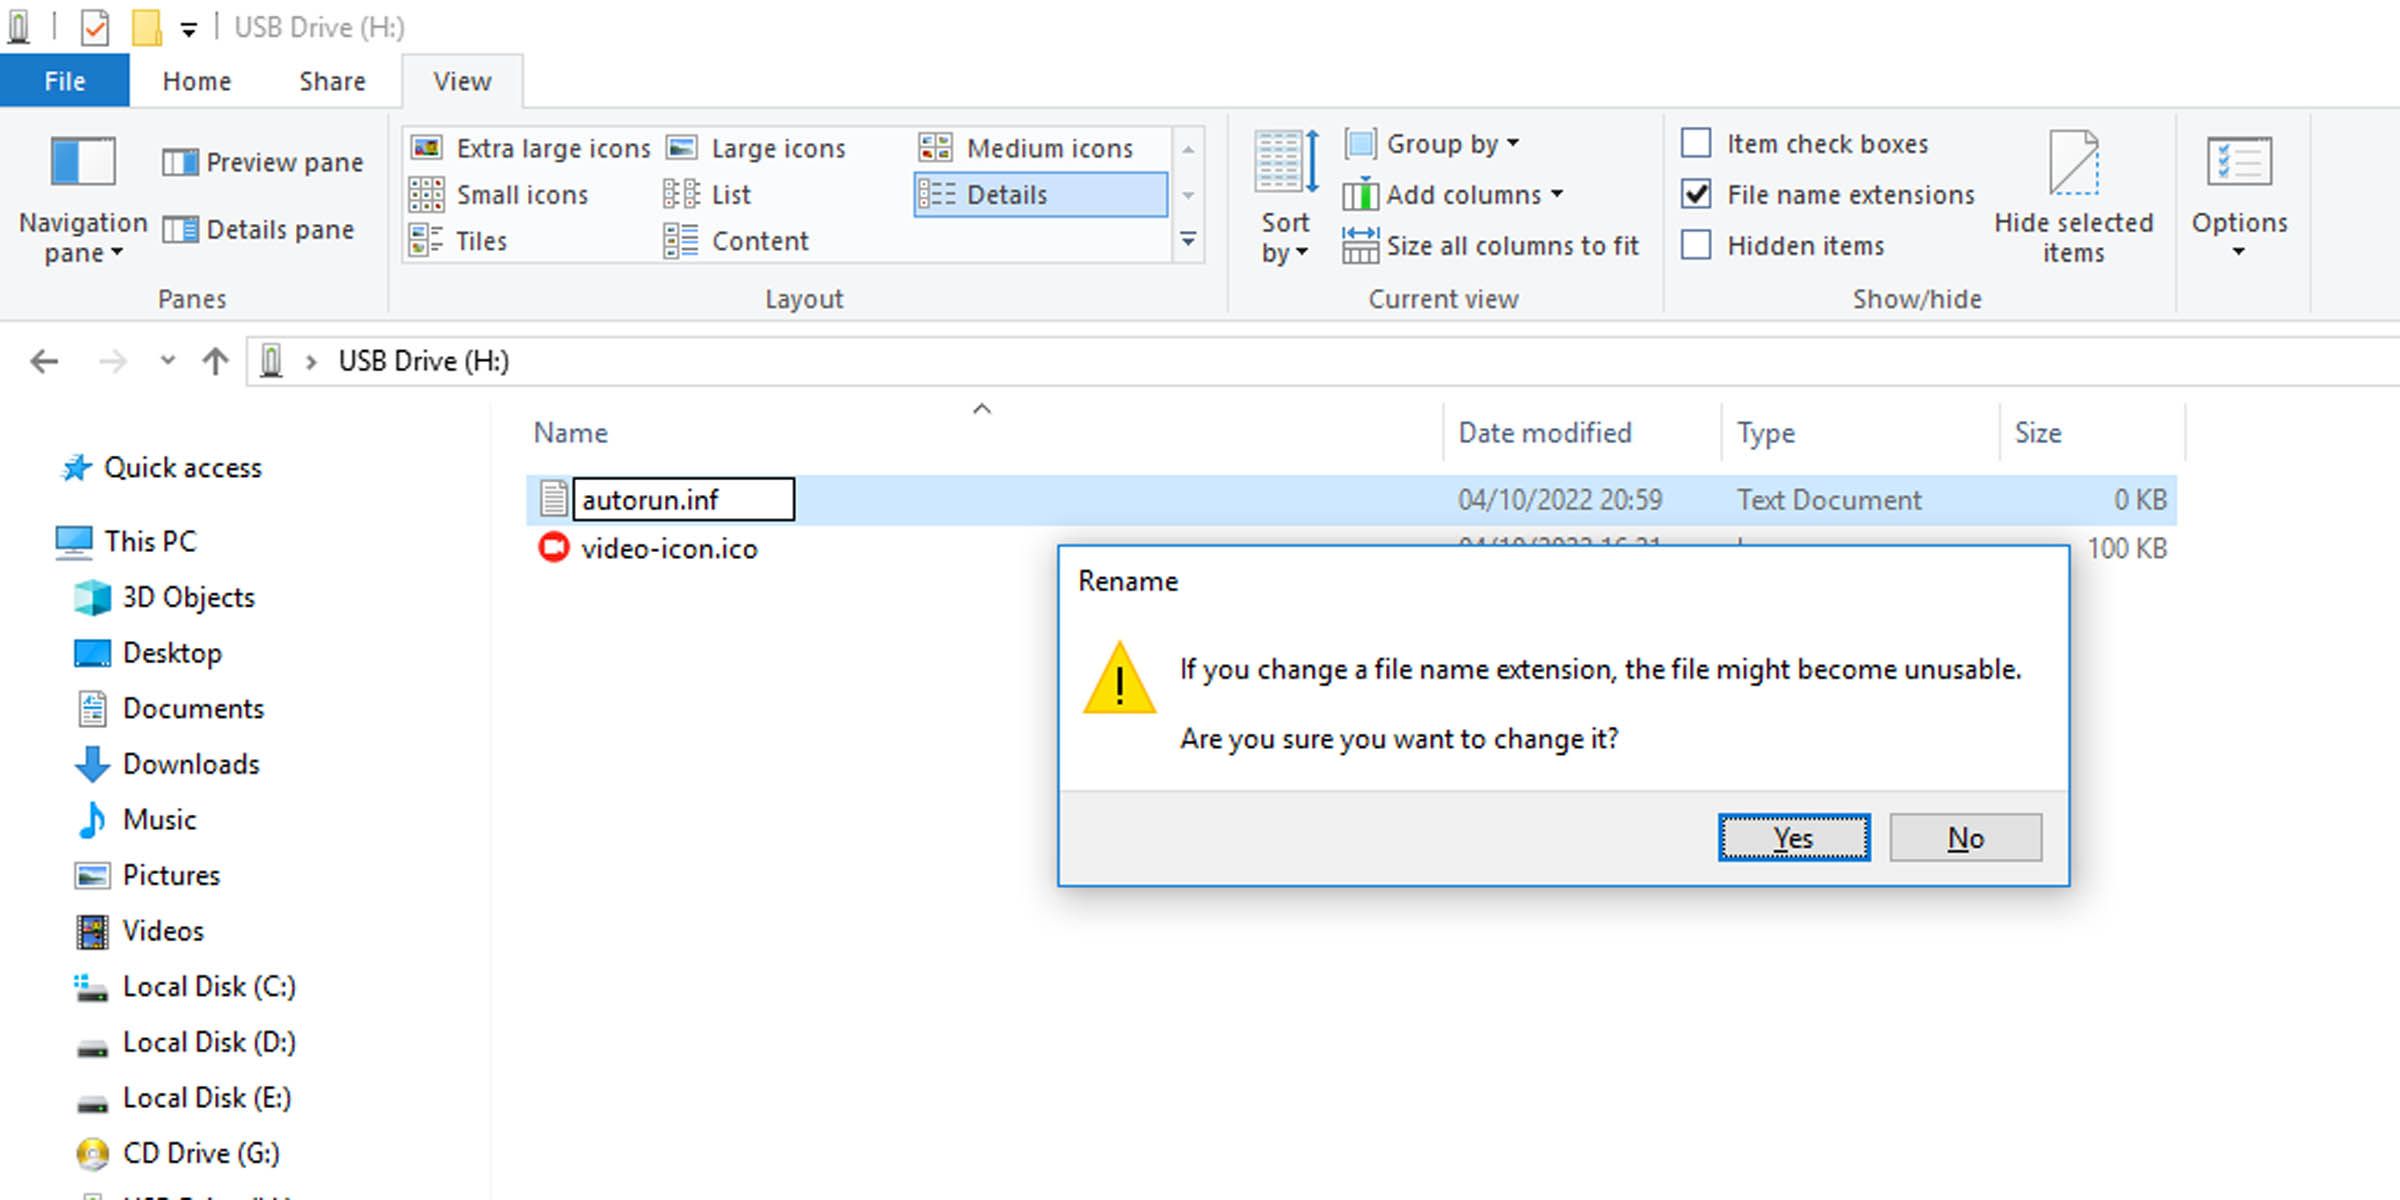
- Create a new text document on the USB drive and rename it to autorun.inf by removing the existing “.txt” extension. Make sure you see file extensions (View > Filename Extensions).
Windows should display a prompt asking if you’re sure you want to change the filename extension.
- Choose Yes when prompted to change the file type to an INF file.
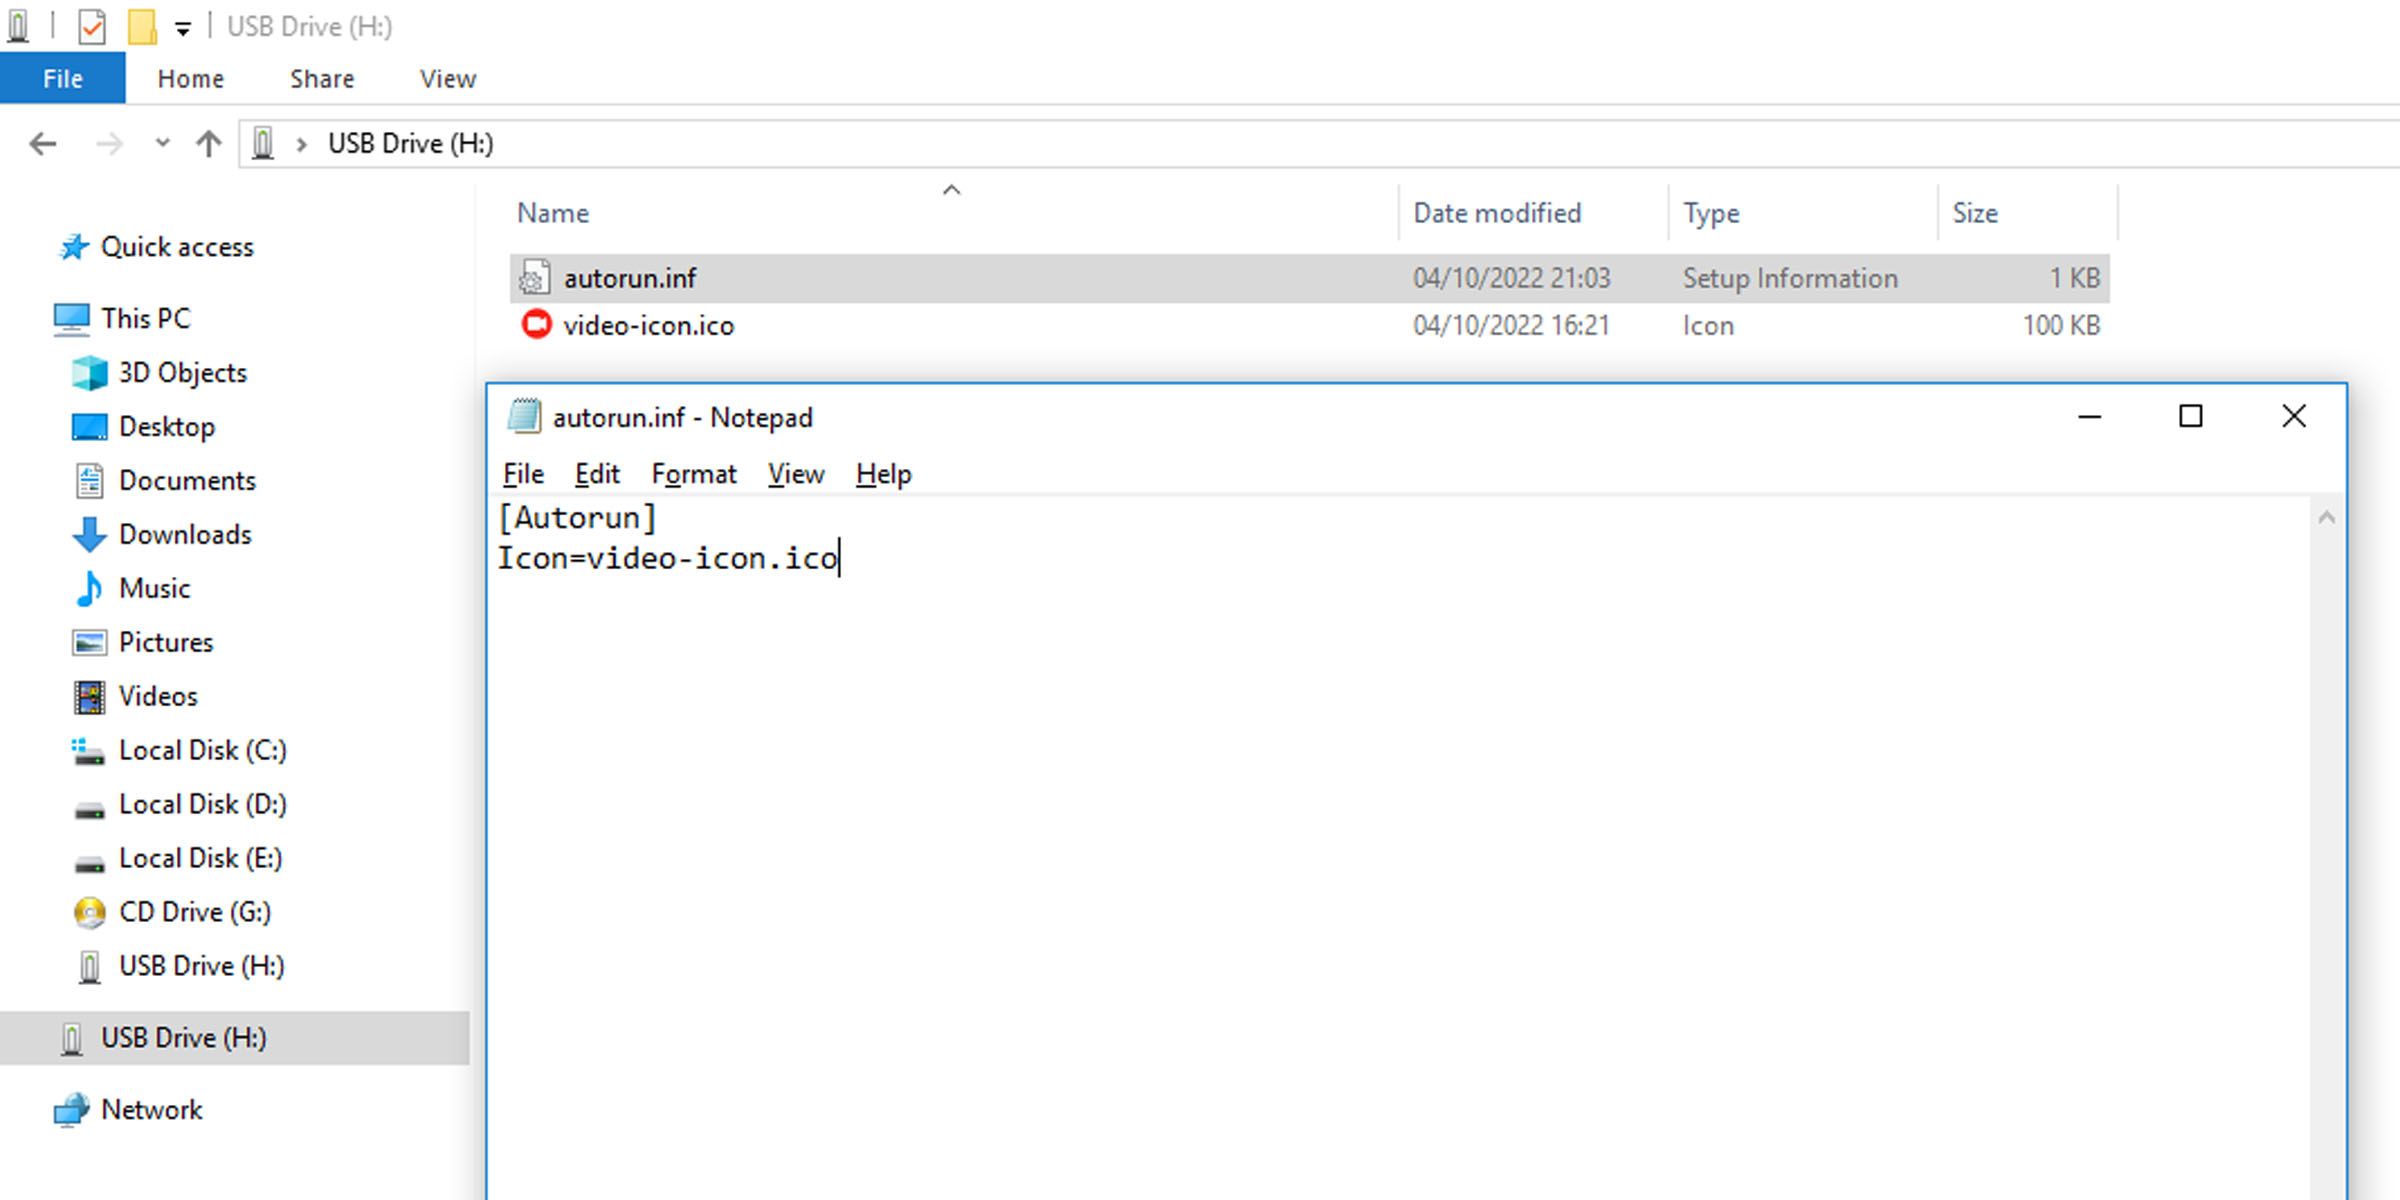
- Open the INF file and type: [Autorun] Icon=icon-name.ico Replace “icon-name.ico” with the name of the selected icon. Make sure this name does not contain spaces.
- Save and close the file.
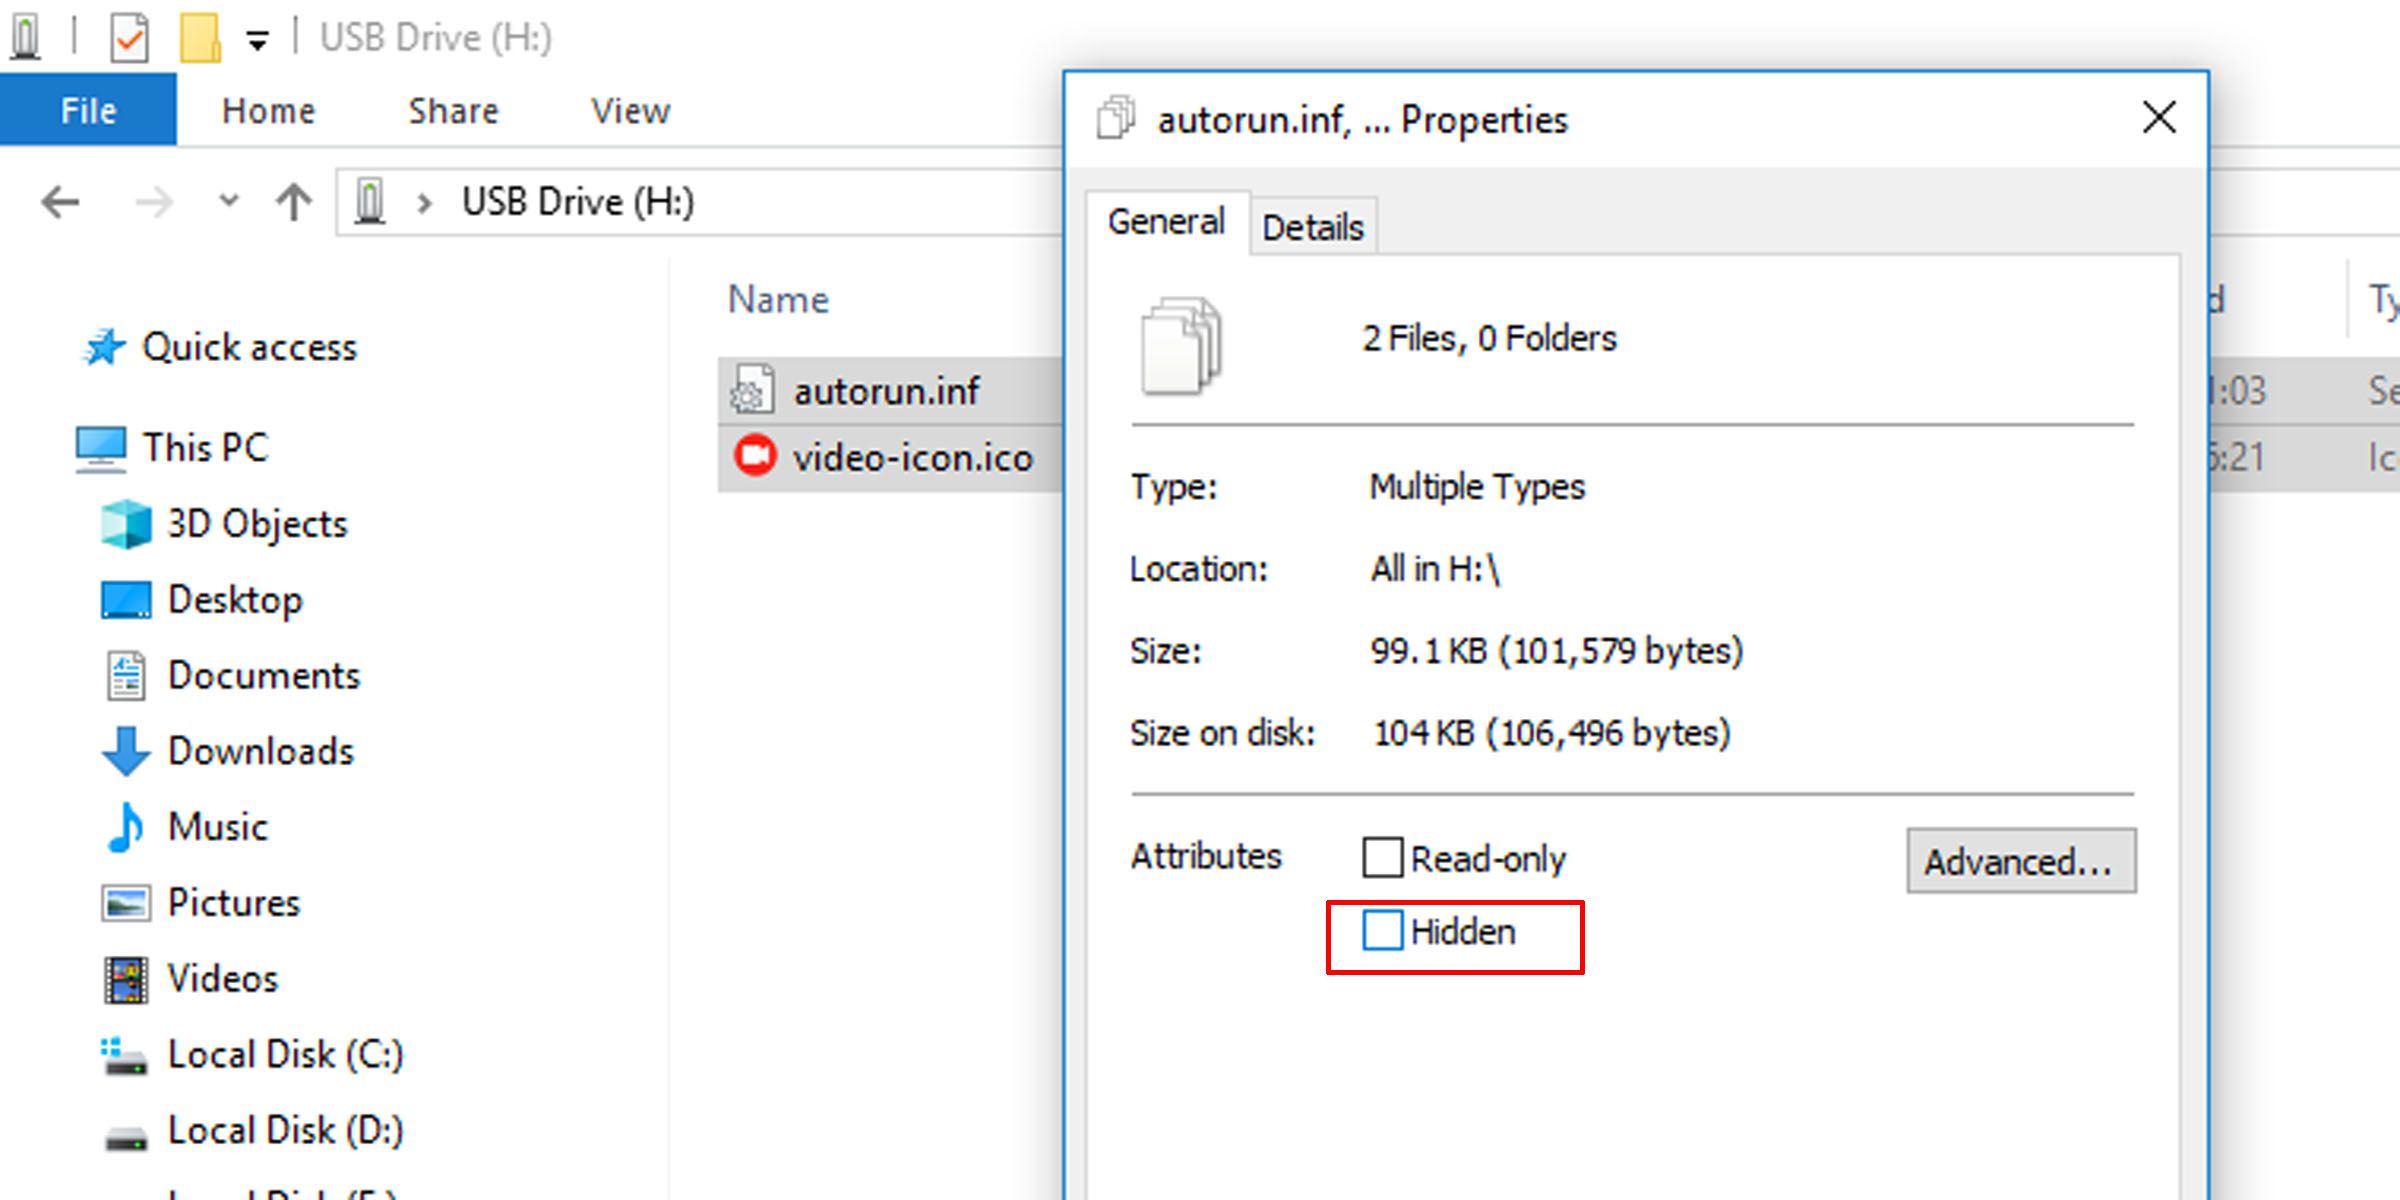
- Next, you need to hide these files so that they are not accidentally deleted. Select both, right click on the selection and select Characteristics.
- In which attributes section, select the Hidden option and click OK.
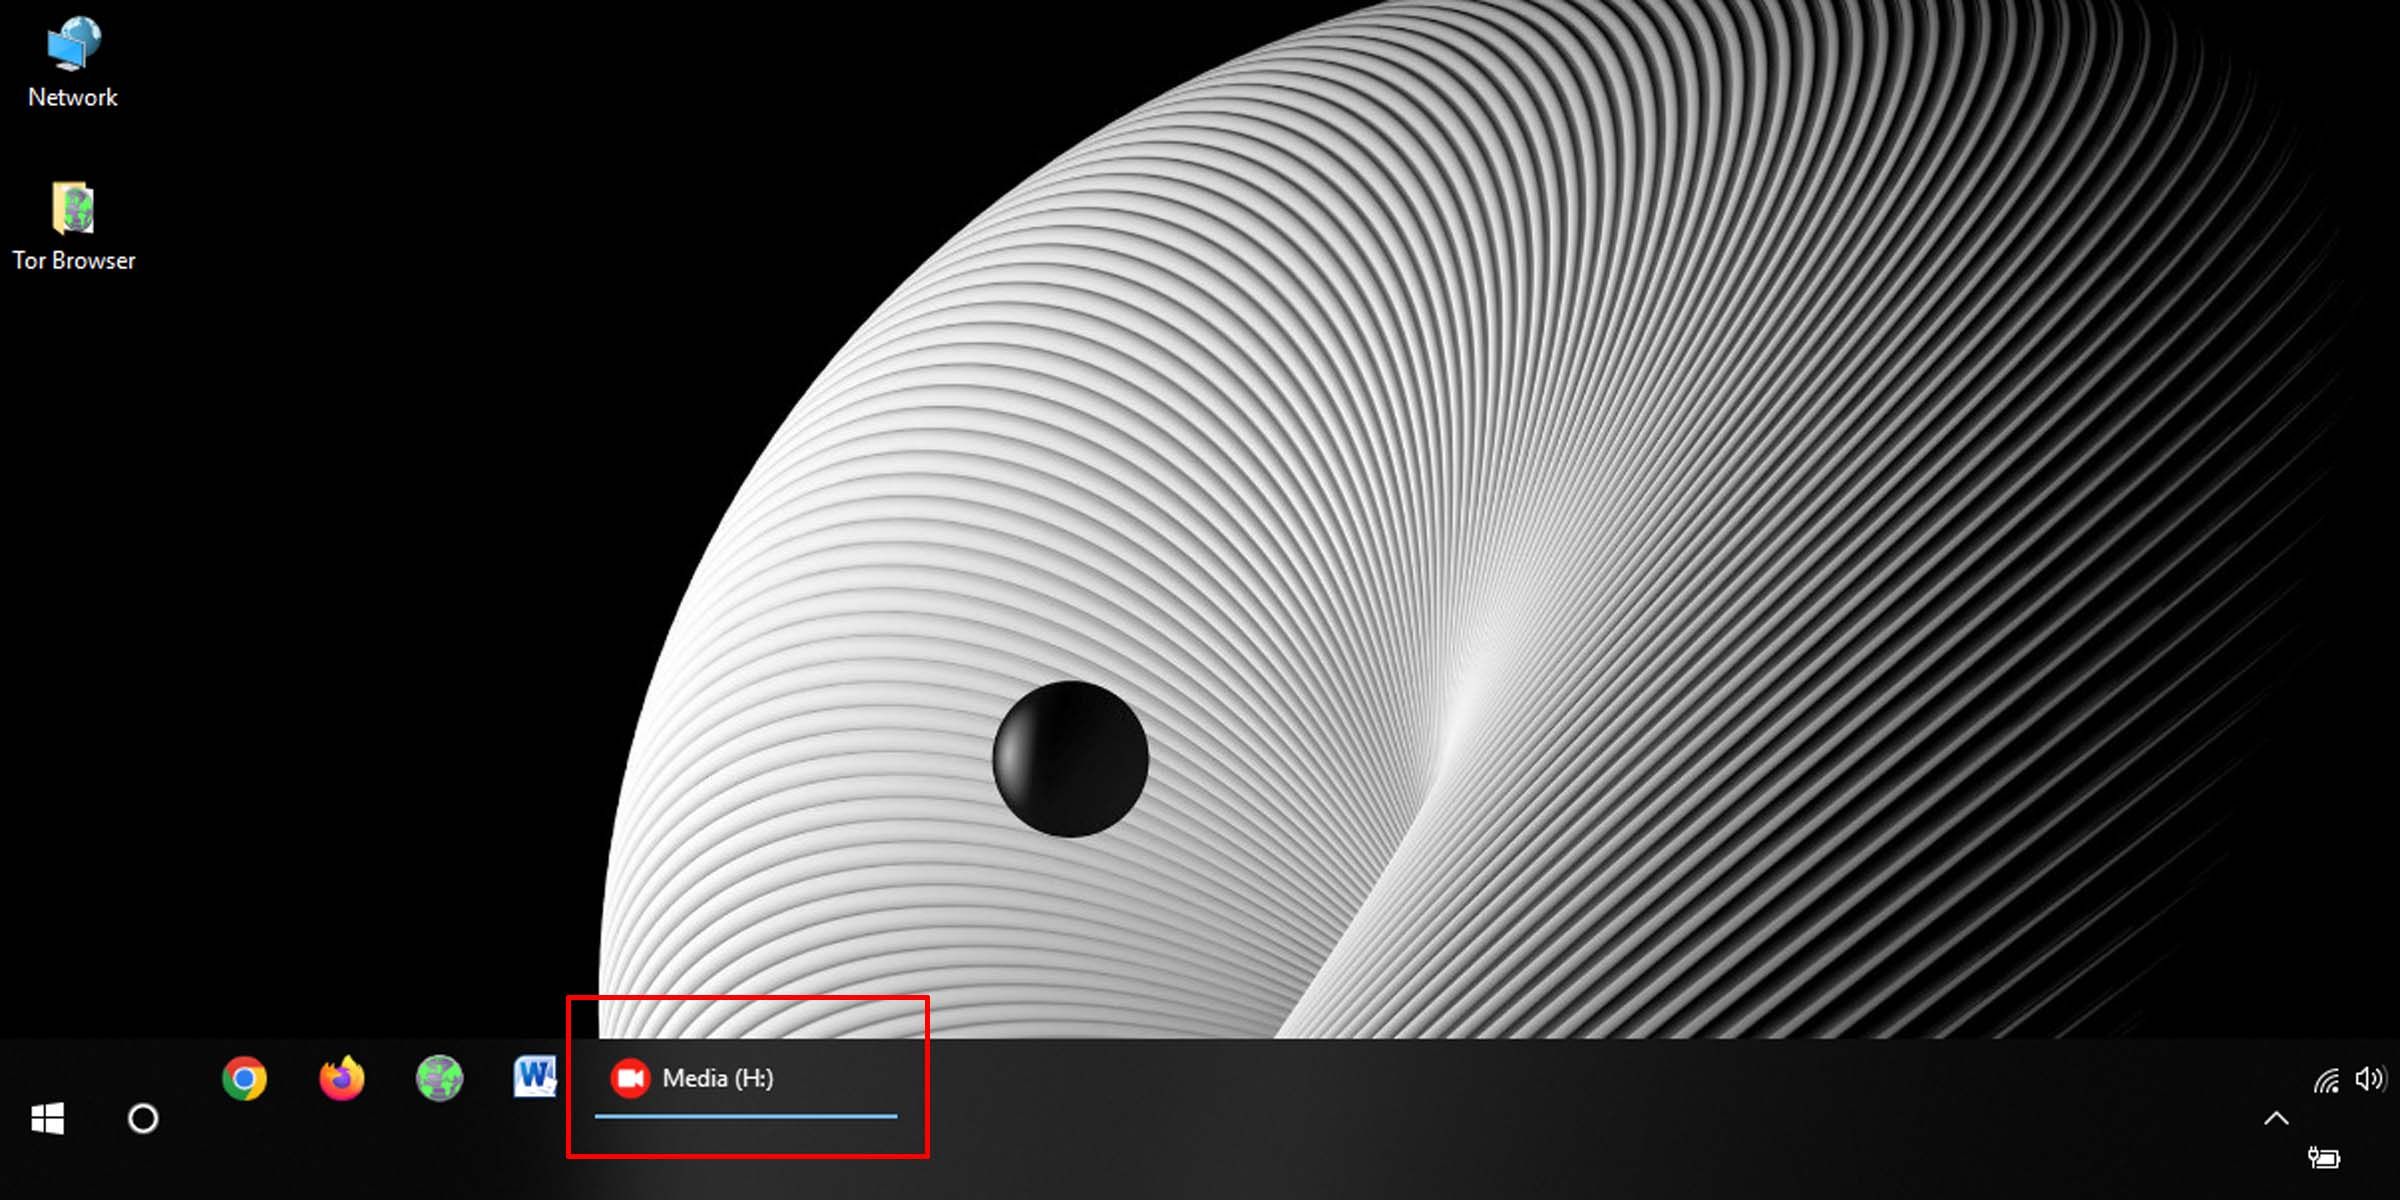
- Test if this worked by safely removing and reconnecting the storage device. Your PC should recognize it and you should see the custom icon you set.
If you want to restore the Windows default icon for that particular USB removable drive, simply plug it in, enable the option to show hidden items, and delete both the icon file and the INF file.
Create your own USB icons on Windows
Setting icons for special purposes is fun, but if you can’t find exactly what you’re looking for, you can take it a step further and create your own. Creating custom desktop icons requires the use of Windows Paint software and is easier than you might think.
