
How to use Safari Extensions in macOS Ventura
AppleInsider may receive an affiliate commission for purchases made through links on our site.
Make Safari on macOS Ventura more useful and a part of your workflow by adding extensions that give you extra functionality straight from your favorite apps.
An extension adds new features to Safari and puts them on the browser toolbar so they’re a single click away no matter what you’re doing. They’re still not very well known among Safari-only users, but they’ve been a big part of Google Chrome for years.
We may still be waiting for a Safari extension gold rush, and there probably never will be as many as for Chrome. However, Apple has taken steps to make it easier for developers to add extensions — and for users to find useful extensions.
If you’ve used Safari extensions in macOS Monterey, you’ll find that they’re practically the same in macOS Ventura. But the installation process is a little different, and behind the scenes, Apple has allowed developers to create more.
How to install Safari extensions
- Open Safari on macOS Ventura
- Click on that safari Menu
- Then click settings
- In the settings pane that appears, click Extensions on the right
This is important and you will get it wrong because Apple did something strange. Just above Safari’s Preferences section of the menu is another entry called Safari Extensions.
You don’t want that, not yet. That’s for later, after you’ve seen how to install extensions and which ones you already have.
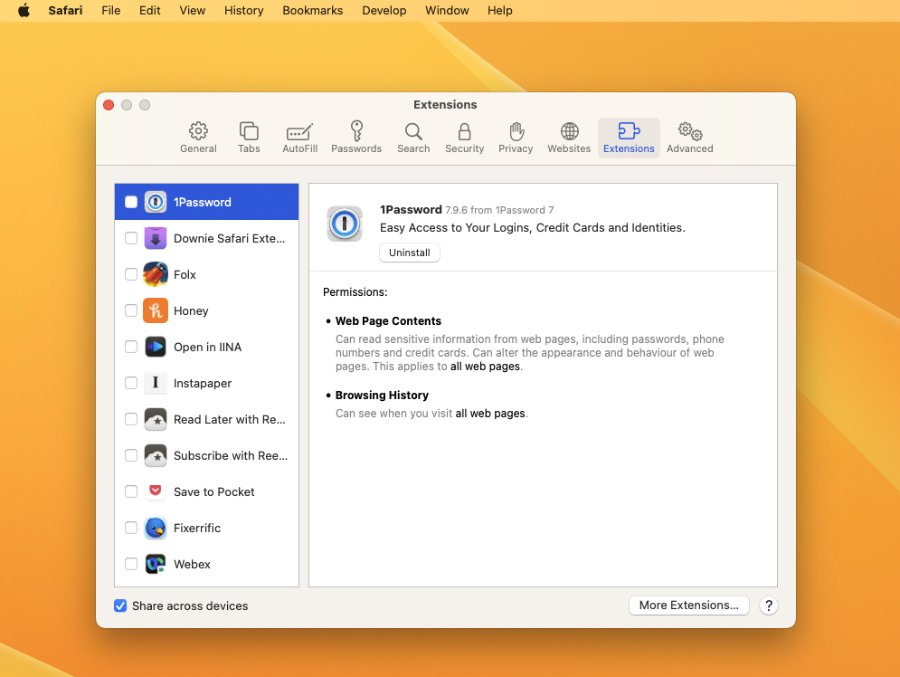
If the apps you use include extensions, they’ll appear here, where you can turn them on or off as needed
Because that’s what it’s about. Even if you’ve never heard of Safari extensions, you already have them.
That’s because you probably have apps that offer some of their functionality to Safari in the form of optional extensions. None of them work, none will be active unless you turn them on, but they are there.
To enable them, click the checkbox next to their name. Safari will ask you to confirm that you want to use it and also warn you that as an extension it can see your browsing history.
Click on turn onand that’s all you really have to do.
You can also now click on the extension’s name and get details on what it does and what it can do, such as: B. monitoring websites. You can also get one in this detail section Uninstall Button.
What extensions you already have
It really depends on the apps you have, but then there’s this too – the extensions you need the most are probably the ones in the apps you use the most.
However, this type of extension mainly gets you into the main app to perform a function or record some information. And there are others that only offer one or two very specific features that improve using Safari.
For example, there are those who – with your permission – monitor when you buy something online. If there’s a discount code you can apply, an extension might find it and recommend it to you.
As much as Apple would like there to be more, it doesn’t have a deluge of extensions just yet, so you can take a look at the App Store to see most or all.
And this is how you install more extensions.
How to install more extensions in Safari
- Open the App Store on Mac
- Search for “extensions”
- Or go to categories, Safari Extensions
In the App Store, sometimes it’s not entirely clear when you get out of extension search results and just look at regular apps instead. That won’t change either until there are many more extensions in the App Store and Apple doesn’t have to try and fill the screen.
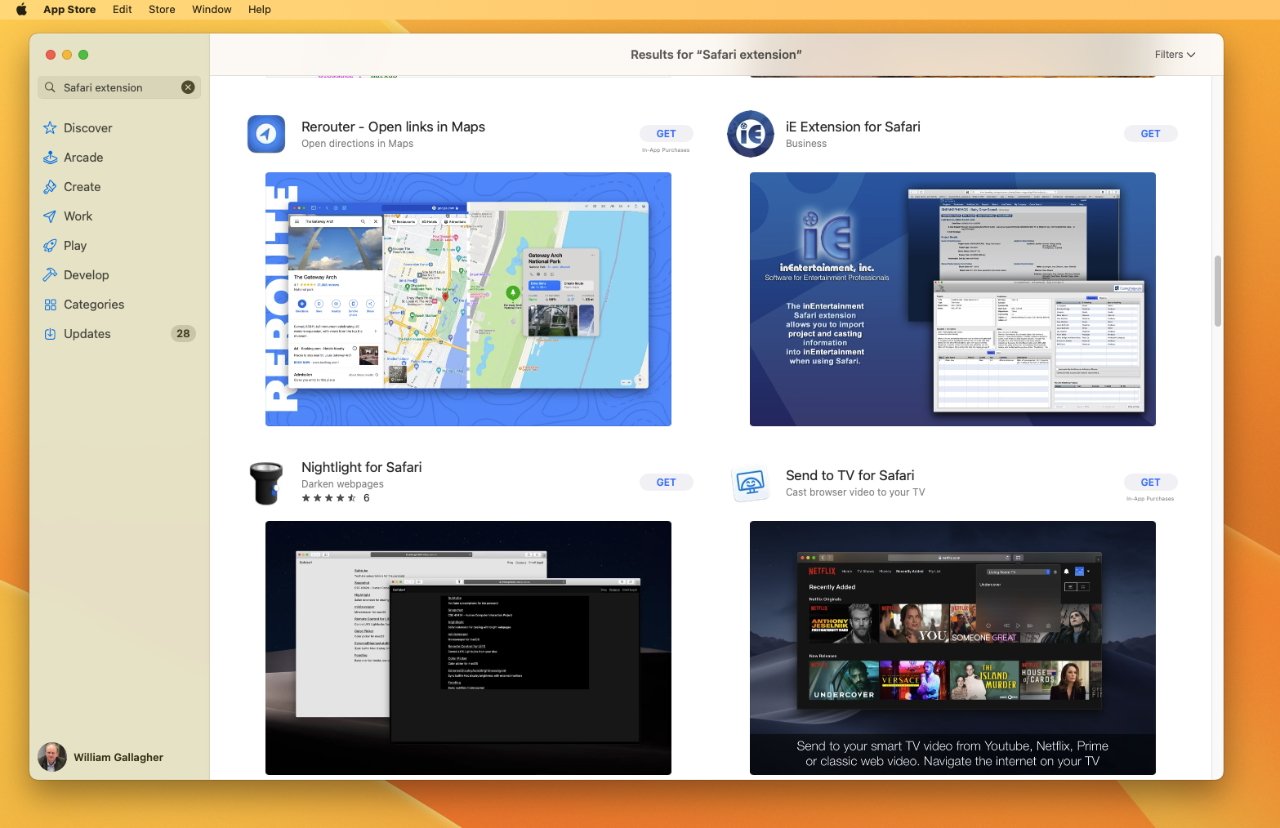
Safari Extensions on the App Store
However, when you find an extension you want, at first the installation process is exactly the same as installing any app. You click the Get button, confirm your purchase, and wait while it installs.
Once installed, return to the Safari Settings page and tick the new extension to enable it.