
Minecraft Tips For Exploring – How To Get Around Without Getting Lost
The only thing easier in Minecraft than hitting a tree is getting lost. You’ve found the coolest river, the richest cave… but you can’t remember where your house is. In the beginning you just have to be careful, but as you progress through the game your options will multiply to make sure you know where you are in your Minecraft world. Here’s what you need to know about navigating and finding your way around in Minecraft.
The basics: paths, directions and signs
The children in fairy tales did it, and so can you. However, instead of leaving a trail of breadcrumbs in your wake, you can do something better. Place these torches in your inventory to work, using them to mark your path as you explore. However, it can sometimes be difficult to see where a group of torches is pointing. To support that Get out your shovel and use its alternate function on the ground. You can lay out a good looking and highly functional trail with nothing more than a shovel.
Minecraft canonically doesn’t have cardinal directions like north and south in the game, but the The sun and moon always rise in one direction and set in the other, so you can decipher where north, south, east, and west are. Keep these in mind as you build and explore.
And if all else fails, signs are easy to mass-produce. The posting of informative signs showing the various “arrow” characters (^, V, < und >) can be enough to get you anywhere.
Make a compass
But you shouldn’t have to do a ton of work or pay close attention to finding your way home. There are easier options once you start gathering more materials.
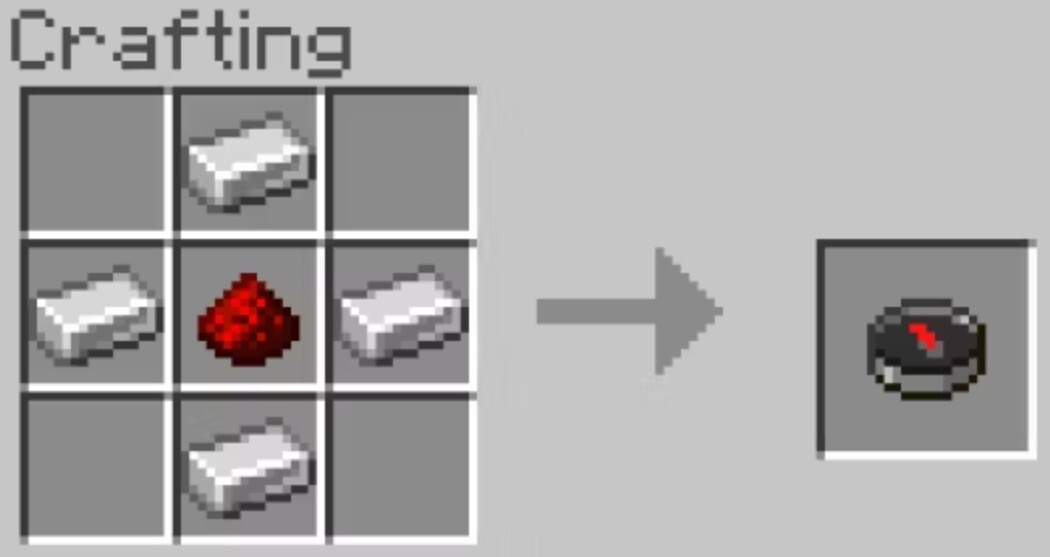
The compass is perhaps the easiest to build and use. By default, this compass points back to the world spawn – the place where you first spawn when you log in. This will ensure that no matter where you go, you can at least find your way back to that point. However, the further you move your base of operations from the world spawn, the less convenient this becomes. But this problem can also be solved with a magnetite– more on that below. Regardless, this simple tool gives you a foolproof way to get back to the world’s spawn point, no matter how far you’ve gone.
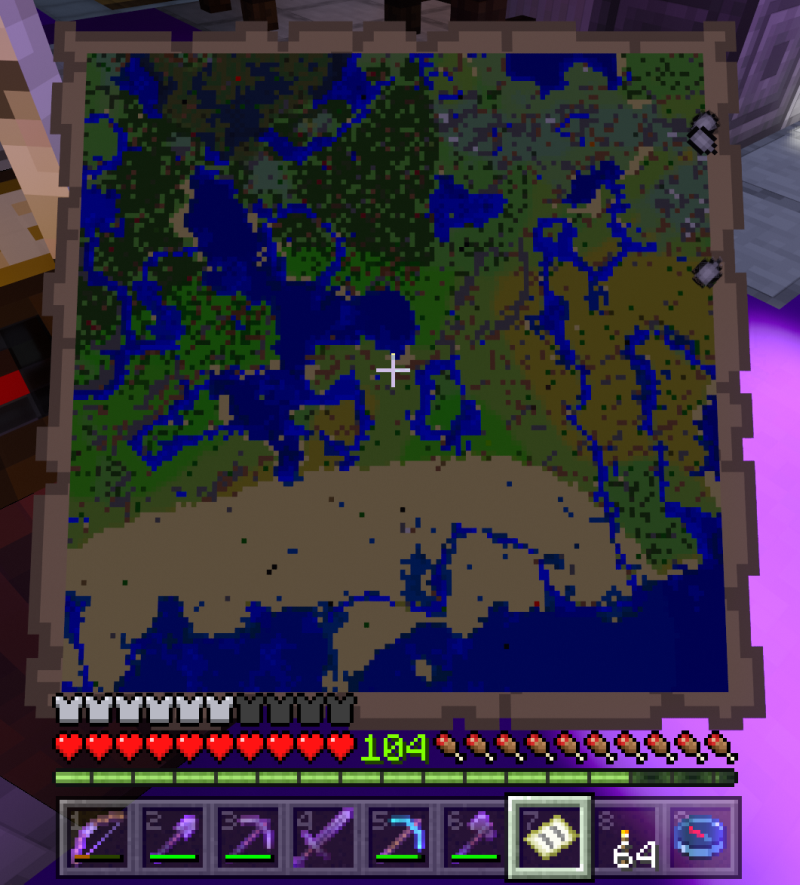
Create a map
A compass will always get you back to its point of origin, but it won’t get you back to that crazy cave you found while traveling. A card, on the other hand, does. To create a map, you need nine sheets of paper that you can get by with harvest sugar cane and take it to a craft table. Mapping can consume a lot of paper, so you’ll likely need a few stacks – but nine is the way to start. By creating and activating a map, you end up with a basic map of the area you are currently in, which you can then uncover on the map by walking around the area covered by that map. But that’s just the beginning – cards are incredibly useful items once you know what to do with them.
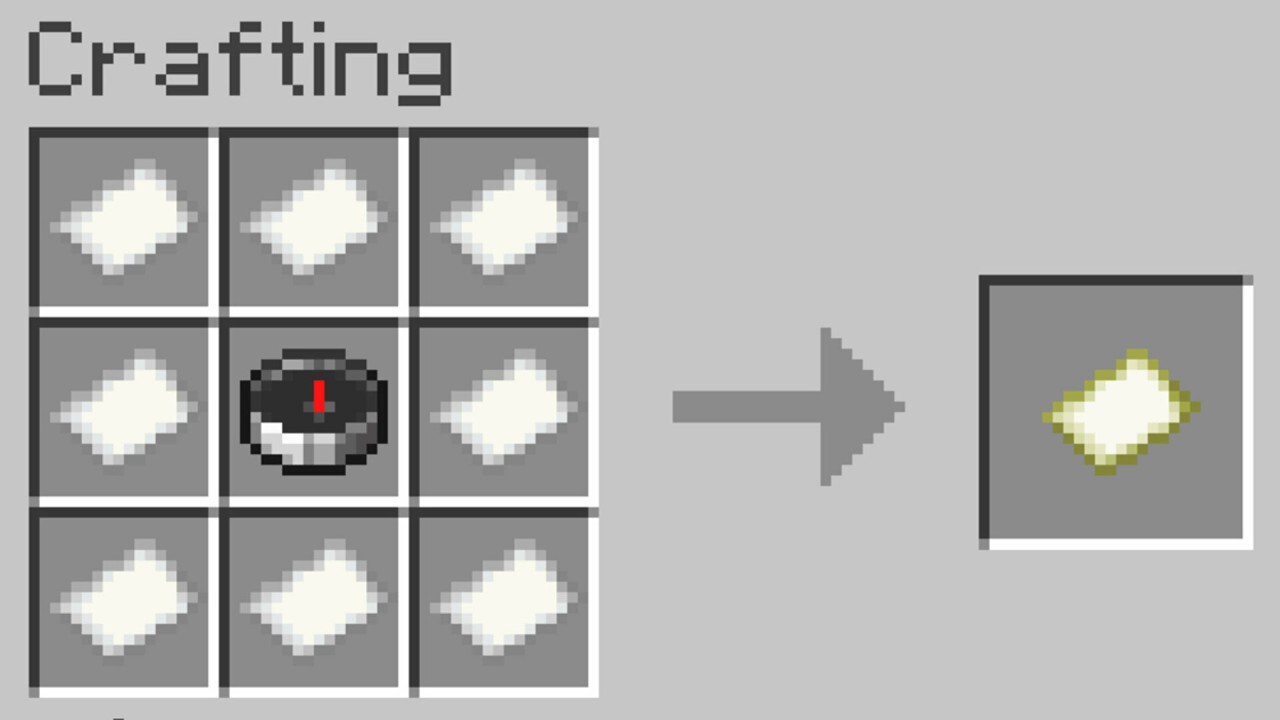
Create a locator map
The next level after creating a simple map is creating a locator map. You need 8 sheets of paper and a compass. You’ll end up with a map like above, but now you and all other players on your server are shown on the map, including the direction each player is facing in real-time. If they are off the edge of the map, they will appear on the edge of the map so you can help your friends navigate home even if they are lost.
How to zoom maps
The final shape of a map is to create a zoomed out map. There are five levels of map zoom:
- Level 0/4: 256 blocks
- Level 1/4: 512 blocks
- Level 2/4: 768 blocks
- Level 3/4: 1024 blocks
- Level 4/4: 1280 blocks
you need one cartography table to get started, which requires four wooden boards and two sheets of paper. Then you can take your 0-zoom map – tracker or not – and place it in the top slot of the mapping table. Insert a sheet of paper into the bottom slot, and then take out the resulting product for a zoom level 1 card. Repeat this four more times to get a zoom level 4 map.
That being said, these maps make great works of art when mounted on a frame and can be a great way to remember all the things you’ve created in your Minecraft world.
Make a magnet

Another useful item you can craft is one we hinted at above, the Lodestone. This is the most advanced of these as it requires a Netherite ingot, obtained by mining Ancient Debris from the Nether. You also need a Stonemason to craft a set of 8 Carved Stone Blocks.
Place a magnet somewhere and then use a compass on it and that compass will then point to the magnet and not the world spawn. This is especially useful in the Nether and The End, where compasses don’t work by default. If you place a magnet in one of these dimensions and sync a compass to it, that compass will stop going crazy and point to the magnet instead. Drop this Lodestone at your spawn point and you can always return home, even in these dangerous dimensions.
However, Lodestones are useful even in the Overworld. You might find a place for your base of operations far away from the world spawn. By dropping a Lodestone there and syncing it with it, you can ensure you can always return home.
The products discussed here have been independently selected by our editors. GameSpot may receive a portion of the revenue if you purchase something featured on our site.