How to Enable and Customize the Touch Keyboard on Windows 11
Although physical keyboards are still the tool of choice for power typers and gamers, onscreen keyboards can come in handy when the physical keyboard has stopped working or you’re just too tired to press the keys.
In Windows 11, you can enable touch and the onscreen keyboard in a slightly different way than in Windows 10. In this guide, we’ll show you how to enable your touch keyboard and how to get the most out of it with a few tricks and tips.
How to enable touch keyboard on Windows 11
The easiest way to enable the touch keyboard on Windows 11 is through the Settings app.
Here’s how you can do it:
- Press Win + I together to open Windows settings.
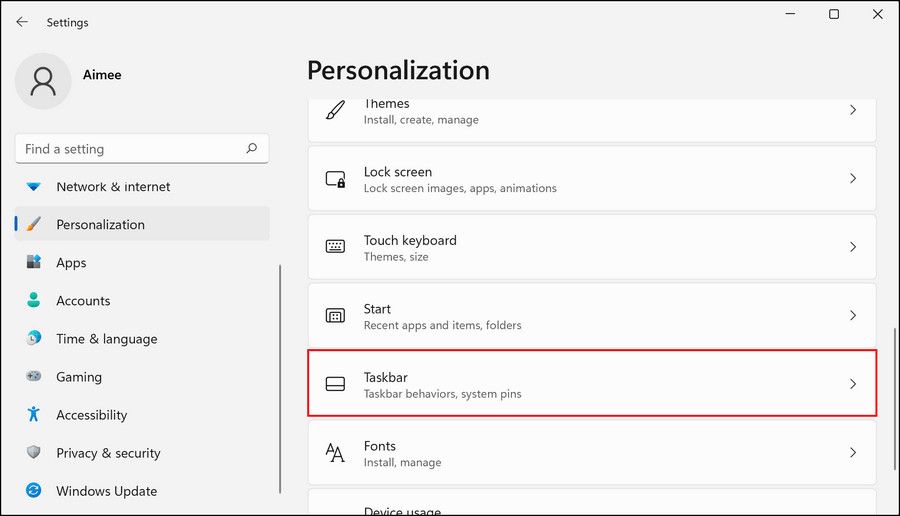
- Choose personalization from the left pane.
- In the right pane, scroll down to find the taskbar option and click on it.
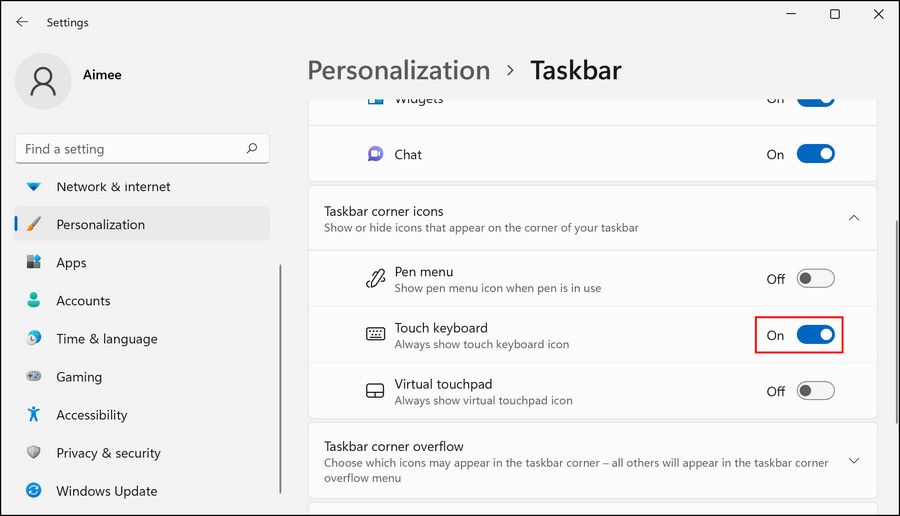
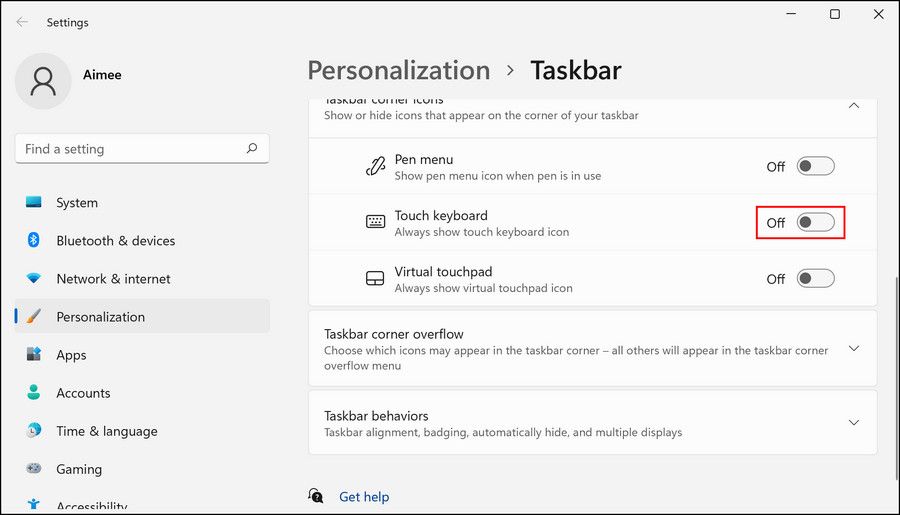
- Now activate the switch for Touch keyboard in the Taskbar Corner Icons section.
This will always show the touch keyboard icon in your system tray, which you can just click to launch the on-screen keyboard.
The different methods to launch On-Screen Keyboard in Windows 11
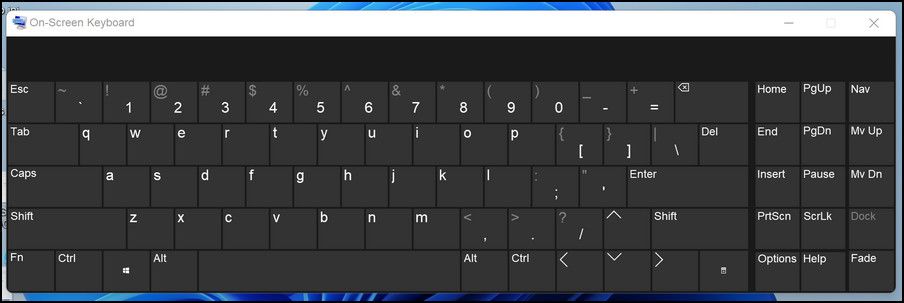
There are also several other ways to launch the on-screen keyboard. However, unlike the standard touch keyboard, this keyboard is floating so you can move it around the screen.
Below are several ways to launch the On-Screen Keyboard:
1. Use the on-screen keyboard shortcut
Several Windows services and features can be started with keyboard shortcuts set by default.
To launch the on-screen keyboard, press ctrl + Win + O keys together. Once the keyboard is launched, you can adjust its placement to your liking.
2. Open the Run dialog
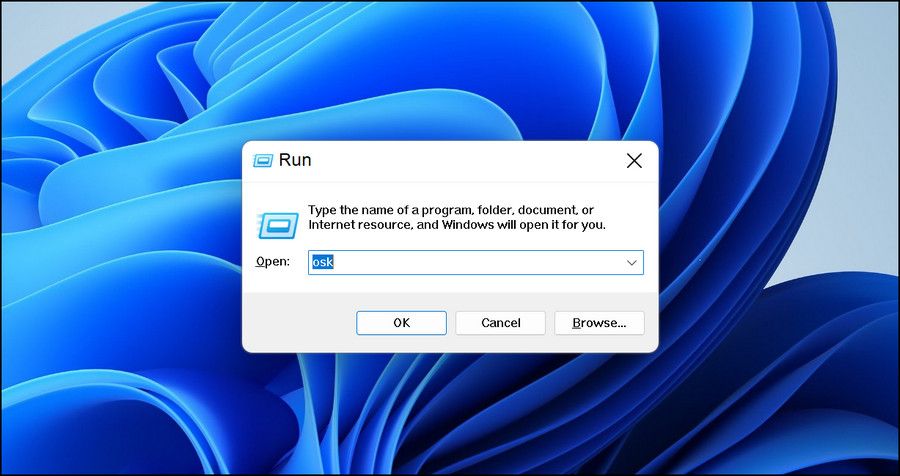
You can also start the on-screen keyboard by starting Run. Press first Win + R together. In the following dialog, enter “osk” in the text field and click Enter.
This should launch the keyboard successfully.
3. Use Windows search
You can launch On-Screen Keyboard from Windows Search just like other apps.
Just open the Windows search bar with “On-Screen Keyboard” in the search bar and click Open under the appropriate result.
How to get the most out of the touch keyboard
Once you enable the touch keyboard, you can personalize it to your liking.
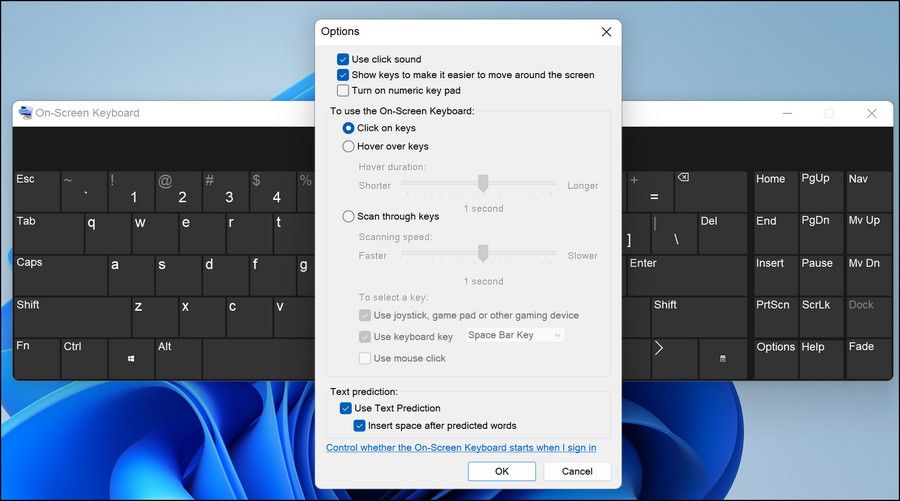
To get started, just launch the keyboard and click options Button. If you are using the on-screen keyboard, you will find the Options button on the right side of the keyboard.
After clicking, you can customize features like click sounds, text prediction, hover duration, and scanning speed.
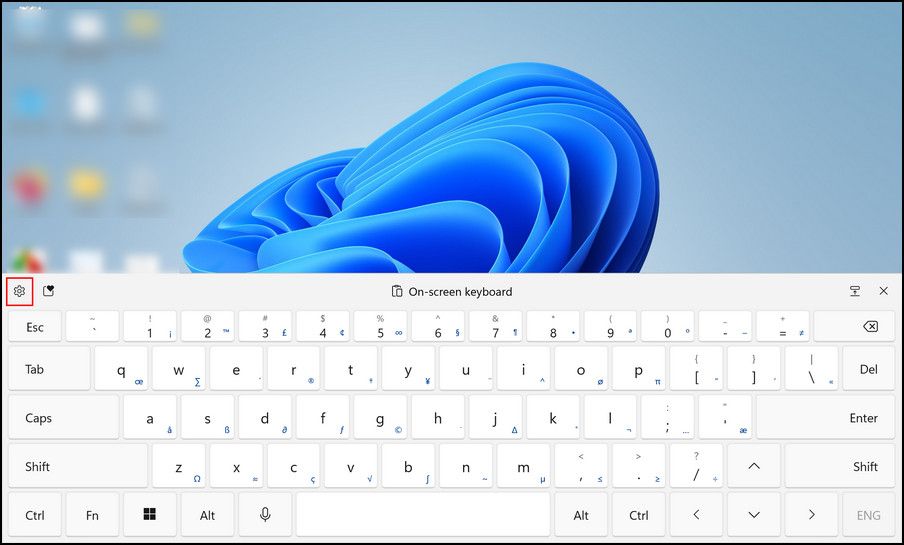
If you are using the touch keyboard, click gear icon is at the top left. Here you can customize features like keyboard layout, handwriting, themes, and size of the keyboard.
For example, if you want to change the keyboard theme, you can choose one of the 17 available options. In the same window, you can customize the overall size of the keyboard as well as the size of the keys.
You can also change the keyboard language and its regional format by going to the input settings. If you don’t like the default onscreen keyboard on Windows, visit our guide to the best virtual keyboards for Windows to explore more options.
How to disable the touch keyboard again
If you no longer want to use the keyboard, it is best to switch it off again. Leaving the icon on the taskbar can result in accidental clicks, which can become annoying
To disable the touch keyboard:
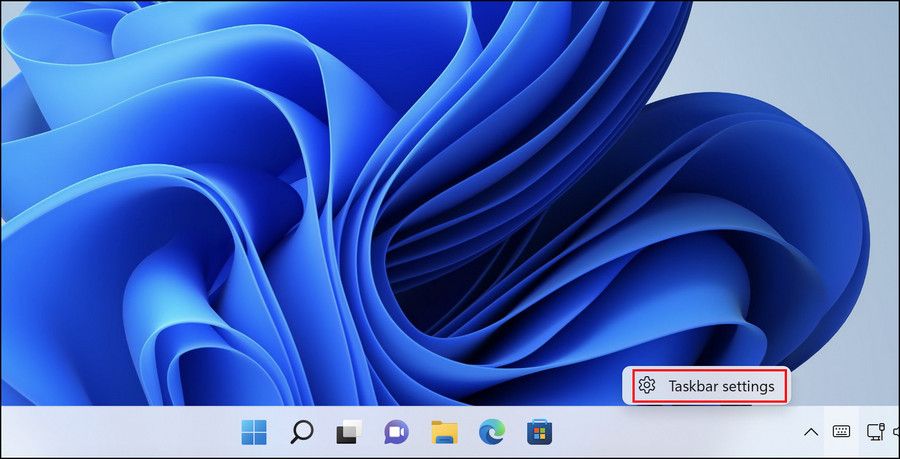
- Right-click on your taskbar and click Taskbar Settings.
- Disable the switch for Touch keyboard.
That’s it; You should no longer see the touch keyboard icon on your taskbar.
Get the most out of the Windows Touch keyboard
Virtual keyboards may not be as convenient as physical keyboards, but they have their own advantages. For example, did you know that entering sensitive information like bank account details on a touch keyboard is less risky than on a physical keyboard? This is because malicious websites can record your keystrokes on a physical keyboard, allowing them to determine what information you typed!
