How to Ride Drops on Your Mountain Bike
Cyclists often say the descent is the best part of a ride and it’s certainly well-earned if you’ve pedaled uphill for that singletrack.
But if there’s a drop on the trail—whether it’s the size of a sidewalk curb, a tree root, or going off a boulder or log in the trail—there can be some apprehension or straight-up fear in tackling the new terrain. That’s especially true if you’ve never been introduced to the body alignment and bike positioning that can help you safely handle a drop.
There’s a wide variety of drops out there, so the approach you take over them changes based on the height of the drop, steepness, and length of the landing, not to mention other obstacles like rocks, loose dirt, exposure, or tree branches. That’s why it’s easy to get lost on what to do and avoid drops altogether. But with this guide, you can go into them with a little more confidence.
“A very common request from riders is to work on drops, a request that’s second only to jumping. The skill goes into 80% of all lessons because it’s foundational and important for different degrees of riding from going down a natural step in the trail to riding off a six-foot vertical drop. There’s a progression of difficulty,” says Josh Whitmore, the owner of MTB Skills Factory, which offers mountain bike lessons for all skill levels and is based out of Kanuga Bike Park near Brevard, North Carolina.
To introduce you to the basic technique of conquering drops, as well as how to progress to more advanced skills, we chatted with the pros to bring you technique tips. First, a lesson on the lingo.
Drop Skills Terminology
Technical Trail Feature: A feature on a non-level, dynamic trail that requires a specific ride technique to ride more comfortably, efficiently, and safely. Technical trail features include drops, jumps, berms, and rock gardens.
Drop: A technical feature on a trail or in a bike park where the ground’s angle becomes steep or displaced enough that the bike’s front tire cannot easily stay planted and both tires cannot roll down to the lower elevation. Drops can result from natural or human-made objects such as boulders, roots, logs, ladder bridges or wood platforms, and bridges or a steep elevation change in the slope.
Dropper Post: A seat post with a hand-operated lever (attached on one side of the handlebar) that enables the bike seat to conveniently and quickly be raised or lowered to various heights mid-ride, which allows the rider to move their center of gravity backward without hitting the seat.
Lip: The edge of a takeoff on a drop or purpose-built jump on a trail or in a bike park.
Step-down: A natural or human-made technical trail feature or type of drop where the rider drops down from a higher spot to a landing at a lower elevation, and the terrain immediately below the lip is usually flat. A small or moderate step-down (three feet or less) can be ridden as a drop. Otherwise, riders can load their bike before leaving the lip to jump, travel further in the air, and land on the slanted ground past the flat section, thus turning the feature into a step-down jump. A step-down can be found on a trail or in a bike park and have a lip that’s flat or angled up.
Banked turns: A banked turn is a technical trail feature (also called a berm or berms) where the trail is tilted up at an angle while it smoothly curves around a turn.
Check out a full list of mountain bike terms and slang on NTX Trails.
The Foundational Steps to Riding Drops
Now that you know the terms, it’s time to learn the skills.
A beginner-level drop could be a natural or human-made drop in the singletrack that’s less than one-foot high. At a very foundational level, a drop could also be a small boulder or root that you need to descend over in the trail or it can mean riding off the edge of a sidewalk. The drop or elevation change is minuscule enough that it is still rollable (as in, both tires can remain on the ground).
As you approach a drop, you want to be in the “ready position,” says Whitmore. The athletic stance helps riders avoid an OTB or over-the-bars situation.
“Any time the front wheel loses elevation and is lower than the rear wheel, the biggest fear is that we’ll go over the handlebars, which could happen if we have a static body position, and then our center of mass ends up in front of the front wheel,” explains Whitmore, who is also an instructor trainer for the Professional Mountain Bike Instructors Association (PMBIA).
To help you avoid that static positioning, here’s how to get into the ready position.
How to Hit a Ready Position
- Where to practice: on a flat trail or ground
- Why it’s key: to increase stability on the bike
- Where you might use it: to ride over a small boulder, log, or root that goes across the trail, a small natural or human-made drop in the trail, or off a sidewalk curb; there can often be an elevation change while riding off the end of a bridge (that allows trail riders to go across a creek or river) where the ready position comes into play; you also need to know the ready position for trails rated beginner (green), intermediate (blue), or advanced (black)
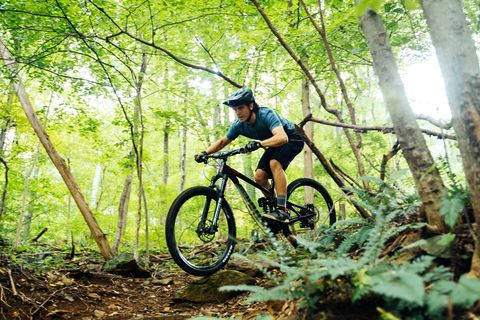
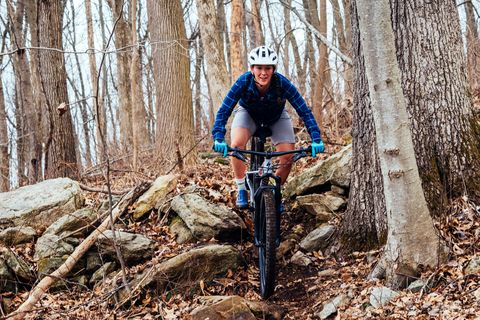
To get in the ready position while on the bike, stand with your feet flat on the pedals. (If you have a dropper seatpost, make sure the seat is down.) Keep the pedals level with each other and level to the ground. Hover your chin above the stem, where the handlebars attach to the steerer tube of the bike fork.
From here, “you hinge forward at the waist, so the chest is low, and bend your arms and knees like a speed skater crouched over the bike,” says Whitmore. “The ready position helps us get our center of mass closer to the bike, which makes the bike more stable, less tippy, and allows us to access a bunch of range of motion in all directions.”
Another name for the pose is the neutral position, according to CTS pro coach Jane Marshall, a USA Cycling level 1 coach and PMBIA level 1 coach.
“A ready-neutral position is with the arms bent and the elbows forward like you’re in a push-up position with your hands on the bike handlebars (if the bars were the ground),” Marshall says. “It’s not a really aggressive ready position where the chest is all the way down. You want to be up higher.”
In that slightly bent position, you can slowly approach the small drop with intention and control to roll over the top: There’s no need to “boost or jump” off the lip of the obstacle, says Whitmore. Both wheels can stay on the ground.
How to Do a Front Tire Poke
A next step in learning to ride drops is practicing the front tire poke or what some cyclists call the “push.” You use this technique both when you roll over something like a log (without the front wheel going airborne) or if the front tire doesn’t stay on the ground.
- Where to practice: on a flat trail while riding over a large stick or small log
- Why it’s key: to prevent the body position from moving over the handlebar
- Where you might use it: to ride over a beginner or intermediate-level natural drop (up to two-feet high) that is created by a boulder, log, root, or step-down on a mountain bike trail; these features can be located on beginner (green), intermediate (blue), or advanced-rated (black) trails, in a bike park, at a pumptrack, or skills practice areas at a trailhead
As you roll over the lip of the drop, the next step is to “peak and poke,” Whitmore says. Look slightly in front of your front tire before it rolls down (then be sure to scan one to two seconds ahead on the trail, so you’re ready for what’s next) and gently poke the front tire as you leave the lip of the drop by pushing the handlebar forward (not up).
When you poke the bike forward, the front tire is physically moving forward, so you want your center of mass behind the front wheel. The poke should then allow you to shift your center of mass toward the back wheel so that you don’t go over the handlebar.
As soon as the rear wheel follows and rolls over the drop, your body will naturally return to the centered position above the bike, explains Whitmore.
When riders get uncomfortable or scared, they can panic and grab the brakes: Do not abruptly grab the brakes when you land after a drop, which can cause the bike to skid. Also, avoid using the front brake while going over an obstacle and during a landing, which will stop the front wheel from rolling and pitching the rider over the handlebar.
How to Do 2-1-0 Braking
Speaking of braking, it’s another skill that comes in handy when riding drops. Follow this 2-1-0 technique to figure out how to brake as you tackle a sharp descent.
- Where to practice: smooth singletrack with mellow banked turns
- Why it’s key: to learn how to control your brake use
- Where you might use it: before approaching any type of drop on a trail or in a bike park; Whitmore suggests practicing this technique on other technical terrain features, such as banked turns, so you get comfortable with it
The 2-1-0 principle stands for how you use your brakes: “Use both brakes to slow down before a technical trail feature (or as you practice the technique while approaching a banked turn in the trail). Use one brake—the rear brake—over the obstacle. As soon as you’ve cleared the obstacle, go to zero brakes as you exit,” Whitmore explains.
One of the most important things to keep in mind: No matter how big or small the drop, you never want to use your brakes upon immediate landing and you never want to hit the front brake while you are gaining speed or momentum off of a drop—that’ll send you over the handlebars.
How to Progress to Intermediate Drops
After enough repetition that you feel comfortable on small drops, it’s time to graduate to intermediate-level drops—like an abrupt two-foot drop—which will be bigger and often require more speed to ride. At that height the drop becomes non-rollable.
“When the step gets big enough, you’ll hit your bike’s bottom bracket on the object if you’re going too slow because the front wheel drops away,” says Whitmore.
To help push the bike further from the lip, which gives the back tire time to follow before the front tire drops, you can add a front wheel lift. The skill can be practiced separately, dialed in, and added to drops.
How to Do a Front Wheel Lift
Adding a front wheel lift to a drop helps the rider land in a more level or neutral position—otherwise, the front tire can abruptly drop and hit the ground before the back tire catches up.
- Where to practice: grassy field
- Why it’s key: to help the bike stay level as it goes off a moderate-size drop
- Where you might use it: when descending an intermediate- or advanced-level drop (created by a boulder, log, root, or another object) that is two feet high or more; these human-made or natural drops are typically found on advanced-rated (black) trails or in a bike park
Before applying this technique to a drop, practice on flat ground with simple objects like a stick or marks on the ground, such as a painted line in a parking lot. “A front wheel lift is an important pre-drill to conquer timing and be able to have wheel control,” Marshall says.
As you ride on flat ground in a standing position, slightly extend your elbows and knees, then bend both to compress the front tire and shock. When the energy rebounds, slightly pull up on the handlebar and explode the front tire off the ground.
Once you’re comfortable with the movement, apply the front wheel lift to a drop scenario. To do that, find a two-foot drop, and follow the technique you practiced: Compress and rebound the front tire before leaving the lip or edge of the drop. Keep the knees bent to help absorb the back wheel going off the lip (otherwise, you might feel the back tire kick you forward). Then you’ll poke the front wheel down before landing.
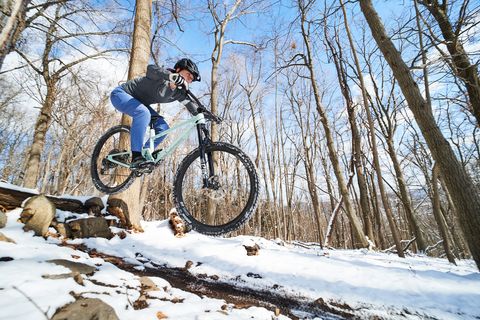
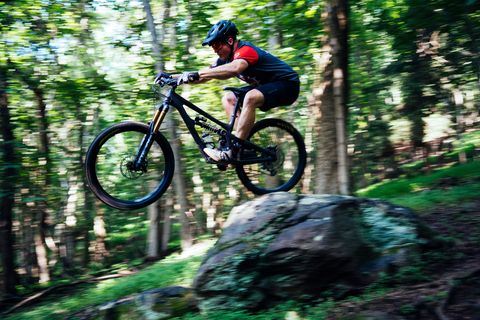
In the air, make sure to recenter yourself above the bike (weight shifts back on the lift) and anticipate the landing area. Bend your elbows and knees to stay in a strong, stable position when the wheels hit, which helps absorb the impact and softly land.
Keep in mind the ready position as your go over the drop too—that means you’re standing in an athletic position, feet flat on the pedals, knees and elbows bent, and looking ahead. The bigger the drop, the more aggressive that stance.
Be sure to not grab the front brake, which will pitch you over the handlebar.
How to Progress to Advanced and Expert Drops
For air drops that are two to three feet or more, be sure to scout the technical terrain feature and not ride blind over the horizon line, Whitmore suggests.
“As the height of the drop gets bigger, all of your physical motions need to be more exaggerated and dynamic,” says Marshall. Also, “as the front wheel goes over the edge of the obstacle, drop, or boulder, we want to push the front wheel down into the ground or ‘lead the front wheel down’ with our arms. This keeps you in a neutral riding position, instead of pushing or poking the bike forward, which pushes the rider over the back wheel and leads to loss of control over the front wheel.”
Before you take air over the obstacle, “press down with your feet and your hands to load and compress the bike as you’re approaching the drop, especially with low speed,” Marshall explains. The faster the speed, the less press you need. (Note: Needing to use low versus high speed while dropping off of a technical terrain feature is relative to the trail steepness, rider, and the specific feature. While not enough speed means you might not make it over the drop, too much speed can cause issues such as the rider losing their balance or control of the bike.)
As you go off, have a flat back but make sure your chest isn’t all the way down and toward the handlebars—you want your torso to be a bit higher. “You want to absorb the bike up with your hands and feet, so you’re pulling the bike up under you. How much you poke forward the front wheel to land depends on the angle, steepness, and slope of the landing,” Marshall says.
To stay in a strong, stable position during the landing, bend your elbows and knees to absorb the impact when the rear wheel hits the ground, which will happen before the front wheel touches down, she says.
“It would be awesome if both tires touch the ground at the same time,” Whitmore adds. “But the angle of the bike will also depend on the angle of the landing zone.”
The Best Place to Practice Drops
The best place to practice an advanced drop is on maintained trails, such as at a bike park, which can be lift-accessed at a ski area like Killington Bike Park in Vermont or Telluride Ski Resort in Colorado. Progressive drops can also be found at trailheads, pumptracks, or drive-up city-managed bike parks like Tannery Knobs in Tennessee. It’s also good for riders to consider taking a lesson from a certified mountain bike instructor to get better and more confident at handling these bigger drops.
“At the Kanuga Mountain Bike Park here in North Carolina, we have giant jumps, big drops, and huge obstacles. You see riders go off effortlessly—but you didn’t see the 65 other times they walked it,” says Whitmore. Translation: It’s okay to walk a section if you need to, especially if you’re not feeling 100% confident in your skills yet. It’s all about the practice to build up your technique and ability to handle the varied terrain.
Bike parks and often trail systems have human-made drops: progressively taller wooden platforms of various heights. Occasionally, drops are built using rock slabs.
“Go to an intentional place with many different heights of drops. At the beginning or end of your ride, spend 20 minutes playing on those things. It’s nice if you can video yourself, see what you look like, and do a self-diagnosis,” says Whitmore.
Portable bike launch ramps are also a tool that riders can buy for their home yard. For example, professional freestyle mountain biker, Tomas Lemoine has used a portable MTB Hopper ramp. Other similar products include the Jumpack, which was founded by Northern Ireland BMX Champion and All-Ireland Downhill Mountain Bike Champion, Philip Mcintosh. There’s also the option of Freshpark ramps, which are ASTM Safety Certified.
Ultimately, one of the safest, most efficient ways to learn how to ride drops is to attend a mountain bike clinic focused on the technique or to take a lesson, with a group or one-on-one, led by a certified coach.


