
How to build an inexpensive outdoor smart speaker
When necessity is the mother of invention, frugality and resourcefulness must be at least secondary.
This story begins in 2018 when yours finally moved to the suburbs after 14 years in Boston.
My three favorite things about my home are the driveway, the garage, and the patio. The deck needed tunes, however, and my desire for an expensive wireless speaker was diametrically opposed to my desire not to spend money.
I was content to stream music from my phone to a Bluetooth speaker for the first summer, but the problem with Bluetooth is that as soon as you walk away, the music stutters and falls silent, leaving your guests craving the smooth sounds of yacht crave rock.
There’s also the problem of constantly making sure the speaker is charged and either paying more for a waterproof speaker or bringing the speaker inside every time it starts raining or snowing.
I then turned to Sonos, which doesn’t require a constant connection. But its speakers start at a whopping $200, and there’s still the problem of how to keep one outside without being damaged by the elements. There had to be a better, cheaper way.
Spoilers: there is. I did it that way.
Measure twice, order once
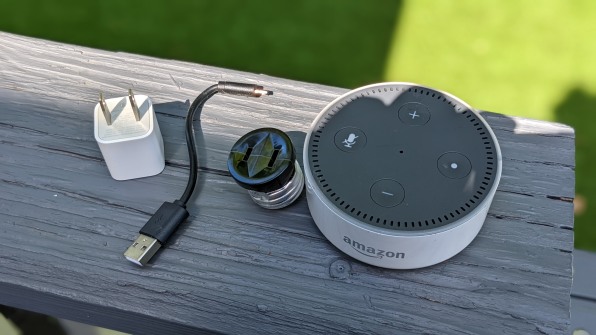
The heart of the system here is an Amazon Echo Dot or a similarly sized smart speaker. The current-gen Echo Dot is way too big, so we need either a $30 third-gen Echo Dot (with a 3.9-inch diameter) or a $20 second-gen Echo Dot (with a a diameter of 3.3 inches). Yes, the Google Nest Mini is also 3.9 inches in diameter but also more expensive.
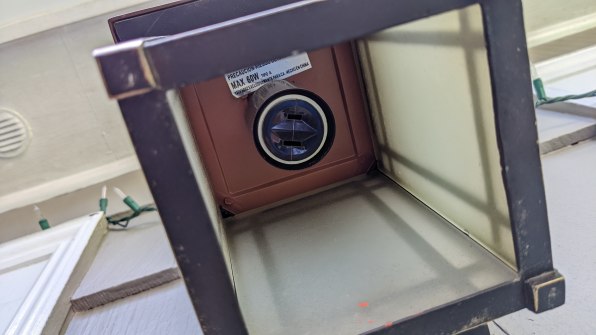
Why the size restrictions? Well, we’re going to house the speaker in an outdoor light that’s designed to protect a lightbulb from rain, sleet, snow, and wind. If a third-gen Echo Dot fits, great. They sound better than the second-gen version anyway, and only cost about $10 more.
So, yes, you’re going to lose a lightbulb in exchange for hands-free, voice-controlled music streaming.
give the power
Of course we need to power the speaker. To do this, you will need a lightweight outlet-to-outlet adapter. I got a double pack for $5.
Remove the bulb and then screw the adapter into place. Congratulations, you now have a two-pin socket in your wall light.
Now there are two additional optional items that you can use to clean up this setup a bit. If you’re using the Echo Dot’s bulky power adapter and want to bundle its long power cord, that’s fine.
But I settled on a tiny iPhone-like Power Cube — this one costs $5 — and a 6-inch micro-USB cable, which also costs $5.
Connect everything together
So the lightbulb to power adapter is screwed into the light socket, the small USB power cube is then plugged into the power adapter, the 6 inch USB cable is then plugged into the cube and finally the Echo Dot is plugged into the USB -Cable plugged in.
A quick puff of ozone later and you have a fully functional, hands-free smart outdoor speaker.
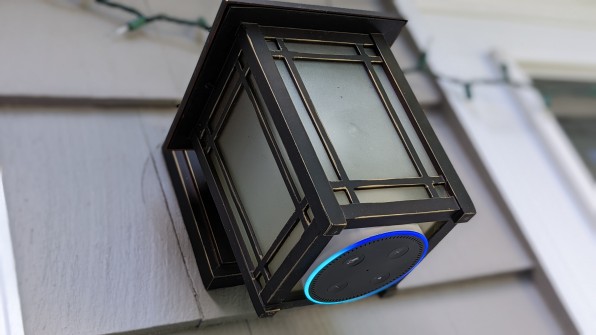
Although I live in the Northeast I keep mine plugged in year round. It has weathered hurricanes, snowstorms, 100-degree days, and cold winters. The only downside is that the audio quality is only so-so. If you’re an audiophile, this probably won’t work for you. If you just want tunes, though, you’ll probably be happy – and the entire setup process takes around five minutes.
Total bill: $20 to $30 for the Echo Dot depending on the version, then around $15 for the adapter, connector, and cable. Enjoy!