How to Convert HTML to an Image in JavaScript
If you’re trying to take a screenshot of part or all of the webpage using JavaScript, you may be stuck. Creating an image from an HTML element can seem like a challenge as there is no direct way in JavaScript.
Thankfully, this isn’t an impossible task, and with the right tools it’s actually quite easy. With the html-to-image library, creating images of DOM nodes is as easy as a single function call.
How does HTML to Image work?
The HTML to Image library generates an image in the form of a Base64 data URL. It supports multiple output formats including PNG, JPG, and SVG. To perform this conversion, the library uses this algorithm:
- Create a clone of the target HTML element, its children, and any attached pseudo-elements.
- Copy the styling for all cloned elements and embed the styling inline.
- Embed the relevant web fonts if available.
- Embed existing images.
- Convert the cloned node to XML and then to SVG.
- Use the SVG to create a data url.
Caveats and Limitations
While html-to-image is a great library, it’s not perfect. It has a few caveats, namely:
- The library does not work in Internet Explorer or Safari.
- If the HTML you are trying to convert contains a malformed canvas element, the library will fail. As MDN explains, inserting non-CORS approved data into your canvas element will corrupt it.
- Because browsers limit the maximum size of a data URL, there are also limits on the size of the HTML that the library can convert.
use of the library
To try out the library, you must first create a project directory on your local machine. Next, install html-to-image in that directory using the npm package manager. Here is the terminal command to install it:
npm install You should also install a JavaScript bundler to make using the library a bit easier. The esbuild bundler can help to package node modules into web-compatible scripts.
npm install esbuildThat’s all you need to install. Next, create a file named index.html in your directory and serve it with a web server of your choice. Paste the following code into index.html:
<!doctype html>
<html lang="en">
<head>
<meta charset="UTF-8">
<meta name="viewport"
content="width=device-width, user-scalable=no, initial-scale=1.0, maximum-scale=1.0, minimum-scale=1.0">
<meta http-equiv="X-UA-Compatible" content="ie=edge">
<title>Document</title>
<style>
.colorful-div {
padding: 3rem;
color: white;
background-image: linear-gradient(to right, yellow, rebeccapurple);
border: 1px solid black;
margin: 1rem auto;
font-size: 3rem;
font-family: cursive;
}
</style>
</head>
<body>
<div class="colorful-div">
I'm going to be in a screenshot!
</div>
<div class="long-text">
I'm an example of a sufficiently verbose paragraph that
illustrates that taking screenshots in JavaScript is
really very easy, for the following reasons:
<ul>
<li>Reason 1</li>
<li>Reason 2</li>
<li>Reason 2</li>
</ul>
</div><script src="out.js"></script>
</body>
</html>
This code creates two elements on the page: a div with a gradient background and some text, and an unordered list inside another div. Next, you’ll write the JavaScript to turn these elements into images. Paste the following code into a new file called script.js:
import * as htmlToImage from "html-to-image";const elems = ['.colorful-div', '.long-text']
elems.forEach((elem, ind) => {
const node = document.querySelector(elem)
htmlToImage.toPng(node)
.then(function (dataUrl) {
let img = new Image();
img.src = dataUrl;
document.body.appendChild(img);
})
.catch(function (error) {
console.error('oops, something went wrong!');
console.log(error)
});
})
This code does a few things:
- Imports the HTML to image library.
- Creates an array of CSS selectors that target the two elements.
- Creates a PNG image in the form of a data url from each element of the array.
- Creates an img tag and sets its src attribute to the data url, creating image copies of the two elements.
Now use esbuild to generate the bundled file (from.js) pointed to by index.html by running the following in your terminal:
./node_modules/.bin/esbuild script.js
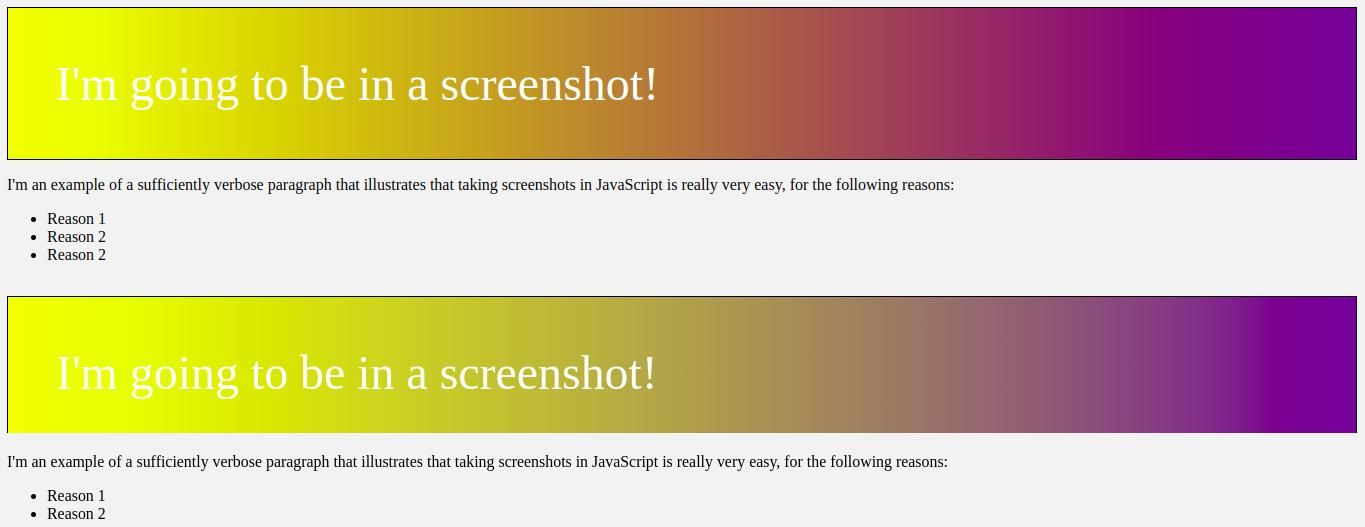
At this point index.html should look like this in your browser:
Even if the copies look exactly like the originals, they are actually picture elements. You can confirm this by opening and checking your development tools.
This library also works with JavaScript frameworks. The HTML-to-Image documentation includes instructions for generating other image formats. It also includes an example showing how to use the library with React.
Creating screenshots with JavaScript is easy
There is no native JavaScript way to create images from HTML elements or to take screenshots of the DOM. However, with the help of libraries and services like HTML-to-Image, this becomes an easy task.
There are other ways to get similar results, such as: B. the wkhtmltoimage library. This open source tool allows you to take screenshots of an entire web page.
