
How to Create an Online Store for Your Amazon Business
In a market full of choices, your brand identity can be the key differentiator that makes customers choose you over the competition.
While marketplaces like Amazon are lucrative sales channels, it’s important to create a storefront that you can fully own and manage. This allows you to build a strong brand identity, reduce your reliance on marketplaces, and shape the user experience from start to finish.
So how do you start? There are several great options for building a website or branded storefront. In this guide, we cover using Wix’s Ecommerce Website Builder to start, operate and grow your online shop.
Why do you need a website?
While it can be difficult to take your eyes off your cash cow, it’s never too early to start building your own customer base and brand. Among the many benefits of creating a standalone website, you’ll enjoy the following benefits:
- Greater control over your branding – If you sell on an online marketplace, you are bound by its rules; You can’t put your logo anywhere, let alone fully control what appears on a product listing. On the other hand, if you own an online store, you have full creative freedom in terms of the look and feel of your website.
- Greater control over pricing (and your margins) – In marketplaces, your competition often dictates your pricing strategy. However, if you run your own website, you can enjoy an unrivaled space. You can test different pricing strategies as well as discounts and special offers without being subject to pressure and restrictions from third parties.
- Data and Analysis Ownership – While marketplaces offer some level of sales data and audience insight, your visibility is limited. Marketplaces also maintain full transparency of their metrics, which has been a source of unease for many sellers. With a platform like Wix eCommerce, you can leverage built-in analytics, custom reports, and integrations that allow for retargeting or additional tracking.
- Address your customers directly – They have little impact on the customer’s journey in the marketplace and most do not allow you to engage with customers outside of their platform. On the other hand, an online store paves the way for regular, ongoing conversations with your customers. You can create a shopping experience that’s uniquely tailored to your shoppers, and re-engage with them via email, SMS, and other means once you’ve gotten their approval.
- A future-proof space – All in all, building your own website helps you lay the right foundation for a self-sustaining business. Instead of a third party holding the keys to the kingdom, you remain in total control. You don’t have to worry about sudden account suspension. You don’t have to fight for real estate. They set the rules and run the show.
Who Should Use Wix Ecommerce?
In particular, Wix eCommerce is a great option for SMBs and fast-growing brands looking to increase their online presence domestically and internationally. It offers intuitive design controls and rich back-office capabilities for a variety of industries.
How to create your online store with Wix
Now let’s dive into the basics of how to start an online shop with Wix. After signing up for a Wix Free or Premium account, follow these seven easy steps.
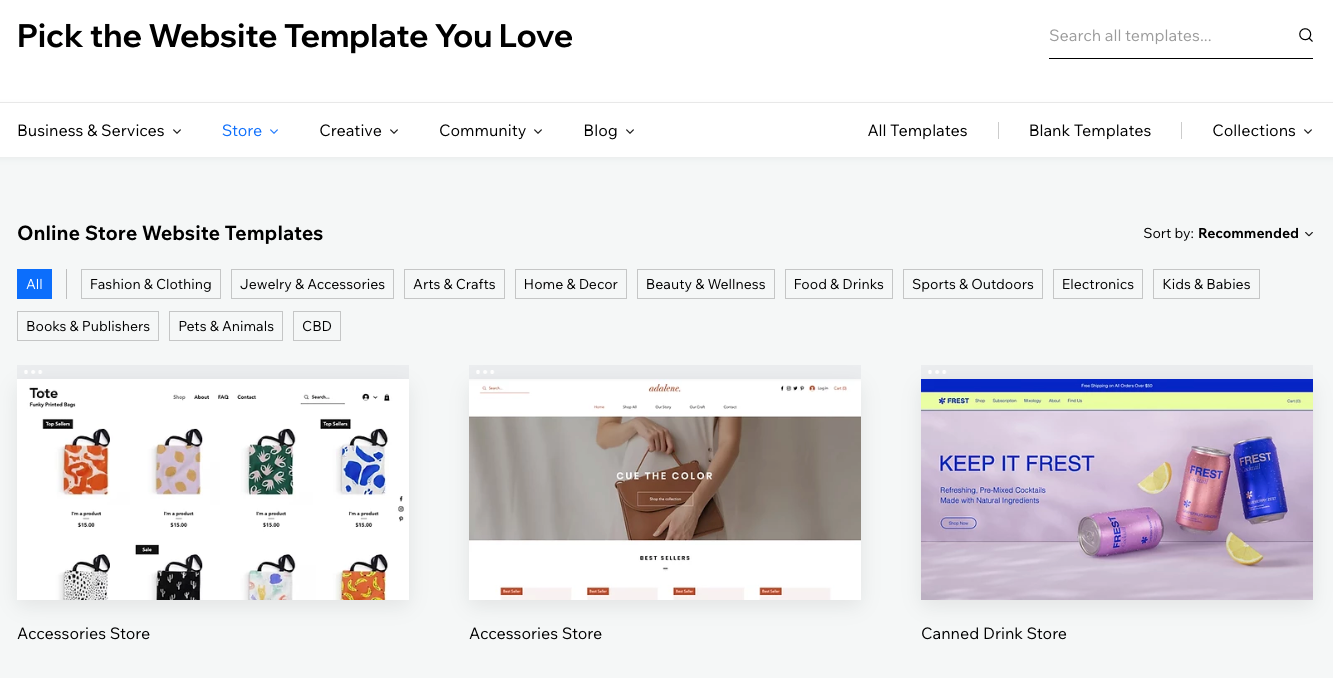
Step 1: Choose a template and customize the design of your online store
First, select one of the Wix ecommerce website templates. These templates are designed to meet the needs of different types of stores including clothing, accessories, home decor, beauty, electronics, and more.
When choosing your design, consider the size of your product catalog and consumer preferences. Check out these for inspiration 14 website design examplesall created with Wix.
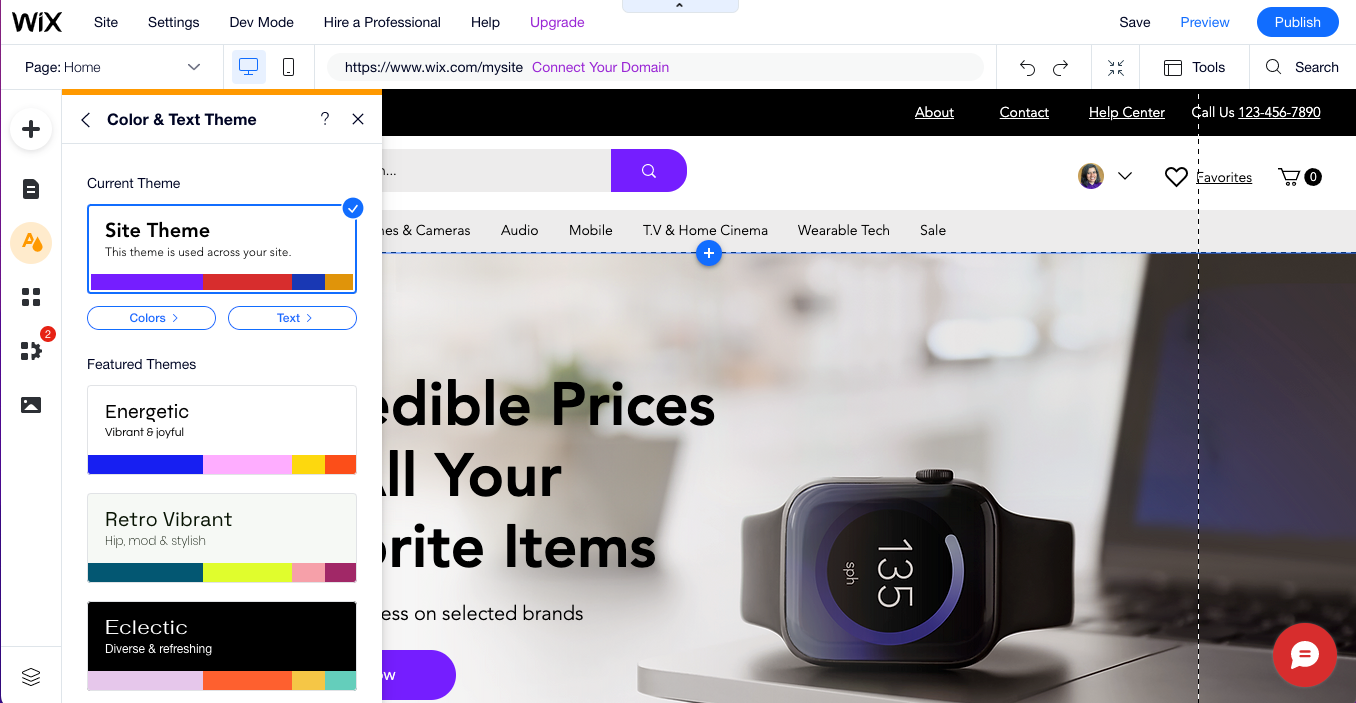
Once you’ve selected a template, you can start customizing your storefront using Wix’s drag-and-drop editor to create a shopping environment that appeals to your shoppers. Use a thoughtful mix of fonts, images, text, and colors to ensure the online store is truly representative of your brand.
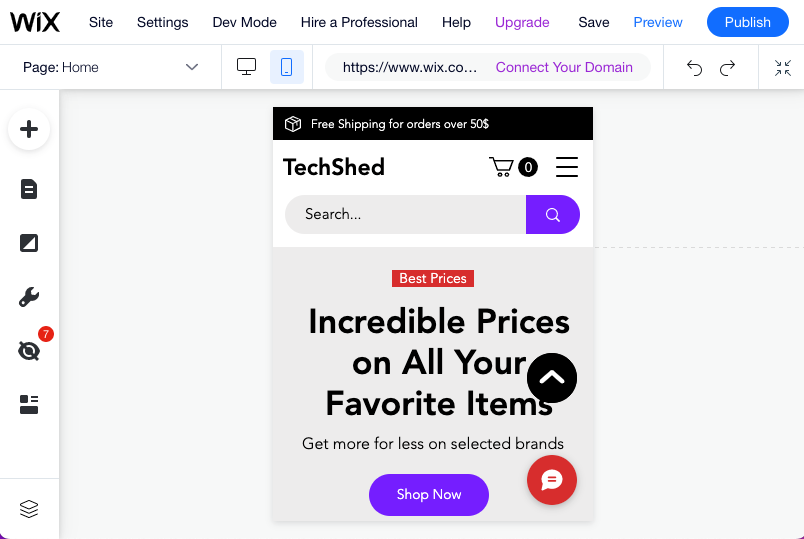
Step 2: Improve the mobile experience
A stunning one 52% of consumers Browse products on their smartphones before making a purchase.
So make sure your online store is mobile-friendly.
Wix sites are mobile responsive by default. However, you should use the mobile editor to ensure all your buttons, text, media, and animations appear the way you want them to. Pay attention to best practices for mobile websites, e.g. B. Make sure your main CTA stays above the fold and limits distractions.
Step 3: Add products to your shop
Now that your shop’s framework is ready, you can start adding your products.
Simply go to “Products” in the “Save Products” tab of your Wix dashboard and click on the “+ New Product” button.
This click will take you to a page where you can upload your products individually or in bulk. You can import your product catalog via a CSV file or continue to step 7 and connect your Amazon account, which allows you to automatically sync your Amazon catalog to your website.
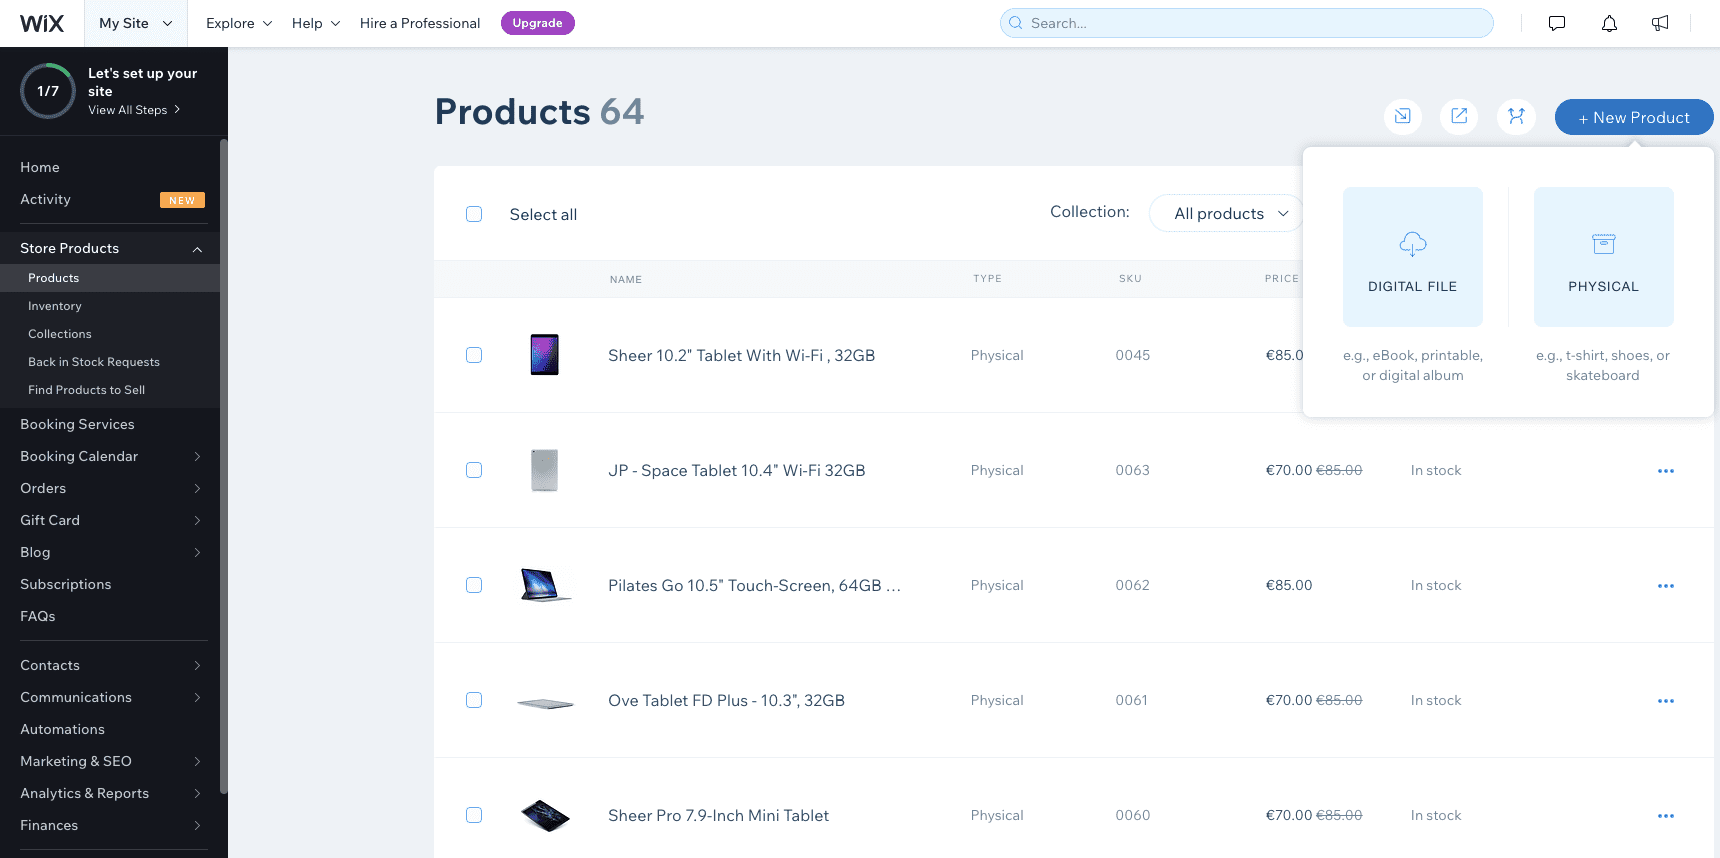
Note: You have the option to list and sell products from dropship providers. With Wix, you can add products from your supplier’s catalog (including print-on-demand products) to your store and customize their details and prices.

Step 4: Connect a payment provider
The ability to accept secure online payments, as well as a variety of payment methods, is critical to the checkout experience.
To connect a payment provider to your store, go to “Accept payments” on the “Settings” tab of your dashboard. Confirm your business location to Wix. Wix then identifies payment providers that are available in your region.
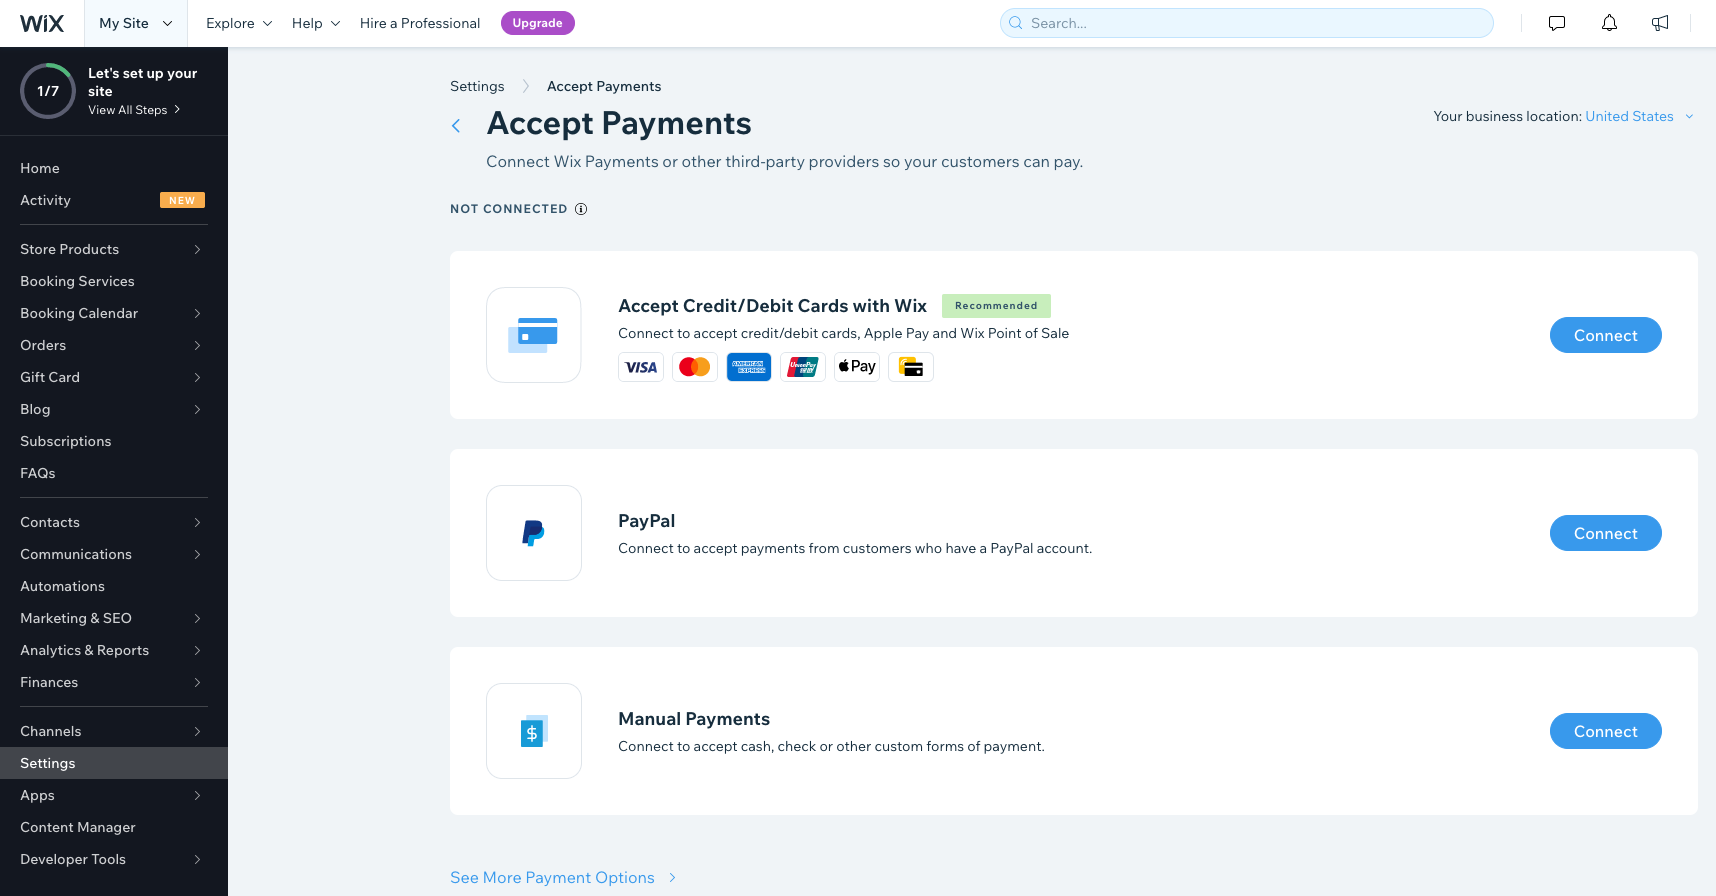
You can connect your store to any of over 50 trusted payment providers, including Wix Payments, PayPal, Stripe, and Square. Additionally, to be more customer-centric, consider offering Buy Now, Pay Later (BNPL) in your store by enabling solutions like Affirm, Afterpay, Sezzle, and more.
On average, Wix shops with three or more payment methods achieve 39% higher sales revenue.
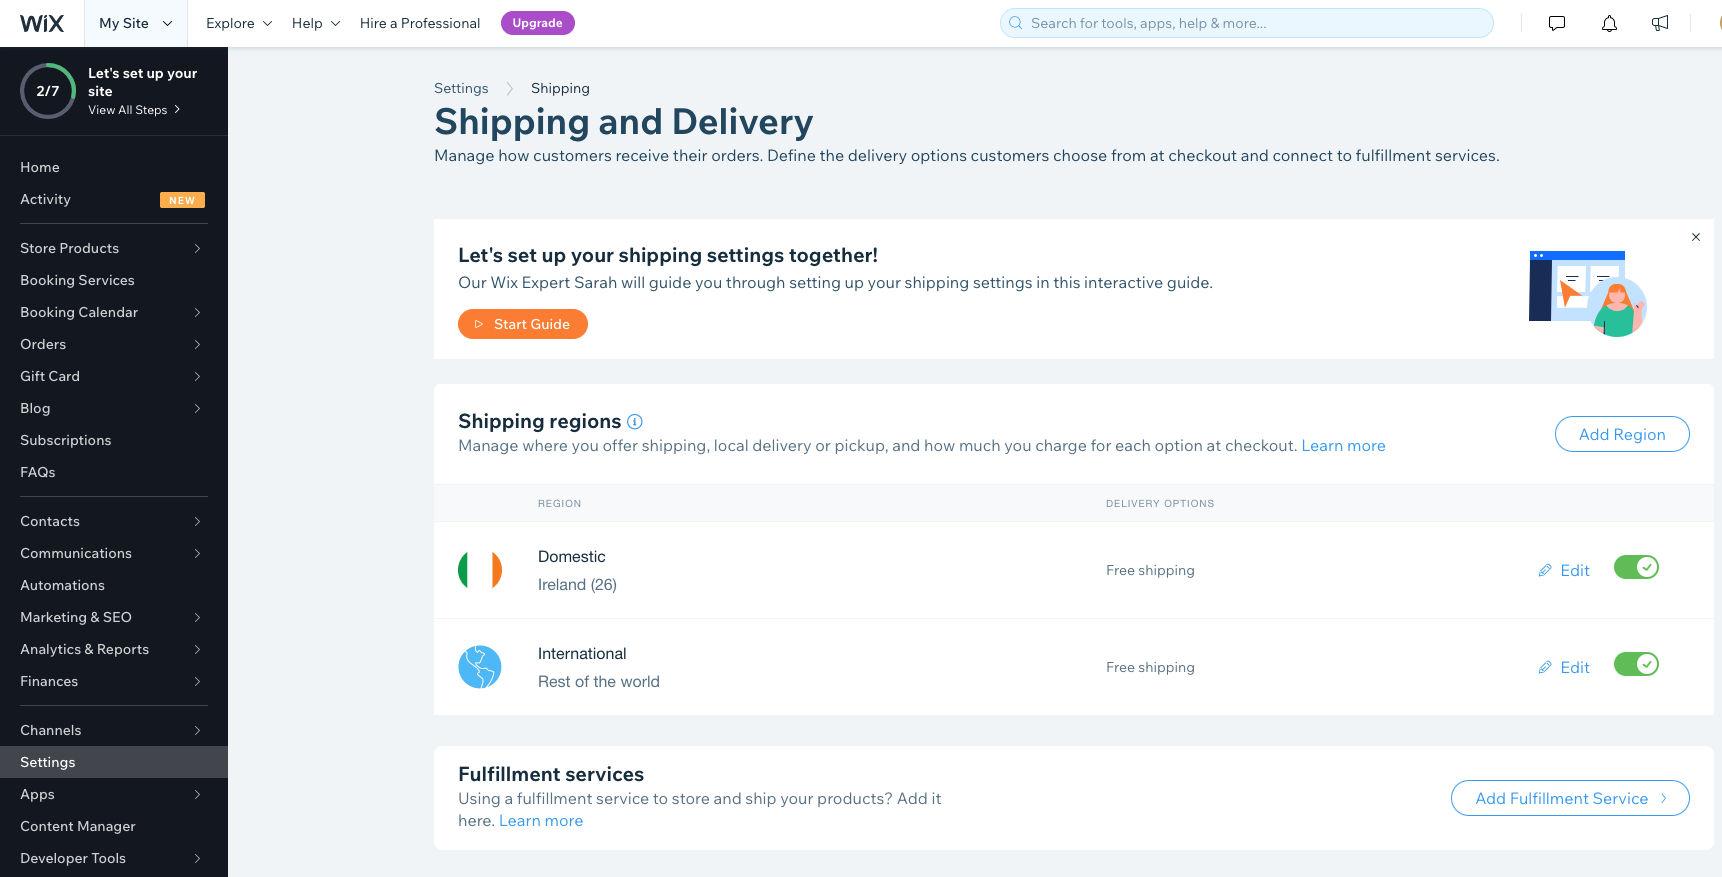
Step 5: Set up shipping and handling
Set your shipping policies by going to “Shipping & Fulfillment” on the “Settings” tab of your dashboard. Here you can select the shipping regions (domestic or international), rules and rates for your online store.
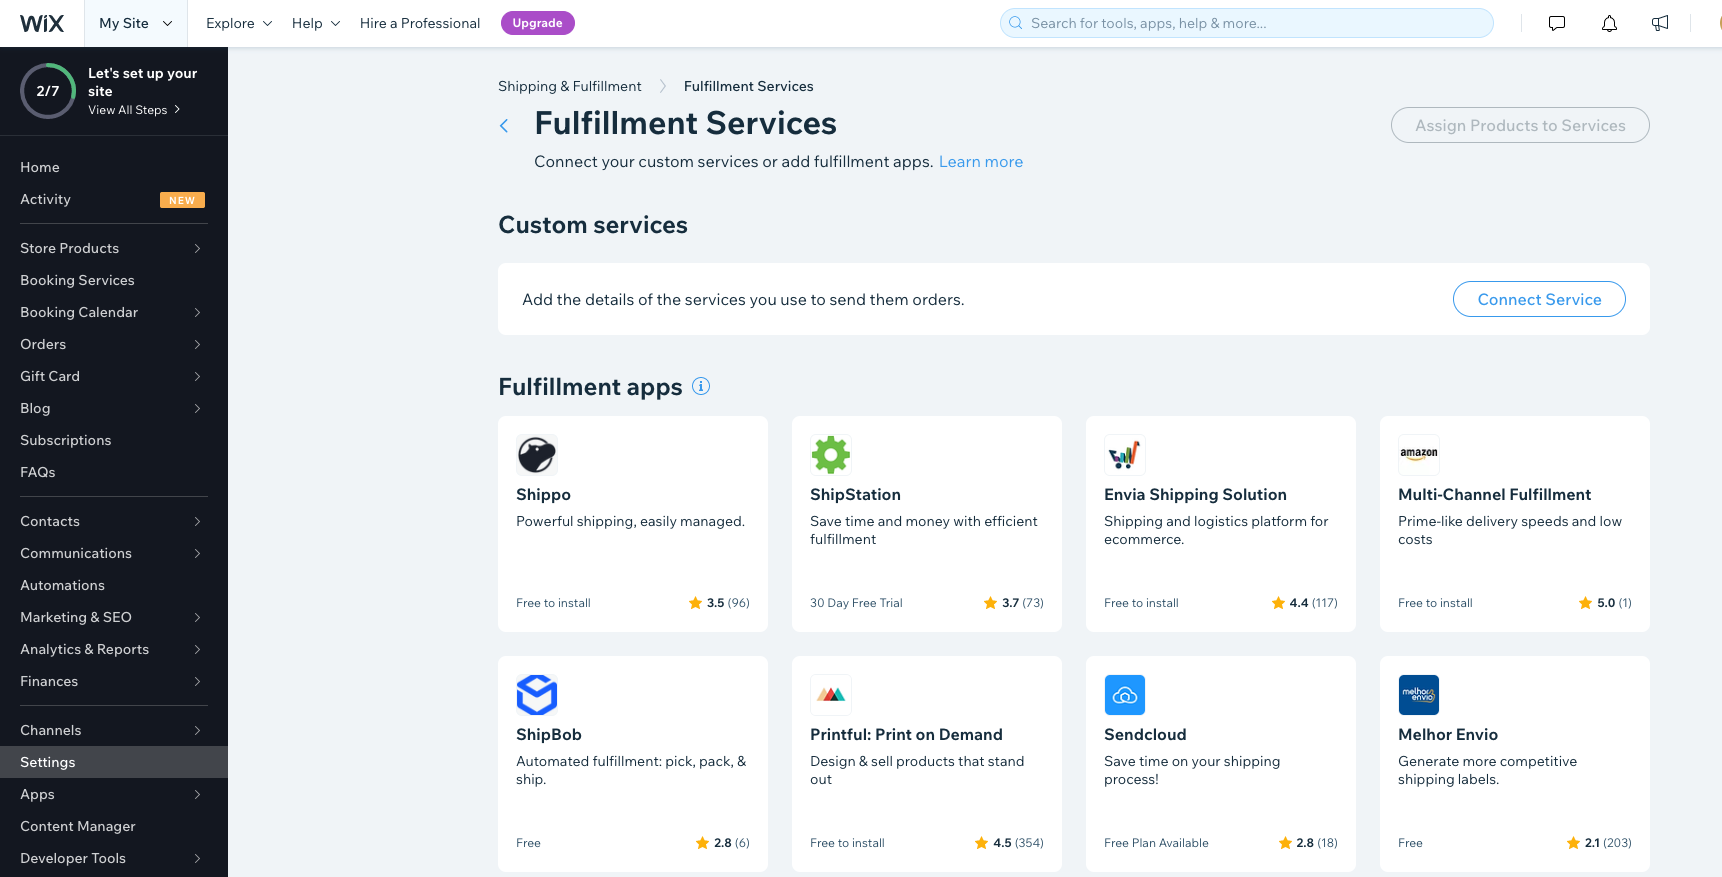
Wix offers integrations with some of the most trusted fulfillment apps, including Shippo, ShipStation, Envia Shipping Solution, and Amazon MCF. You can install one of these apps to automate workflows, get competitive shipping label prices, and simplify other tasks. Going forward, you can manage all orders and shipping labels from your Wix dashboard.
Step 6: Choose a custom domain and start selling
To get your website up and running, you need a domain. You can either buy a domain in your Wix account or transfer a domain purchased from another host.
Just go to “Connect domain” under “Settings” tab. Although all Wix websites come with a free wixsite.com address, a custom domain gives your store a professional look and helps reinforce your brand identity.

After connecting your domain and verifying your site, click Publish in the top right. Voila! Your website is up and running.
Step 7: Connect your shop to Amazon and other channels (optional)
Once you have created your online store, you can easily connect it to your Amazon or other marketplace account.
Go to “Amazon” under the “Channels” tab of your dashboard. On average, Wix merchants who add a sales channel see up to a 12% increase in sales.
Once integrated, you can automatically track inventory and sales across all your sales channels. This protects you from overselling on one channel. You can also see your Amazon order details in the Wix unified dashboard.

Get started with Wix eCommerce today
Wix eCommerce powers entrepreneurs and fast-growing brands around the world. Whether you’re starting your ecommerce business from scratch or looking to expand the reach of your existing business, give Wix a try.