
How to Customize Your WordPress Theme
Need to customize a WordPress theme? Maybe you’ve just launched your personal website, but the standard WordPress themes don’t spice it up.
Luckily, WordPress offers a wide range of options that allow you to change and customize the design of your website to your liking. We’ll show you how to get started.
Step 1: Change the default theme
Currently, a basic WordPress installation comes with the Twenty-Twenty-Two theme set by default. But as you may have noticed, the default theme doesn’t have all the bells and whistles you want on your website. Sure, it loads fast and delivers what’s needed, but you also want your site to look good.
Therefore, you should consider replacing the default WordPress theme with something more customizable. Some great examples are GeneratePress, Astra, OceanWP, Kadence WP, etc.
To do this, log into your website’s WordPress dashboard and select Looks from the left sidebar. Then switch to subjects section and click Add new to install a new theme. WordPress will present a catalog of the most popular and newest themes. You can either select one from this list or manually type the name of the theme you want to install in the search box.
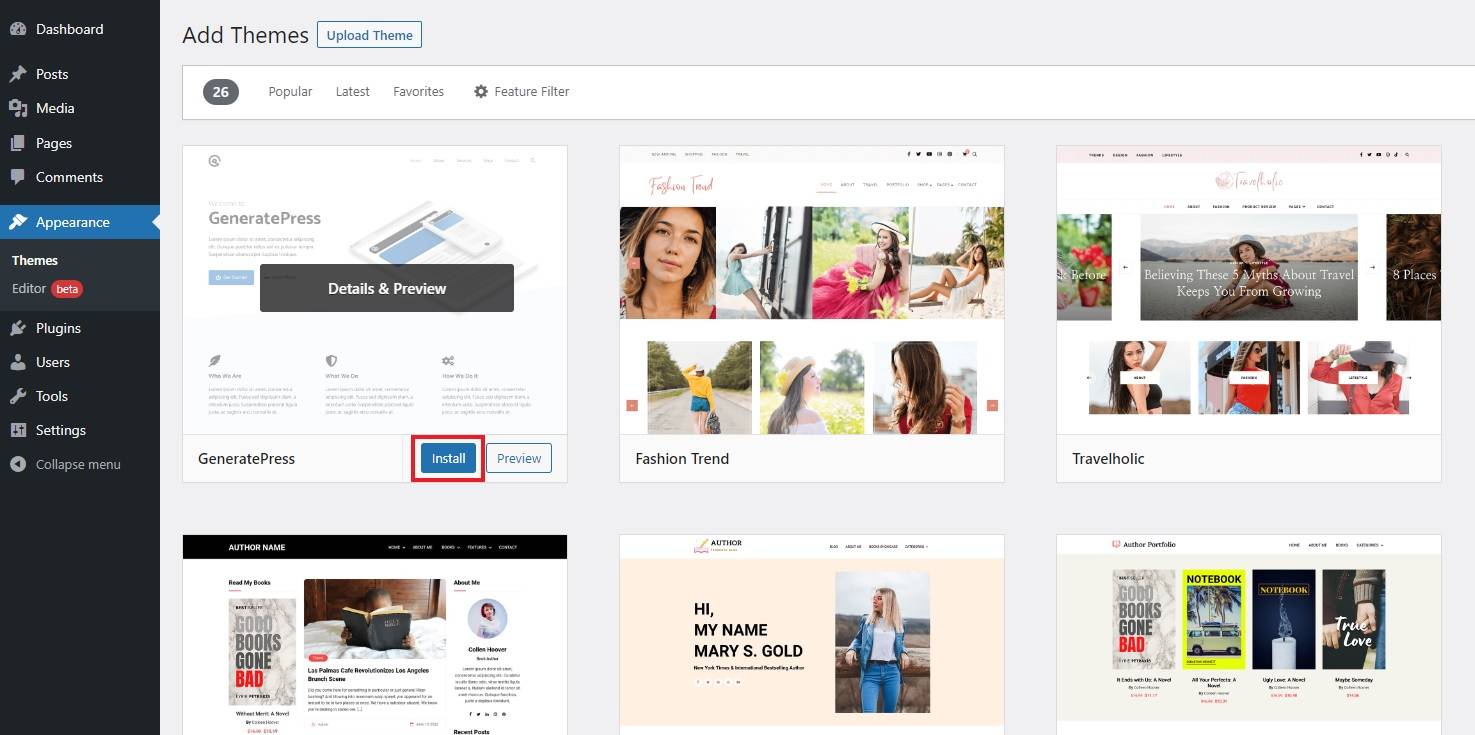
In any case, when you see the topic entry, hover over it and click on it To install. Then click activate to apply the theme to the live website. Many WordPress themes look amazing out of the box, while in some cases you might even have to customize the basic website layout yourself.
Step 2: Change some general site variables
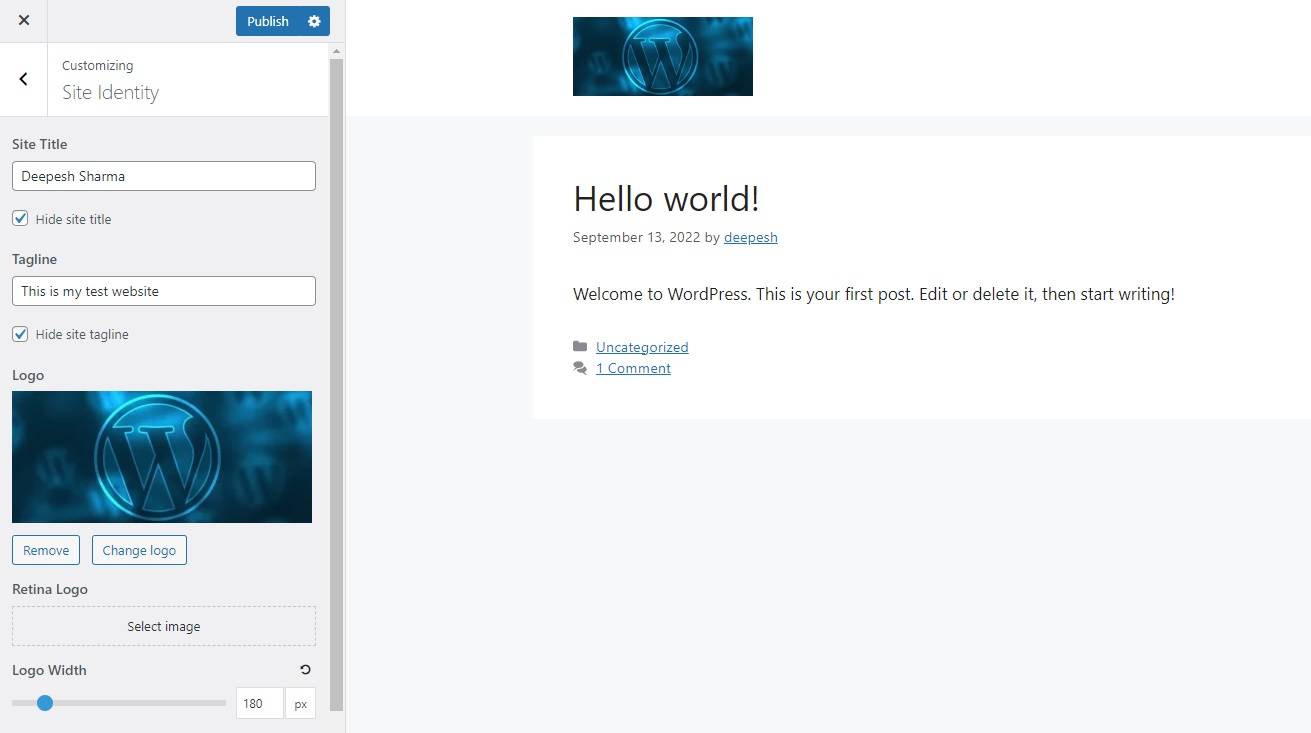
After you have installed the theme you want, the next step is to set some basic variables that will affect your entire website, such as: For example, your website name, tagline, and logo. Go to the Looks section and click To adjust to open the WordPress customizer. Here you will find settings to change the structure, design and typography of your website.
Note that the option names mentioned below may differ depending on the theme installed, but most of the features are only available under a different name in the Customizer. So make sure to play around with the options before making any actual changes to the site.
To start, go to site identity section and enter your website name and tagline. Then create two different logos for your website: the header logo and the favicon. WordPress specifies the recommended dimensions for the favicon; You just have to create the image and upload it to the library. The rest is easy!
You can also hide the site name and tagline when uploading a custom logo.
Then proceed to change the site layout by switching to layout Section. Here you can change the primary container width, header alignment, navigation menu, sidebars, and more.
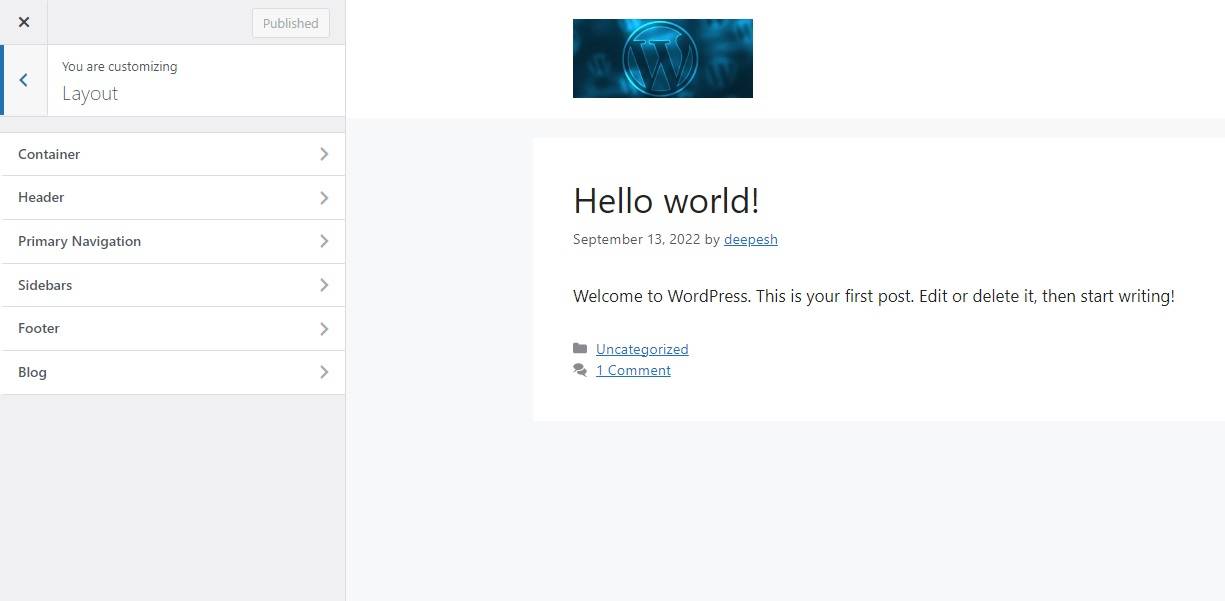
It is recommended that you create your header and footer menus at this point – using the menus Section – so you can later focus solely on the design side of things.
Step 3: Moving on to more advanced styling
Now that the basic things are out of the way, you would have a basic structure of what your website will look like. Don’t fret if it doesn’t look good yet. Go to the Colours section and select the basic colors for your website. You can use an online website to create color palettes for your brand.
Then switch to typography section and add any fonts you want on your website. Once you’ve selected a clean and readable font, move on to widgets. There are a variety of widgets that you can add to your website: search box, recent comments, related articles, gallery, custom HTML, text display, etc.
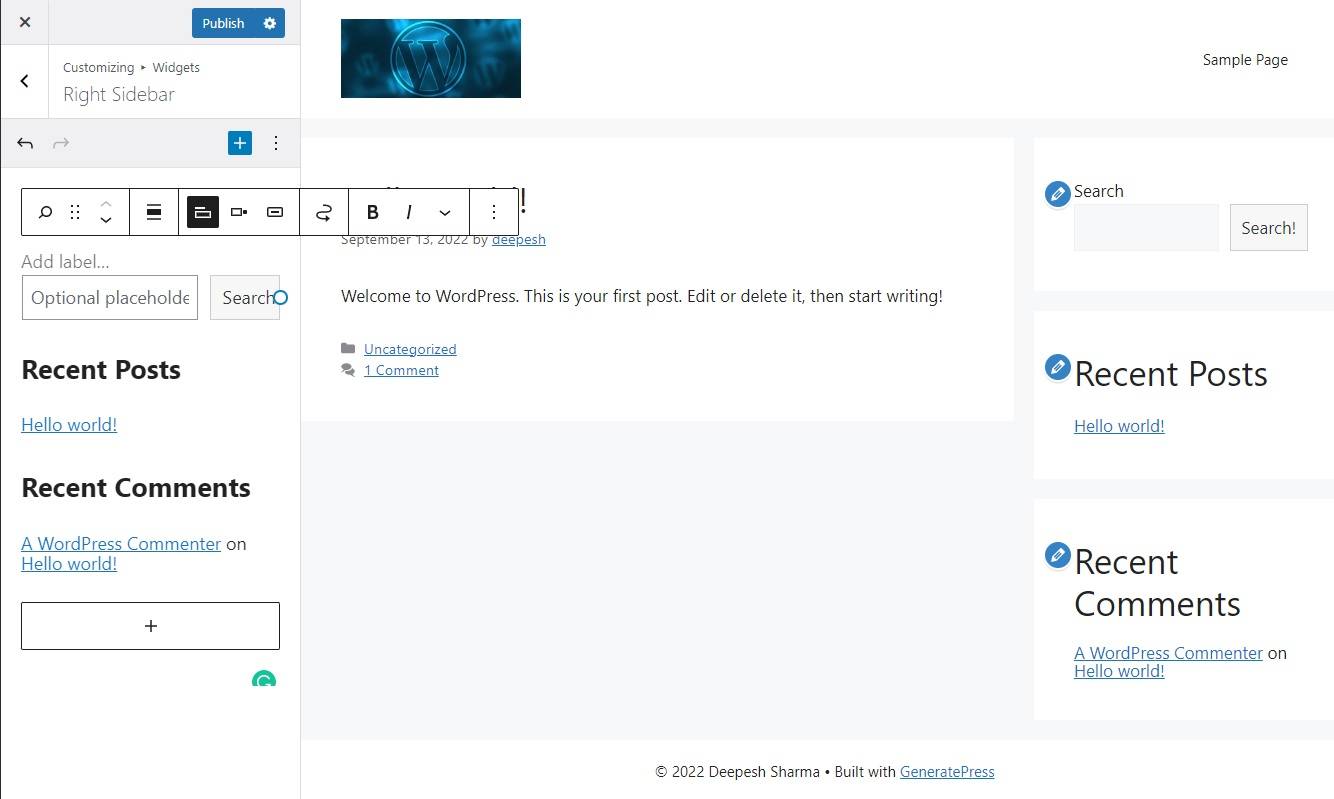
Choose the location where you want to display the widget, then just add one using the WordPress Block Widgets feature.
Step 4: Using Custom Code to Customize Your WordPress Theme
One of WordPress’ many features is its ability to handle custom code. You can add your code on top of WordPress and it will reflect the changes without breaking anything. The only catch? You need to know CSS for styling HTML and PHP to change the default WordPress functionality.
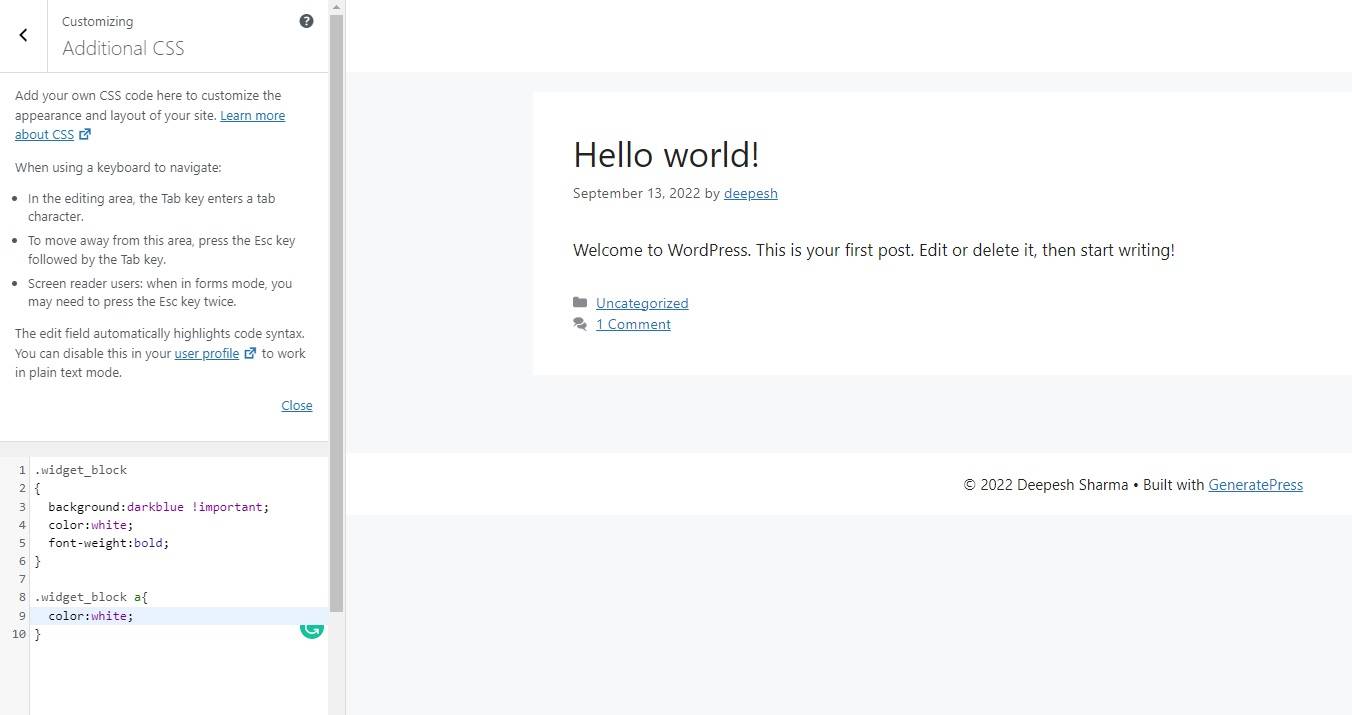
To add custom CSS to your website, go to Additional CSS Section in the WordPress Customizer. Here you can select and style HTML elements according to your taste using classes and IDs. To get the element identifier for an HTML entity, use the browser developer tools provided by Google Chrome and Mozilla Firefox.
To customize how the theme works, go to your WordPress dashboard and select it Looks from the left sidebar. Under Theme file editoryou will find a list of all theme files and an editor to change them.
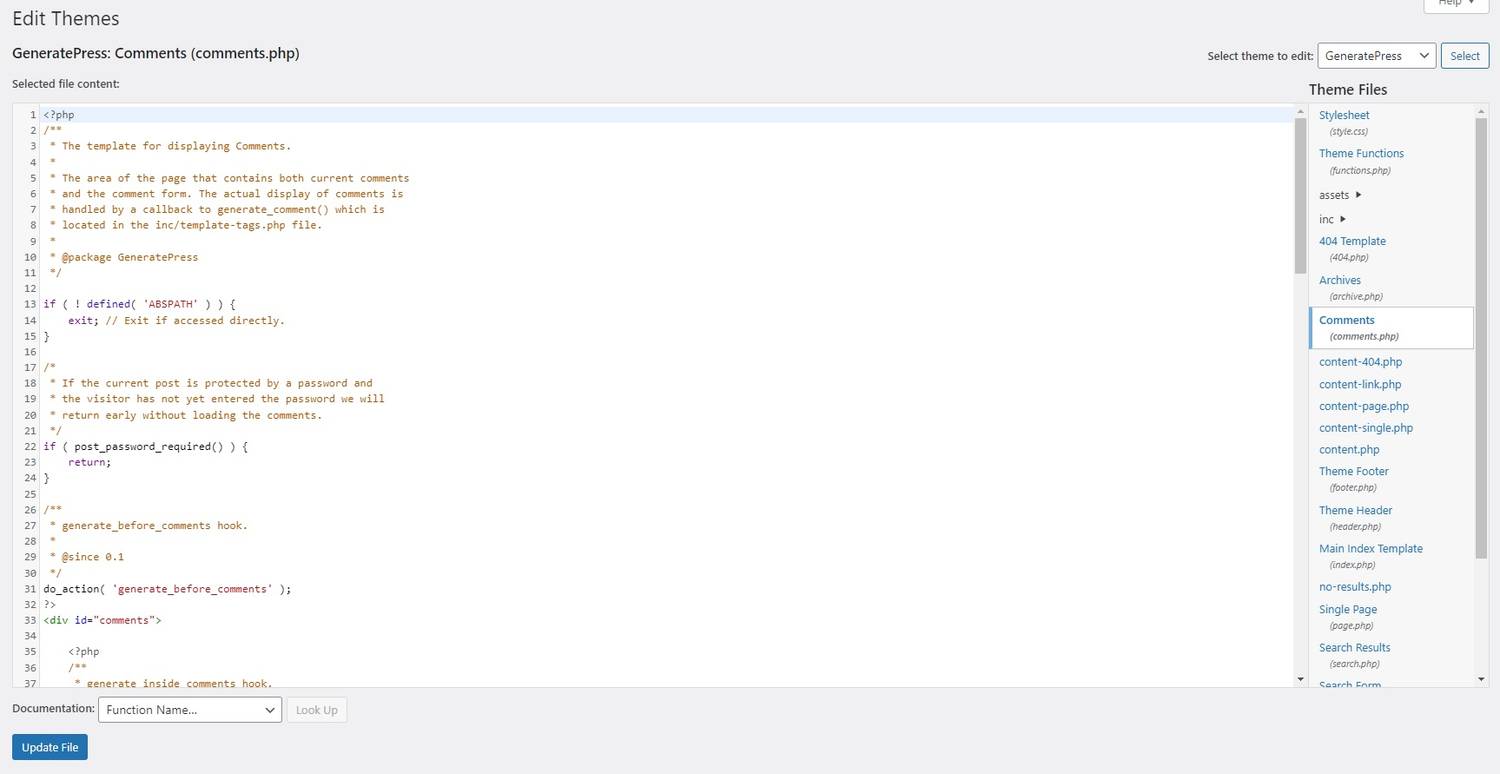
You can change everything from the way posts are displayed on your category pages to how the comments are displayed and filtered by editing PHP files.
Step 5: Create a child theme to save customizations
Your customizations make your website look beautiful. But only until the developer releases a theme update. The changes you make to your theme will be lost once you update your WordPress theme. To counteract this, you can create a child theme from your main WordPress theme.
A child theme inherits the style, appearance, and functionality of the parent theme and allows you to add your customizations above it. This way you can be sure that whenever there is a new update to the main theme, the update will only affect the parent theme and your customizations will remain intact.
Bonus Tip: Use a page builder or templates to style your website
If you don’t want to spend time creating a branded color palette and customizing every aspect of your website, consider using pre-made templates. A disclaimer: Not all WordPress themes offer free templates to their users, but there are many that do.
So, if you’re short on time and need to quickly create a personal or business website, install a theme that comes with various templates to choose from.
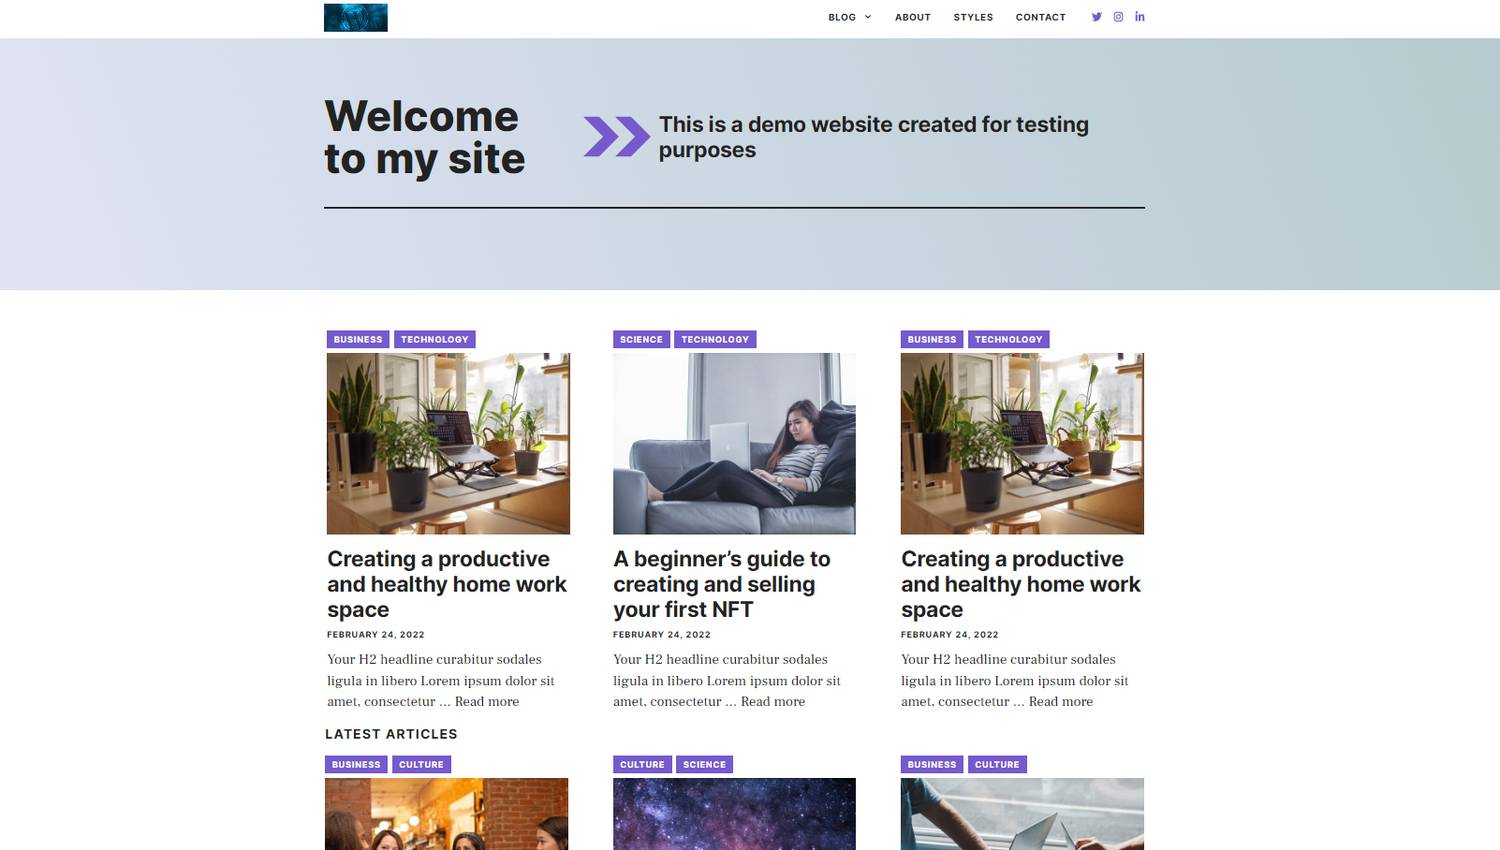
This is how the demo website looks after applying a template from GeneratePress:
Even better, you can use a page builder that lets you create custom pages with drag-and-drop tools. You can also edit and create custom headers and footers with such tools.
WordPress page builders like Elementor and Divi are a lifesaver for those who have no experience with frontend technologies and just need a quick way to build beautiful websites with WordPress without coding.
Creating a professional website with WordPress
Launching a website takes time. You need to buy a domain name and set up hosting, and that’s after you’ve managed to find a brand name.
There are currently almost 1.7 billion websites on the Internet, and more are added every day. Therefore, it is important to choose a unique domain name that will help your brand stand out from the crowd.