
How to Edit Your Sent iMessages to Fix Spelling Errors and Other Mistakes « iOS & iPhone :: Gadget Hacks
Apple is finally letting us fix sent iMessages, and I can honestly say it’s a game changer. Editing messages after they’ve been sent can prevent misunderstandings and allow you to fix embarrassing mistakes before the other person notices. It’s one of the coolest new features of the Messages app, but there are a few key things you should know about how it works.
The new editing tool is a valuable feature for fixing errors with automatic correction, correcting spelling mistakes that can sometimes change the context of a text (e.g. explain yourself. You have a limited time frame to make changes and it doesn’t prevent anyone from to see what you have previously written.
compatibility
To edit iMessages in the Messages app, your iPhone must be running iOS 16. It also works on iPadOS 16 for iPad and macOS 13 Ventura for Mac, which are still in beta. Unfortunately, you can’t edit iMessages from an Apple Watch, but you can still see edit history on watchOS 9.
They can still edit messages sent to recipients using an older software version, but they’ll see each edit as a new message rather than a single message with a history that they can expand on. We’ll go into more detail on that below.
Edit iMessages on iPhone
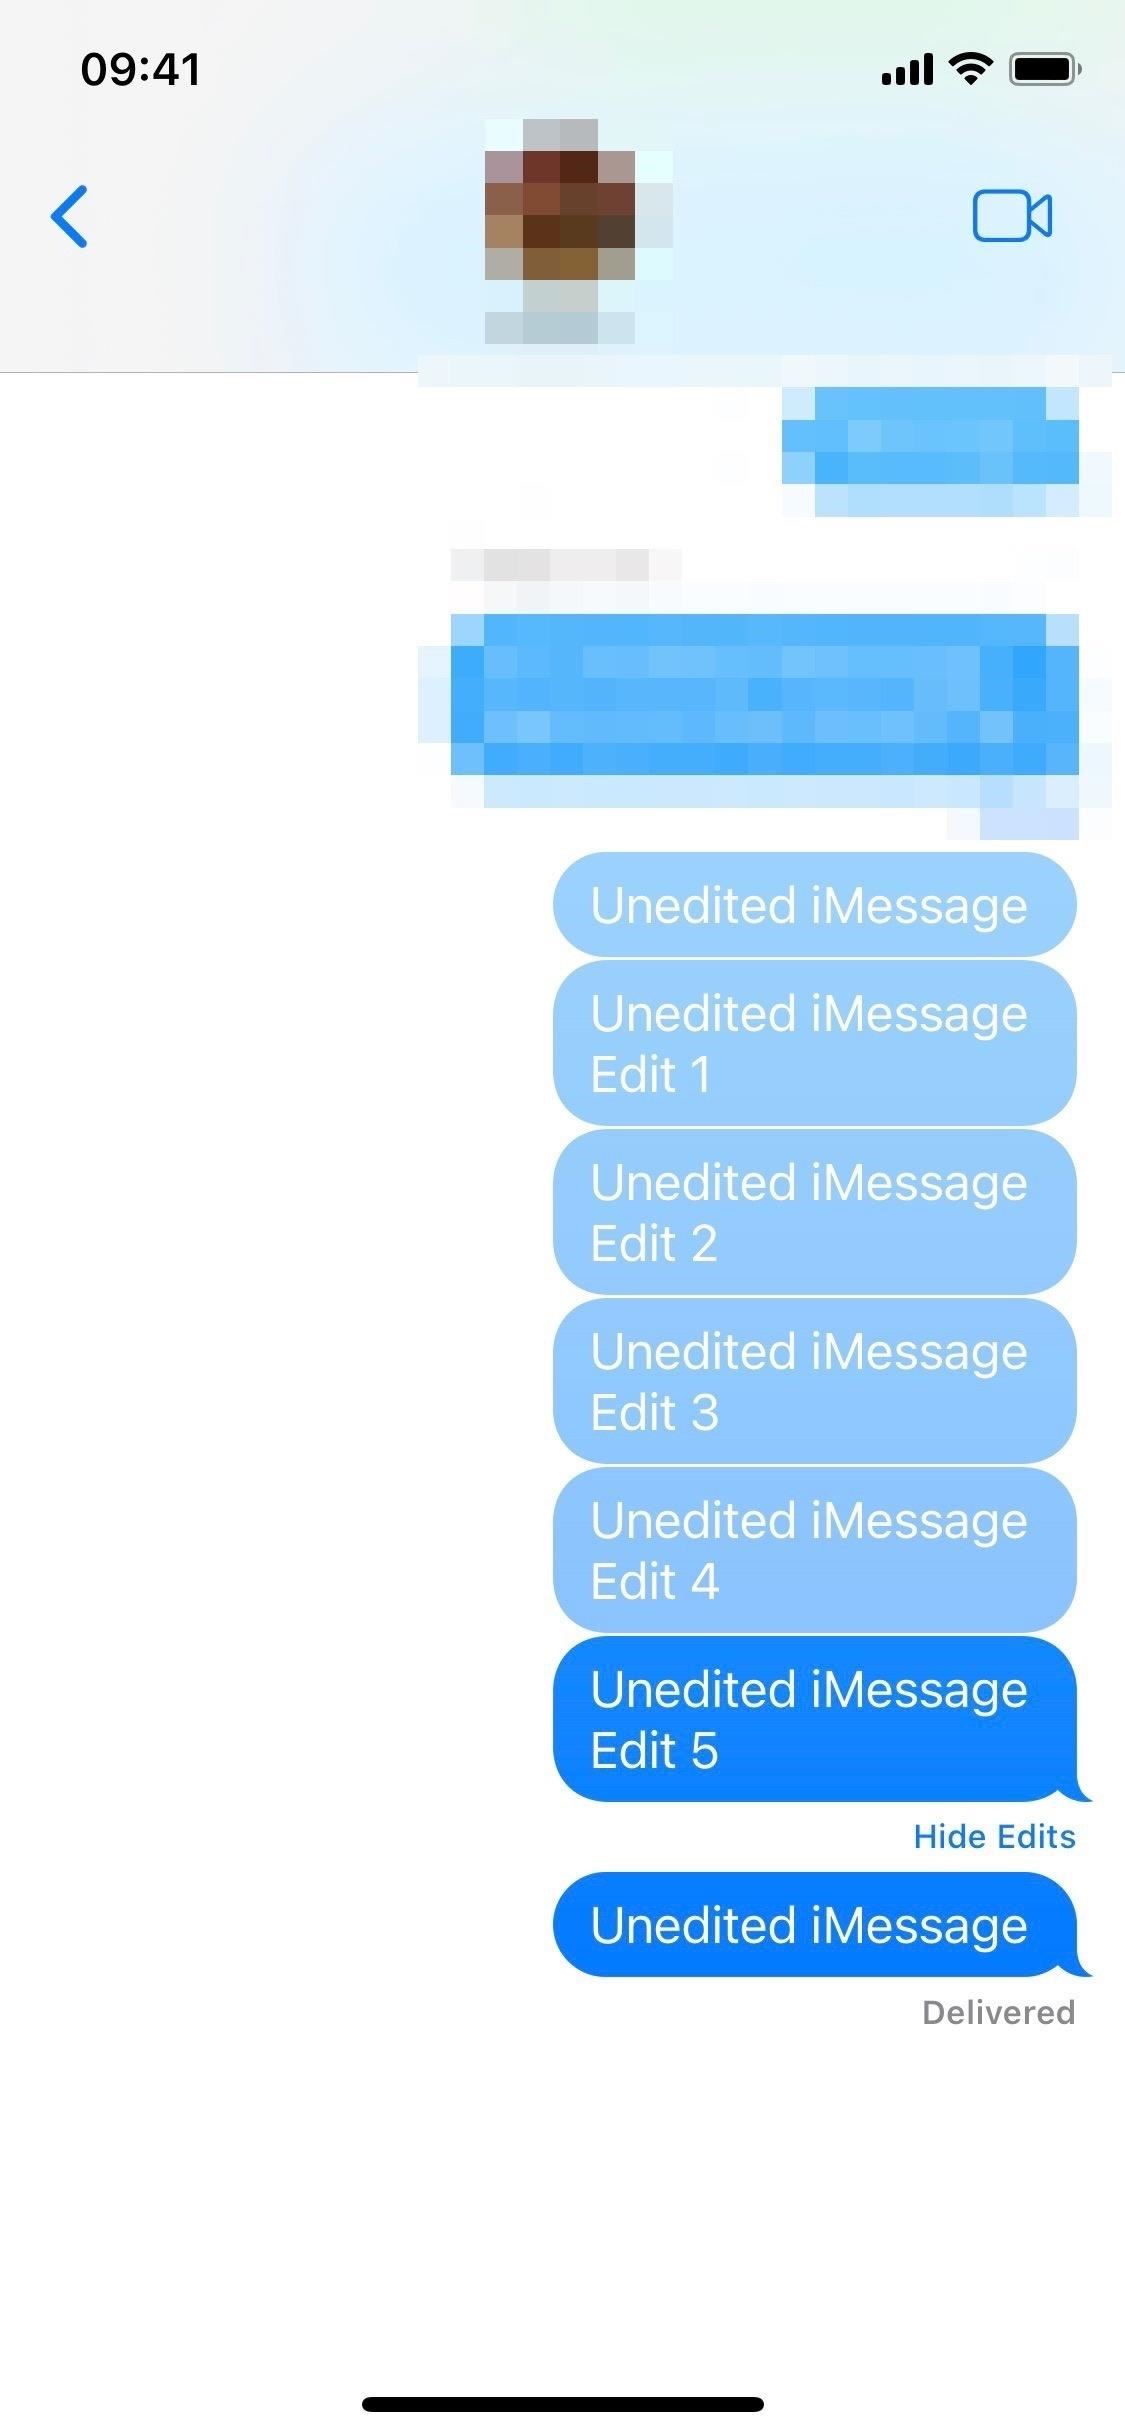
You have 15 minutes to edit a sent iMessage if you want to add, remove, or change anything. You can edit a message up to five times within those 15 minutes. If you’ve reached the editing time for a particular message or the time limit has expired, the Edit button will disappear.
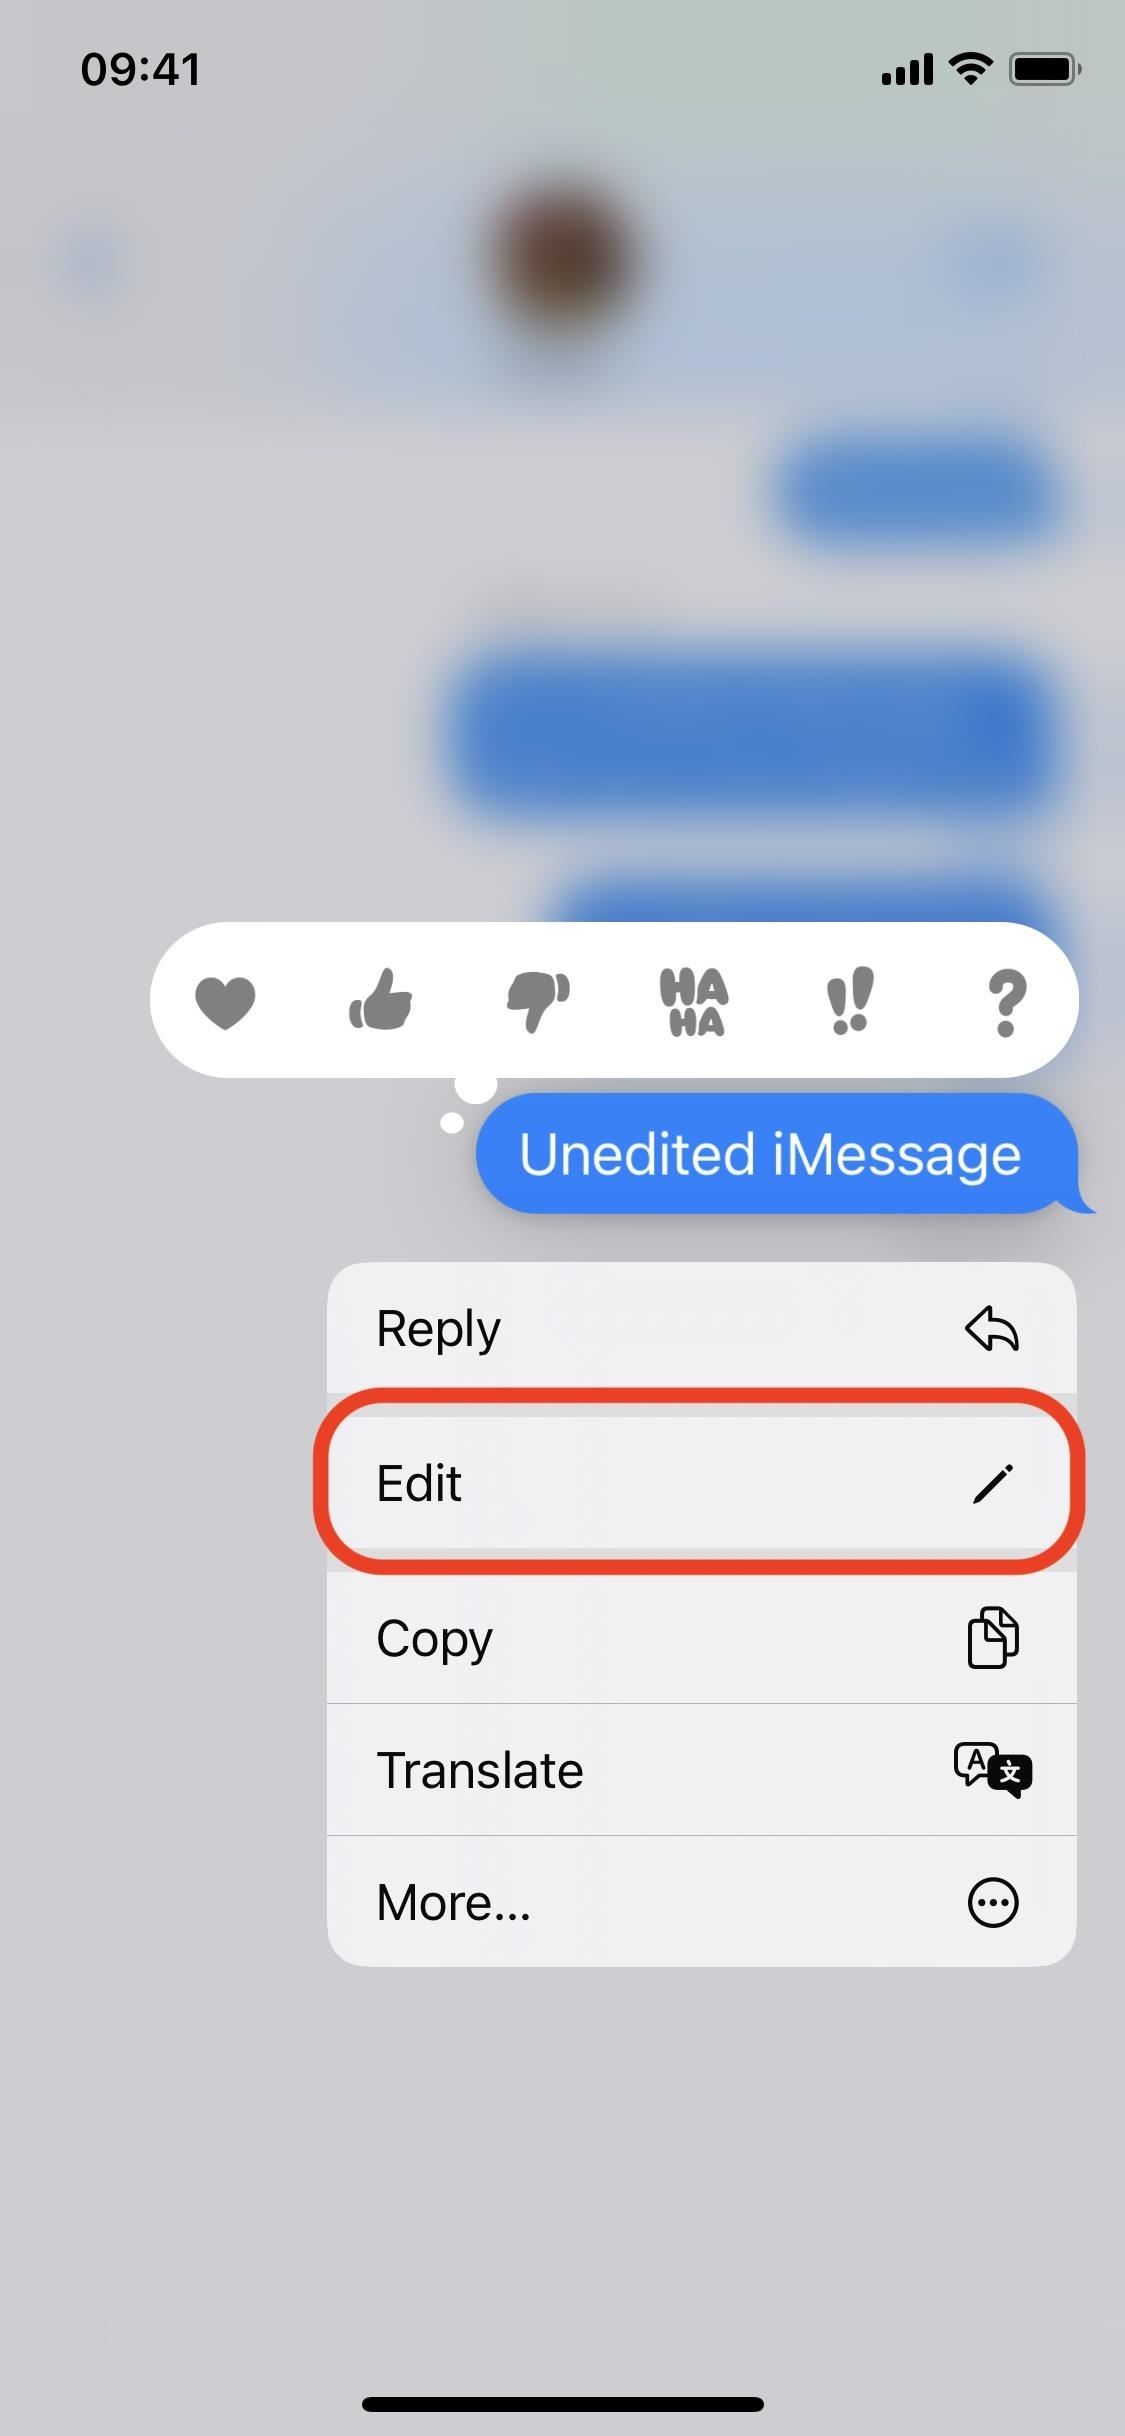
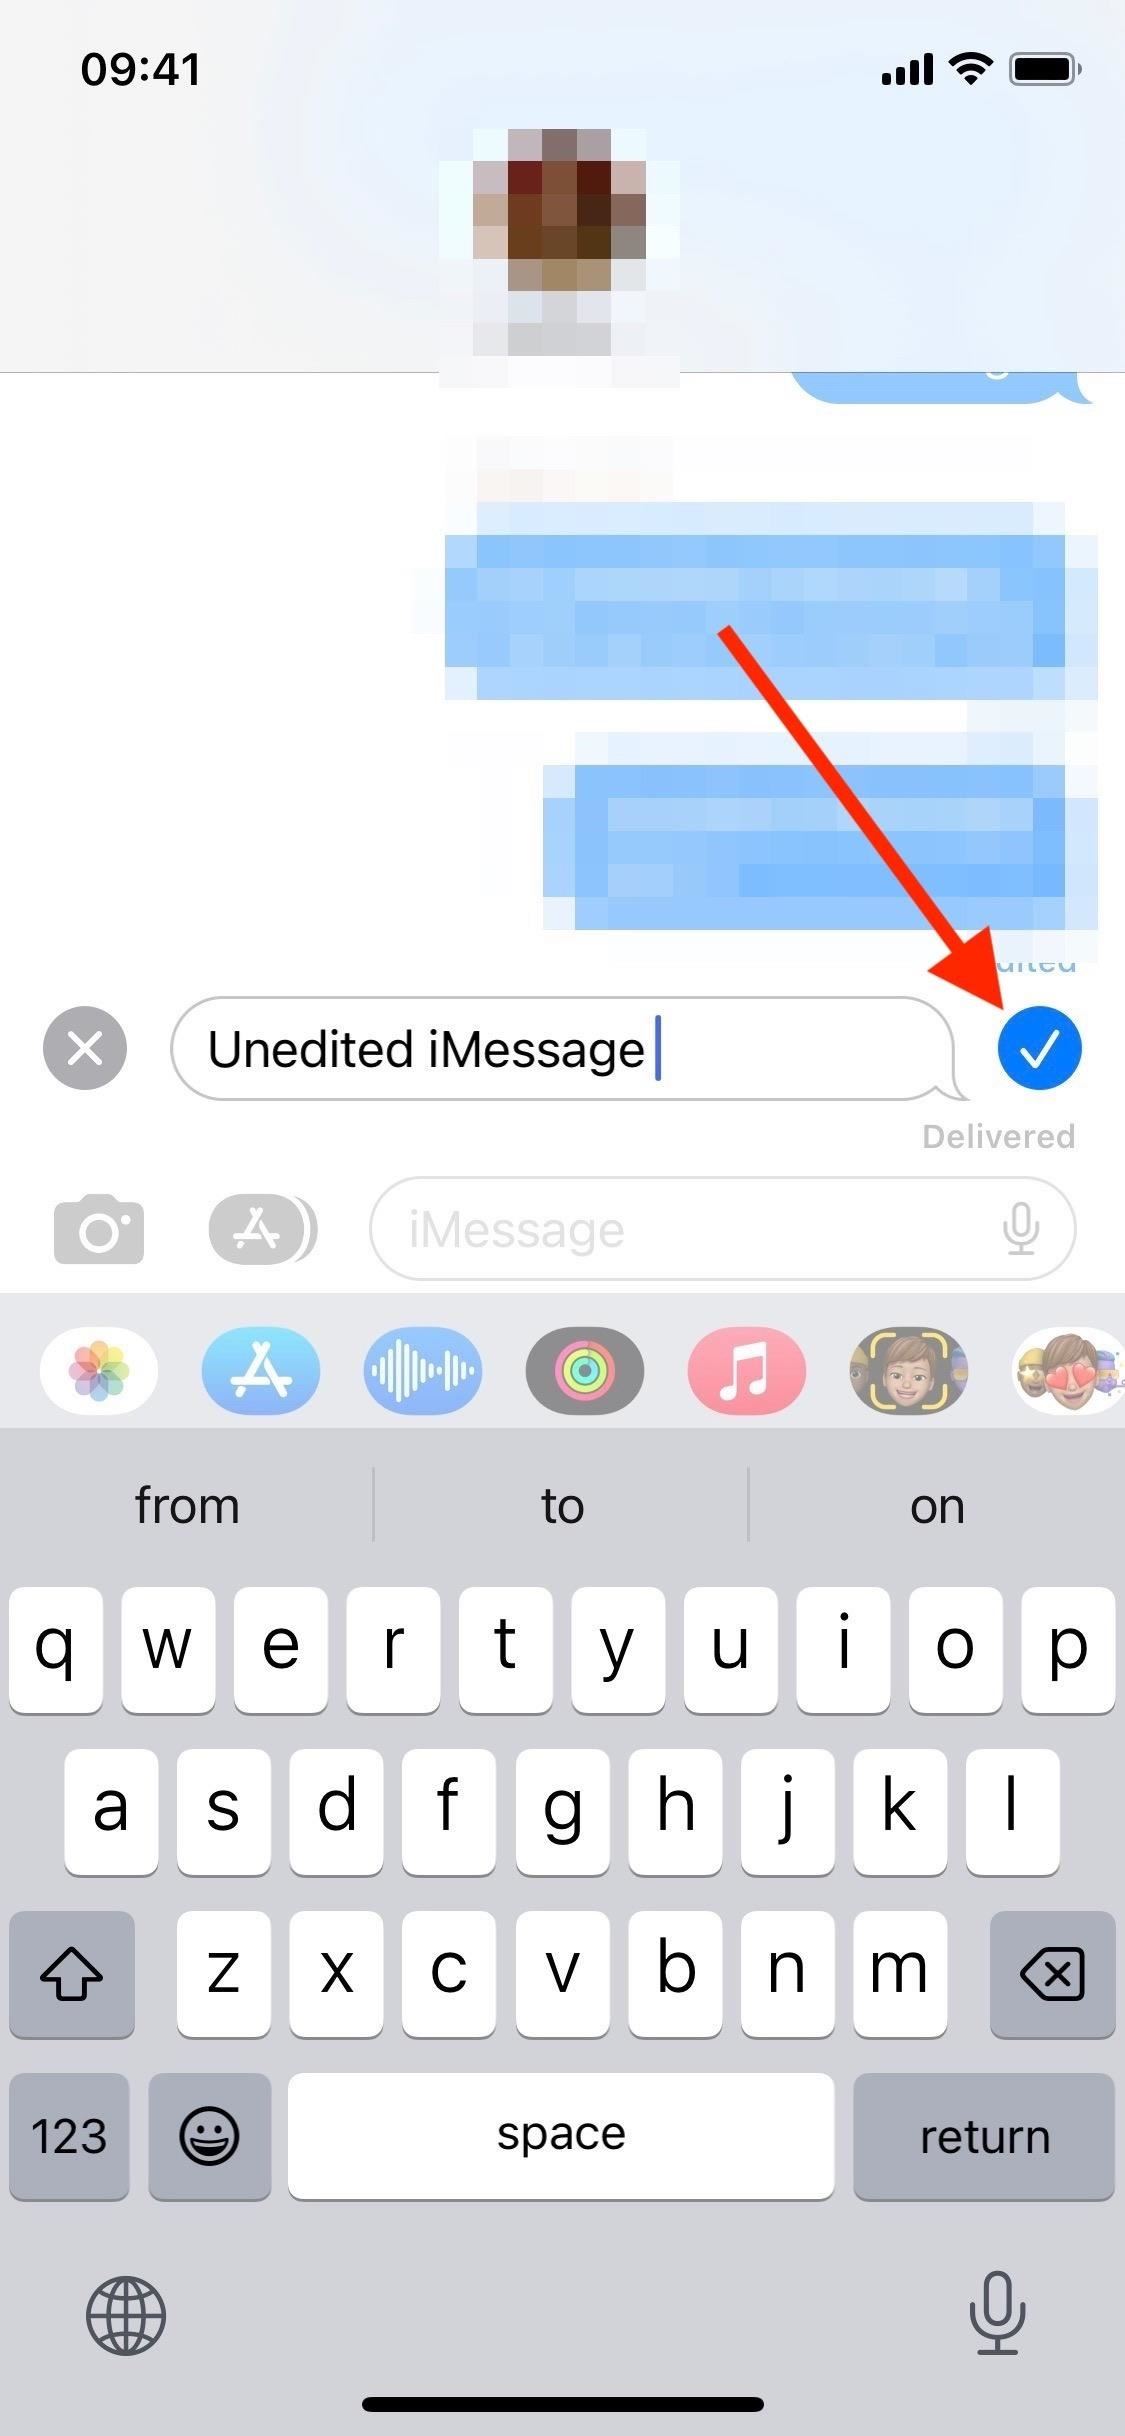
To edit a sent iMessage on iOS 16, press and hold the message to display the quick action menu, then tap Edit. You can then enter your changes and tap the check mark button to confirm.
What your recipients see
An edited message is marked with the label “Edited” for all interlocutors. That way, both the sender and the recipient can tap on it to see the change history. If you tap Hide Edits, the history will be reduced to a single message.
Receivers with older operating systems will not see the changes in the same way. Instead, they get new text for each change that shows what was changed. At the moment, you can’t tell if a recipient’s device supports iMessage editing, so you can never be sure how they view things.

Edit iMessages on macOS
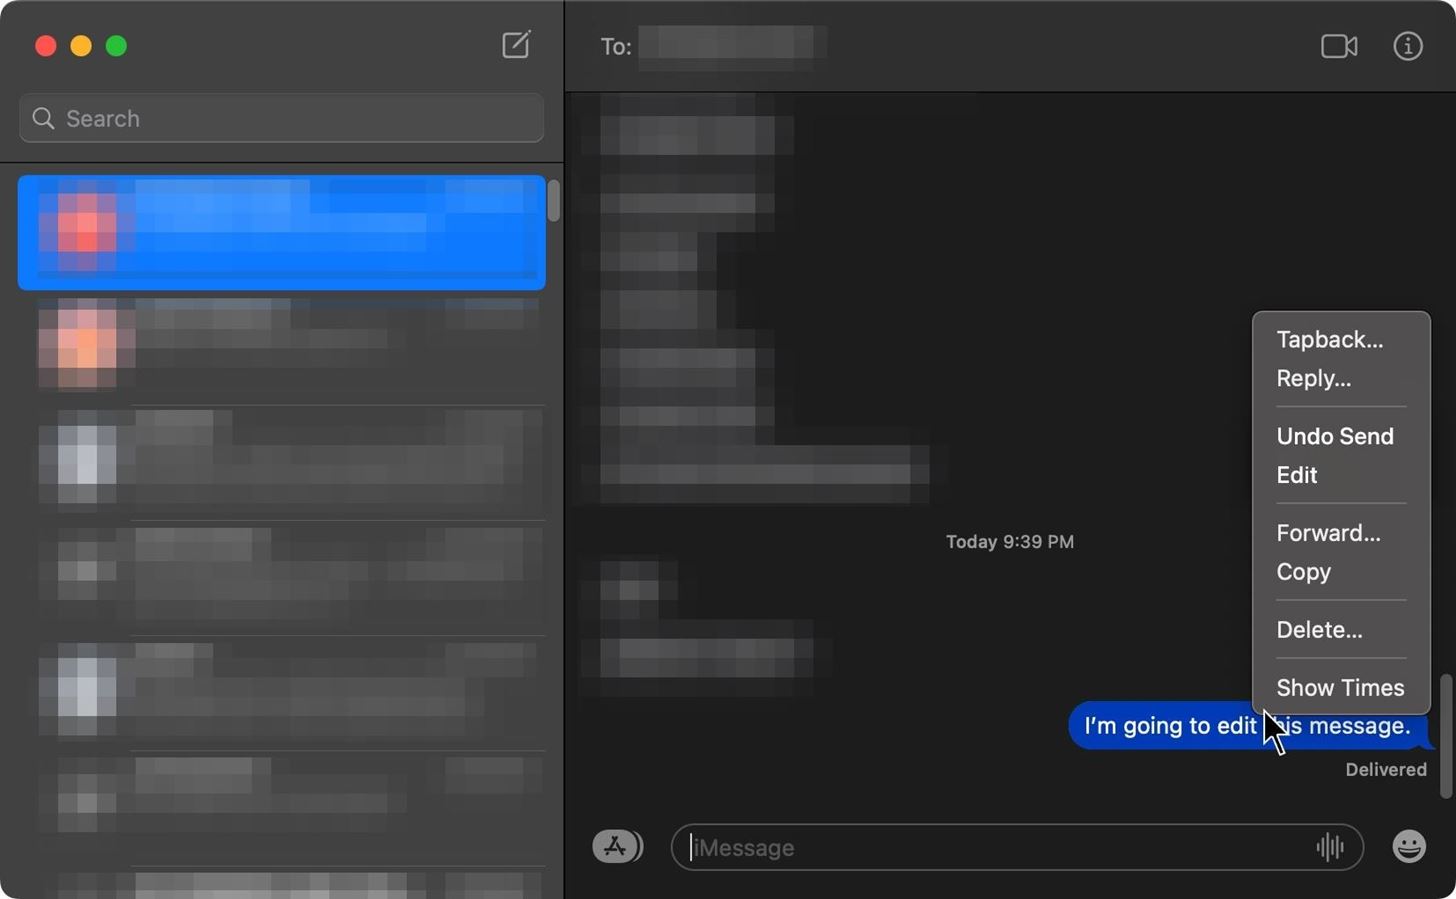
You can also edit iMessages on a Mac, starting with macOS 13 Ventura (still in beta). Right-click (or ctrl-click) the desired message to open the menu, then click Edit to customize your text. You have 15 minutes to make up to five changes before the edit button disappears. Recipients with macOS 12 Monterey and earlier will see each change as separate text showing what changes were made.
Things to keep an eye on
To edit an iMessage sent from your Apple Watch, you must pull out your iPhone, iPad, or Mac within 15 minutes of sending it, since watchOS 9 doesn’t have an iMessage editor. However, edited messages have “Edited” and “Hide edits” buttons to show or hide the edit history.
Also, don’t forget that the editing feature only works with iMessage chats and cannot be applied to SMS or MMS texts. Once you’ve sent a regular or media-based text, you can no longer edit its content.
Apple also introduced another feature in iOS 16 that allows you to take back a recently sent iMessage within two minutes of sending it. This allows you to start over without being limited by the number of edits.
Keep your connection secure with no monthly bill. Get a lifetime subscription to VPN Unlimited for all your devices with a one-time purchase at the new Gadget Hacks Shop and watch Hulu or Netflix with no regional restrictions, increase security when browsing public networks, and much more.
Buy Now (80% off) >
Other worthwhile offers to try: