
How to get the most out of AI de-noise software
In photography, knowing when to put the camera down is a valuable skill. Truly dark situations are particularly tricky: without additional lighting, you can increase the ISO to increase the camera’s sensitivity to light, but that runs the risk of introducing too much distracting digital noise into the shot. That’s what I thought until recently. I am now taking photos that I would not have attempted before because of the denoising software powered by machine learning technology. A high ISO is no longer the compromise it used to be.
This opens up many possibilities for photographers. Maybe your camera is a few years old and doesn’t handle noise as well as newer models. Perhaps you have images in your library that you have written off as too noisy to process. Or you need extremely fast shutter speeds to capture sports or other action. You can shoot knowing that the software will give you extra exposure levels to play with.
sensor sensitivity
Too often I come across the following circumstances. In a dark situation, I increase the ISO so I can use a sufficiently fast shutter speed to avoid motion blur or camera shake. The higher ISO pulls the light out of the scene by sending more power to the image sensor and increasing its sensitivity to light. However, this increase in performance introduces visible noise into the image. At higher ISOs – 6400 and higher, depending on the camera – the noise can be distracting and obscure detail.
The other common occurrence is when I forget to turn the ISO back down after shooting at night or in the dark. The next day, in broad daylight, I have noisy images and unusually fast shutter speeds because the camera has to adjust to so much light sensitivity. If I’m not paying attention to the values when taking a picture, it’s easy to miss the noise just by looking at the preview on the camera’s LCD. Has this happened to some of my favorite pictures? You bet it has.
By the way, this is one of the areas where buying new equipment can help. The hardware and software of today’s cameras handle noise better than in the past. My main body is a four-year-old Fujifilm X-T3, which produces a perfectly tolerable noise level at ISO 6400. That was my upper limit for the ISO setting, but now (depending on the scene, of course) I can comfortably go beyond that.
The Sound of Science
Noise reduction editing features aren’t new, but the way we deal with noise has changed a lot in recent years. In many photo editing apps, the denoising controls apply algorithms that attempt to smooth out noise, often resulting in overly smooth results.
A more effective approach is to use tools based on machine learning models that have processed thousands of noisy images. In “Preprocessing raw files with machine learning for cleaner looking photos” I wrote about DxO PureRAW 2 applying denoising to raw files when demosaicing them.
If you are working with a JPEG or HEIC file, or a RAW file that has already gone through this processing phase, apps like ON1 NoNoise AI (available as a standalone app/plugin and also in ON1 Photo RAW) and Topaz DeNoise AI can analyze it the noise pattern of the image and use this information to correct it.
Testing different de-noise software

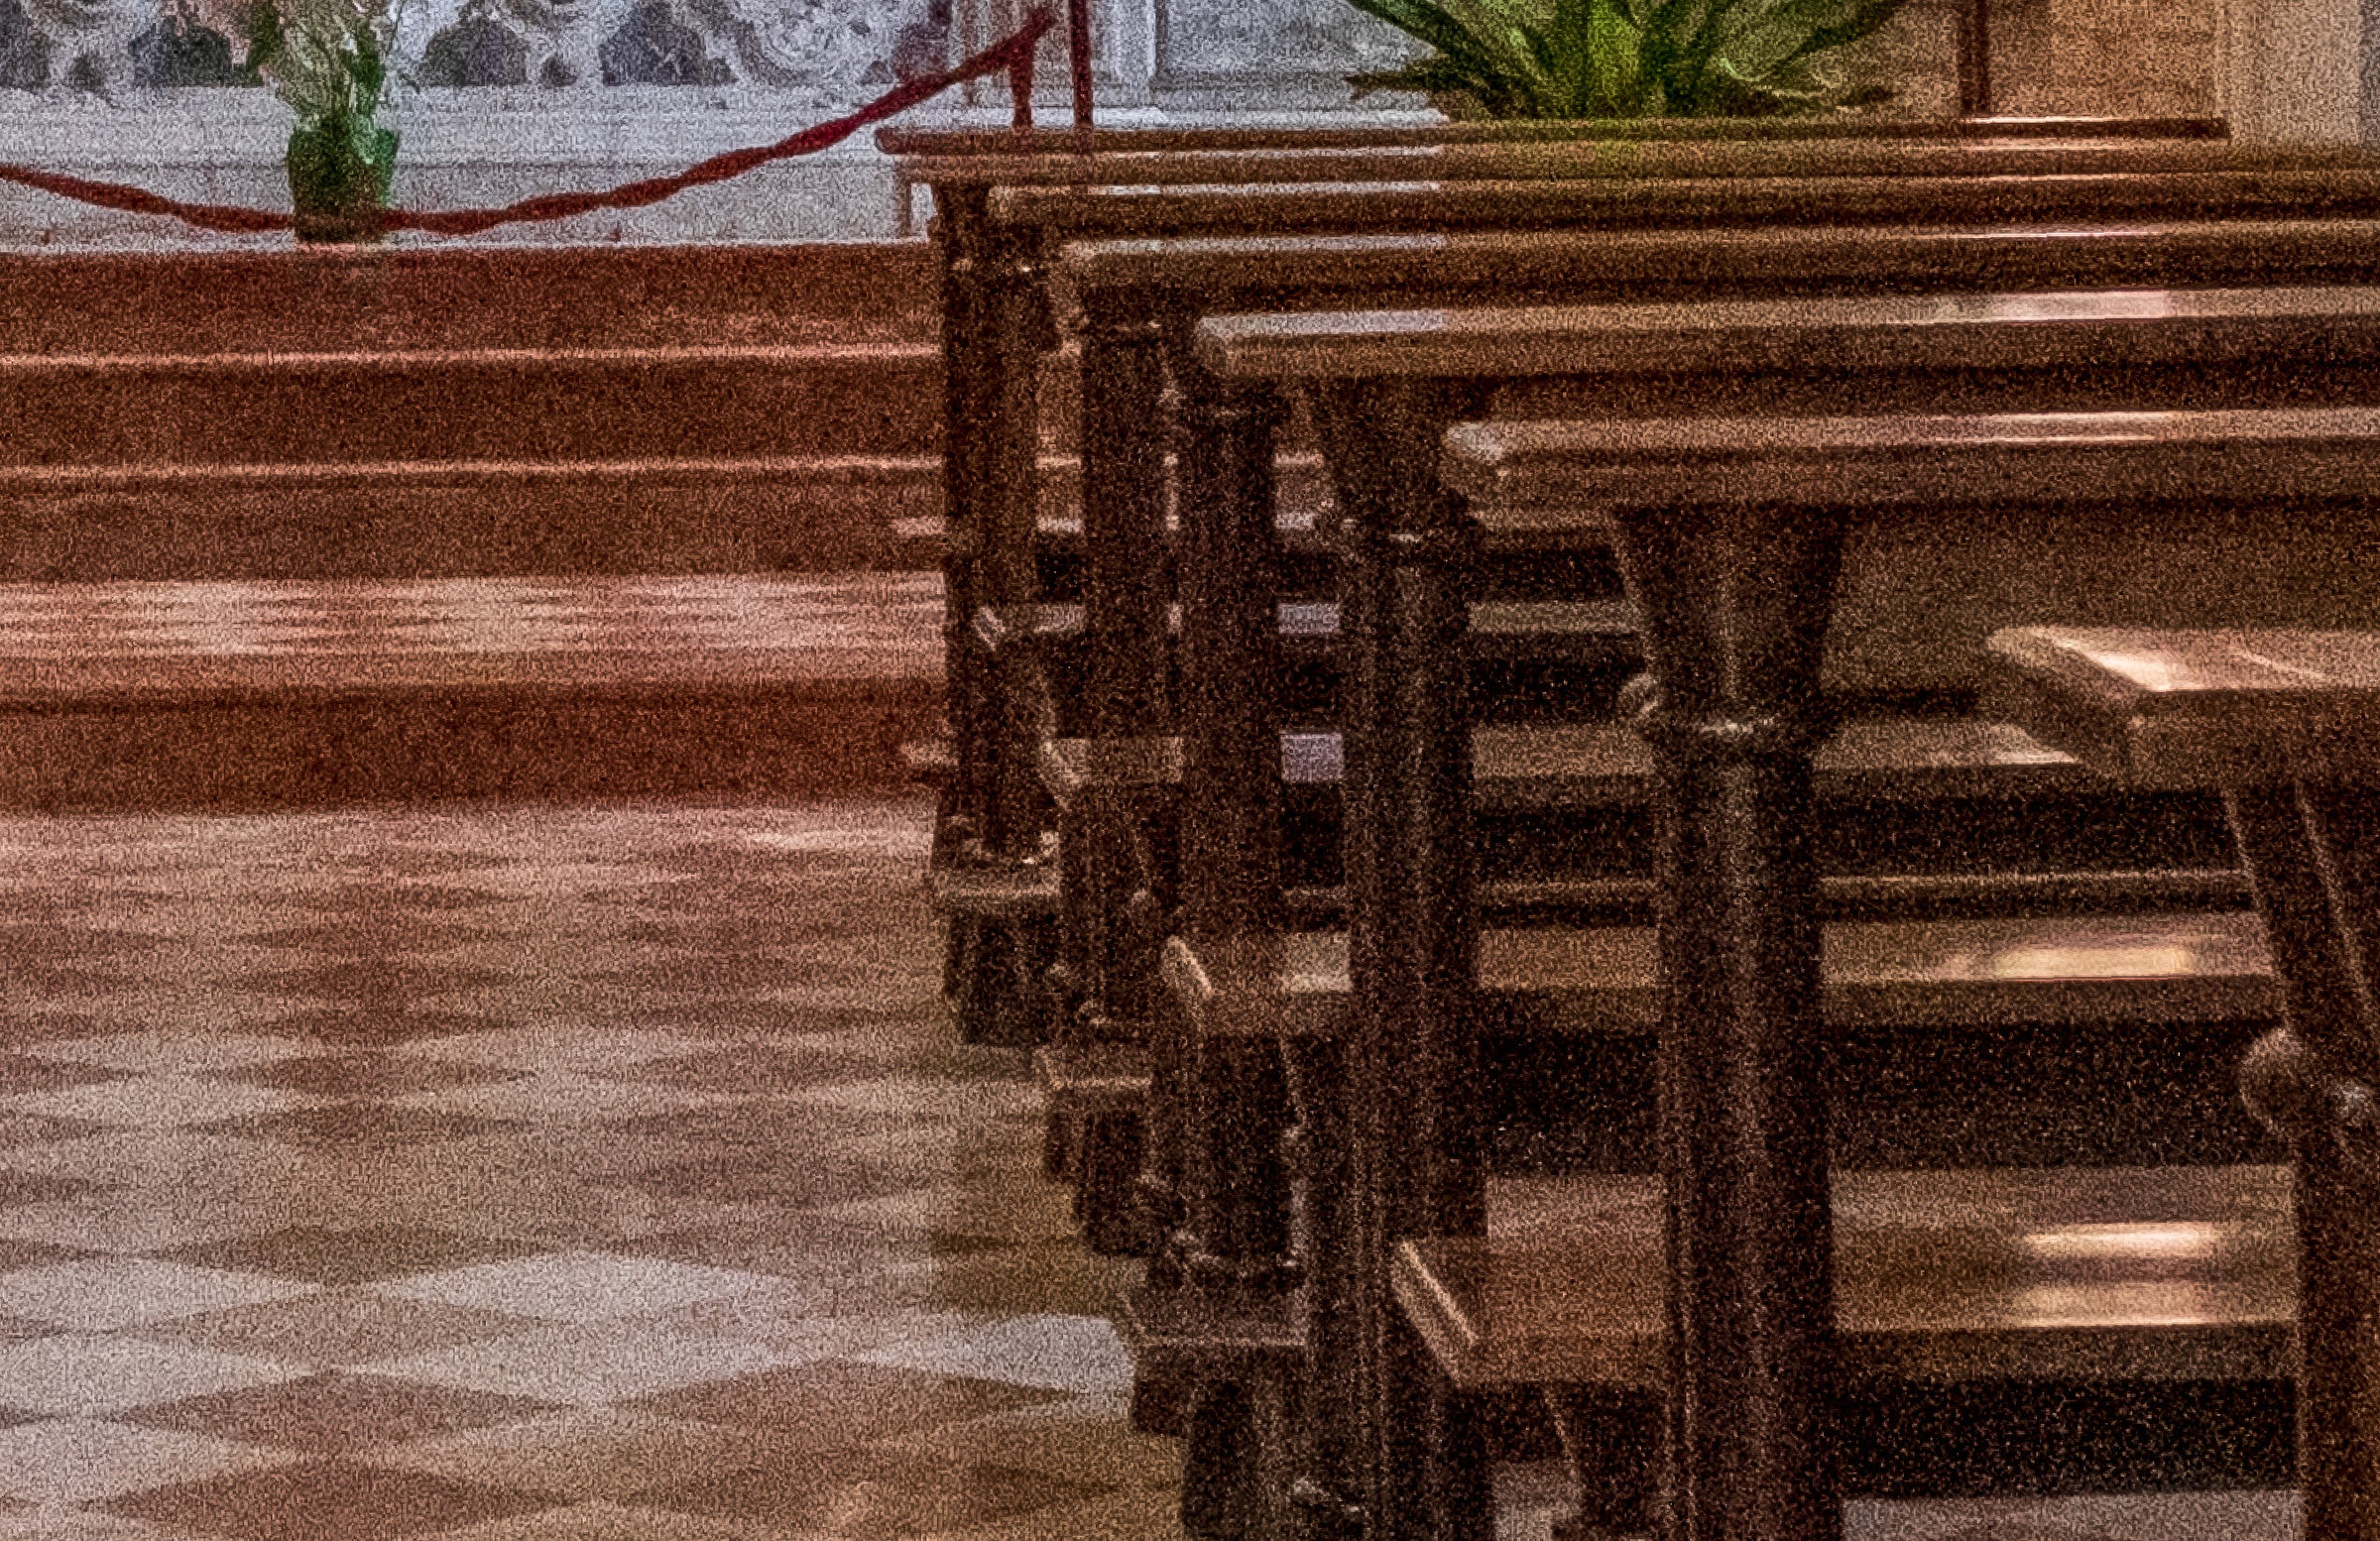
The following image was taken handheld at a shutter speed of 1/60 and ISO 6400. I adjusted the exposure to brighten the scene, but this makes the noise more obvious, especially when viewing the image at 200% scaling. The noise is particularly strong in the dark areas.
light room
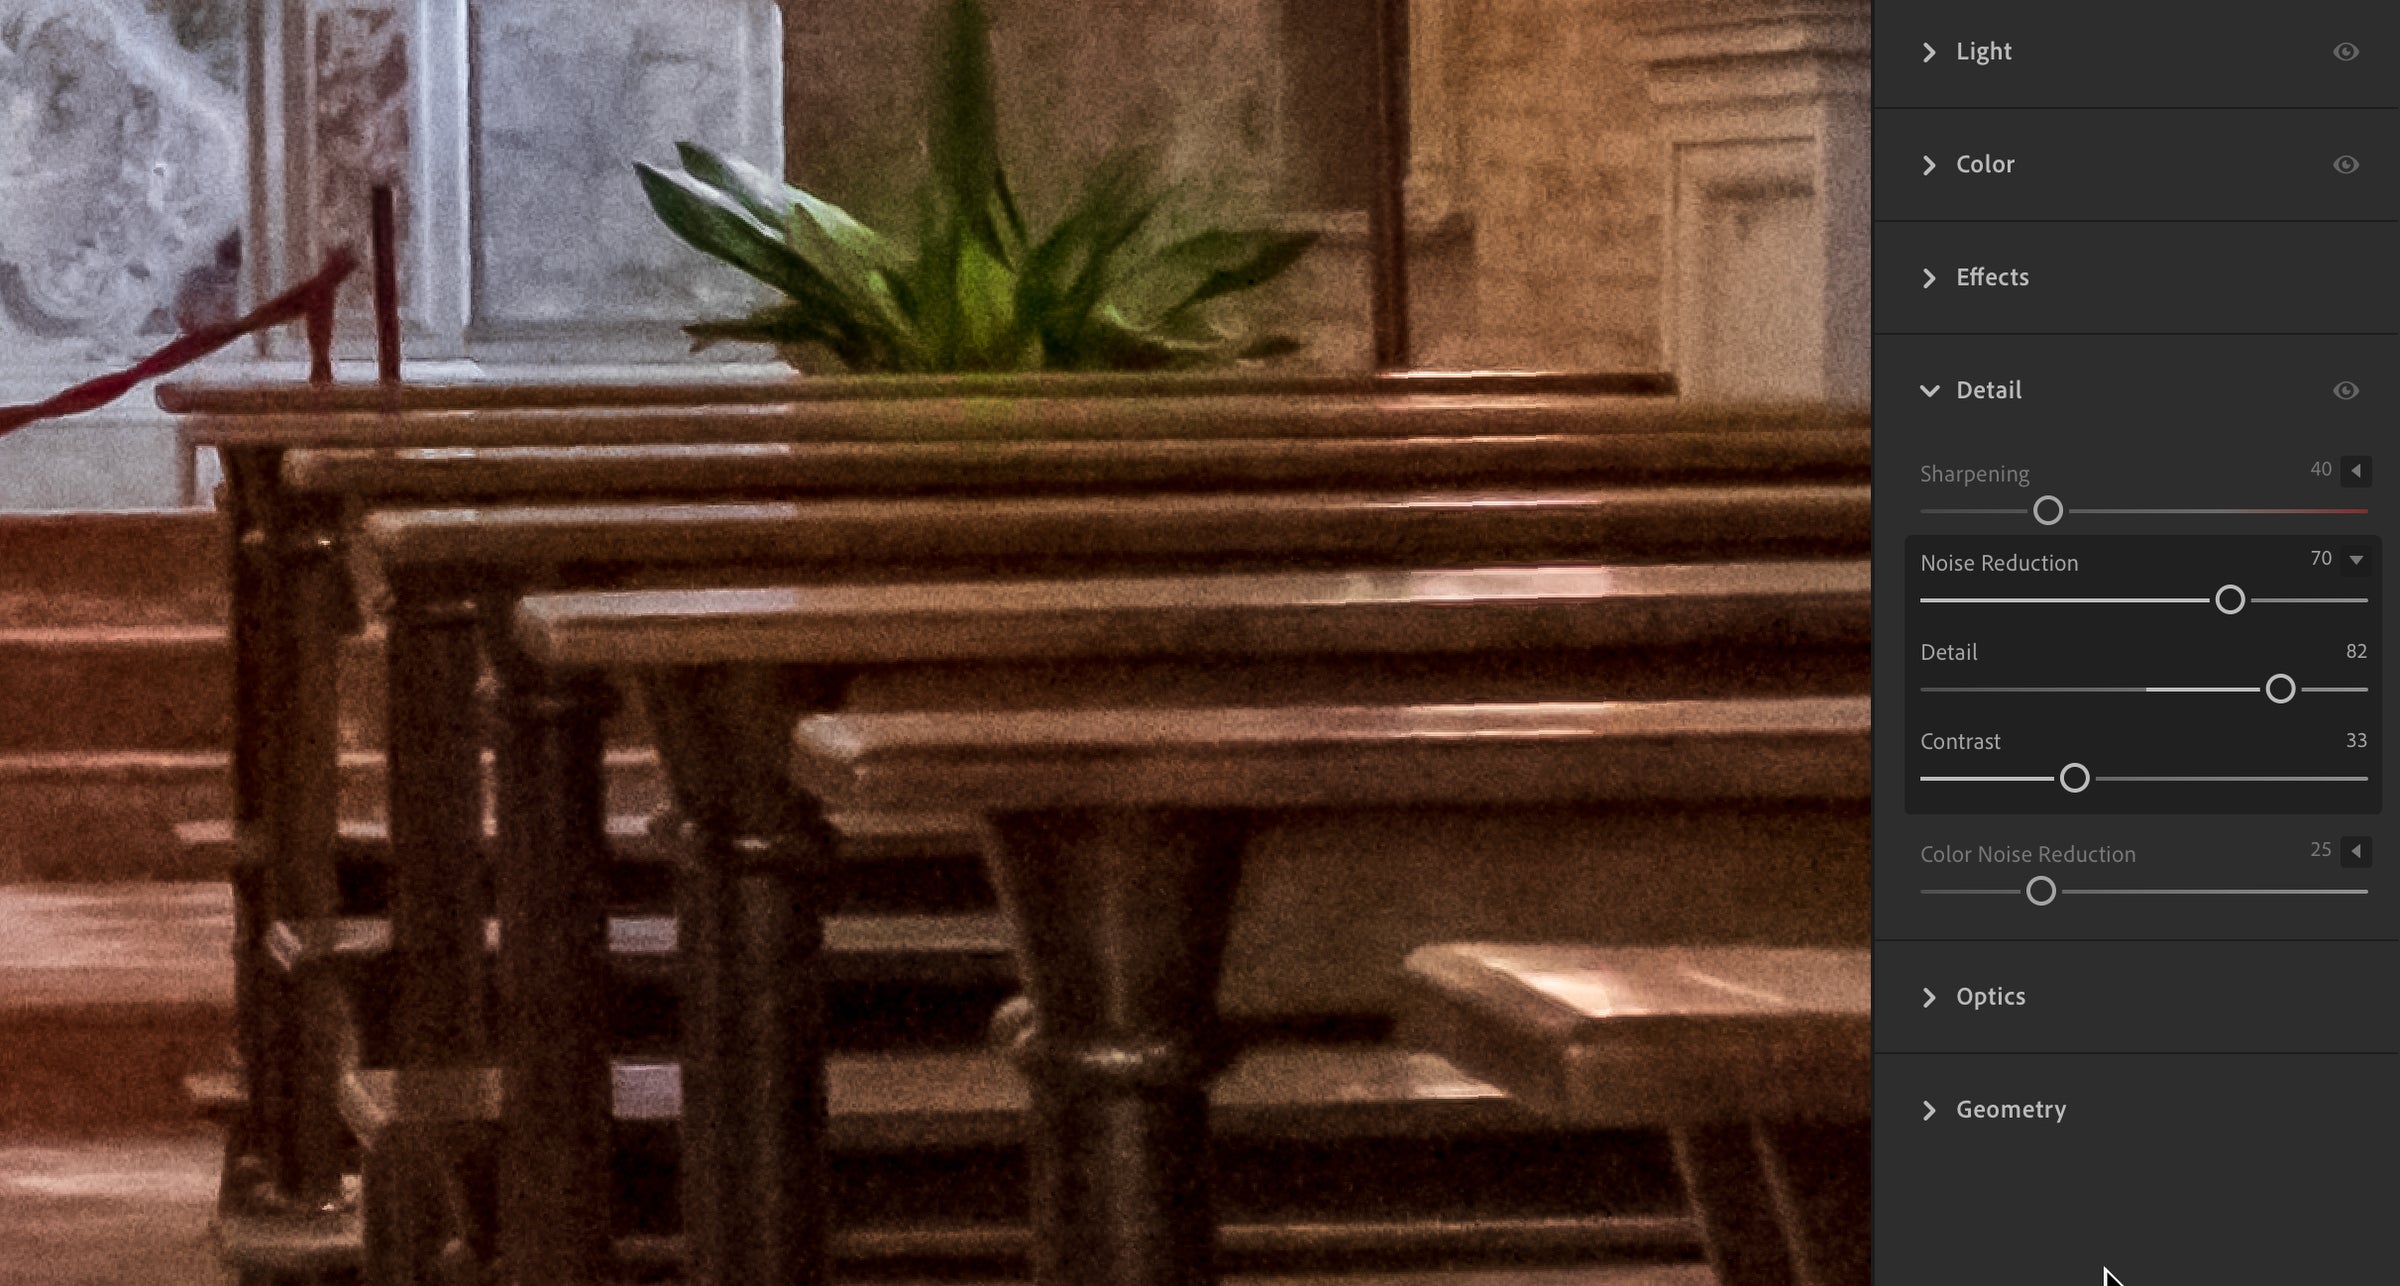
When I apply Lightroom’s noise reduction control, I am able to remove the noise, but everything gets smudged (see below).
ON1 NoNoise AI
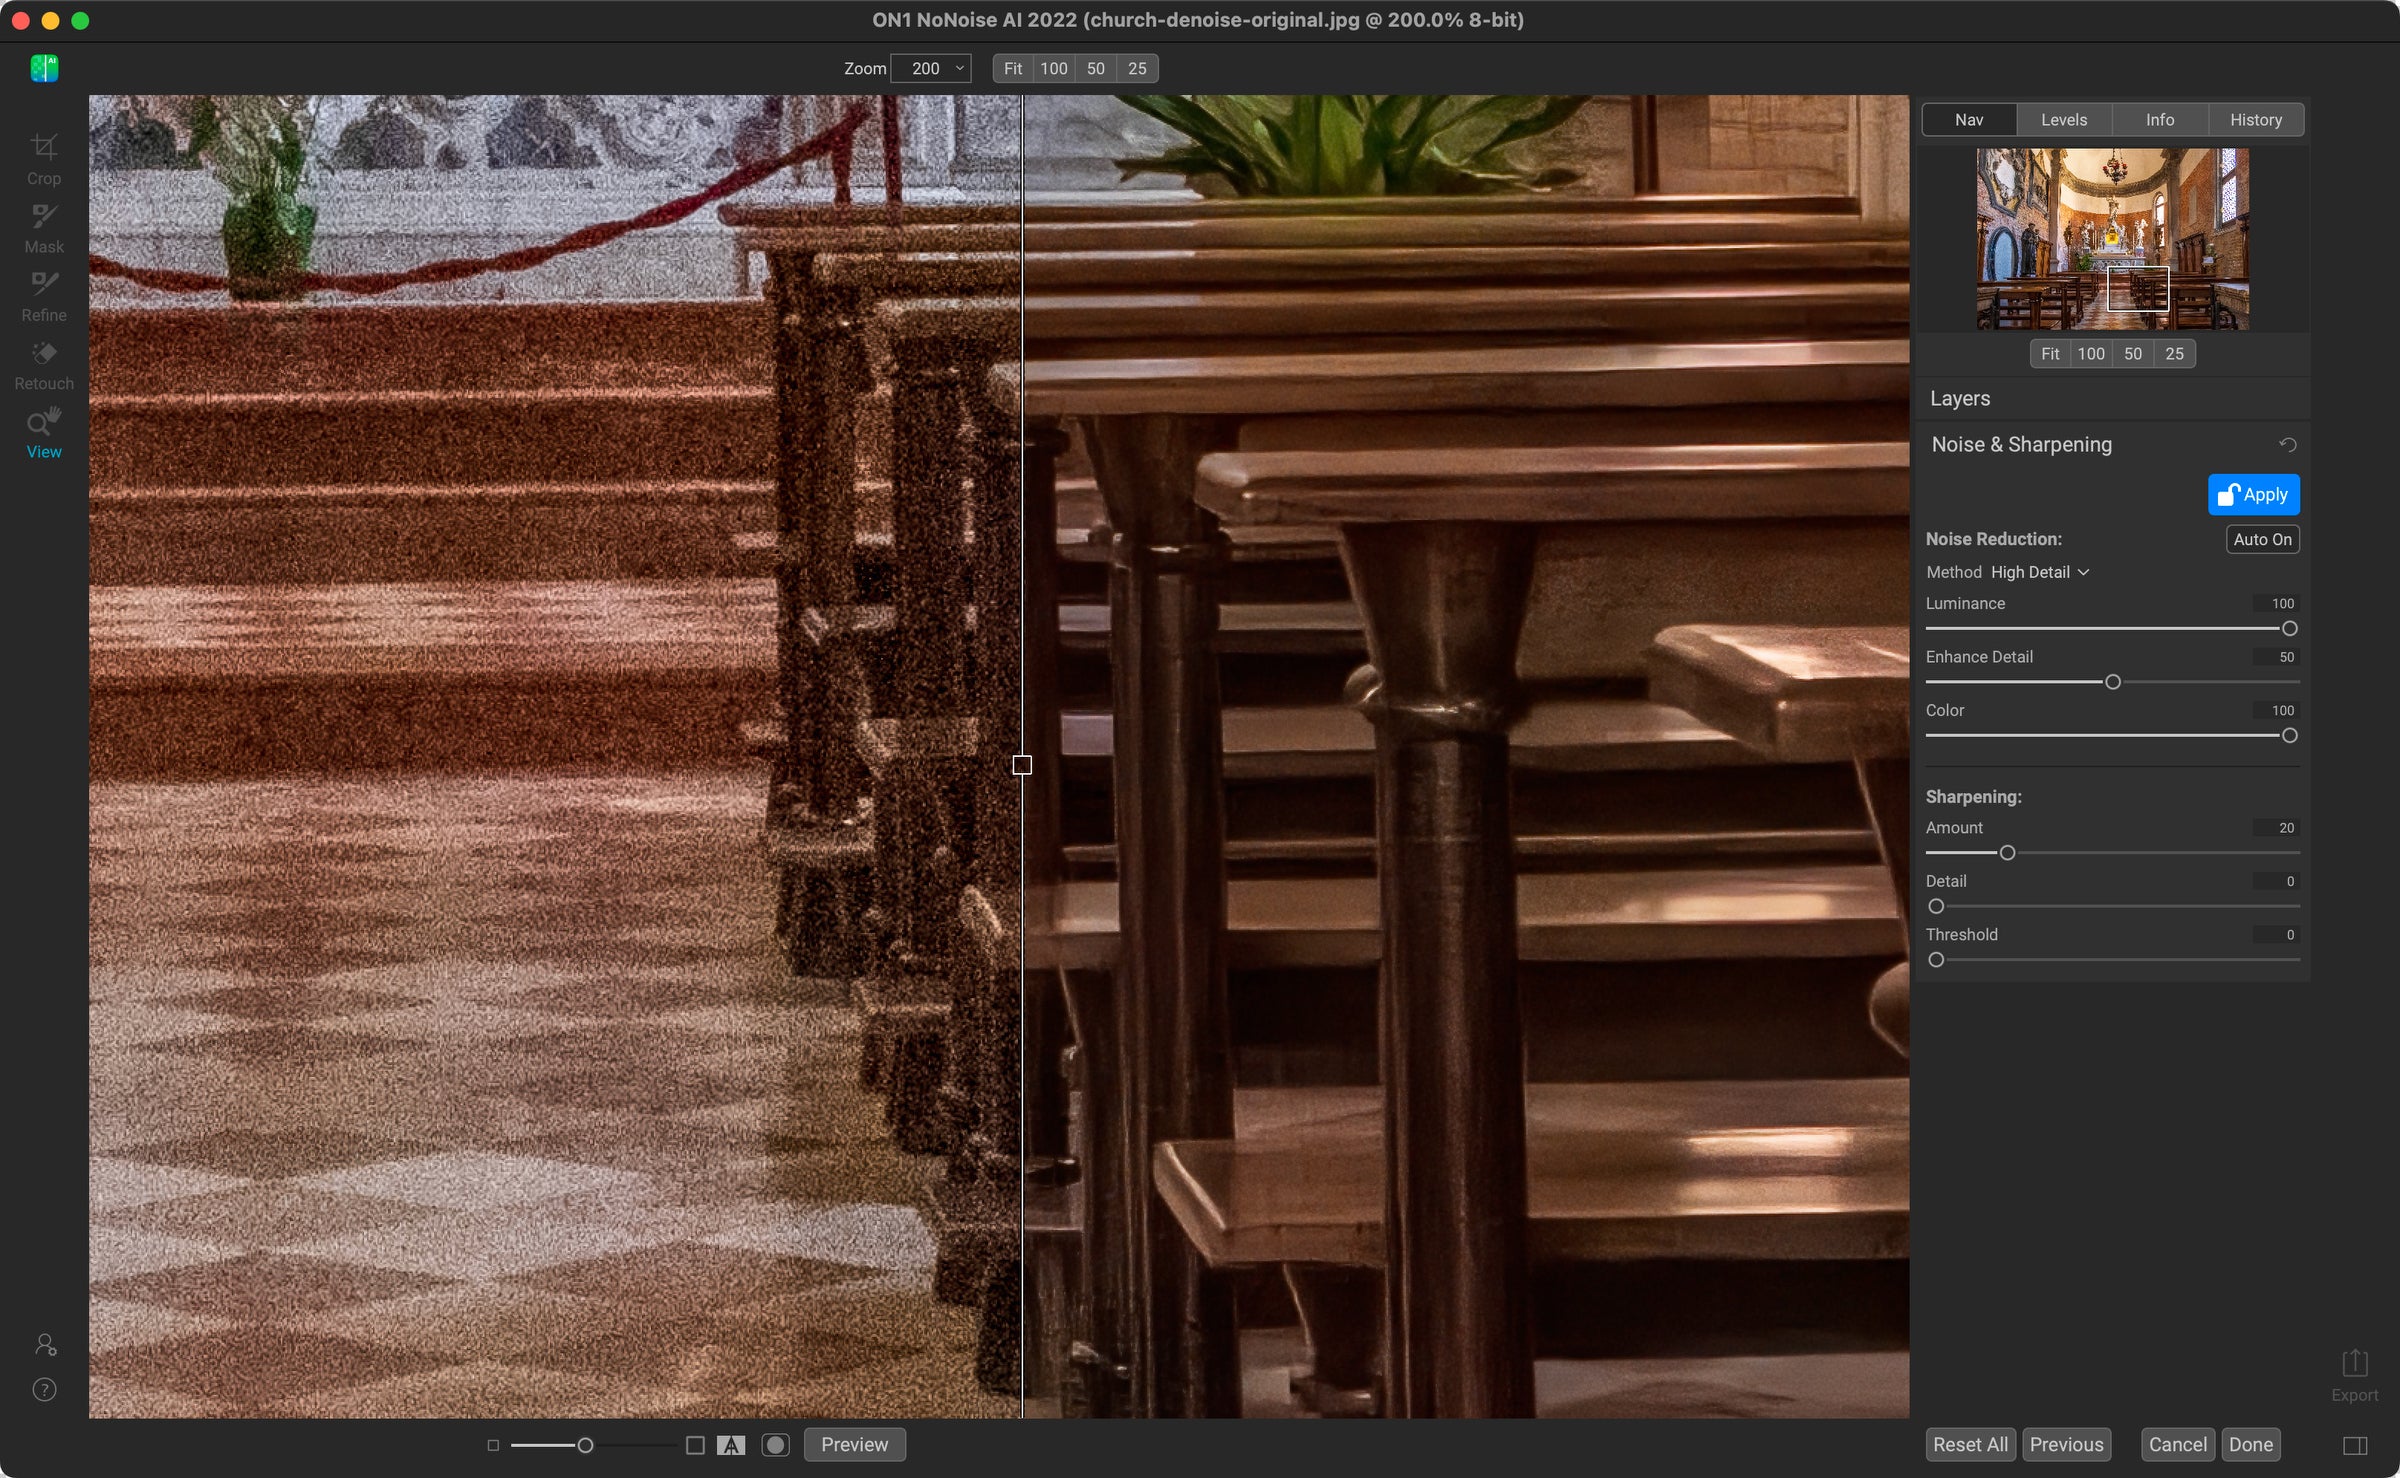
When I open the image in ON1 NoNoise AI, the results are impressive. Noise is removed from the pews, but detail and contrast are preserved. They still have a smoothness, but not in the same way Lightroom rendered them. This is also the default interpretation, so I was able to manipulate the Noise Reduction and Sharpen sliders to tweak the effect. Also remember that at 200% we have pixel peeping; The fully corrected image looks fine.
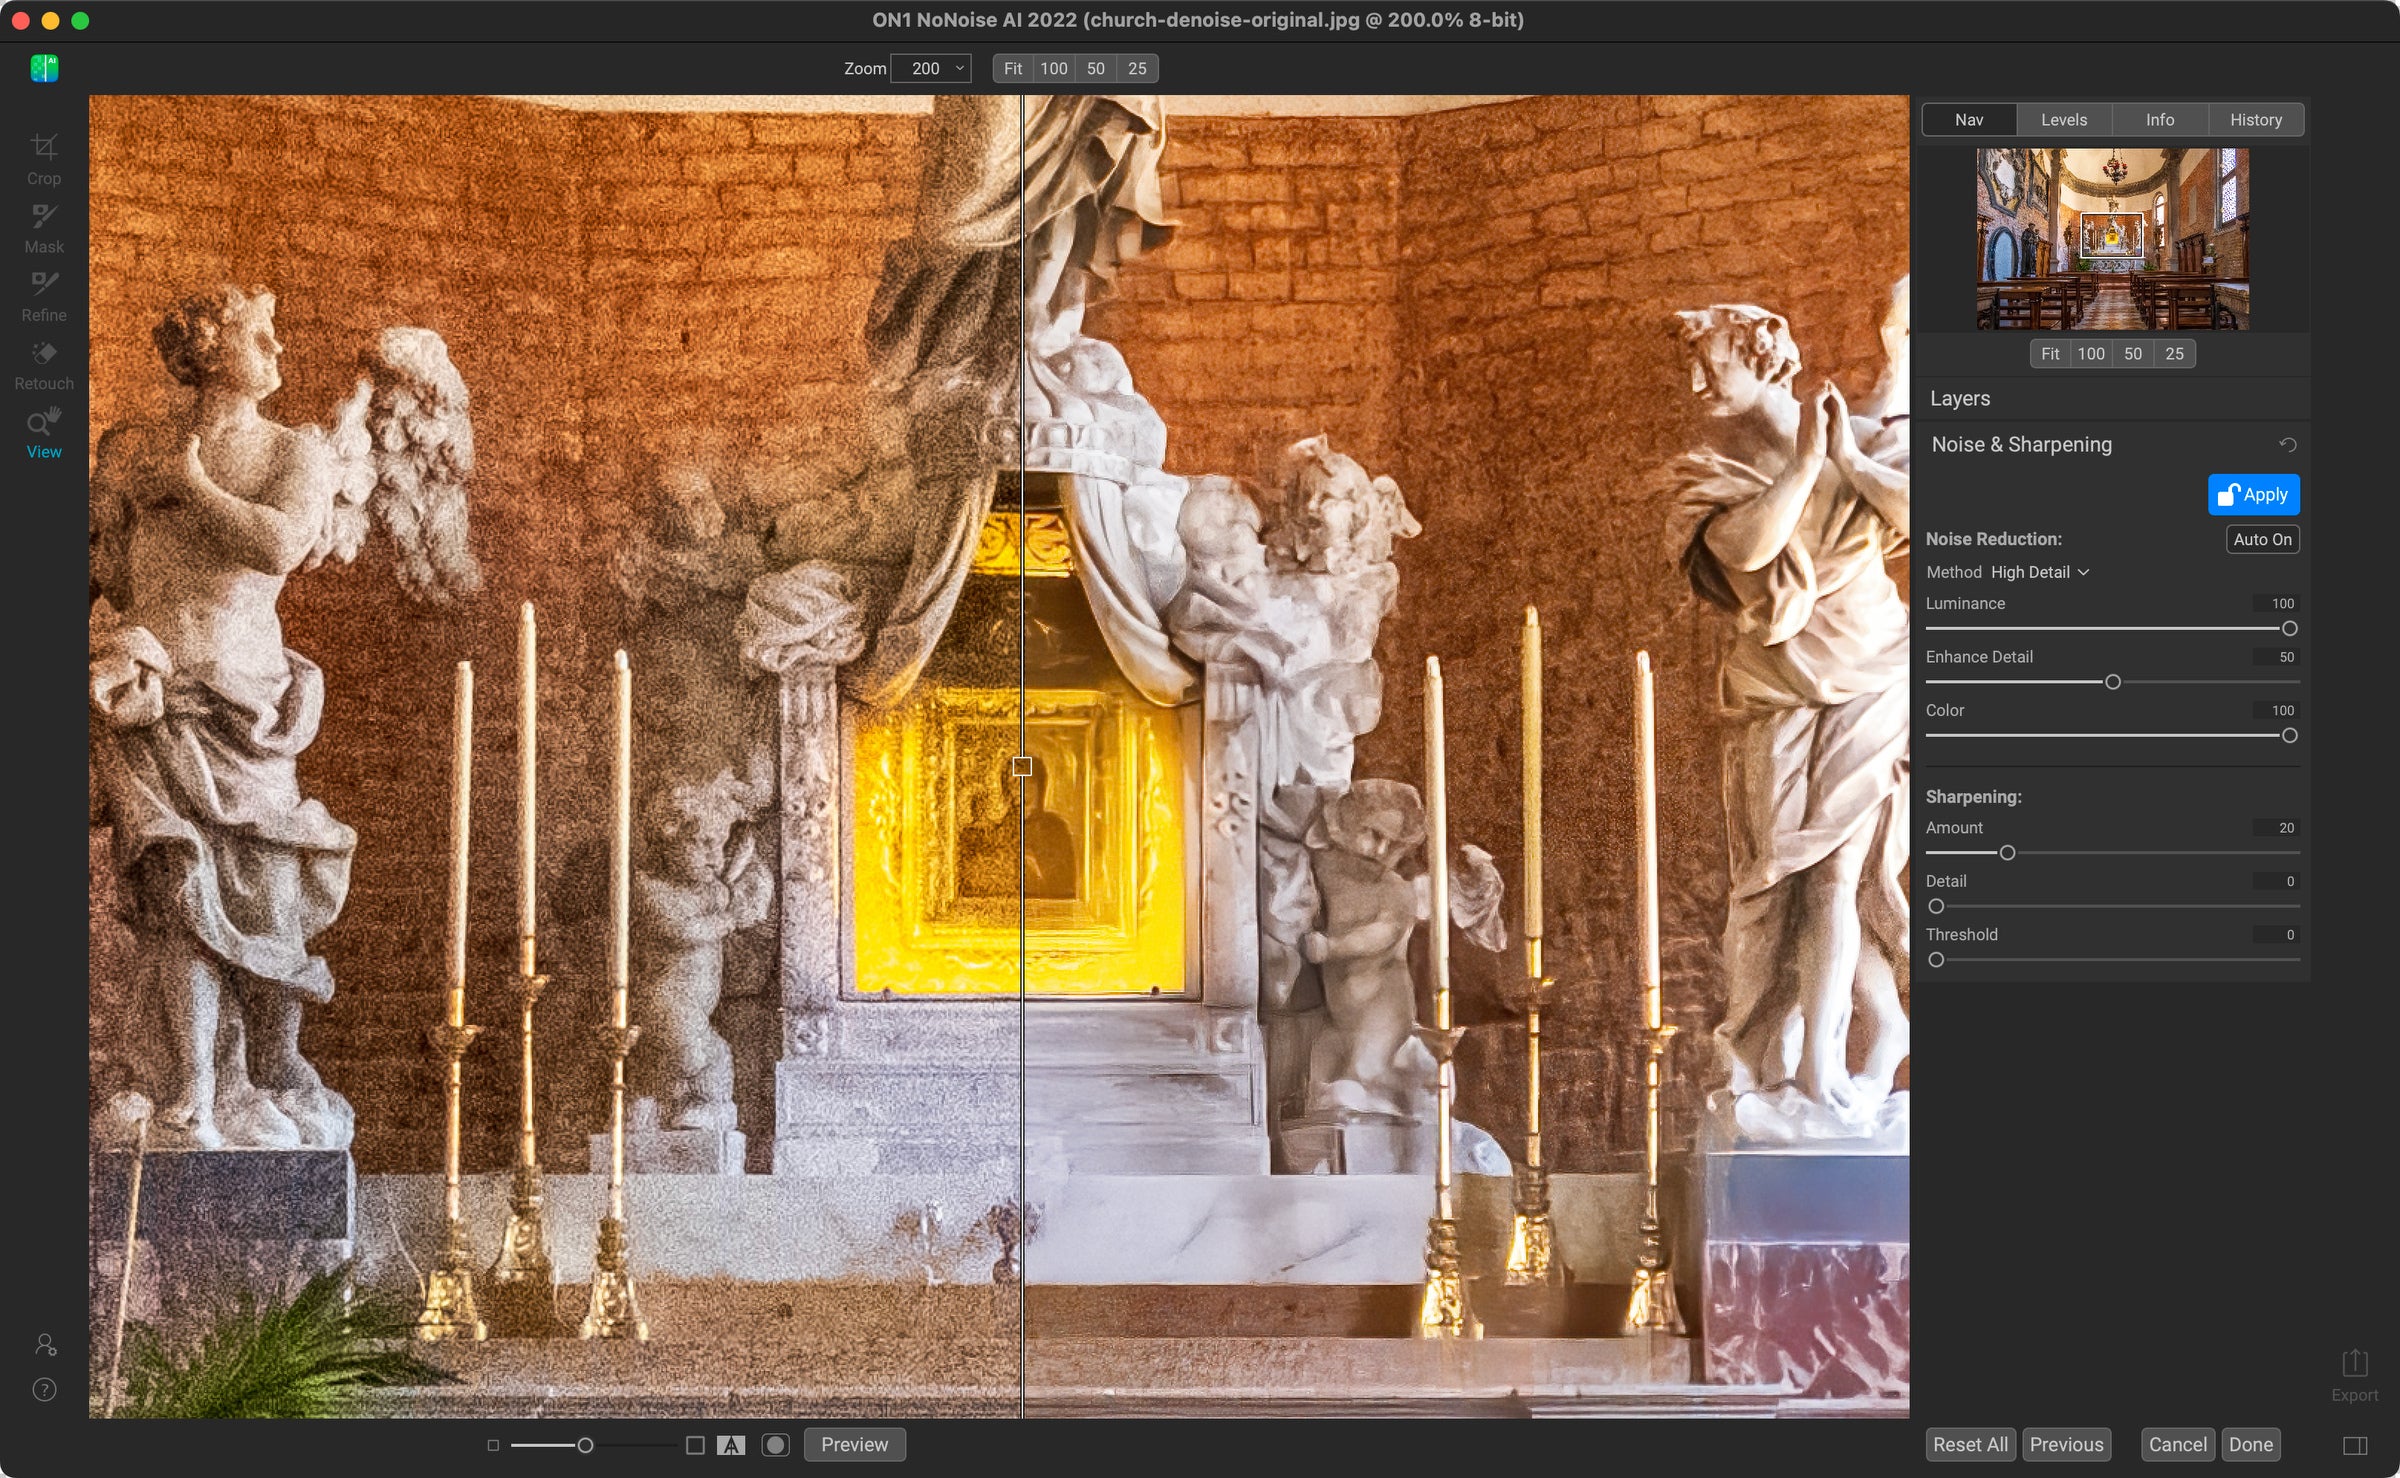
A look at the detail in the center of the photo also shows how much noise reduction is applied. This is also at 200%, so the statues appear almost plastic in this view. At 100% you can see the noise reduction and the statues look better.
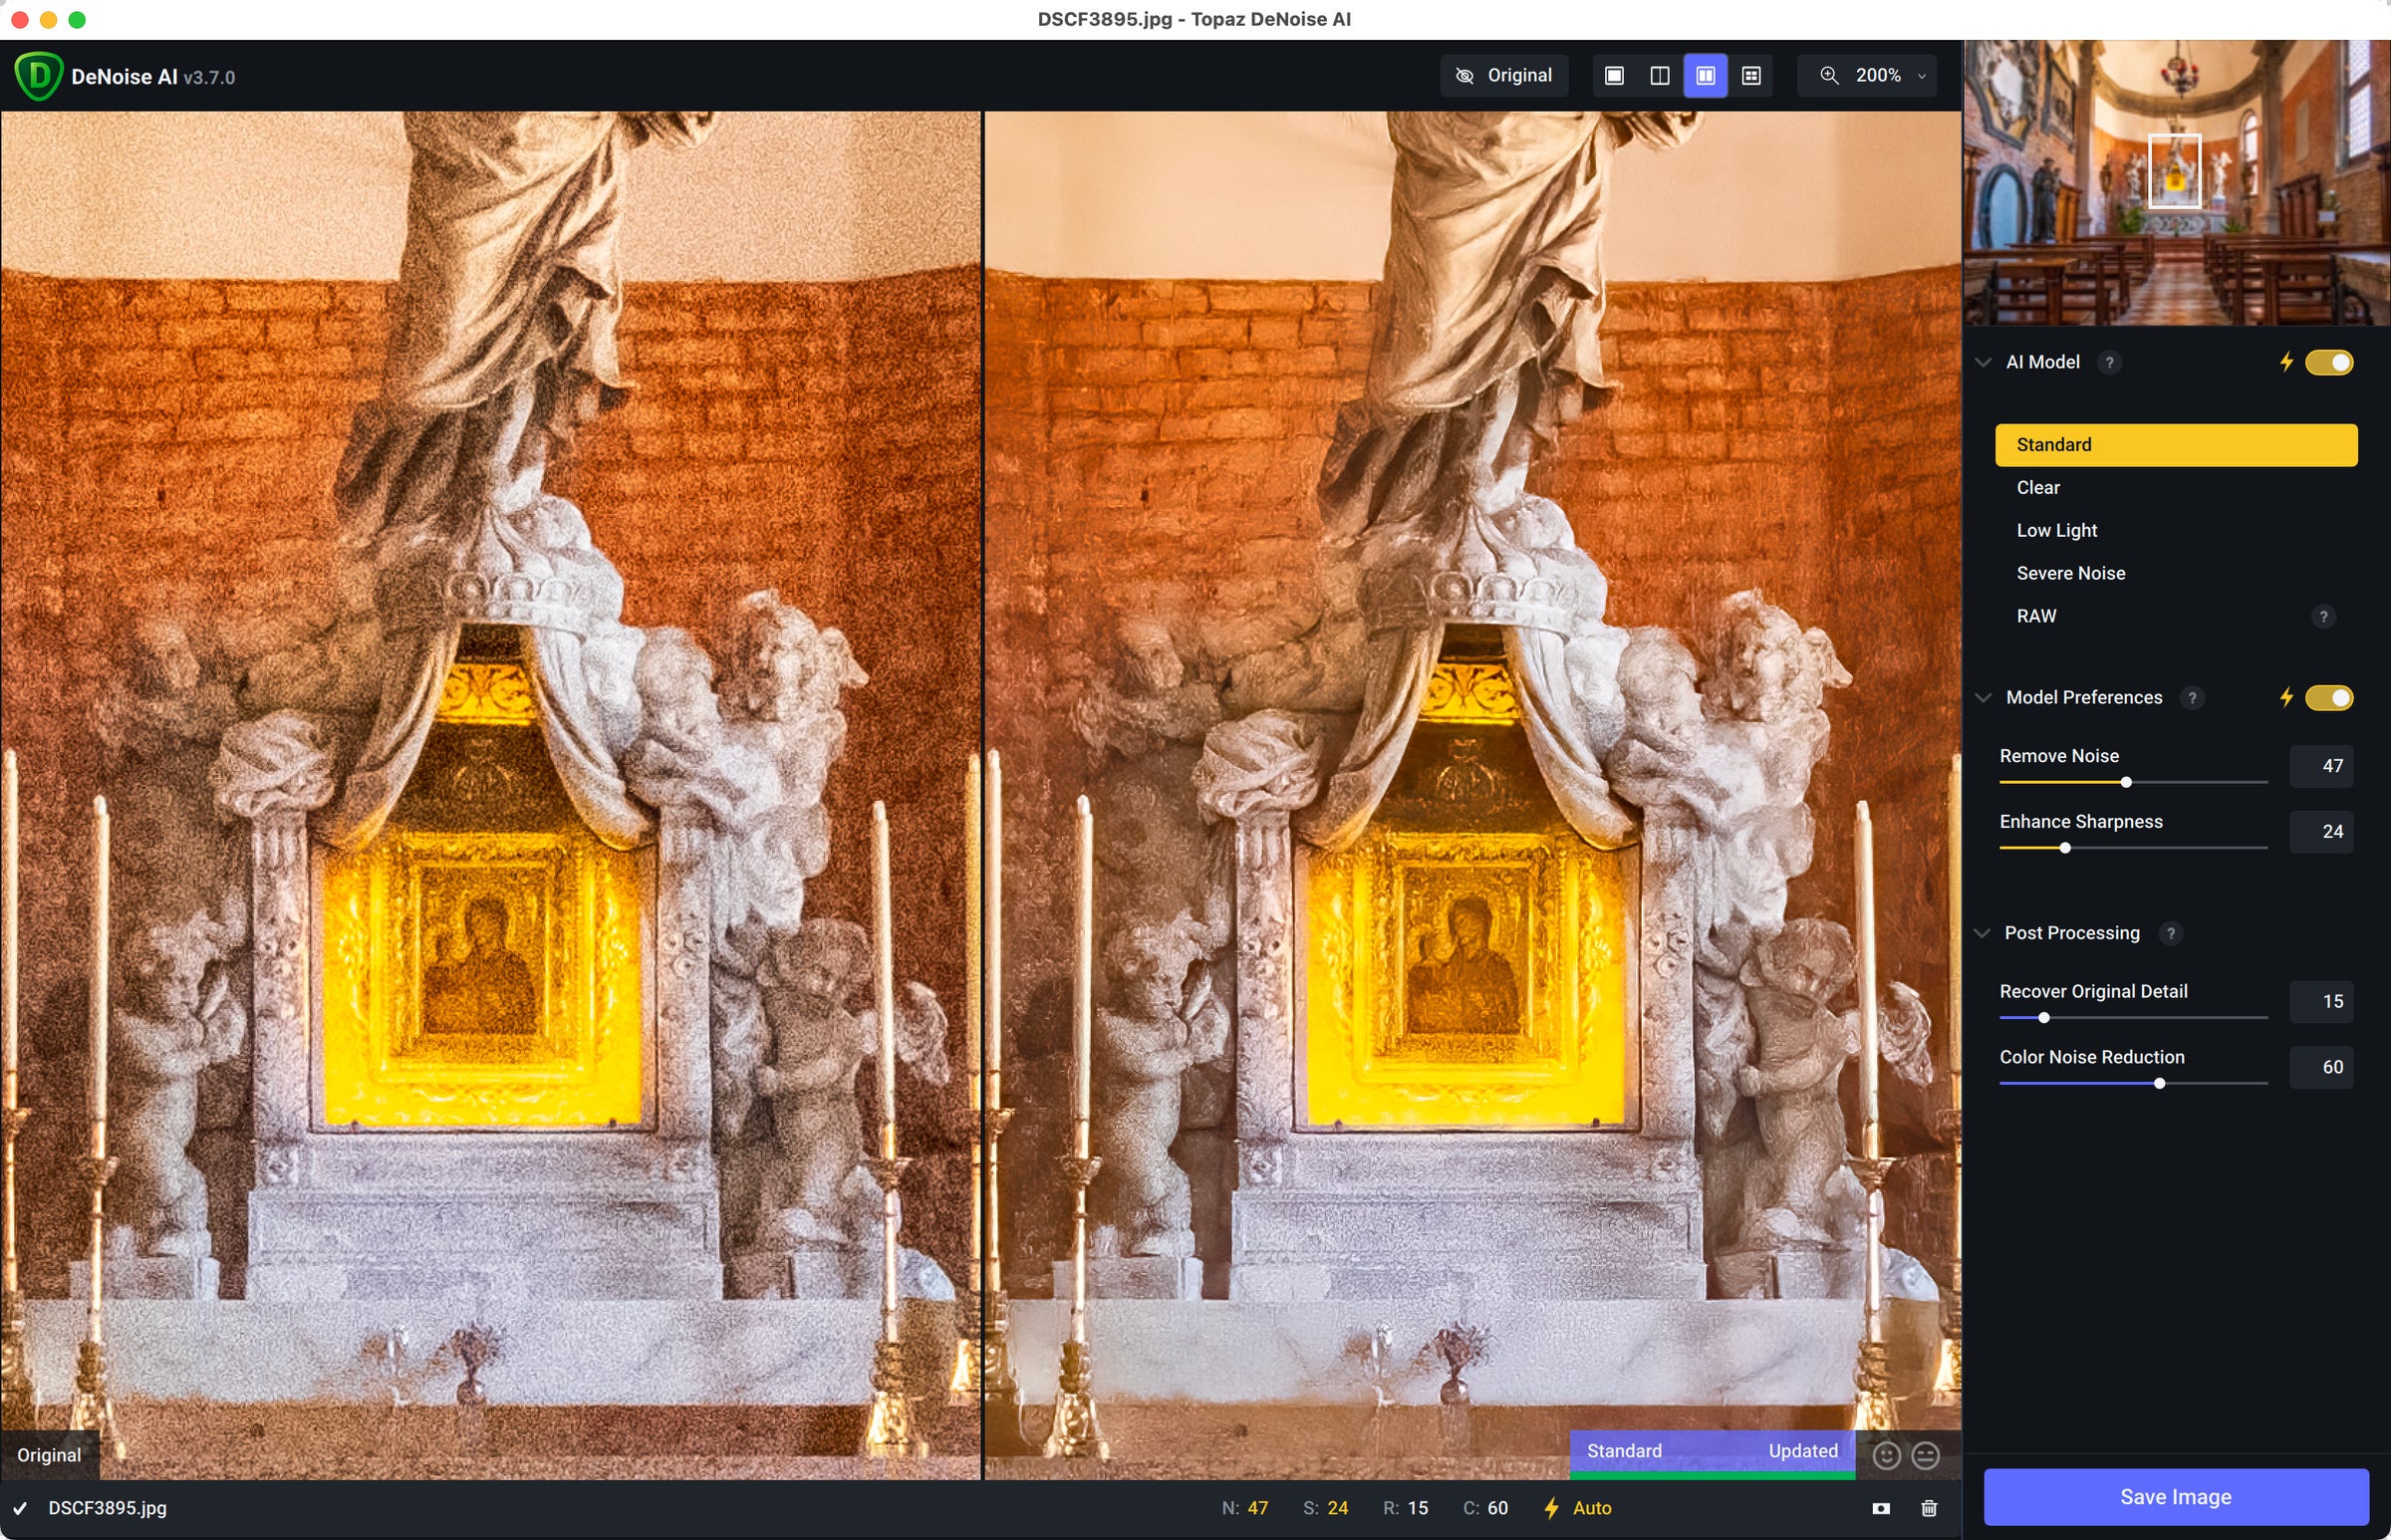
Topaz DeNoise AI
When I run the same photo through Topaz DeNoise AI, you can see that the software appears to be using object detection to adjust the denoising correction in separate areas – not so successfully in this case. The cream wall in the background smooths out nicely as if it was shot at a low ISO, but the marble in the front is still noisy.
bring the noise
As always, your mileage will depend on the image, the amount of noise, and other factors. I’m not here to pit these two apps against each other (you can do that yourself – both offer free trials that you can test on your own images).
What I want to convey are two things. First, the AI makes significant improvements to the handling of noise reduction. And because AI models are constantly fed with new data, they improve over time.
But more importantly, dealing with image noise isn’t the hurdle it used to be. A noisy image does not automatically go to the trash. When you know you can easily eliminate noise in software, think about what’s possible when you’re behind the camera. So try to capture a dark scene at a very high ISO where you may have put the camera away before.
And don’t be like me and forget to reset the ISO after shooting at high values the night before. Even though the software can help you fix the noise.