
How to Record Screen on iPhone or iPad: A Complete Guide
Taking screenshots is a great way to capture and share what’s on your screen. However, screen recording goes one step further and allows you to record and share your on-screen activities, which is much better than sending multiple screenshots. The good news is that all smartphones have a built-in function for this. Here’s how to take screen captures on iPhone or iPad.
Well, there is more than just the capture screen on iPhone. You can edit the clip, add sound and share it on other social media apps. In our experience, the iPhone has far more sophisticated screen recording capabilities than any other device. So, let’s start looking for the screen recording option.
How to add a screen recording to iPhone Control Center
Here’s how you can add the screen recording button to Control Center to quickly enable recording with a single swipe.
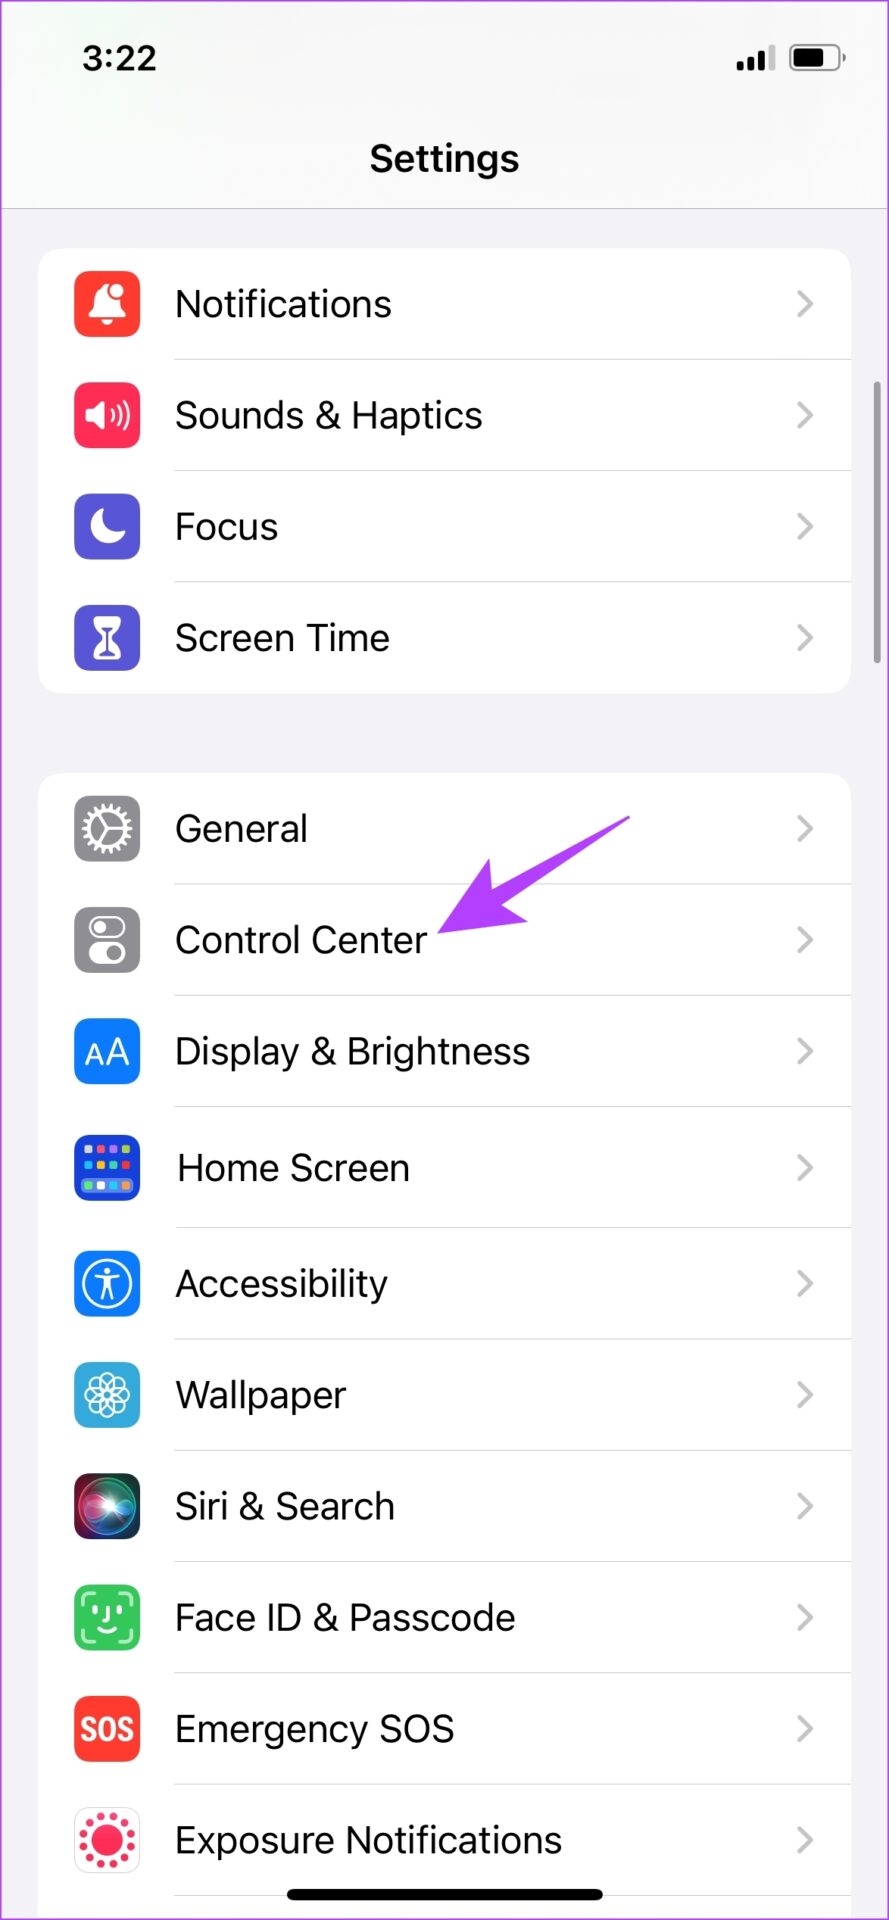
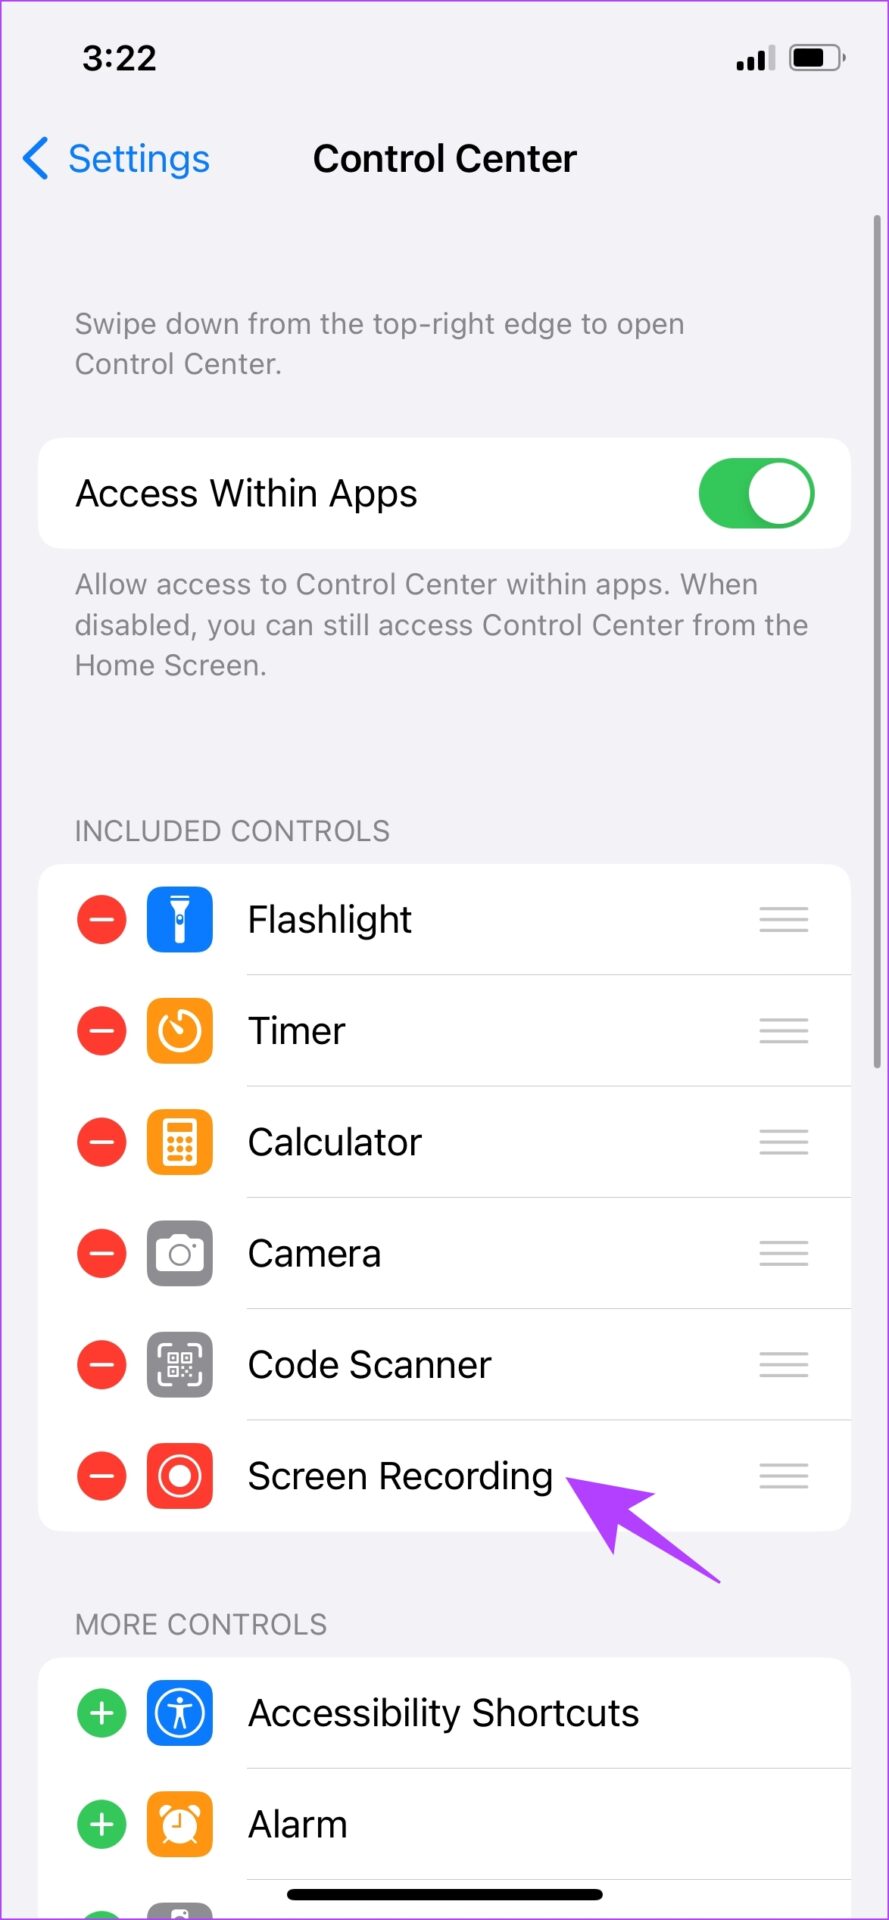
Step 1: Open the Settings app and open Control Center.
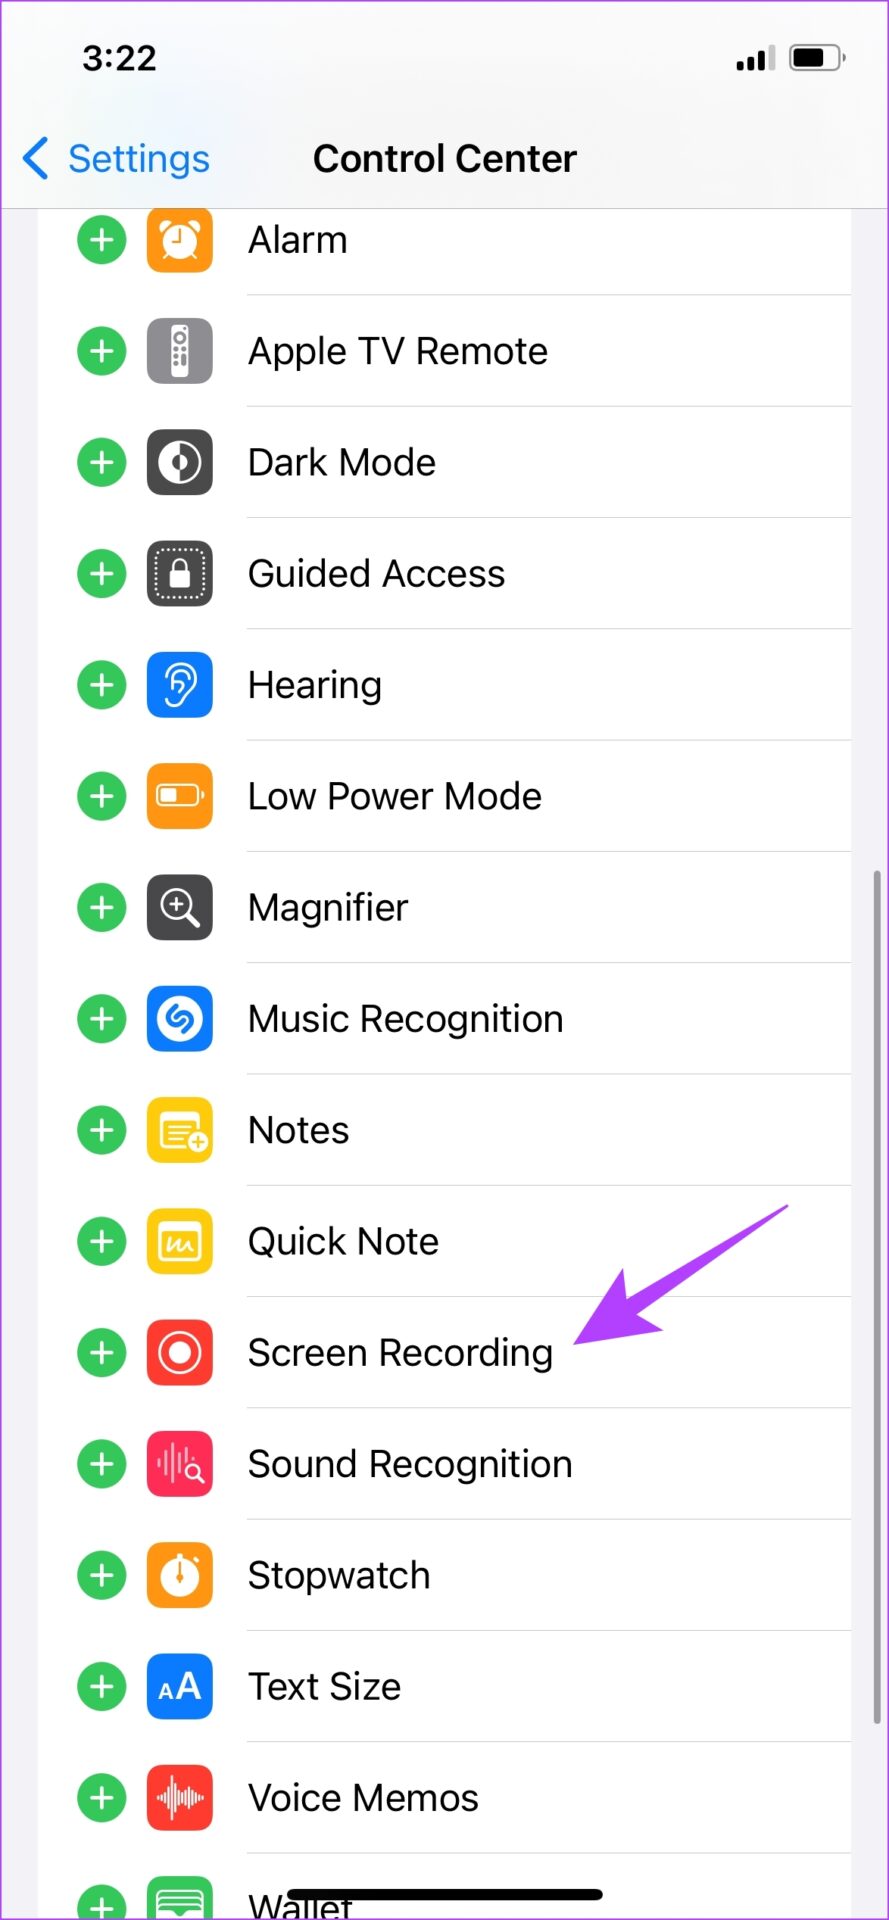
Step 2: Scroll down to find the Screen Recording option and select the “+” icon next to it.
You can now see that the screen recording has been added to the included controls.
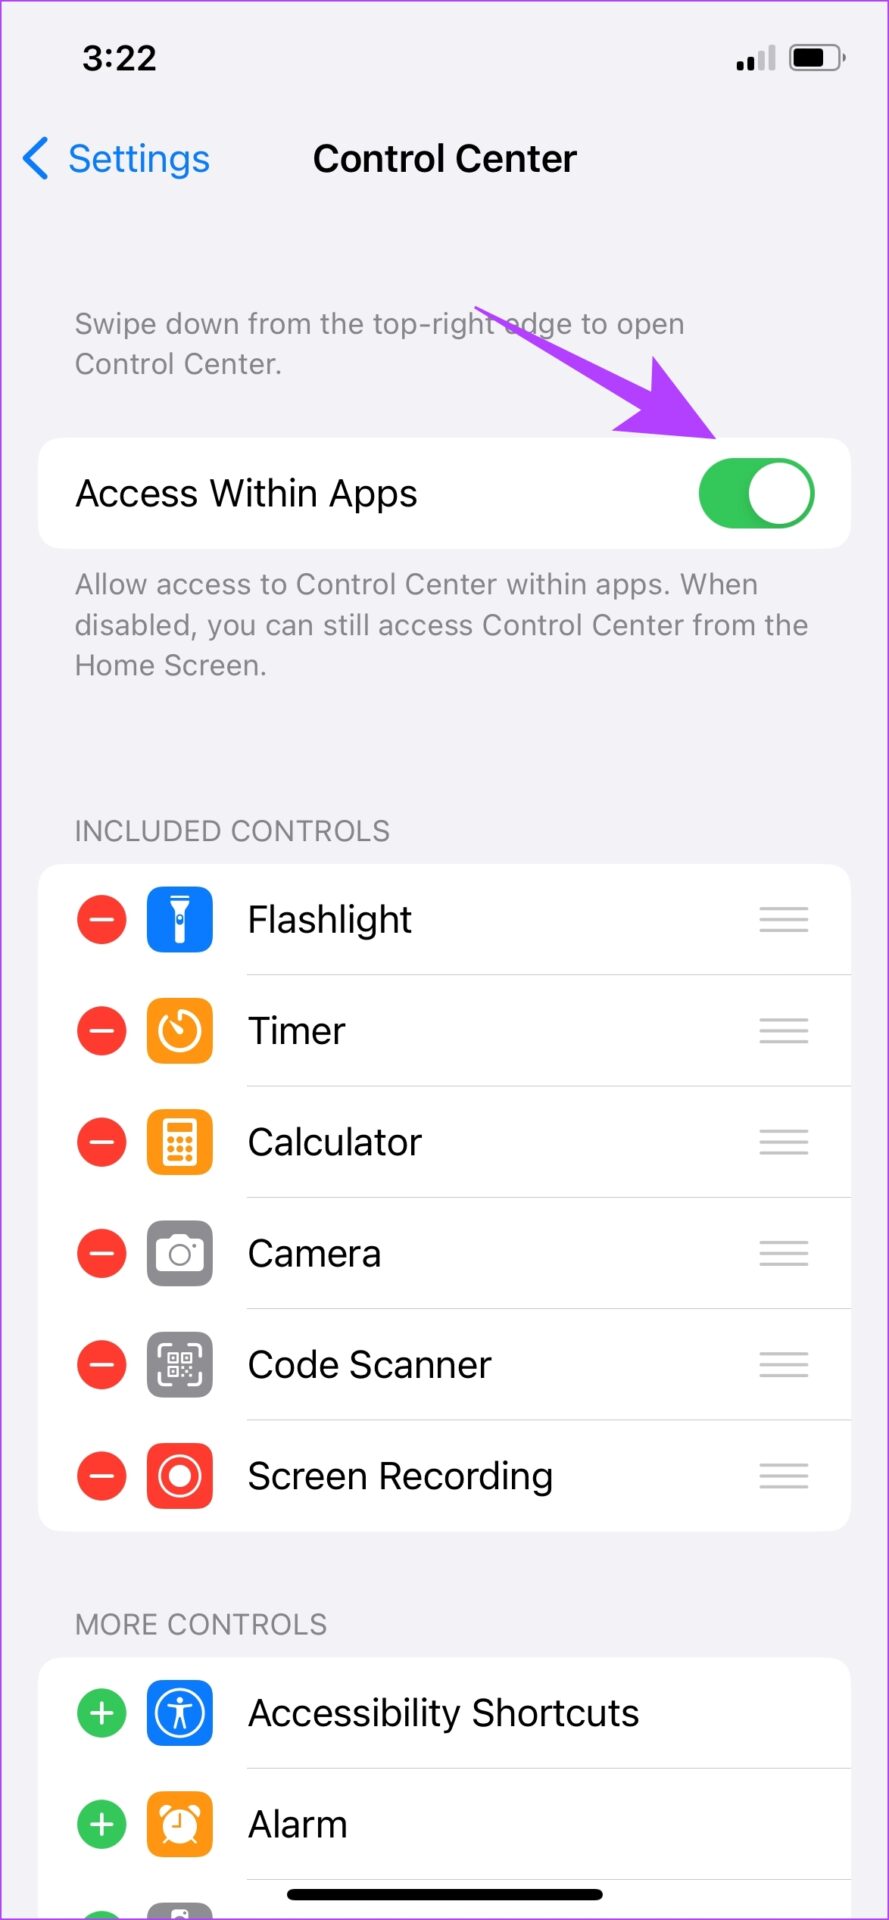
Step 3: On the same screen, turn on Access in apps to ensure you can access Control Center in apps too.
That’s it. You have now added the screen recording button in the control center. Now let’s understand how to use this option to record screen on iPhone or iPad.
How to record screen on iPhone or iPad
Here’s a quick way to start, stop, and save a screen recording on your iPhone or iPad.
Launch capture screen on iPhone
Step 1: Here’s how you can access your iPhone’s control center to start recording.
- iPhones with Face ID: Swipe down from the top-right corner of your screen to open Control Center.
- iPhones with Touch ID: Swipe up from the bottom of the screen to open Control Center.
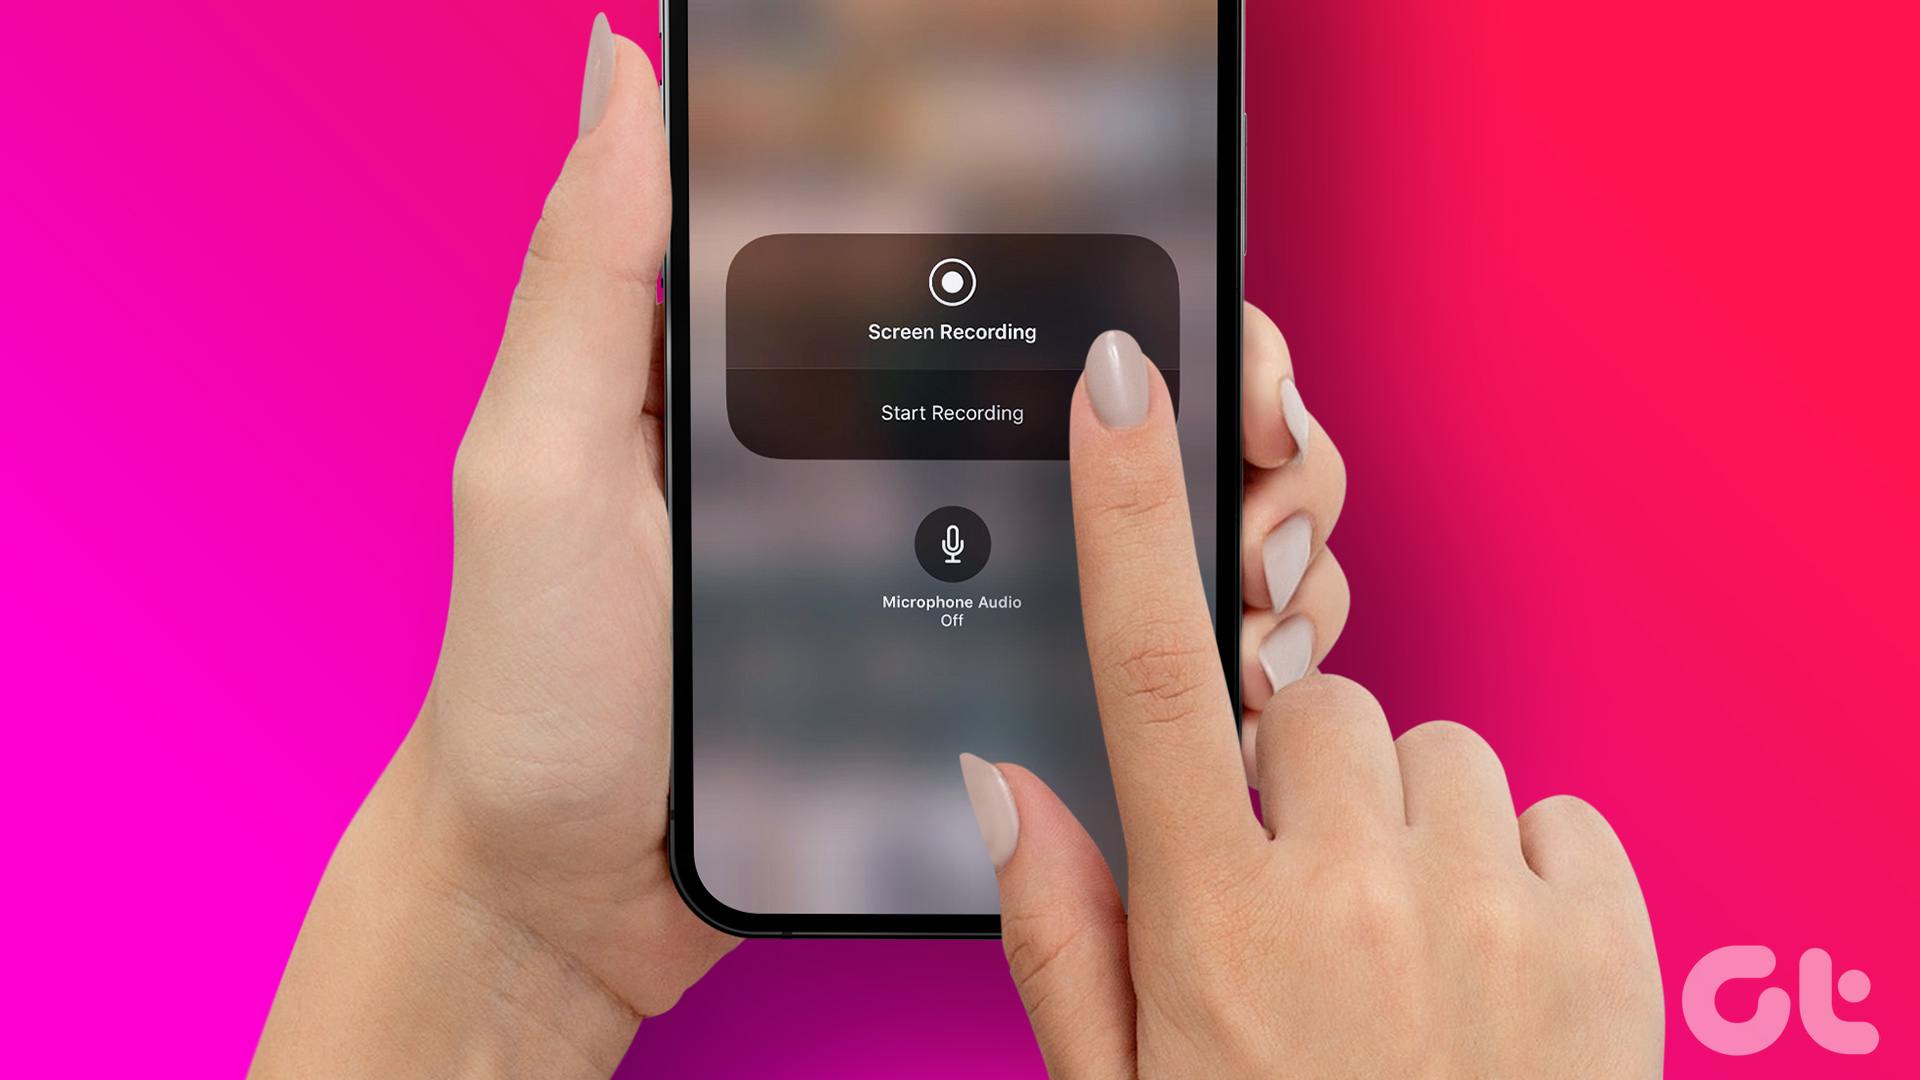
Step 2: Now tap on the screen recording option.
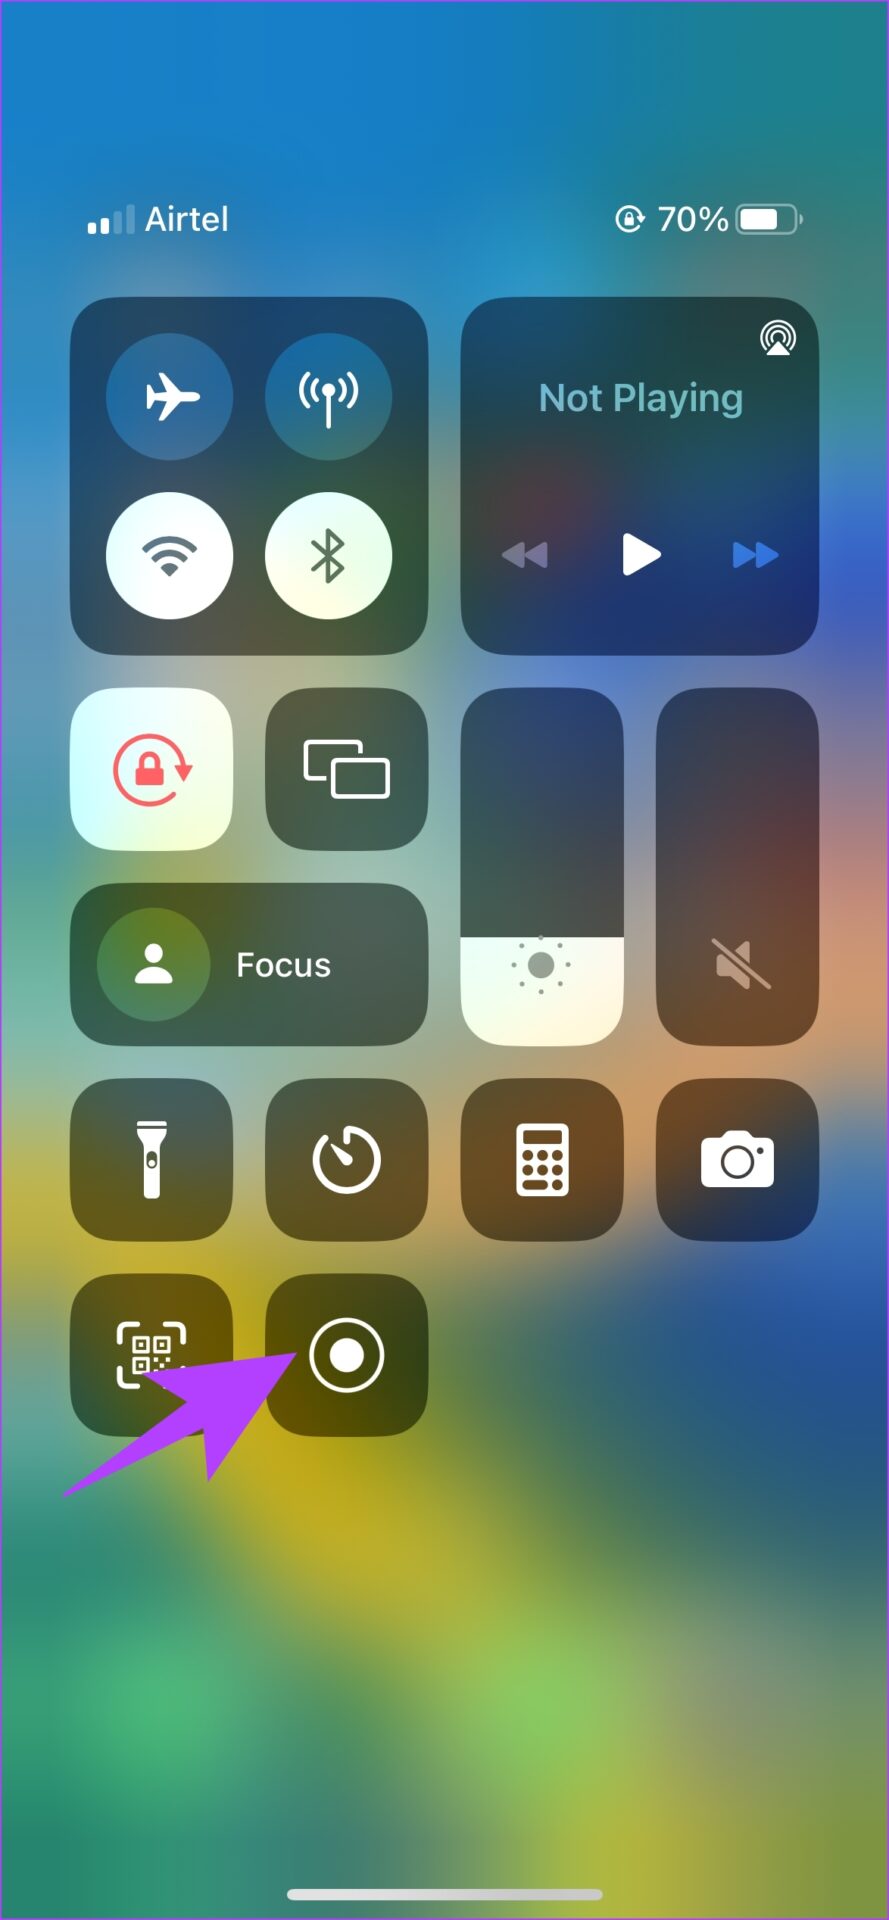
This starts a recording. Now, to stop the recording and save it for further use, continue to the next section.
Stop Screen Recording on iPhone
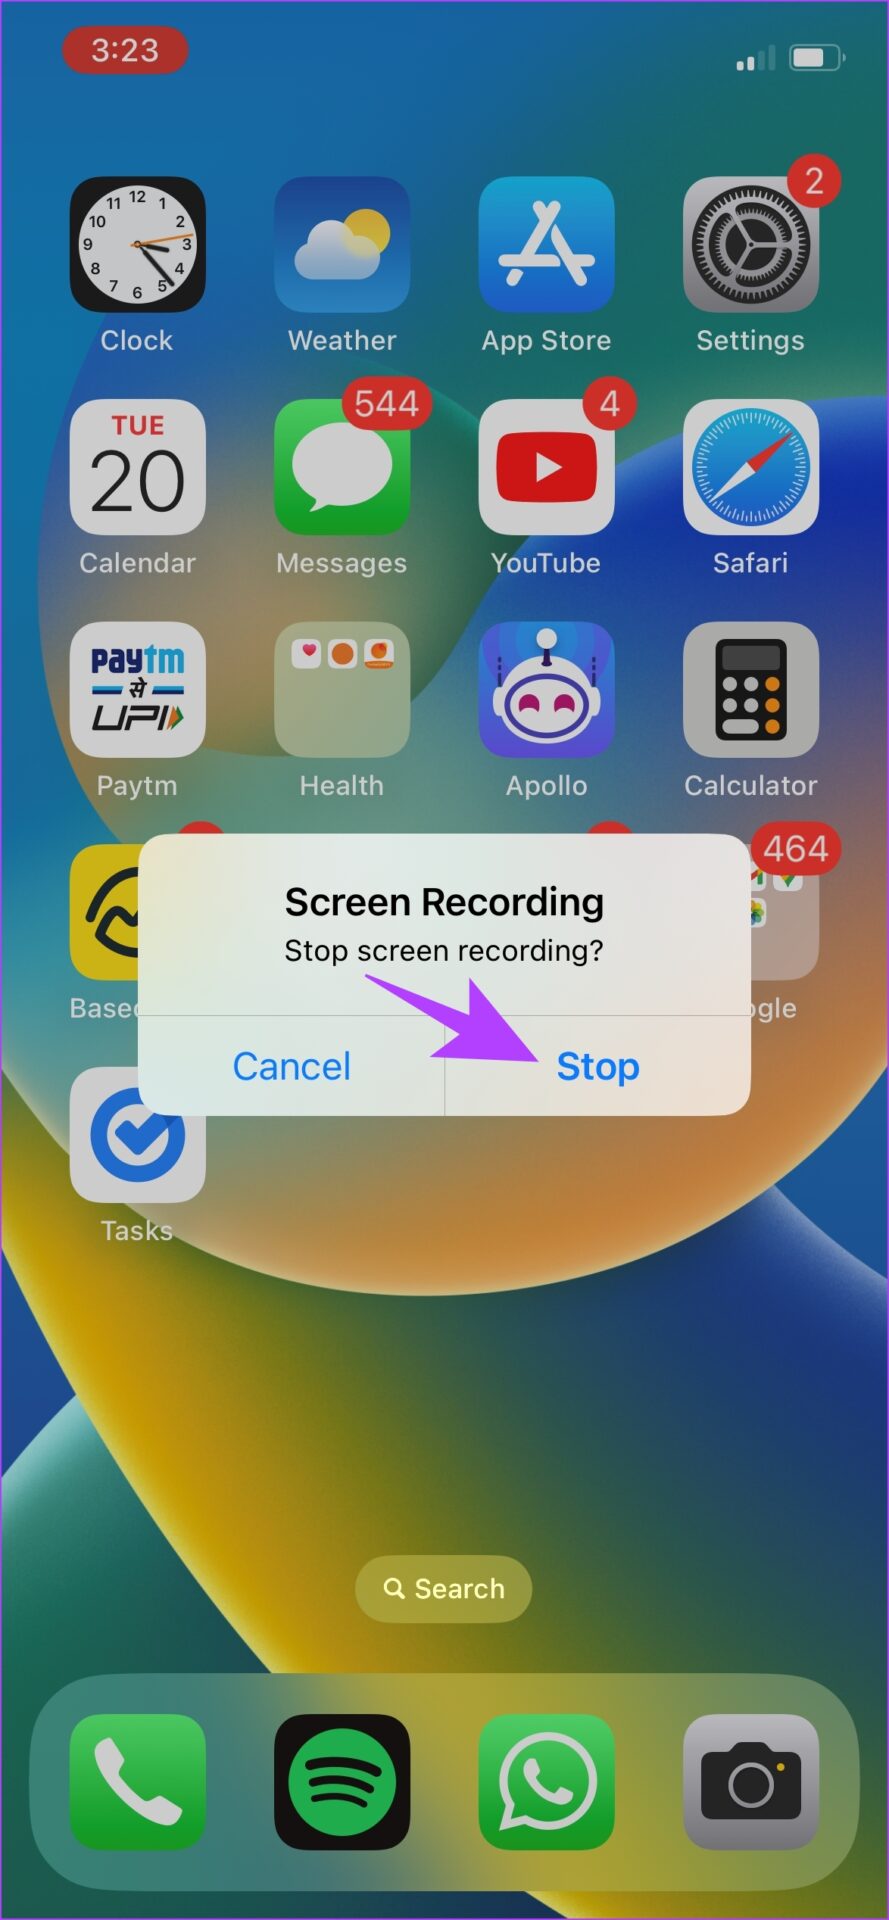
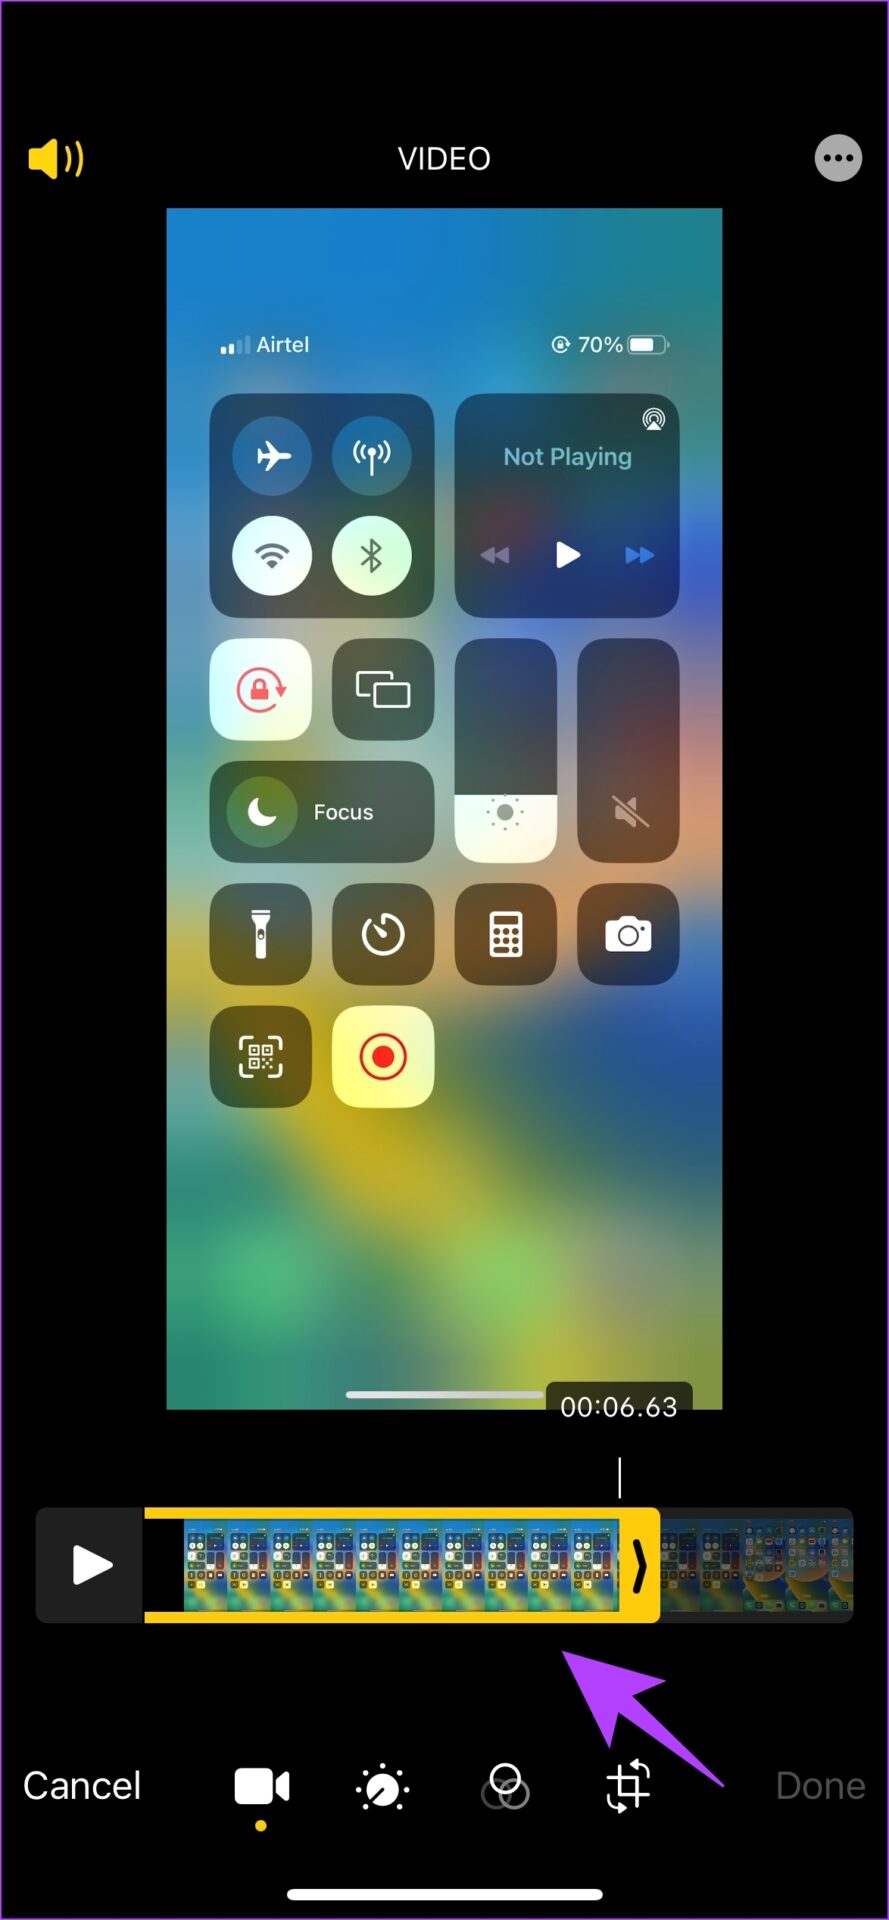
Step 1: Now tap on the red highlighted clock on your status bar.
Step 2: Tap Stop to end the screen recording.
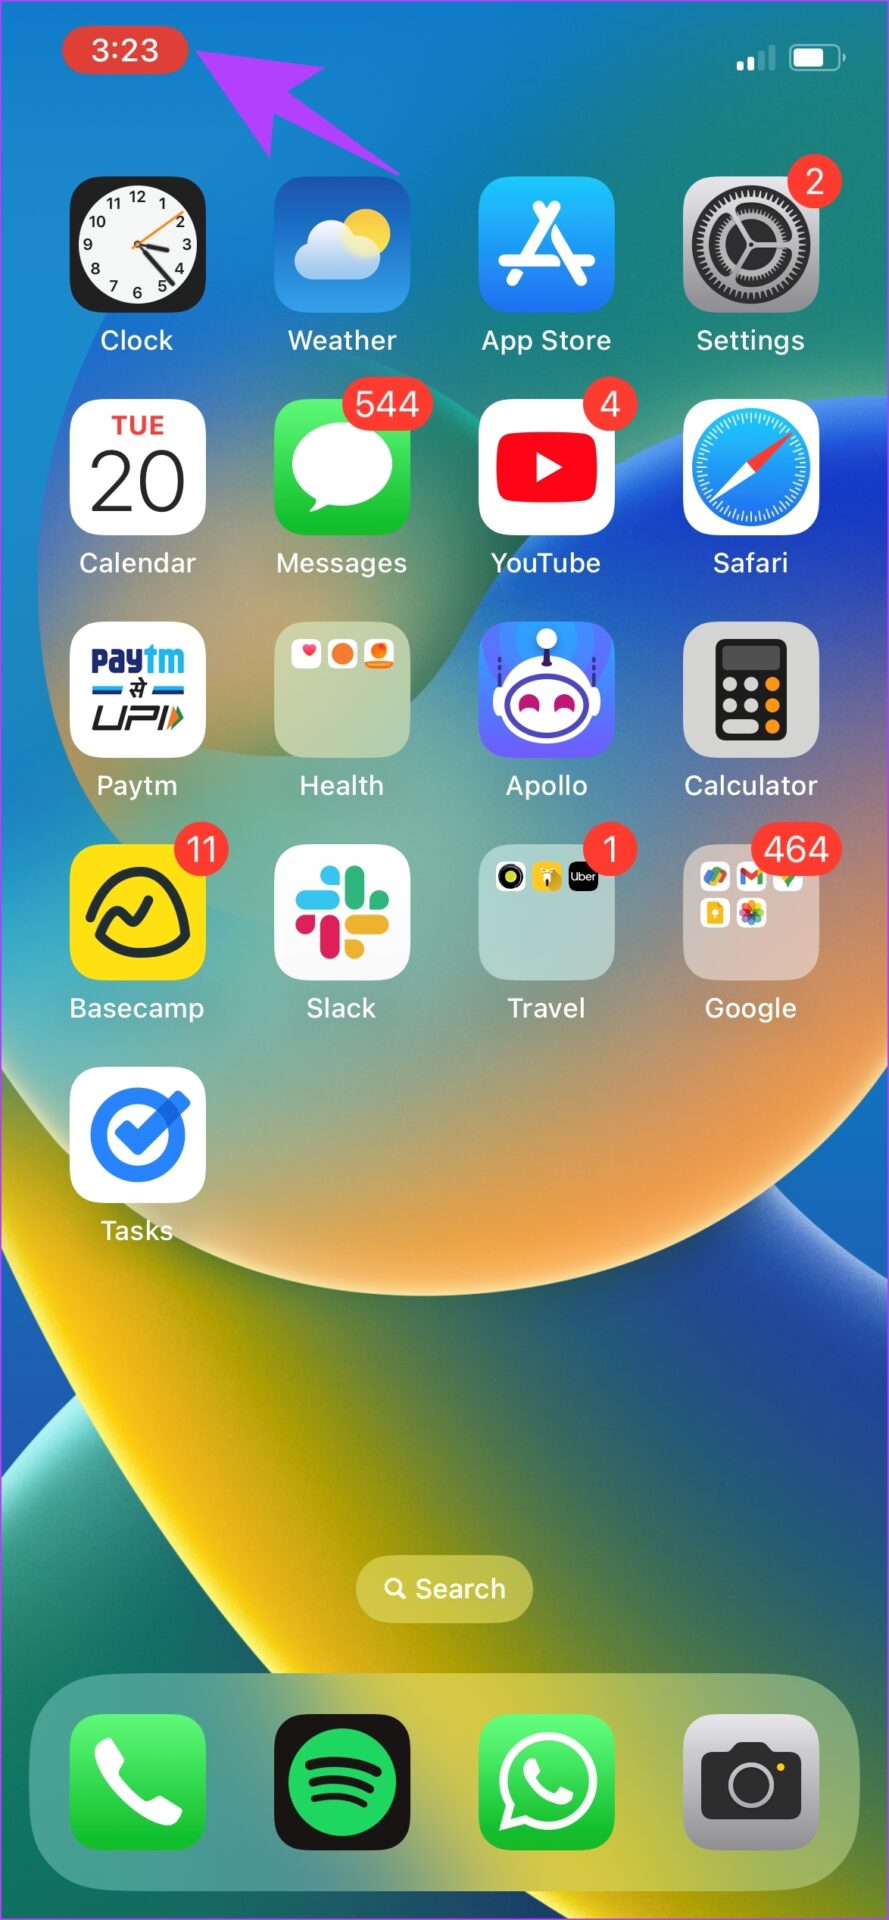
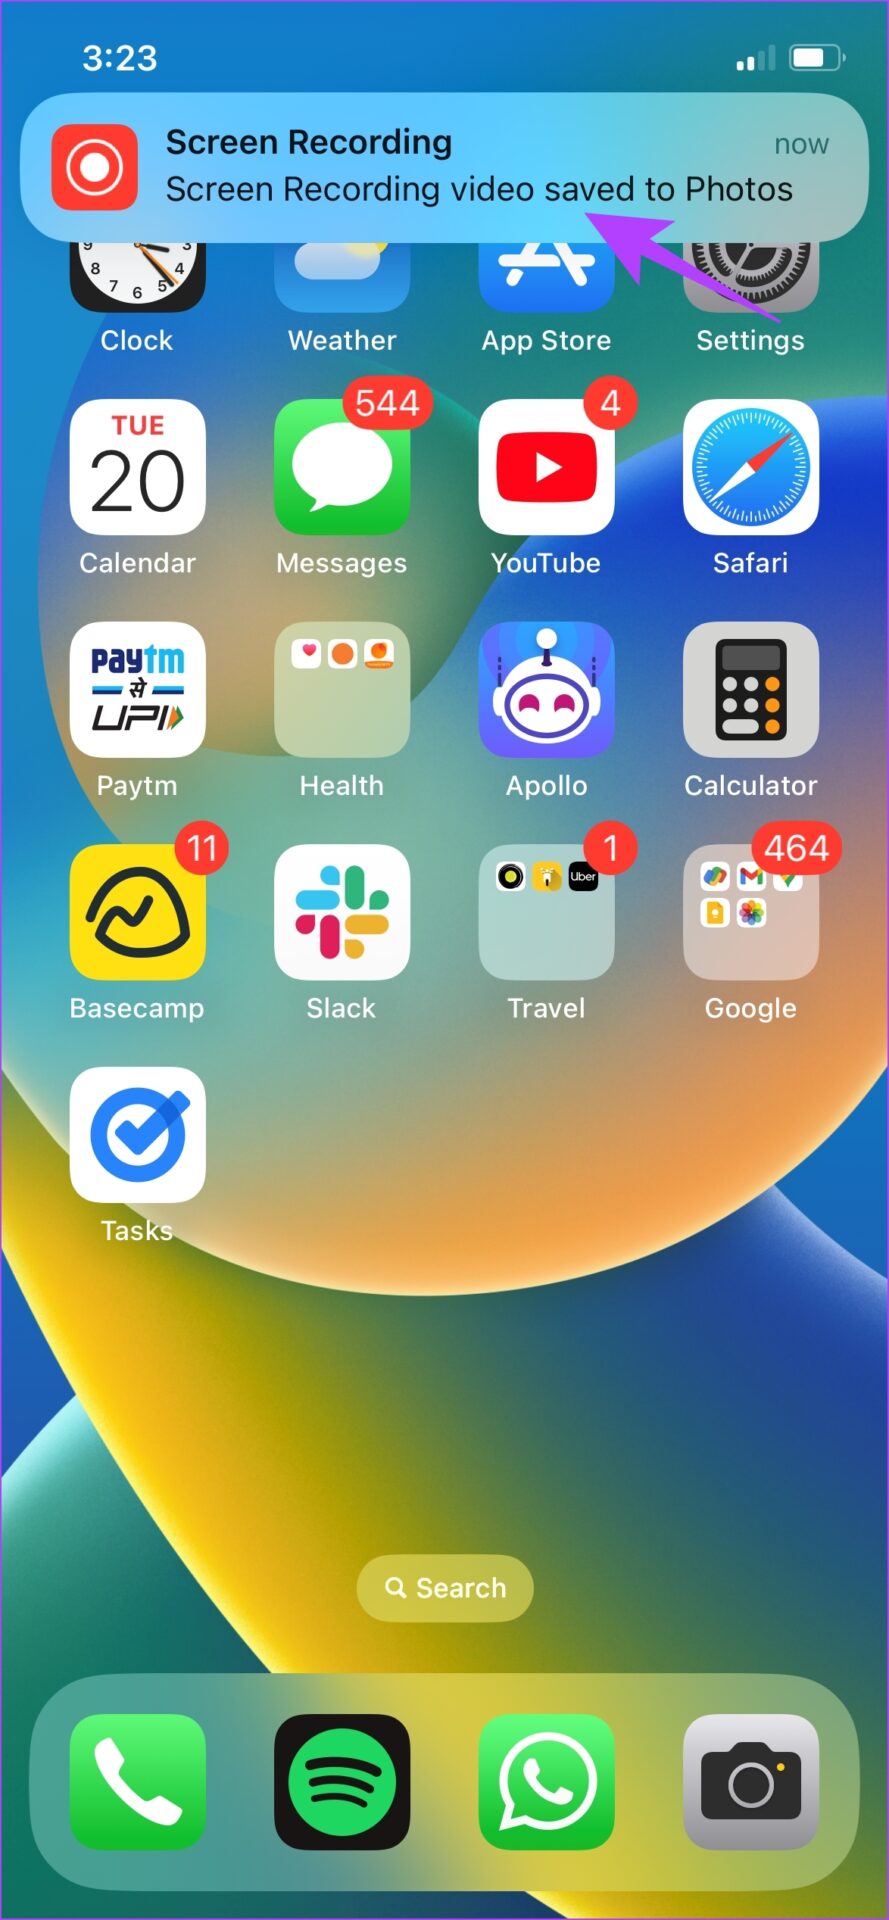
Step 2: Once you stop recording, it will be automatically saved to Photos. You will also get an advance warning for this.
Once the screen capture is saved to your gallery, you can turn the clip’s sound on and off. Let’s explore how to do it with the step-by-step guide below.
How to Enable Sound in Recorded Screen on iPhone
Whenever you record the screen on iPhone or iPad, the sound behind it is automatically captured as well. However, when you play the recording in the Photos app, you may not hear any sound. That’s because you need to enable audio in the editing area of the recording. Here’s how to do it.
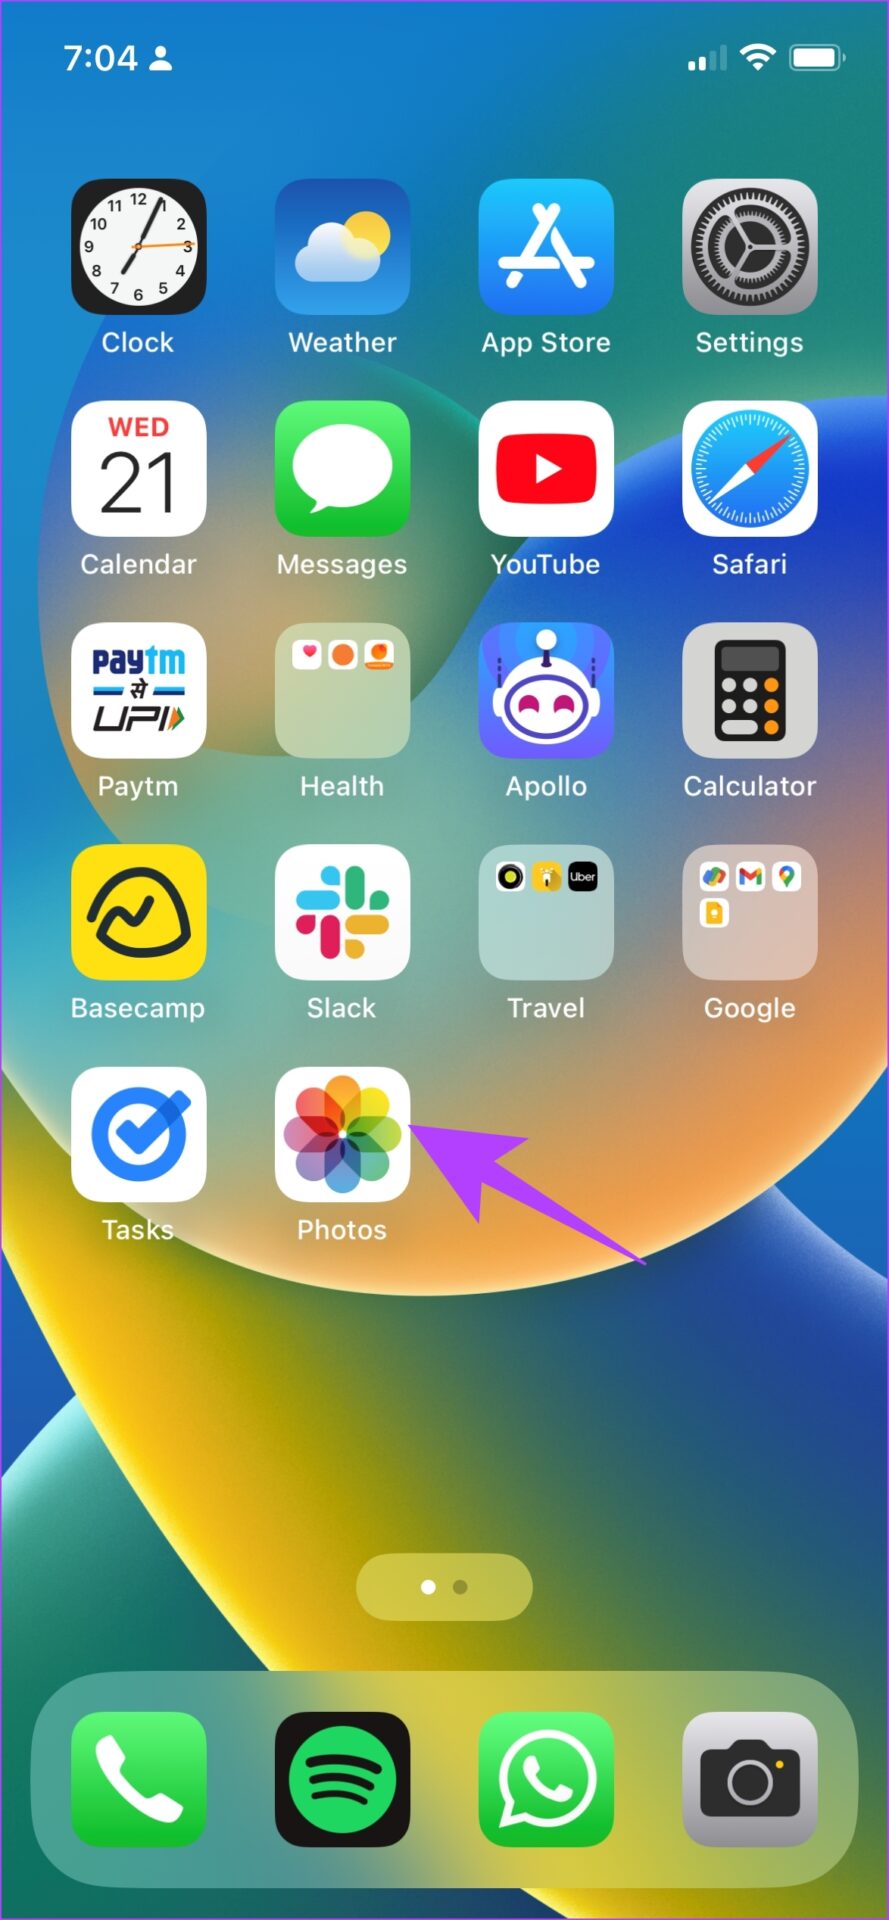
Step 1: Open the Photos app.
Step 2: Open the recording you want audio for and tap Edit in the top right.
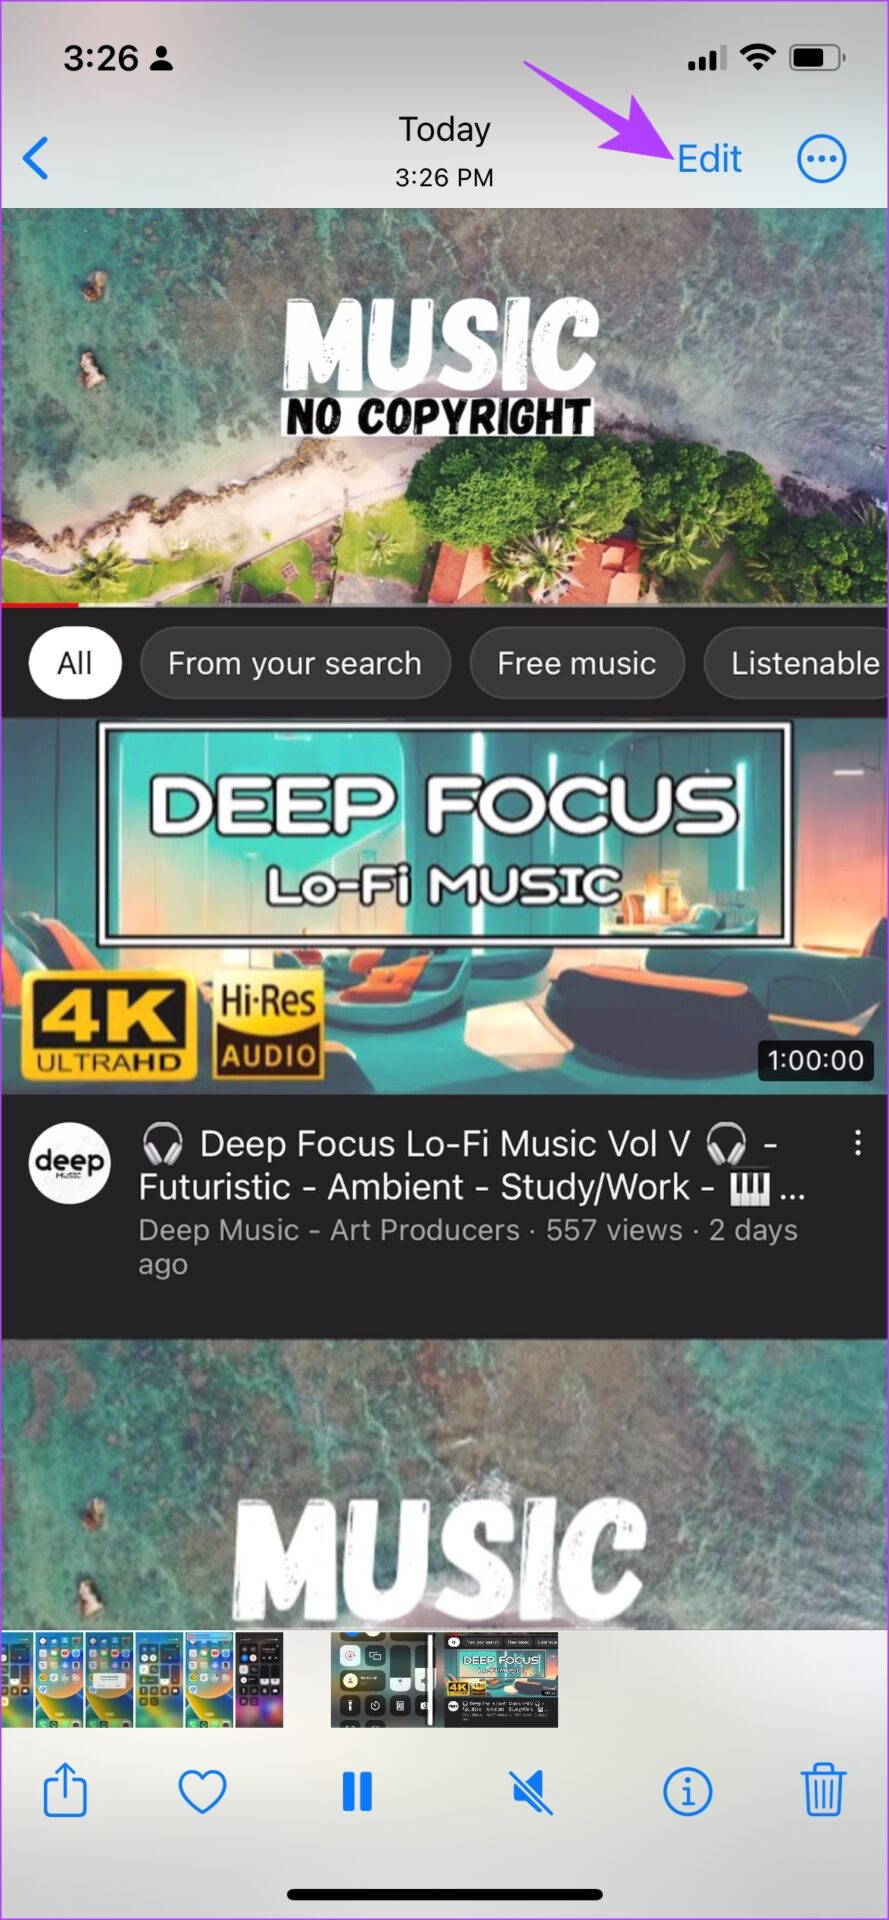
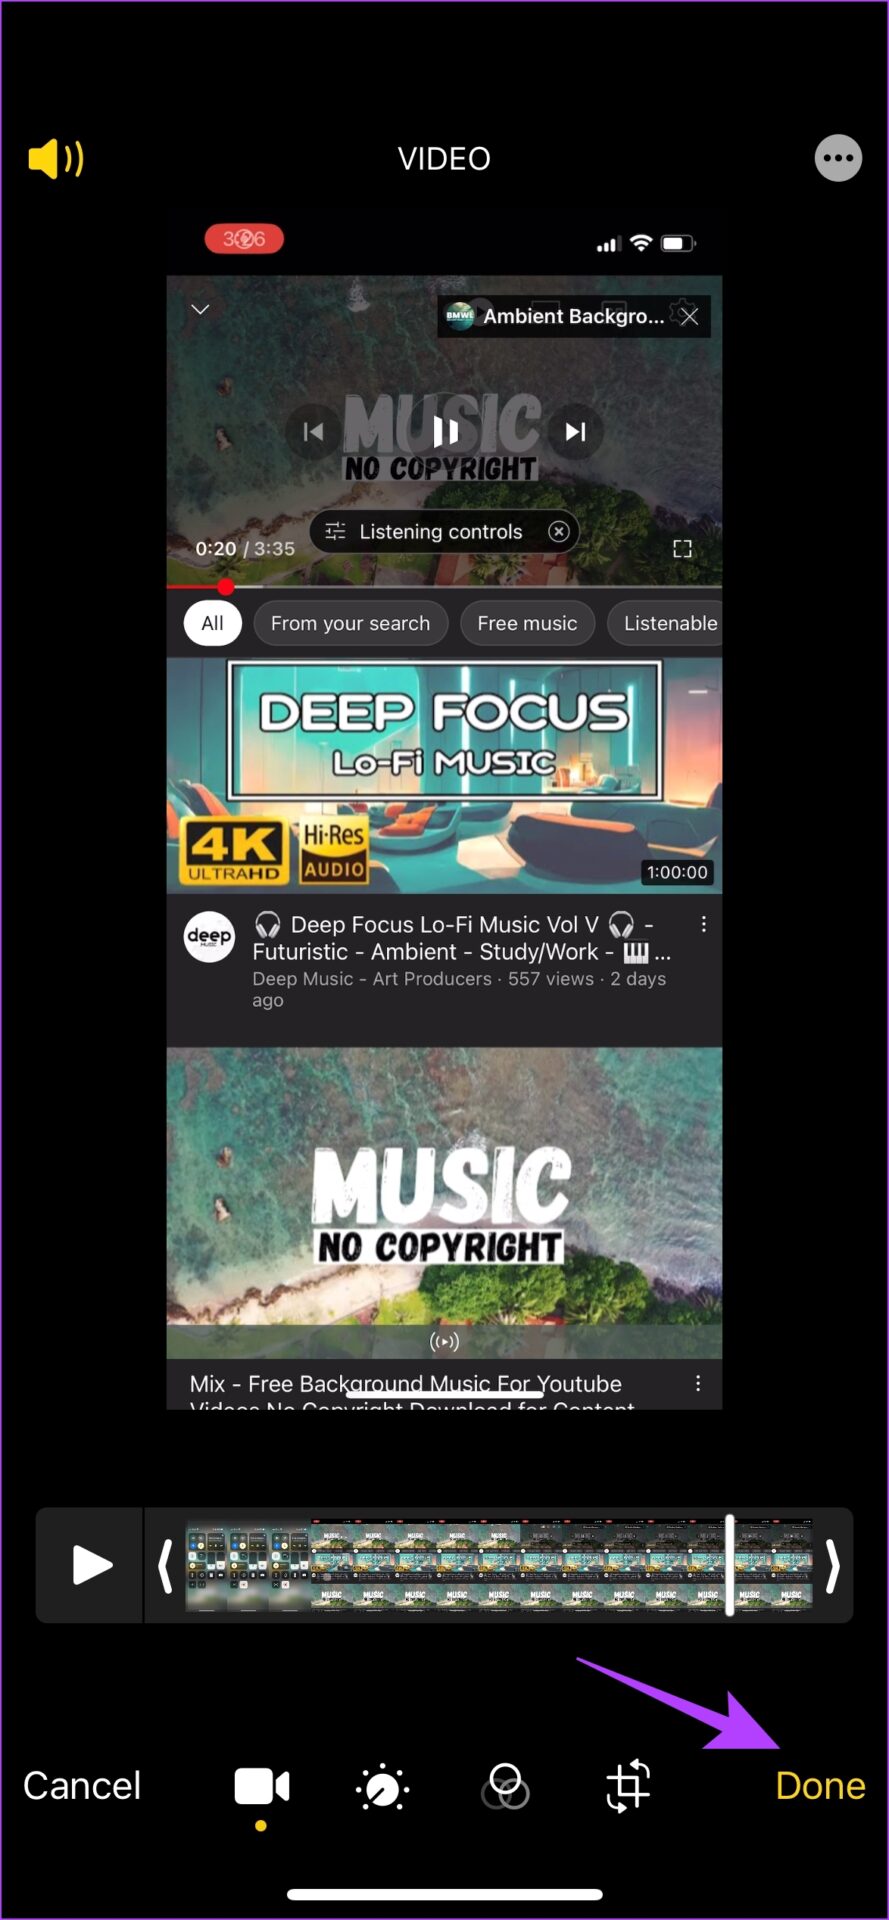
Step 3: In the editing window, tap the volume icon to turn on the sound. Tap Done.
How to record screen on iPhone with external sound
By default, the screen recording feature captures the audio played on your screen but not the external audio. If you want to record external audio, here’s what you need to do.
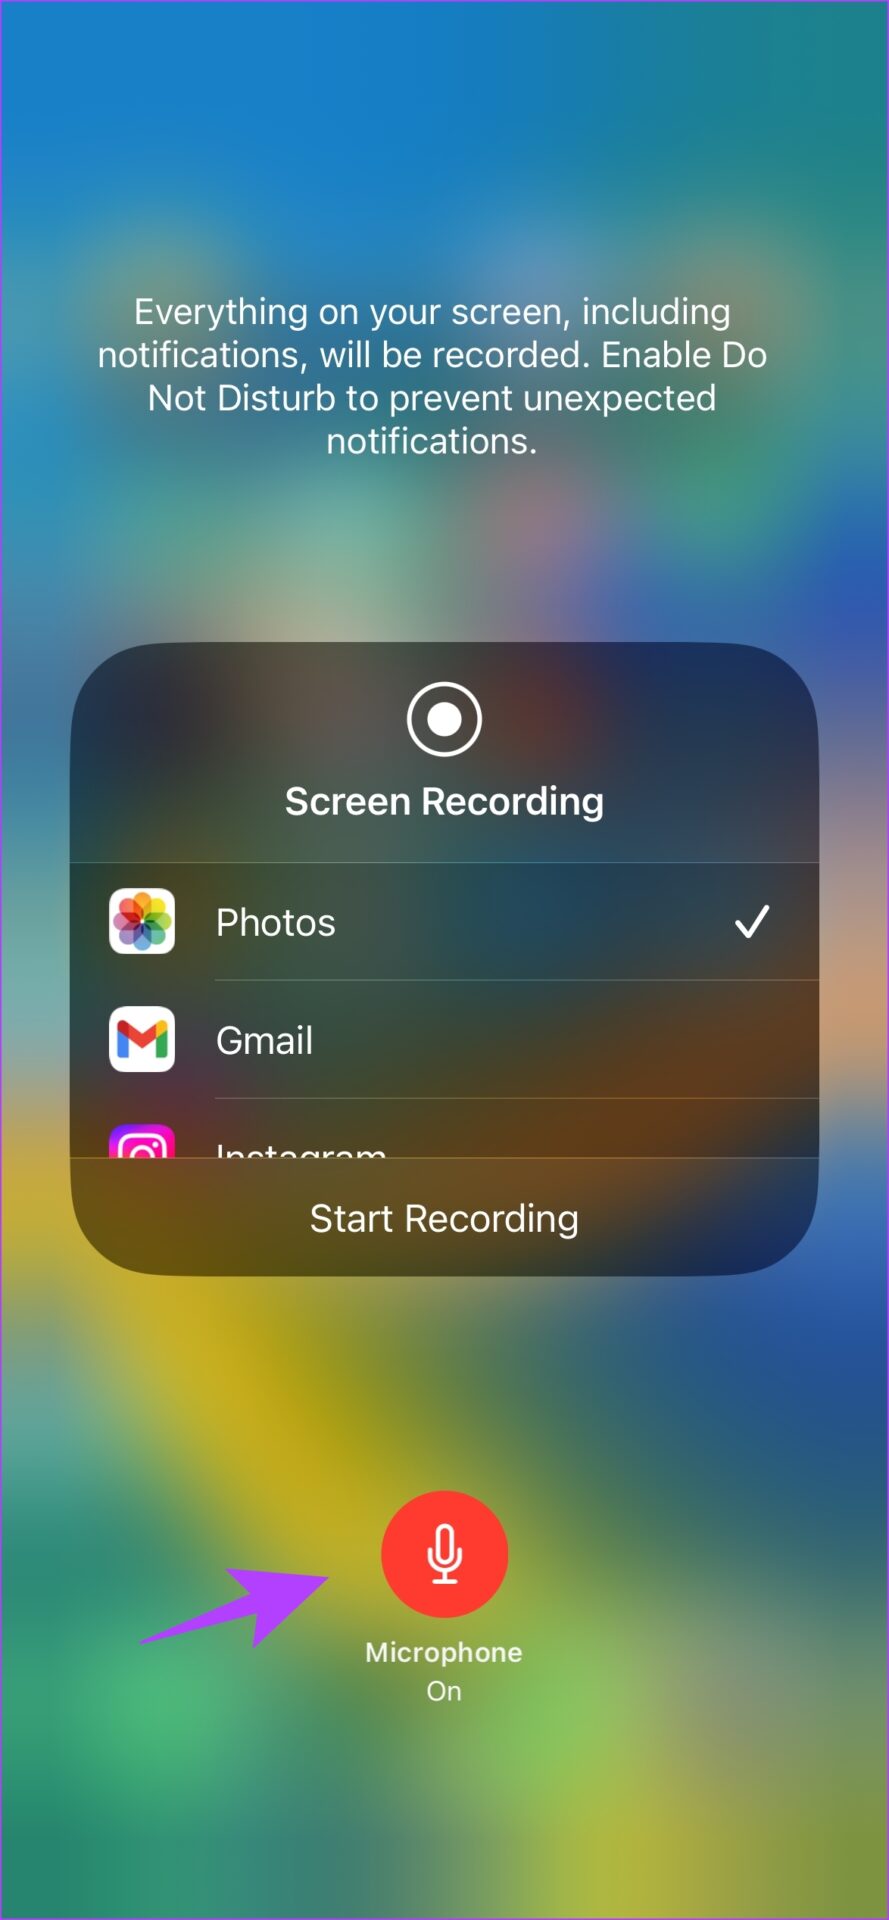
Step 1: Long press the screen recording icon in Control Center.
Step 2: Tap on the microphone icon.
Once it turns red, it can record external audio. To listen to the recorded audio in your clip, you can open Photos and repeat the same steps mentioned earlier.
That’s all you need to do to record with sound on iPhone or iPad. Now that you’ve looked at the Edit menu, you’re probably wondering what the other options are supposed to do. Let’s explore how we can further edit our recording.
How to edit screen recording on iPhone
First, let’s look at what each of the options in the edit panel can do. Just go to the Photos app, tap on your screen capture and click on the edit option at the top right to see all the options below.
Trim recording: You can use the Trim recording option in the edit panel to trim your recording if you feel part of it is unnecessary.
Filter: You can also add filters to your screen recording and give it a different color scheme. You get numerous filters in the Photos app.

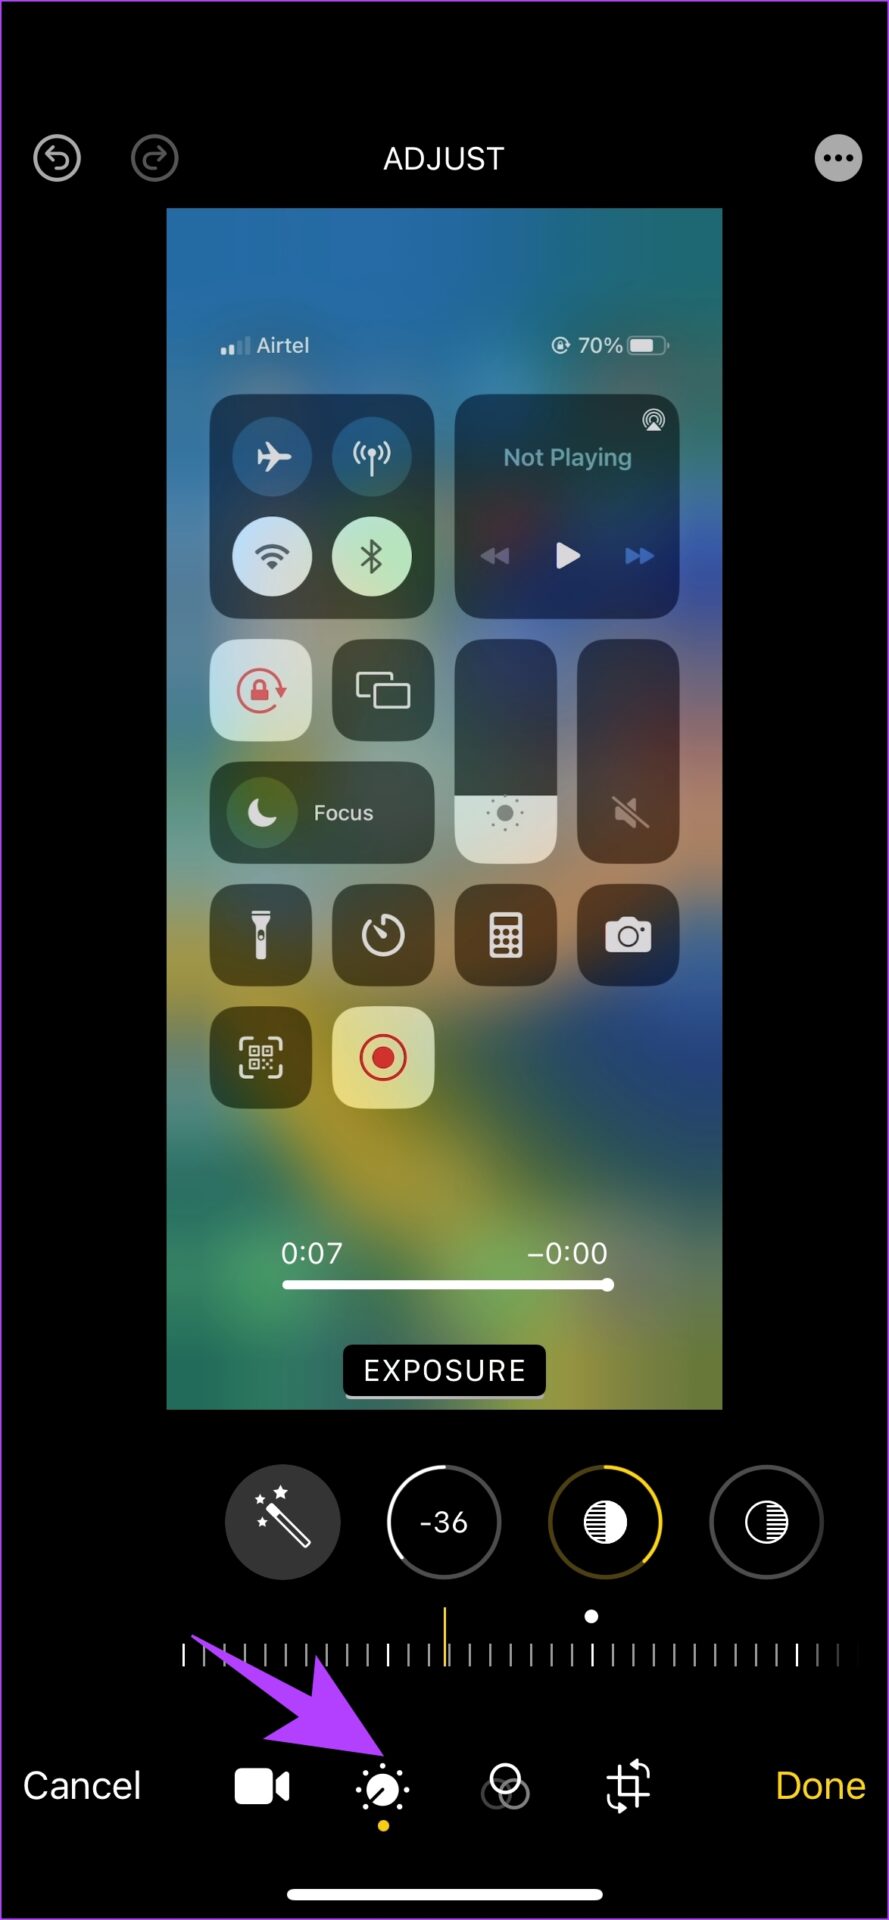
To adjust: If you are not satisfied with some details of the shot, you can use some options in the Adjust panel in the Edit section. This allows you to manage brightness, contrast, saturation, etc.
Harvest: If you want your screen recording to focus on a specific area instead of the entire screen, you can crop your recording. In this way, you can easily resize the video clip to your liking.

How to share screen recording on iPhone and iPad
After editing the recording and customizing it to suit your needs, here’s what you need to do.
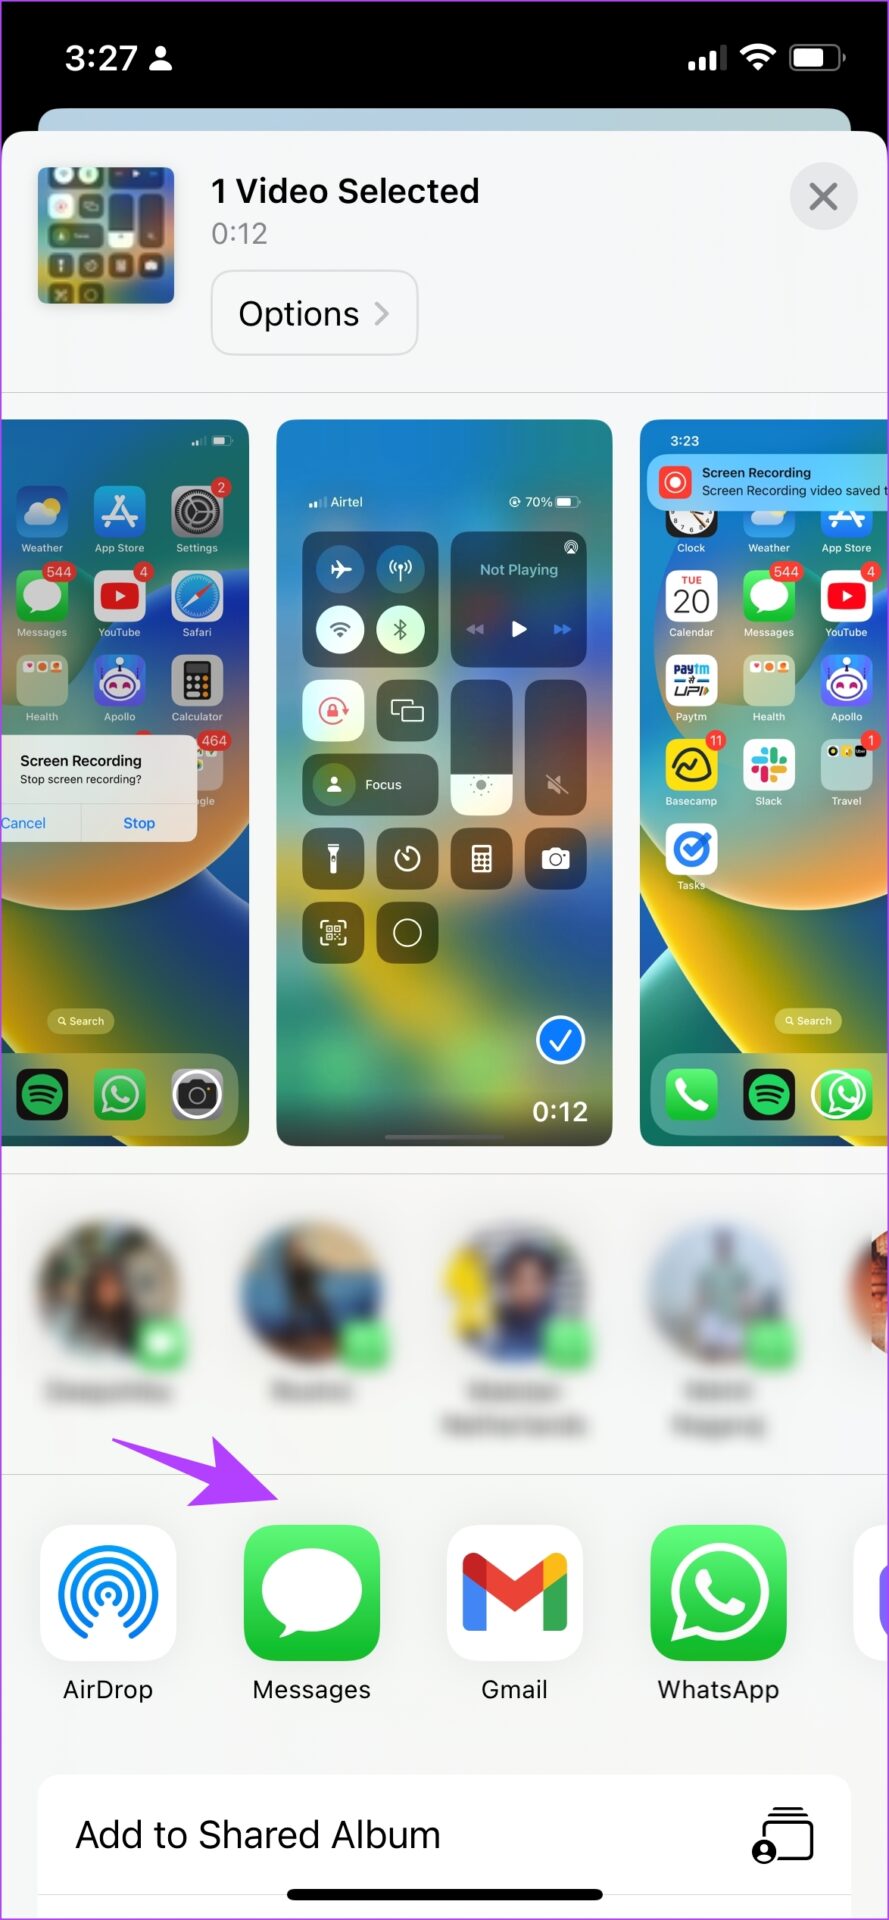
Step 1: Open the Photos app and open the screen capture you want to share.
Step 2: Tap on the share icon. You can find the list of frequently used apps and people. Share your recording.
That’s all you can do with the default screen recording tool on iPhone or iPad. However, if that’s not enough, or you just want to explore other options to control finer details, we have other options for you.
Alternative Ways to Record Screen on iPhone or iPad
You can always go back to recording the screen via a Mac or third-party apps. They would need you to go the extra mile but they are definitely worth it.
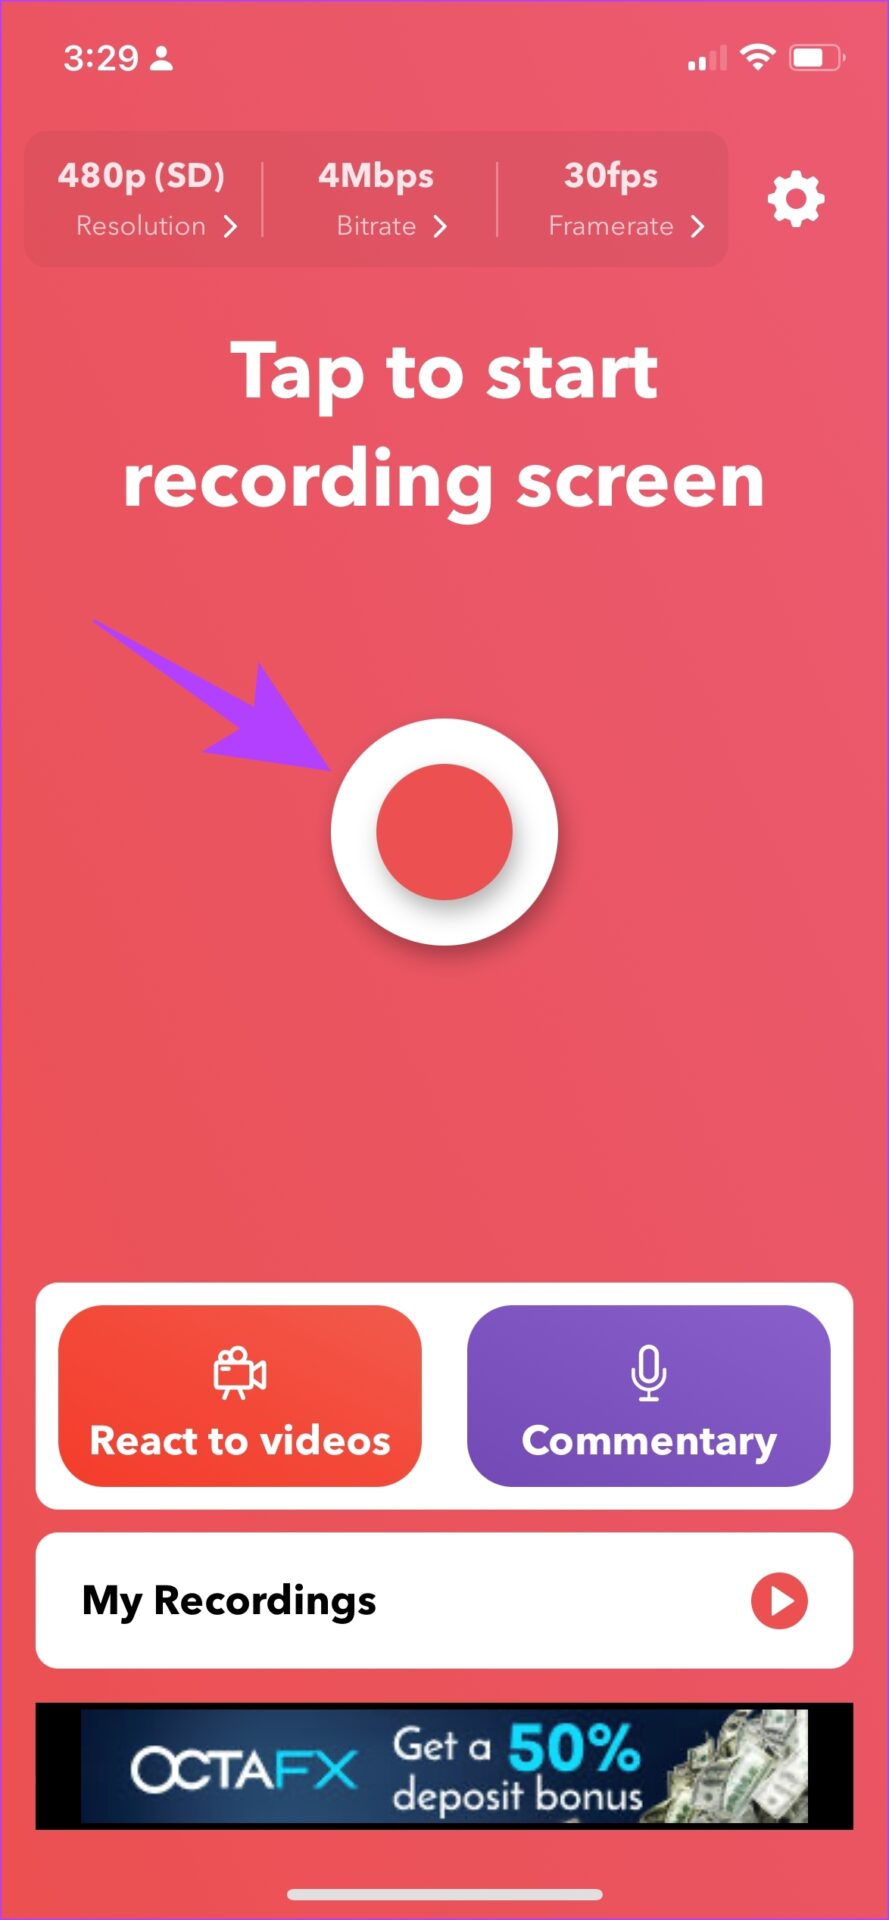
1. Use third-party apps like Record It!
record it! is one of our favorite apps to record screen on iPhone or iPad. You can choose the resolution, bit rate and frame rate of the screen recording. If these are parameters that you want to control and change when taking a screen capture, then this app gets a high recommendation from us.

Besides, it is free to install and easy to use.
How to use Record It! on iPhone
Step 1: Install the app from the App Store.
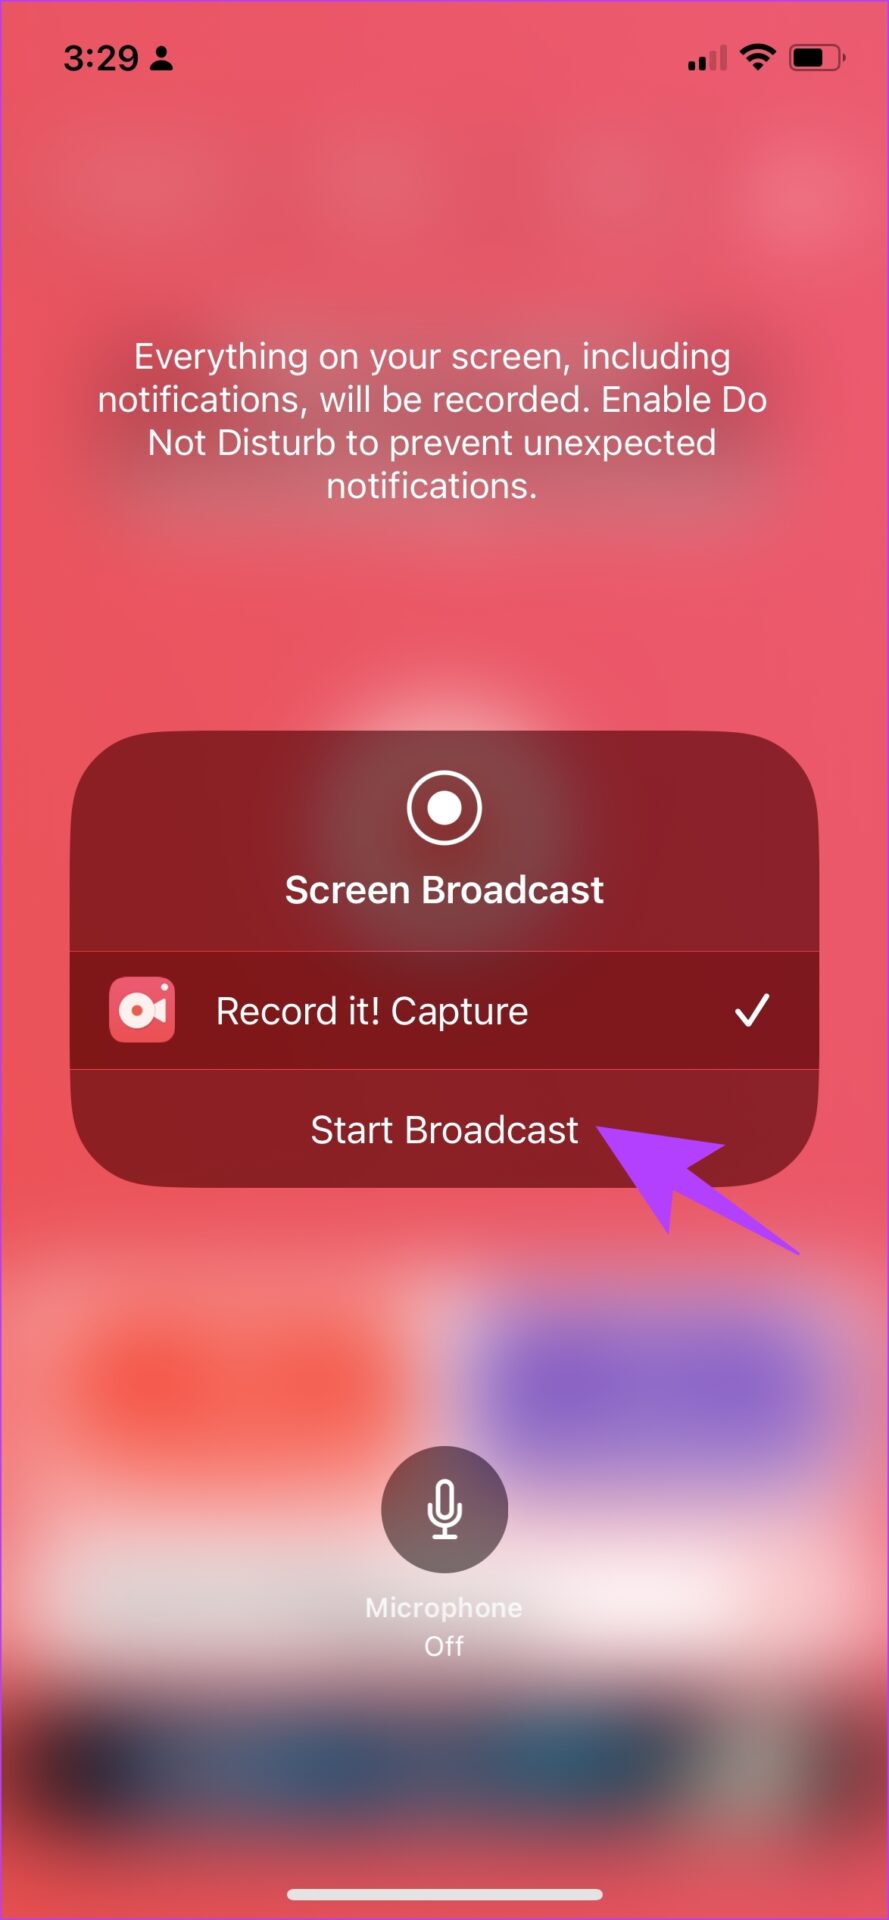
Step 2: Open the app and tap the red button to start recording.
Step 3: Now tap on Start Transfer.
That’s all! The rest of the sharing and editing procedure remains the same as previously mentioned. There is also a method to record the screen directly with your Mac and PC. Let’s see how we can do it.
2. Record iPhone or iPad screen on your Mac
This is how you can record your iPhone and iPad screen on Mac. This is very helpful as you can skip the extra steps of transferring the recording to your Mac.
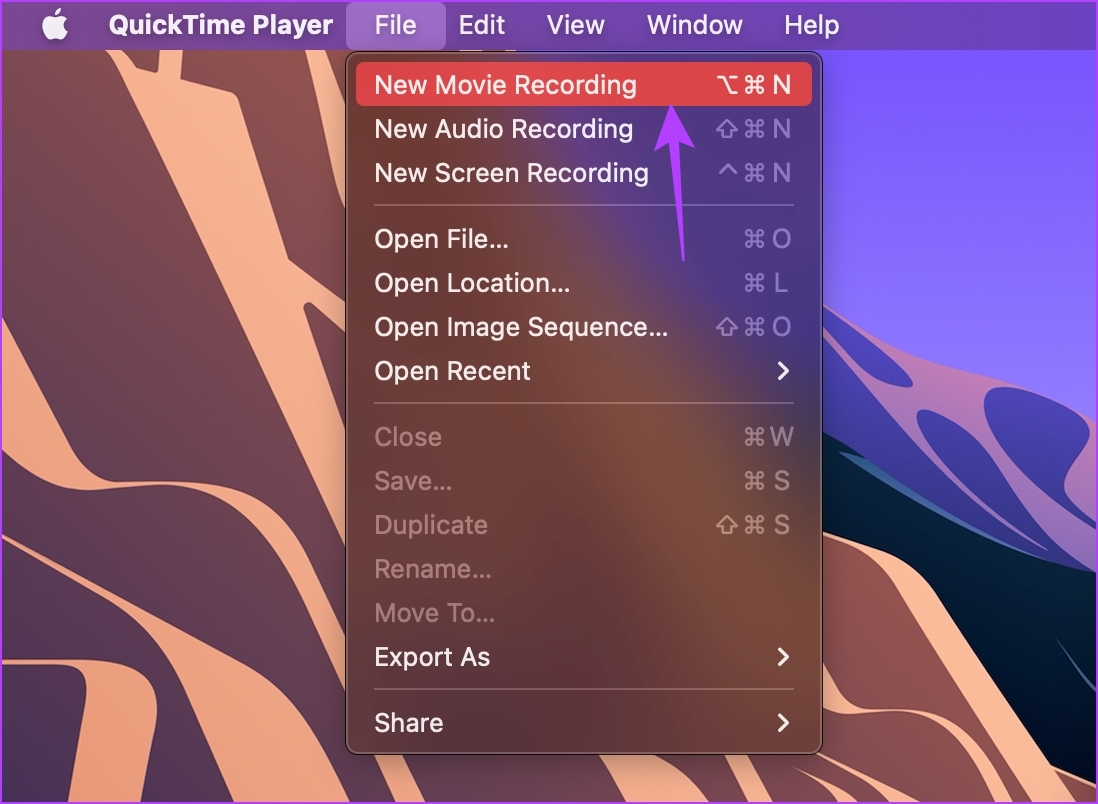
Step 1: Open the QuickTime Player app.
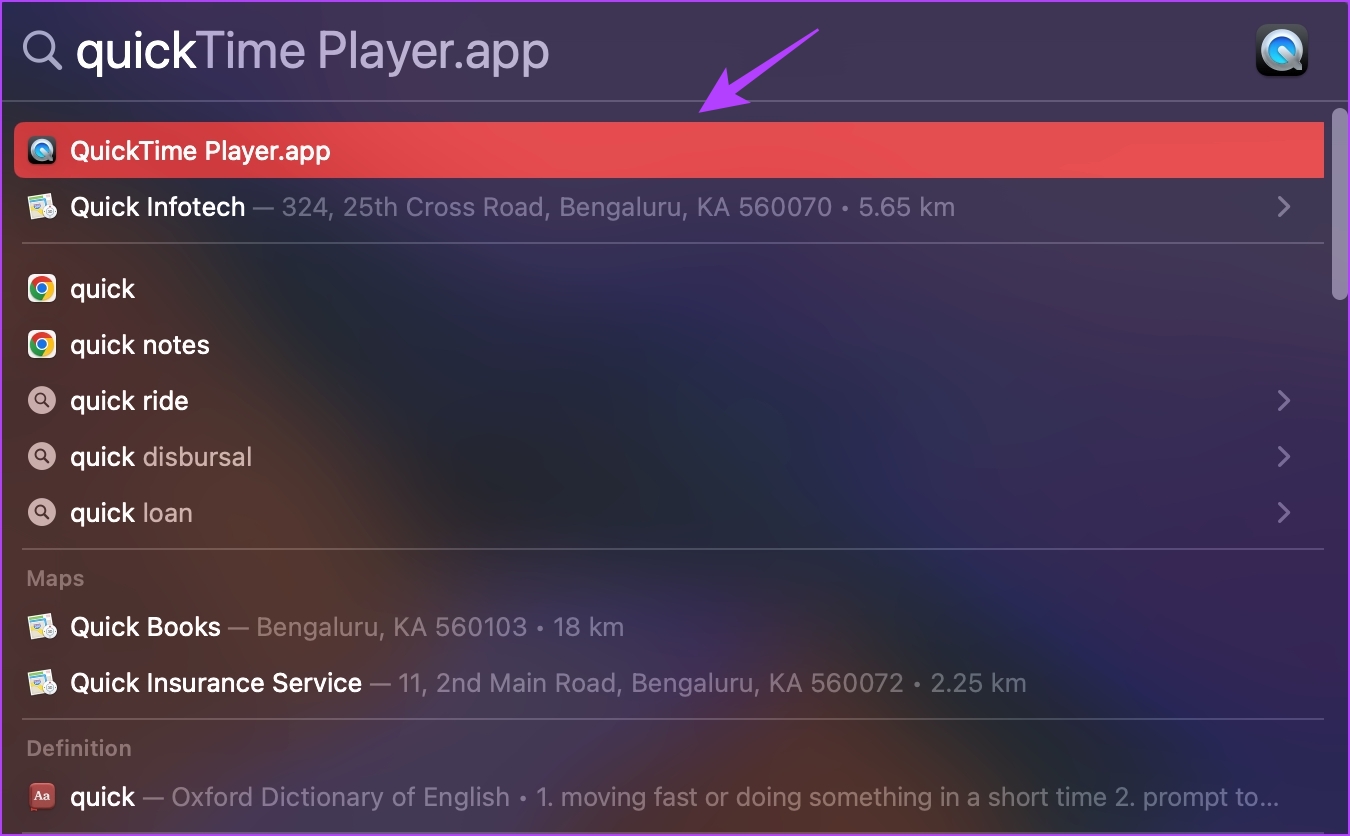
Step 2: Click File -> New Movie Recording.
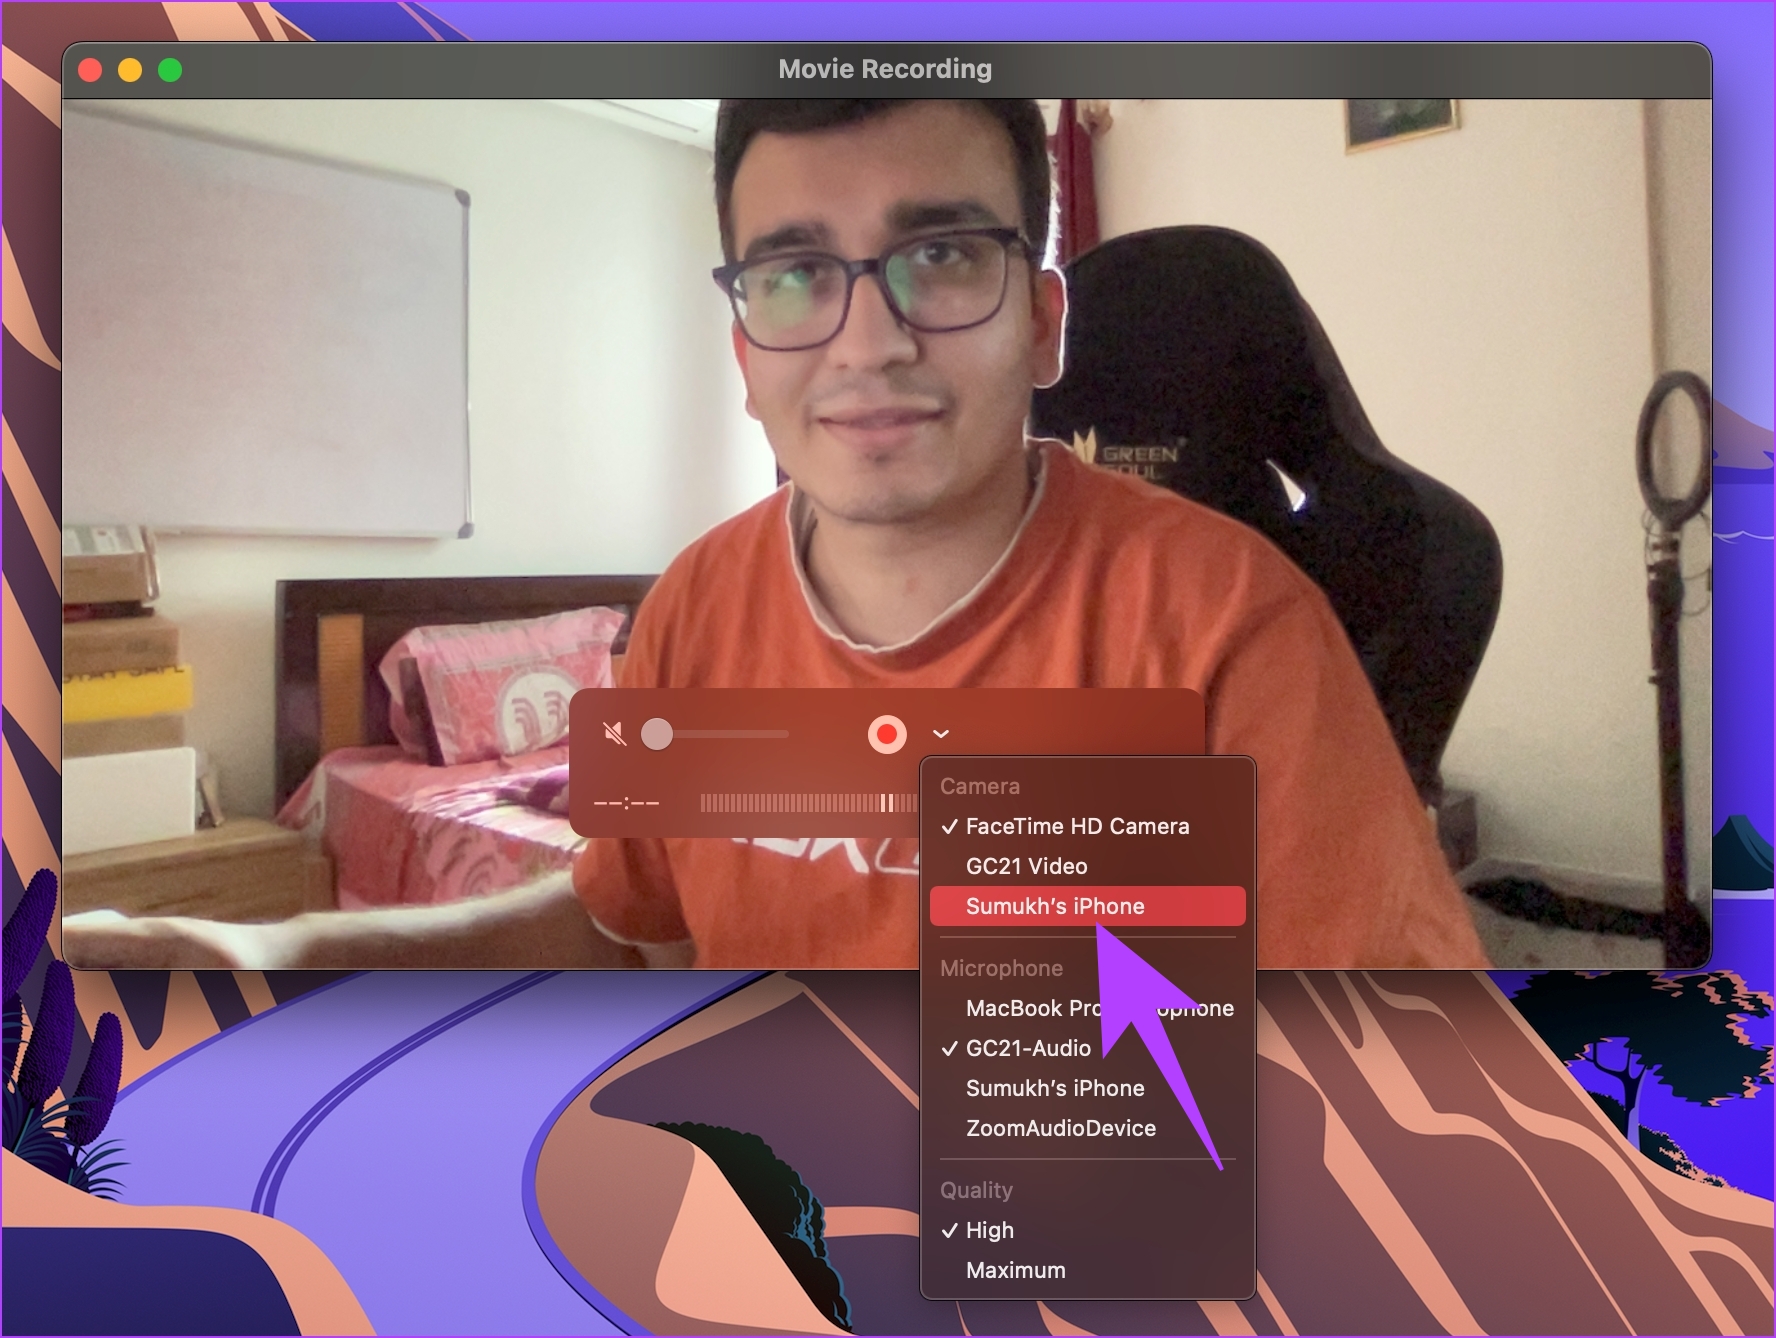
Step 3: Click the down arrow next to the recording icon.
step 4: Now select your iPhone. Make sure your iPhone is connected to the same Wi-Fi network as your Mac.
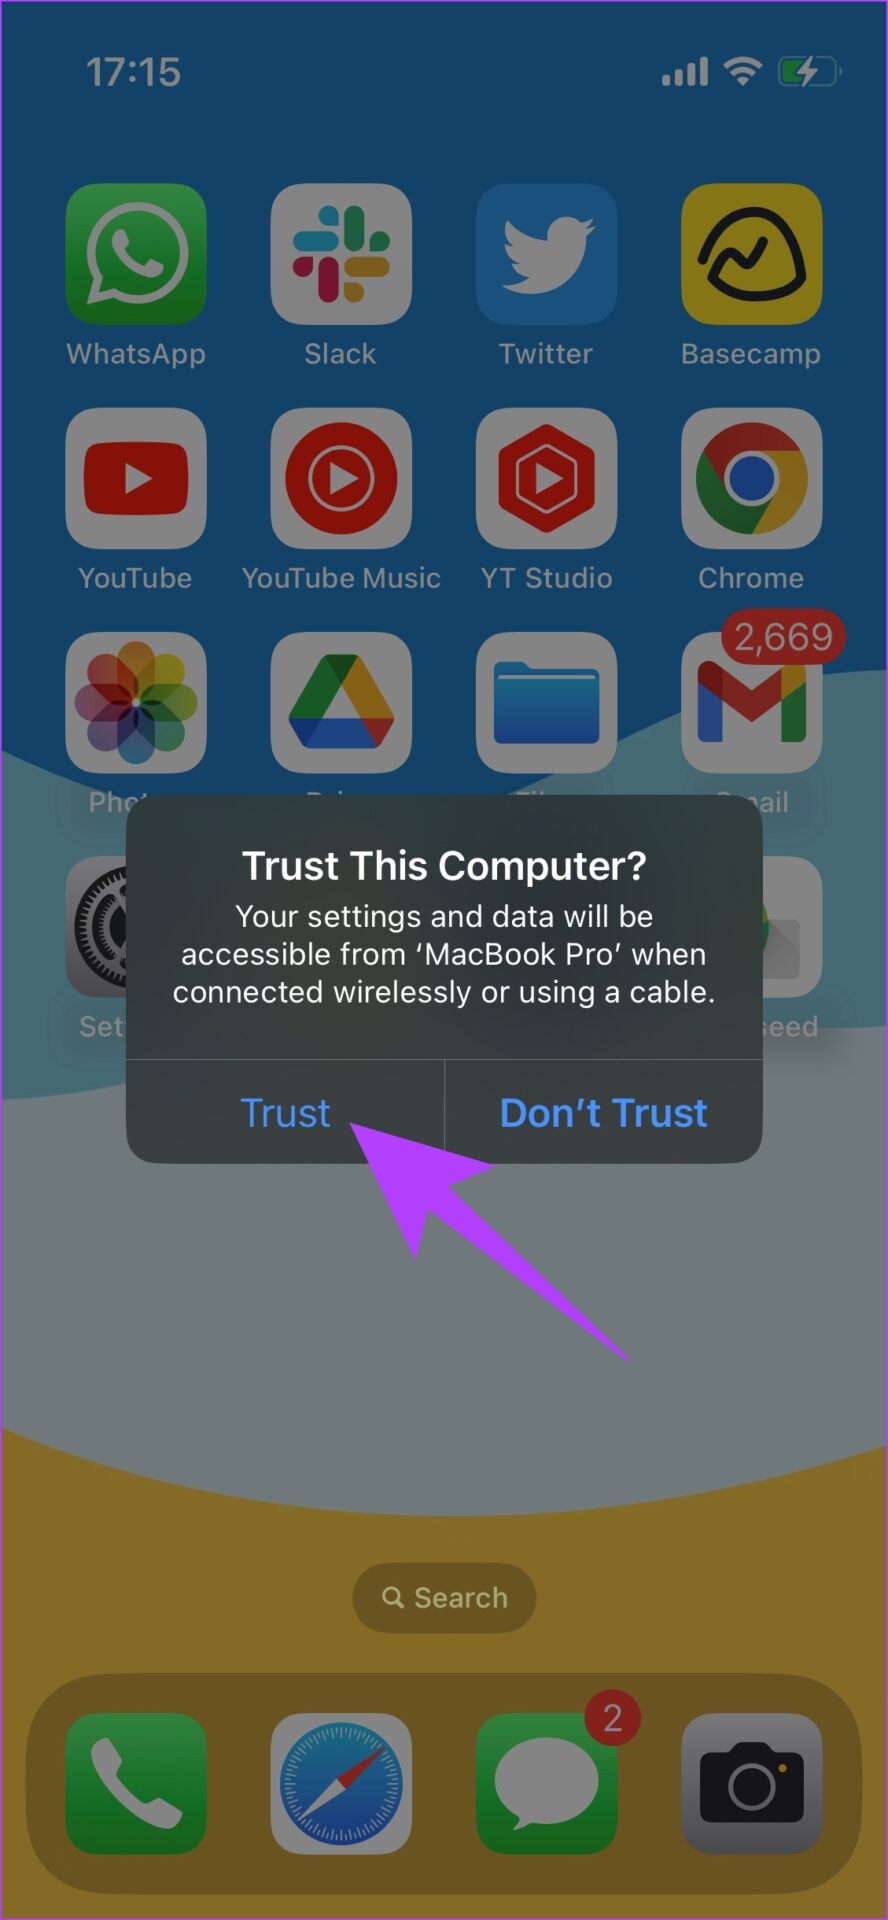
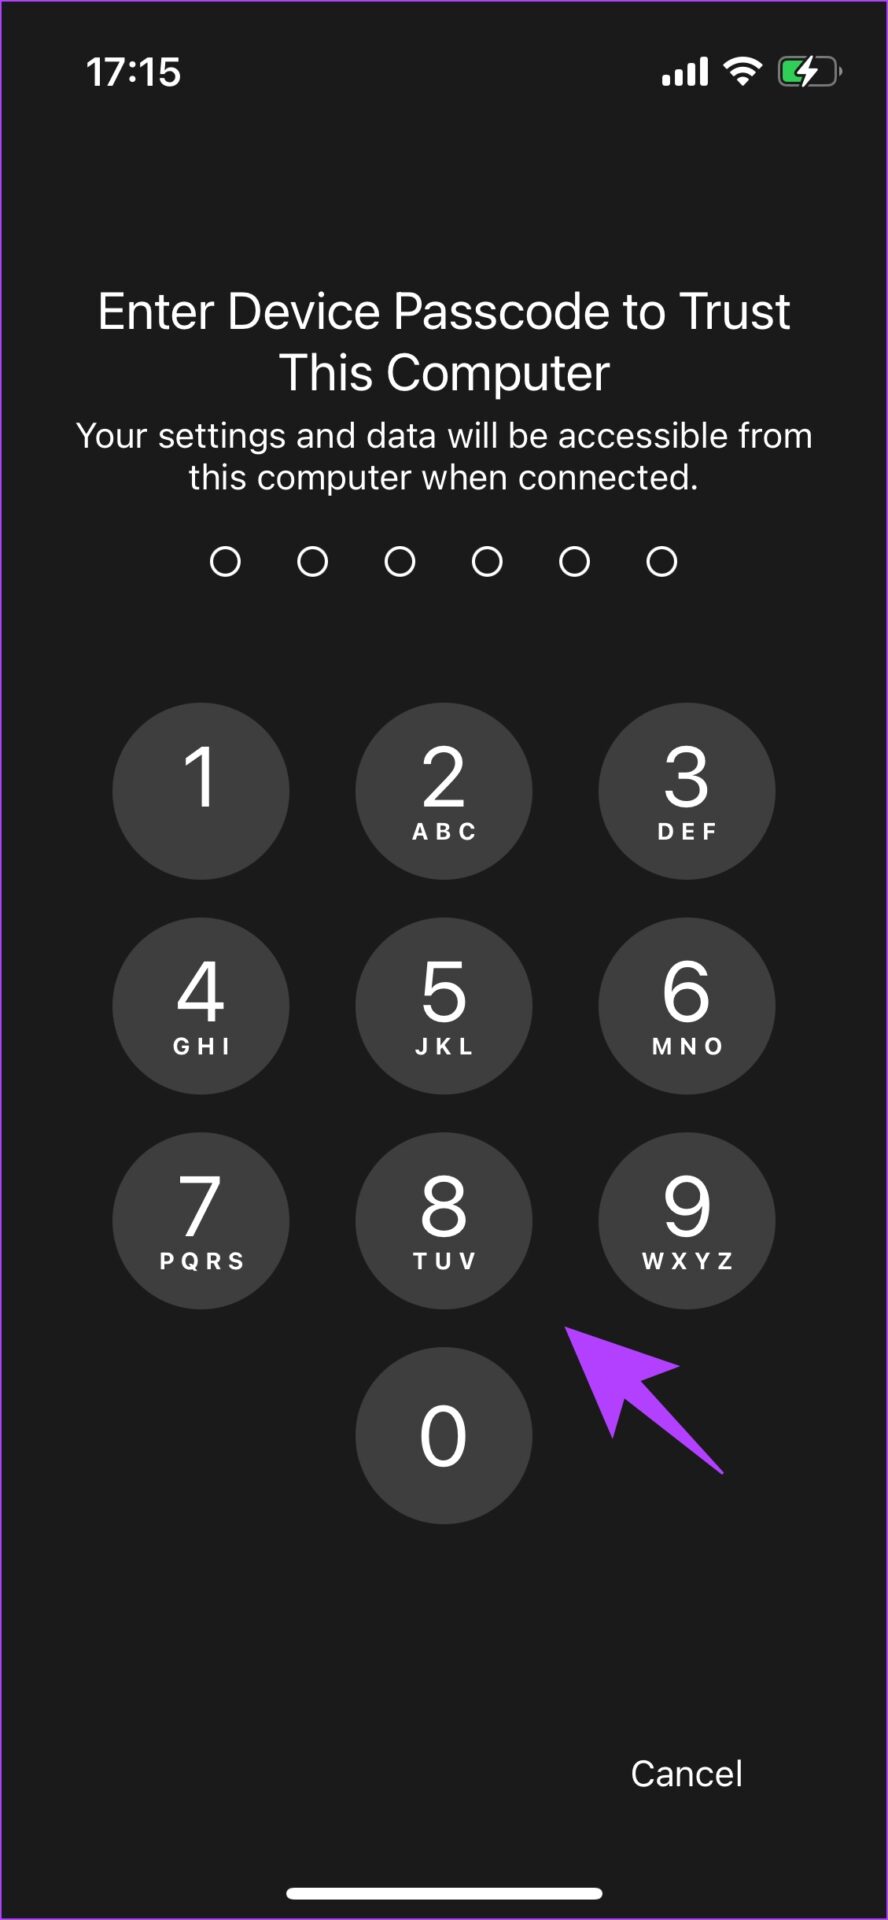
Step 5: Your iPhone will ask you if you trust the computer. Click Trust and enter your passcode.
This will start screen recording your iPhone on your Mac. Click File -> Save on the QuickTime Media Player toolbar to save the recording to your preferred destination.
QuickTime Player on Mac is a free tool, as is the process of recording your iPhone’s screen from Mac. However, on Windows, all reliable tools require a subscription. If you’re ready to record your iPhone screen with Windows, you can check out these two apps: Camtasia ($50 per year) and Reflector ($17.99 for a single license).
If you have other questions, we’ve likely answered them in our FAQ section.
Frequently asked questions about iPhone screen recording
No, content on platforms like Netflix and Prime Video is protected. Therefore, you cannot record the same.
No, you cannot record a phone call on iPhone.
You may have removed the screen recording button from Control Center or not added it in the first place. We have a procedure to do the same at the beginning of this article.
You must enable audio in the clip’s editing area in the Photos app.
Provided you have enough storage space, there is no time limit for recording screen on iPhone.
All you have to do is record it the usual way and turn on your microphone. However, make sure your microphone is on during the FaceTime call.
Record the screen on iPhone or iPad with ease
That’s all you need to know about recording your screen on iPhone and iPad. Apple doesn’t typically advertise such features, so they remain hidden until explored. We hope you found this guide helpful, and we also hope you discovered methods and options that you didn’t know before!