How to Render an Architectural Animation in SketchUp and V-Ray
How to render an architectural animation in SketchUp and V-Ray
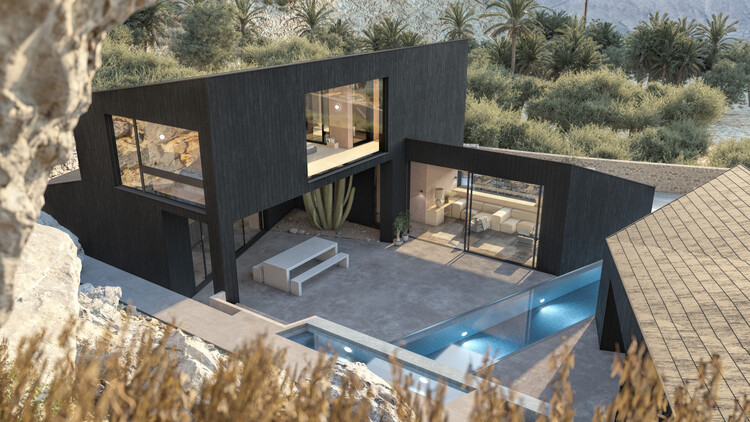
If you’re looking to take your SketchUp skills to the next level, learning how to render animation can be a great way to showcase your designs. In this tutorial I’ll show you how to create a professional animation using SketchUp and the photorealistic rendering plugin V-Ray. Our first step is to create a simple camera animation and then animate the sunlight changing throughout the day. After that, we’ll animate the clouds to create a time-lapse sky and learn how to share our finished rendered clips with others.
The right animation can really help bring architecture and design projects to life. By creating a 3D animation of a proposed building or space, architects and designers can get a much better sense of how it will look and feel when built. Viewers can better understand the scope of the project, see how sunlight interacts with the design throughout the day, and imagine what it feels like to inhabit the space.
How to animate a camera in SketchUp
In the first part of this tutorial, we’ll create a simple animation of a camera moving through the SketchUp scene. Our SketchUp scene is based on a custom made energy neutral home for a private client by renowned architecture firm Koto Design. The first step is to set your camera’s starting position and save the view in the Scene tab. Let’s label this tab Scene_Start. Next, move the camera to the desired end position and create another scene tab. Let’s label this tab scene_end. The duration of the animation can be set by entering the scene transition length in the model info box. Here I set it to five seconds and checked Enable scene transitions. After we checked the Record in animation Option in scene settings, we are ready to export preview.
Before I render the clips, I like to export them as a SketchUp preview first. Choose File > Export from the menu to start the process. Choose .mp4 as format and give the file a name. You can adjust the resolution and frame rate in the settings, and I’ll take care of that for this preview Loop to the original scene is switched off. After you click “Export”, the preview should be ready in a few minutes.
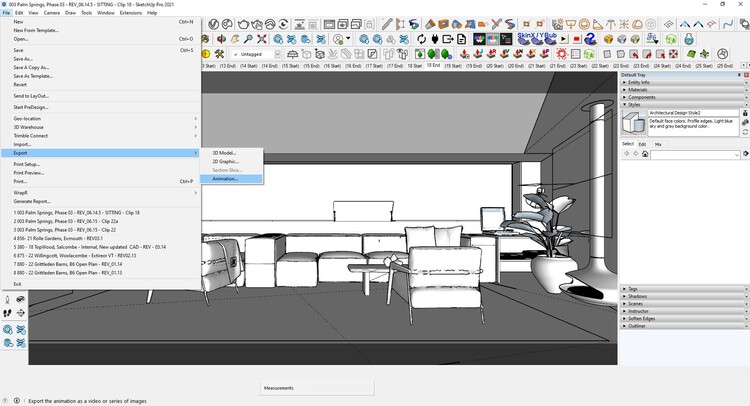
How to render an animation in V-Ray for SketchUp
If the preview animation looks good, it’s time to render the finale in V-Ray. I recommend starting with a couple of low-res test renders to make sure the lighting and materials look the way you want them to. It’s also a good idea to turn it on Safe frame so you see the correct aspect ratio, and then render at least one full-resolution frame at the final size and quality before rendering the animation. When you’re happy with your tests, turn on the animation switch in V-Ray, choose the filename and folder for your images, and press render. V-Ray renders the animation sequence as individual frames, which you later assemble into an animated clip.
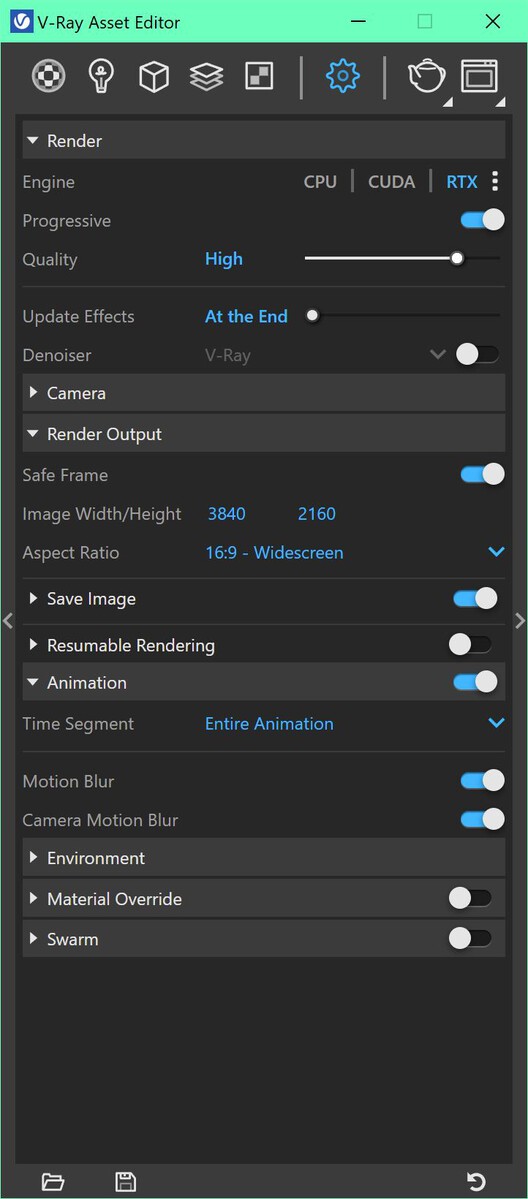
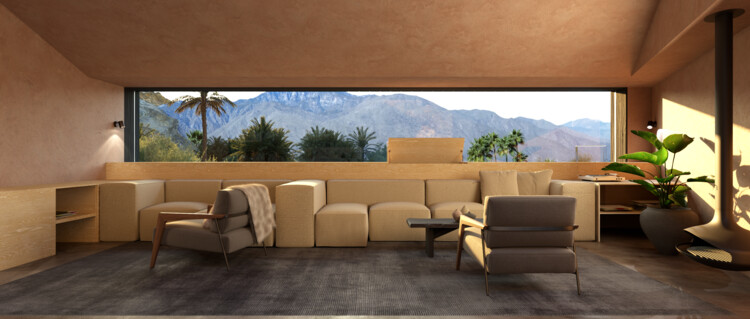
Depending on your hardware and scene, V-Ray offers several rendering options. You can render with CPUs, GPUs, or a combination of both. I rendered the test frames on a Lenovo P1 laptop, then switched to my desktop with an NVIDIA RTX A6000 for the final few frames. You can choose the option that best suits your setup. To render animation frames even faster, you can use render nodes on multiple machines or even send them to the Chaos Cloud rendering service.
Playback of your rendered animation
Once the frames are rendered, you can view the sequence in a frame player or video editor. In this case, we load the sequence into Chaos Player for fast and smooth playback. Simply drag and drop the folder containing the images into Chaos Player and press the spacebar. (Chaos Player is included with the V-Ray Premium subscription plan.)


How to animate the sunlight
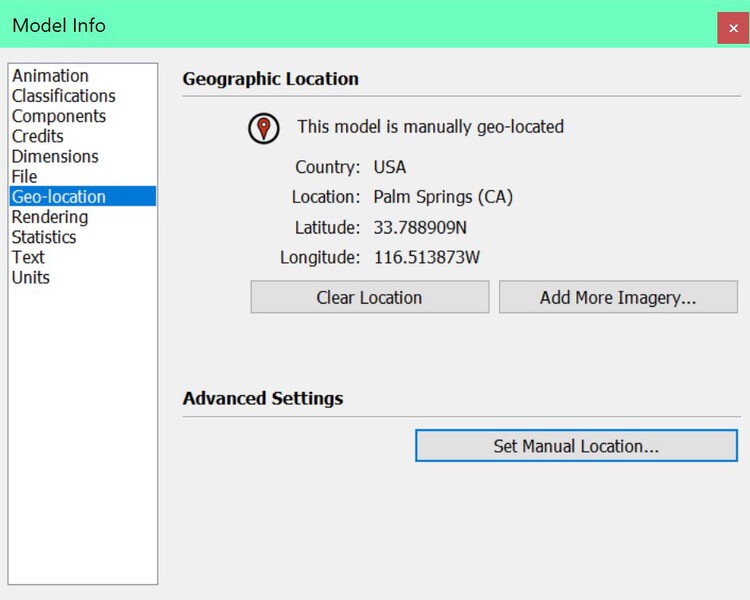
Now that you know how to create a camera animation, let’s animate the sunlight. This type of animation shows how daylight affects a building throughout the day. I recommend geolocating your SketchUp model so your sun positions are accurate. In the “Shadows” area you can specify how long the sun should move. In our case, I set it to 30 minutes, but you can set it to a much longer time if you’d like.
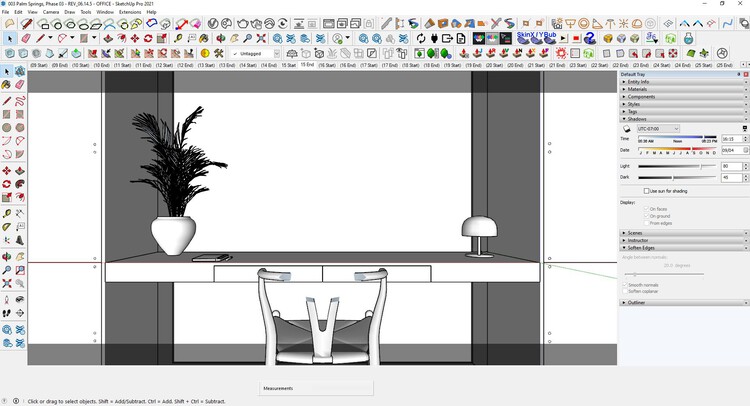
The sun positions shown in the shadow window are detected and rendered by V-Ray. And we can render the sequence of animated frames just like we did before for the animated camera. Not only does V-Ray give you accurate sunlight, it also gives you correct reflected light and correct sky lighting.


How to create time-lapse skies with animated clouds
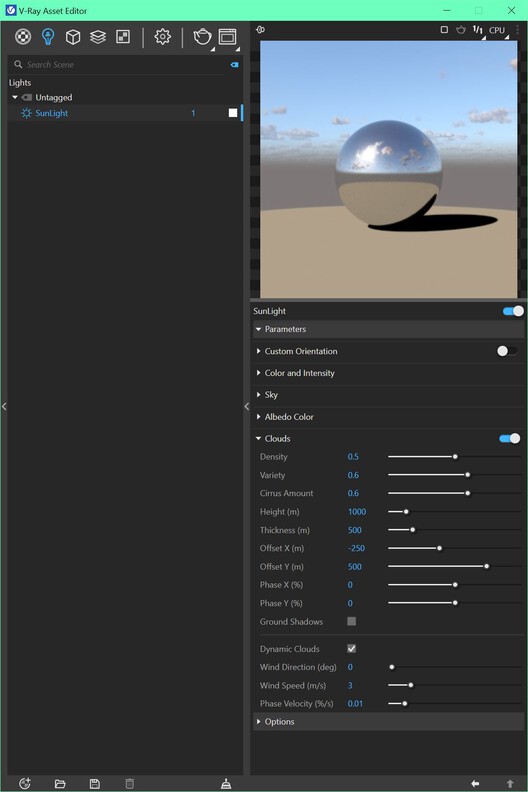
Finally, let’s add some clouds to our animation to create a time-lapse sky. This is a new feature added in V-Ray 6 for SketchUp and is an easy way to add visual interest and movement to your scene. The settings for the new procedural clouds are available in the Sunlight light source in the V-Ray Asset Editor. Here you can create any type of custom sky, from partly cloudy to overcast, by adjusting settings for density, diversity, amount of cirrus, elevation, and more. To animate the clouds, you can activate them Dynamic Clouds Check box and set wind direction, speed and phase speed. Once the clouds look the way you want, you can render your animation using V-Ray.


Share your final animation
Now that you have your animation clips ready, it’s time to start thinking about how to put them all together. This is where a video editor comes into play. With a video editor, you can rearrange your clips in any order, add transitions between them, and even add a music track. Once you are happy with your sequence, you can export your animation and share it on Youtube, Vimeo or your website. Here’s a look at the final animation.
Animation is one of the best ways to tell a story, communicate an idea, and bring your designs to life. Create amazing animations in no time with SketchUp and V-Ray.
Thank you for following our tutorial. I hope you learned something new about rendering architectural animations in SketchUp and V-Ray. If you’re interested in learning even more, check out our courses at Archilime Academy. Our 3 month master classes teach all the steps to create photorealistic renderings using the same techniques we use in our studio. Whether you’re a beginner or a pro, our masterclasses combine one-on-one coaching, live group sessions, and online learning to help you create quality architectural visualizations.
About the author
Dan Stone is Operations Manager at Archilime, a creative agency and visualization studio working on high profile real estate development projects around the world. Dan is also a certified V-Ray trainer with decades of experience working with SketchUp and V-Ray. He loves teaching aspiring artists at Archilime Academy, the first V-Ray SketchUp authorized training center in the UK.
About V-Ray for SketchUp
V-Ray is one of the most popular photorealistic rendering plugins for architectural visualization. V-Ray 6 for SketchUp is available now and includes tools for creating custom skies and detailed geometric patterns, as well as new and improved materials that add realism and speed. V-Ray 6 also introduces new cloud collaboration and Enscape compatibility to bring teams together like never before. Visit chaos.com for a free 30-day trial.