
How to set up Azure budget alerts
Cost management is one of the most important considerations in cloud computing. If managed well, a cloud environment can be extremely valuable, but if poorly managed, the cloud can cost more than a traditional on-premises environment.
Azure resource pricing is based on consumption. You pay for resources as you use them. It’s helpful to monitor cloud usage and spending using automation to avoid sticker shock.
Azure can set financial budgets and receive alerts when users are expected to exceed those budgets. Azure offers this service, known as Azure Budgets, through the Microsoft Cost Management tool suite.
Before you start using this service, you should be aware that budget notifications are for notification purposes only. The job of the tool is just to send an email notification. It is the recipient’s responsibility – typically an IT administrator – to take the appropriate action. It’s possible to use Azure Monitor and runbooks to take action, but that’s not part of the standard budgeting tool.
Create budget alerts
To set up budget notifications, go to the Azure portal. Use the search function to find budgets or find it on the left side of the menu stack.
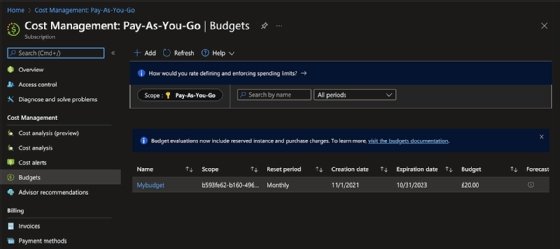
To create an alert, click +Add Button. When it opens, there are many options. The default scope that budget alerts would apply is an entire Azure subscription. However, administrators can use a filter to limit scope to smaller, more discrete parts of a subscription.
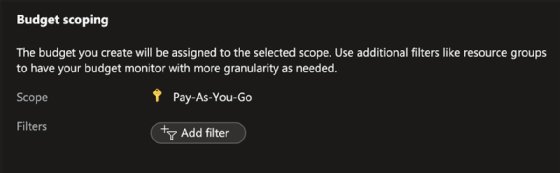
For example, you could filter to select an Azure resource group that contains multiple VMs. Resource groups are designed to contain resources that share the same lifecycle, so it makes sense to group them from a budgeting perspective as well.
Selecting items from the filter group will limit what is shown in the drop-down results. Figure 3 shows an example of filtering.
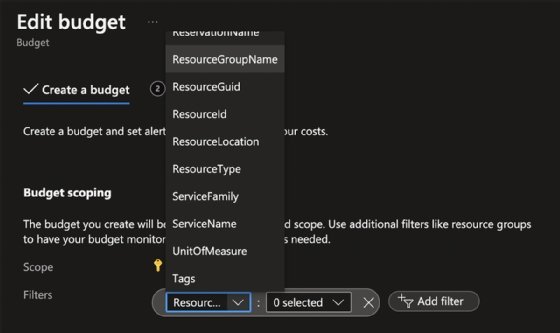
It is possible to make the scope more granular. For this you need to put more effort, e.g. B. Get resource IDs.
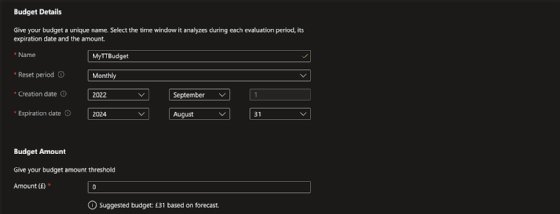
Next, enter budget details such as name, start and end dates as shown in Figure 4. The budget threshold must also be set. Azure proposes a budget based on historical usage over multiple months, but the admin makes the final decision.
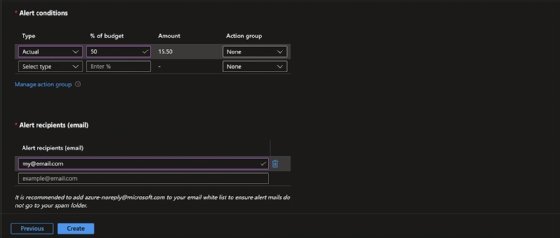
The next screen (see Figure 5) allows administrators to set alarm conditions. There are two different types of budget alert conditions: actual and forecast. Using the actual value will only trigger an alert if the budget threshold has been reached. The forecast setting, on the other hand, warns if it predicts that the cost will be reached within the current month. This allows admins to make proactive changes to avoid going over budget.
You can mix and match so that notifications are sent at different points – for example, when costs hit 25% or 50% of a budget.
Specify the recipients of the alert and the language as needed. Instead of individuals, consider an email distribution group as recipients. This simplifies administration and avoids a situation where a costly notification is missed because the person happens to be out of the office.
click Create to complete the creation of the budget notification.
Use tags to streamline cost management
To simplify budgeting, Use tags for each resource. Enforce this rule through an Azure policy for the appropriate subscription or management group. This means that each item has a cost center and other appropriate tags. This allows the administrator to break down the costs incurred for specific tags or groups of tags and makes the entire Microsoft Cost Management suite easier to use.
Available tags are shown to the left of the cost center. Select the appropriate tag name and value to narrow the data returned.
Multi-Cloud Capabilities
Admins can extend Azure Budget Tool to AWS. This requires a modest amount of configuration on the AWS side, but once that’s done, it’s possible to use the same budget tab in Azure to set AWS costs.