How to Use a Light Meter in Photography
![]()
For decades, there’s a piece of gear that I’ve always had in my camera bag. This would be a handheld light meter. I feel I’m in the minority these days by still using a handheld light meter and that’s too bad this is so.
While one can certainly shoot using their in-camera meter, there are cases where it’s not the best choice or even feasible to do so. In this guide, we will cover everything from what a light meter is to how to properly use one in your photography.
Table of Contents
What is a Handheld Light Meter?
Before I get into the whys of using one, let’s take a look at what exactly a handheld light meter is.
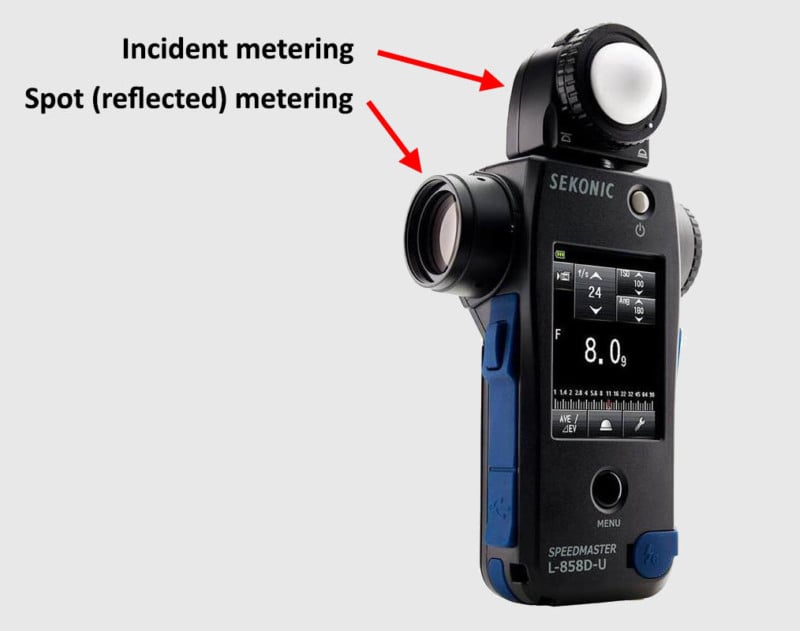
A handheld light meter is a device that measures light in order to determine the correct exposure for photographing an object or scene. Light meters are available in a variety of shapes and sizes (Figure 1) and also have different capabilities. By definition, handheld meters will fit in the hand much like a smartphone, but some of them, like spot meters, may have a more pistol-like grip to them.
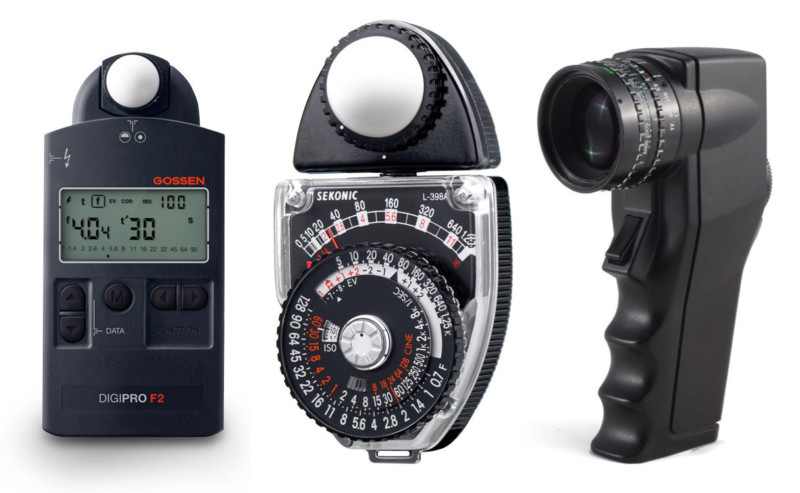
Most early light meters required no batteries — instead, they used cells that were light-sensitive to drive a needle to display the readings. You can still find this type of meter today, like the L-398 from Sekonic for example. Most modern light meters do require batteries and display information via electronic displays.
No matter how the information is displayed, most photographic light meters will provide you with the same basic information. By measuring the available light, the meter will provide the correct aperture/f-stop combination for a given scene.
Now at this point you might think “My camera’s built-in meter can tell me that”, and that’s true, but is it going to be the most accurate and consistent? And what about studio flash?
Let’s get into it.
Reflected vs Incident Metering
Reflective metering is the type employed by a camera as well as many handheld meters. Light entering the lens or meter objective has reflected off of the subject. Depending on your meter or camera’s metering settings, this light is evaluated and a “correct” exposure is determined.
In cameras, this can be based on judging primarily the center area of the scene (center-weighted), a small spot in the image (spot metering), or by evaluating the entire scene and coming up with an exposure value. The first two are pretty self-explanatory, but evaluative metering is more complex.
Most modern cameras can divide a scene up into multiple zones and can compare the results to a list of programmed scenes in the camera processor. As far back as the 1980s, cameras started employing multi-zone meters, using up to sometimes five zones. Current digital cameras can evaluate a scene using dozens of (or more) points to provide what it determines to be the “correct” exposure for the scene. I put quotes around correct in the previous language because that can be subjective, and there are two factors that affect the reading one gets with reflective metering.
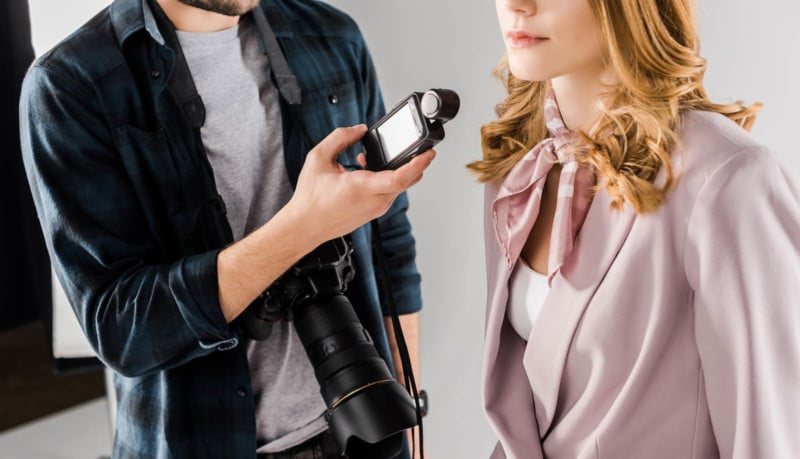
One is that reflected light will vary in intensity based on the subject (Figure 2). For instance, someone with dark skin is going to reflect less light than a person that is fair-skinned. The result can be that the camera meter (or a handheld reflective meter) will over-expose the dark skin and will underexpose for the light skin.
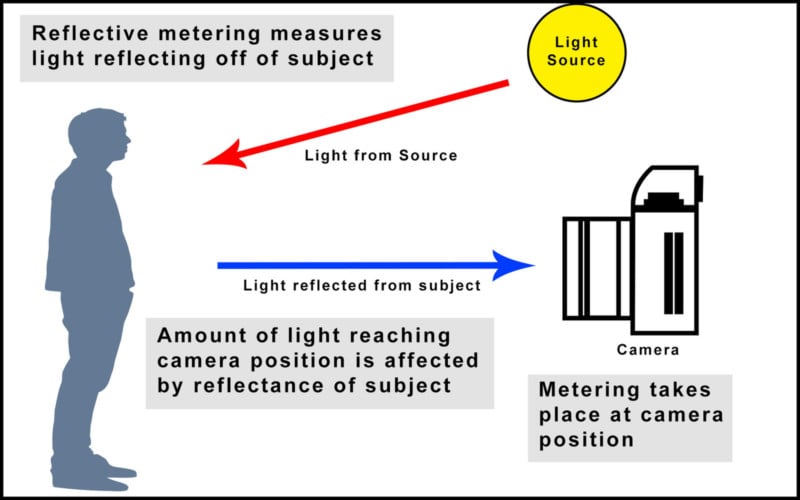
The second factor is that evaluative, in-camera processing of the light readings is making the best guess based on the scene or subject. Together this introduces inconsistency, and you can see this when the objects in a scene change position or the light source (or photographer) moves and the exposure is affected.
Note: These factors are relevant whether you’re shooting in full manual or automatic modes because even in manual mode, you are still making setting changes based on information provided by the in-camera meter.
How consistent your needs are will depend on the shoot. For some work, the variances in exposure are perfectly acceptable. For things like fashion or product photography, the results need a high level of consistency, and that’s where incident-type metering shines. Many handheld meters have a reflective reading option. In the case of spot meters, they have to read reflective by the nature of their design.
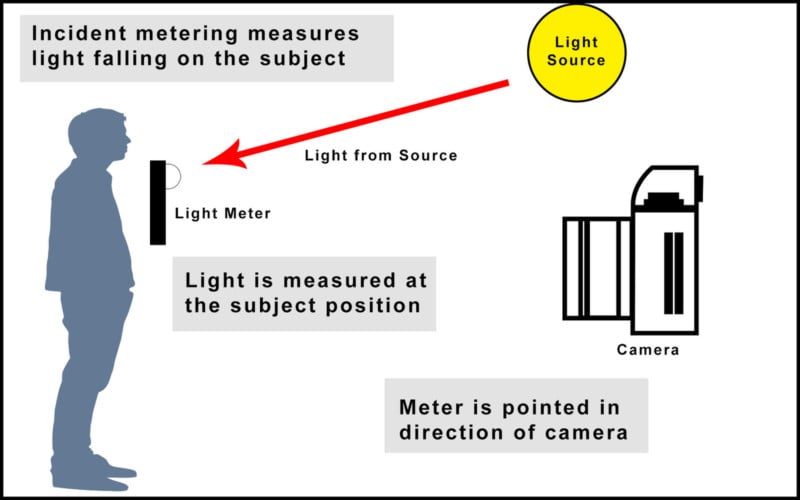
Incident metering works by measuring the light that is falling on the subject or scene. Instead of relying on the reflectance of objects, the measurement is based on how much light is falling on the subject or scene, coming from the light source (or sources). By measuring the amount of light coming from the source, the correct exposure is now objective instead of subjective like reflective readings.
To take an incident reading, you place the white meter diffuser right at the subject (Figure 3) and have it pointing towards the camera position. In the case of metering for flash, it helps to have a remote trigger you can have with you so you can fire the flash while at the subject position with the meter. Assistants are also very handy for this.
Let’s say, for example, you have to shoot headshots for twenty people and there’s a variety of light and dark skin tones within this group of people. Metering based on reflective measurements will result in varied “correct” exposure values (Figure 4). Then you’ll either need to adjust as you shoot or fix them in post after the fact to get all the images consistently exposed.

By using an incident reading, you will know exactly how much light is coming from your light source. By using this exposure value for all the headshots, everyone will be properly exposed even if the subjects have wide differences in skin tones from each other (Figure 5). The same applies to any situation where you are using lights that are set to a fixed output and the subject is placed the same distance from the light source from shot to shot. This will make your life much easier and can save a lot of time in post.

It’s not just the subject that benefits from using a meter. If you are needing to have your background lit evenly, you can use a meter to take readings from various spots on the background. This will show you areas that may be lighter or darker than others, and then you can adjust your lighting accordingly.
How to Use an Reflective Light Meter
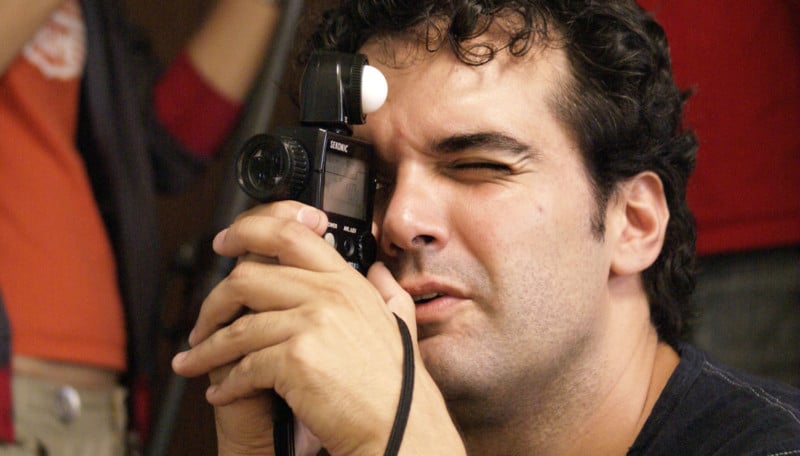
Using a reflective light meter is more familiar to photographers as this is the principle used by the light meters built into cameras.
- Choose Your Camera Settings. First, set your camera to manual mode and choose your desired ISO (and aperture or shutter speed if you would like to control either of those).
- Match the Settings on the Meter. Set your light meter to the same setting(s) as your camera.
- Take One or More Light Readings. Hold the spot meter viewfinder up to your eye and use the indicator at the center of the frame to choose where to take a measurement in the scene. Use the metering button to take a reading. While you can base your exposure on a single spot reading, you will typically want to do multiple readings on the most important areas of the scene (e.g. the darkest shadows, the brightest highlights, and the key midtones), save them in the meter’s memory, and then have the meter calculate the average for the final exposure value.
- Use the Calculated Settings. The light meter will return an optimal aperture and/or shutter speed calculated through doing the light reading. Set your camera to these settings.
How to Use an Incident Light Meter
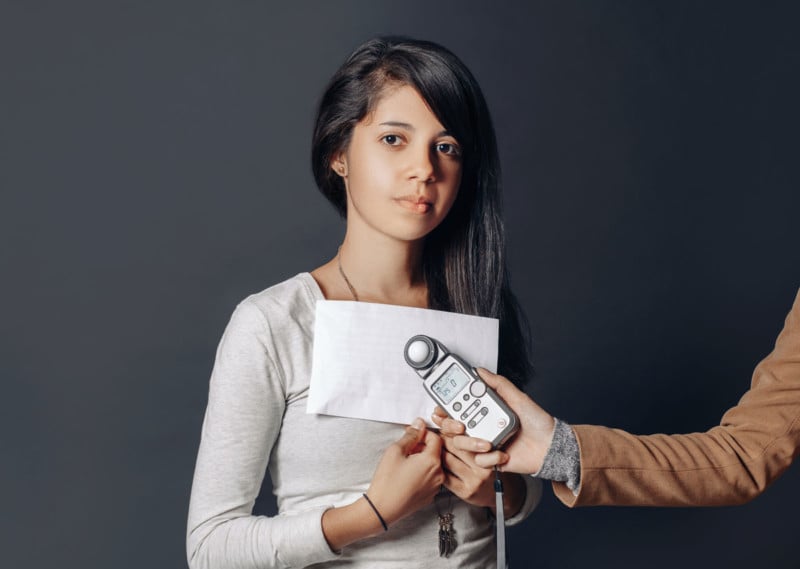
Here are the basic steps to using an incident light meter to figure out the shutter speed you should use.
- Choose Your Camera Settings. First, set your camera to manual mode and choose your desired ISO (and aperture or shutter speed if you would like to control either of those).
- Match the Settings on the Meter. Set your light meter to the same setting(s) as your camera.
- Get the Meter Ready for a Reading. You may need to “activate” your light meter to get it ready to make a light reading. For example, you may need to twist the knob around the white dome (called the lumisphere) of the meter.
- Set the Correct Mode. As most light meters will have one mode for reading ambient light and another for metering flash, you will want to make sure your meter is set to the correct mode.
- Take a Light Reading. Next, hold the meter in front of the subject and with the lumisphere facing the camera. Press the metering button to take a measurement of the ambient light. If you are metering for a flash, trigger the flash while the meter is taking the reading.
- Use the Calculated Settings. The light meter will return an optimal aperture and/or shutter speed calculated through doing the light reading. Set your camera to these settings.
Metering Flash
One of the best cases for having a handheld meter is for using studio flash. When using manual studio flash, your in-camera meter is not only useless, it can actually be misleading. Since the camera meter has no idea how much light will be present when the flash fires, using settings based on only the ambient light will undoubtedly result in very overexposed images (Figure 6). While many readers might know this is a given, I’ve seen other photographers struggle with this issue a lot over the years.

This situation is the reason I first decided I needed a handheld meter back in the late 1980s. In particular, I needed one that could read flash for use with studio strobes. Without a meter, I would be forced to guess the correct f-stop when using my studio lights.
While you can experiment and find the correct exposure on a digital camera today by reviewing your test shots, that was not an option using film. Even with cameras that could use Polaroids for testing, it often cost about $1.00 per shot for the film, so not a very cheap or effective way of determining exposure.
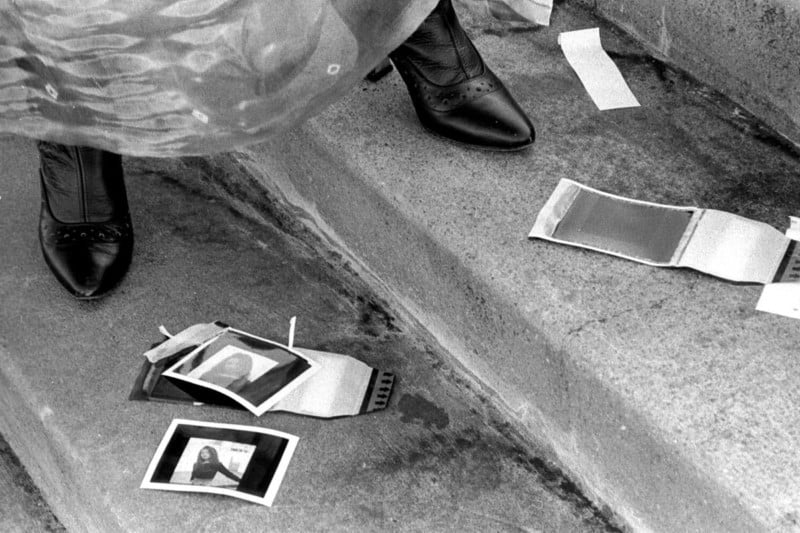
Even today, with the ability to instantly review your test shots, it makes sense to have an accurate starting point. Most of the time, your meter’s reading will be all you need, but of course, you might still want to make exposure adjustments to fit your vision. Having a good starting point still saves time and when on a working set, time is money.
Some flash meters can also display the difference between flash exposure and ambient light. The Sekonic L-478D-U for instance will display a percentage of flash to ambient light (Figure 8) which can be very useful for daylight fill situations. It can also be useful for determining how long to drag the shutter in order to balance low-intensity indoor lighting with flash exposure.

Many cameras can be used with flashes that measure via TTL that will allow you to adjust this balance as well, but the nature of TTL means that any changes to the scene or subject placement could change the final exposure. Using a meter can provide a “source of truth” that can be used to get the correct exposure.
Light Meter Accessories
While most handheld incident meters come standard with a hemispherical diffuser over the light sensor, in some cases the manufacturer provides other options depending on the model of meter. Some meters have interchangeable diffusers while others allow for the entire upper section (sometimes referred to as the head) to be removed and replaced or even put on an extension cable.
I’m not going to go into all the available options as that could be an entire article itself, but I do want to point out one option I feel is very useful. Available for many meters is a “lumidisc” that replaces the domed diffuser. These are used to measure light on a flat plane and are often included with many, but not all, handheld meters.
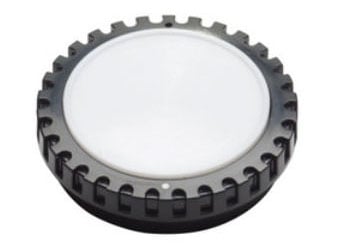
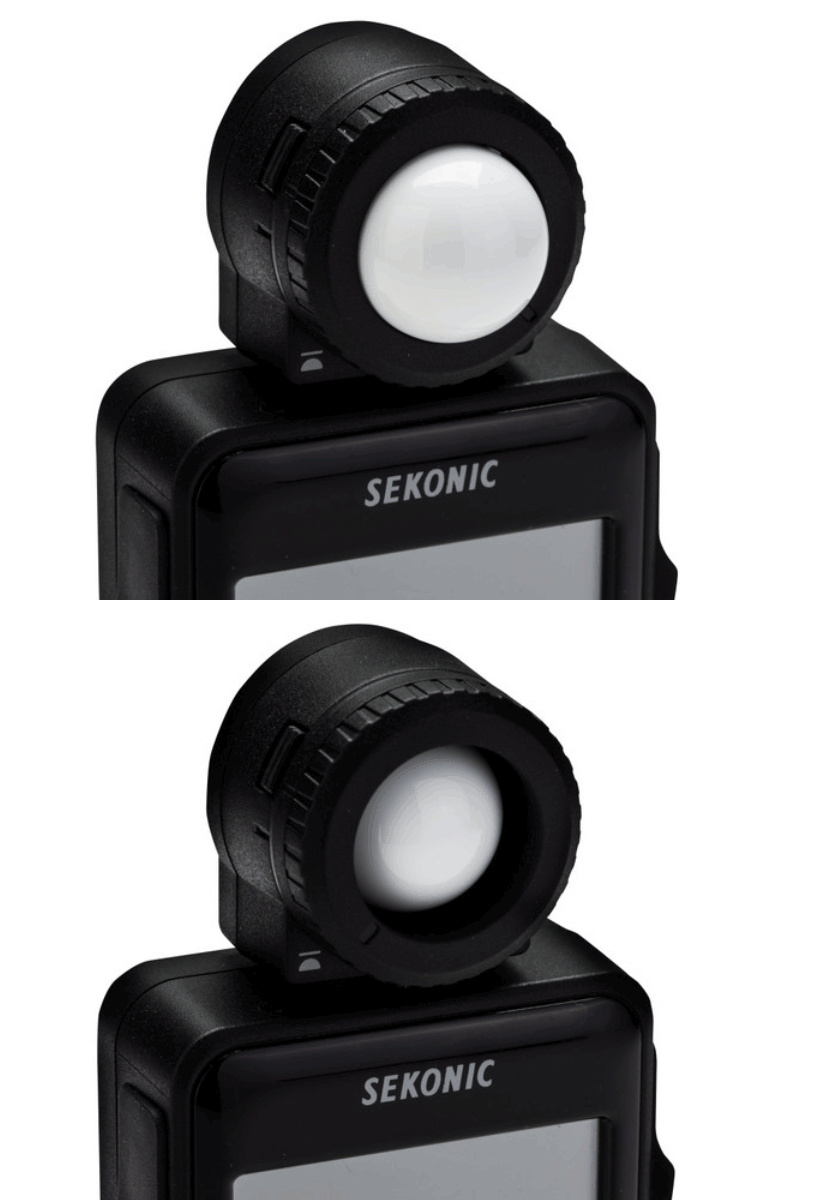
For portrait photography, the flat diffuser is useful for checking the light on each side of the face individually. While you can take these measurements with a dome diffuser, the flat diffuser disc is more directional and better suited for this type of measurement (Figure 9a). Some meters have a retractable dome that can recess into the metering head. This produces similar results to the flat diffuser without having to remove anything.
Is Using an Incident Meter Always Best?
The short answer is “No”. For studio work, I stand fast on the idea that a handheld incident meter is best, and that applies to both flash and constant lights. I feel the same way about situations where I can get into position where the subject will be and measure the light at the point. Shooting available light portraits indoors on location, film production stills, and other indoor events where the lighting should be consistent are times when getting a reading from the subject location might be possible.

While I find using my handheld incident meter to be the best option for a lot of the types of photography I shoot, there are plenty of situations where one isn’t necessary or even feasible to use. Landscape photography is a perfect example of where it isn’t practical. In most cases, the subject (scene) is very far away. In cases like this, a spot meter or in-camera meter makes sense and are really the only options.
Keep in mind there are some ways to measure reflected flash with some meters. This includes certain spot meters as well as other flash meters that can use reflective attachments. While I don’t see many situations where this would offer an advantage, I’d be remiss if I didn’t point out these options exist.
Other Handheld Meters
The above describes the basics of using a handheld meter for still photography. There are also meters designed for reading color temperature (Color Meters) and there are also meters designed specifically for video and cinema use. Many photographic meters offer some degree of metering settings for video/film use. However, dedicated ones will offer a wider range of settings and reading types needed for motion image capture.
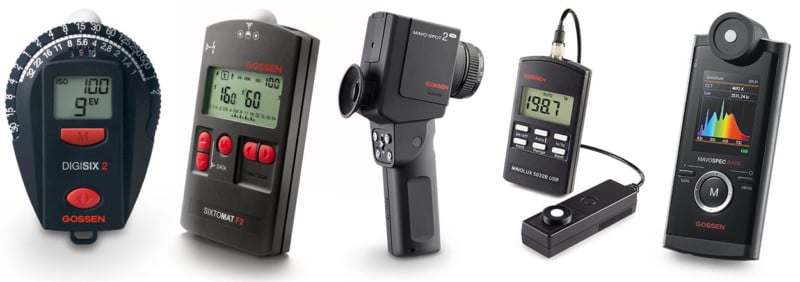
There are also industrial light meters used for environmental services that can measure light in multiple ways for checking on work environment settings, signage, and a wide range of other uses. Gossen in particular offers a wide variety of light measuring devices for photography and industrial use.
Conclusion
While one can certainly be successful in their photography work without ever using a handheld meter, they are very useful tools. They can save you time in getting your lighting set correctly, which leaves you more time to concentrate on the subject and composition.
![]()
Handheld meters can also help identify problematic gear. I discovered one of my studio strobes was putting out inconsistent amounts of light at lower settings by testing it with my meter. This helped me sort out why my headshot sessions were giving me slightly brighter and darker images even though the light was set manually.
There are several manufacturers making handheld incident/reflected meters, with pricing starting around the $130 mark for a basic one. If budget is a concern there is a wide selection of used meters out there and typically if they are in good shape, they should still be accurate and reliable. Just test them when you get them and then get out and shoot!
Image credits: Header photo from Depositphotos