
iOS 16: How to Use Personalized Spatial Audio on iPhone
Apple released iOS 16 for iPhone and iPad a few days ago. While not a major upgrade, it does offer some interesting features. Personalized spatial audio is one such feature affecting AirPods. We’re here to tell you all about Personalized Spatial Audio, from how it works to how you use it.
Apple has made strides on the audio front in recent years. When they launched Spatial Audio for Apple Music in 2021, they wanted to offer an even more immersive music experience. It felt like we were sitting next to Ed Sheeran in the studio listening to Shape of You. And no doubt Personalized Spatial Audio blew us away in equal measure. Continue reading this guide to learn more.
What is personalized spatial audio?
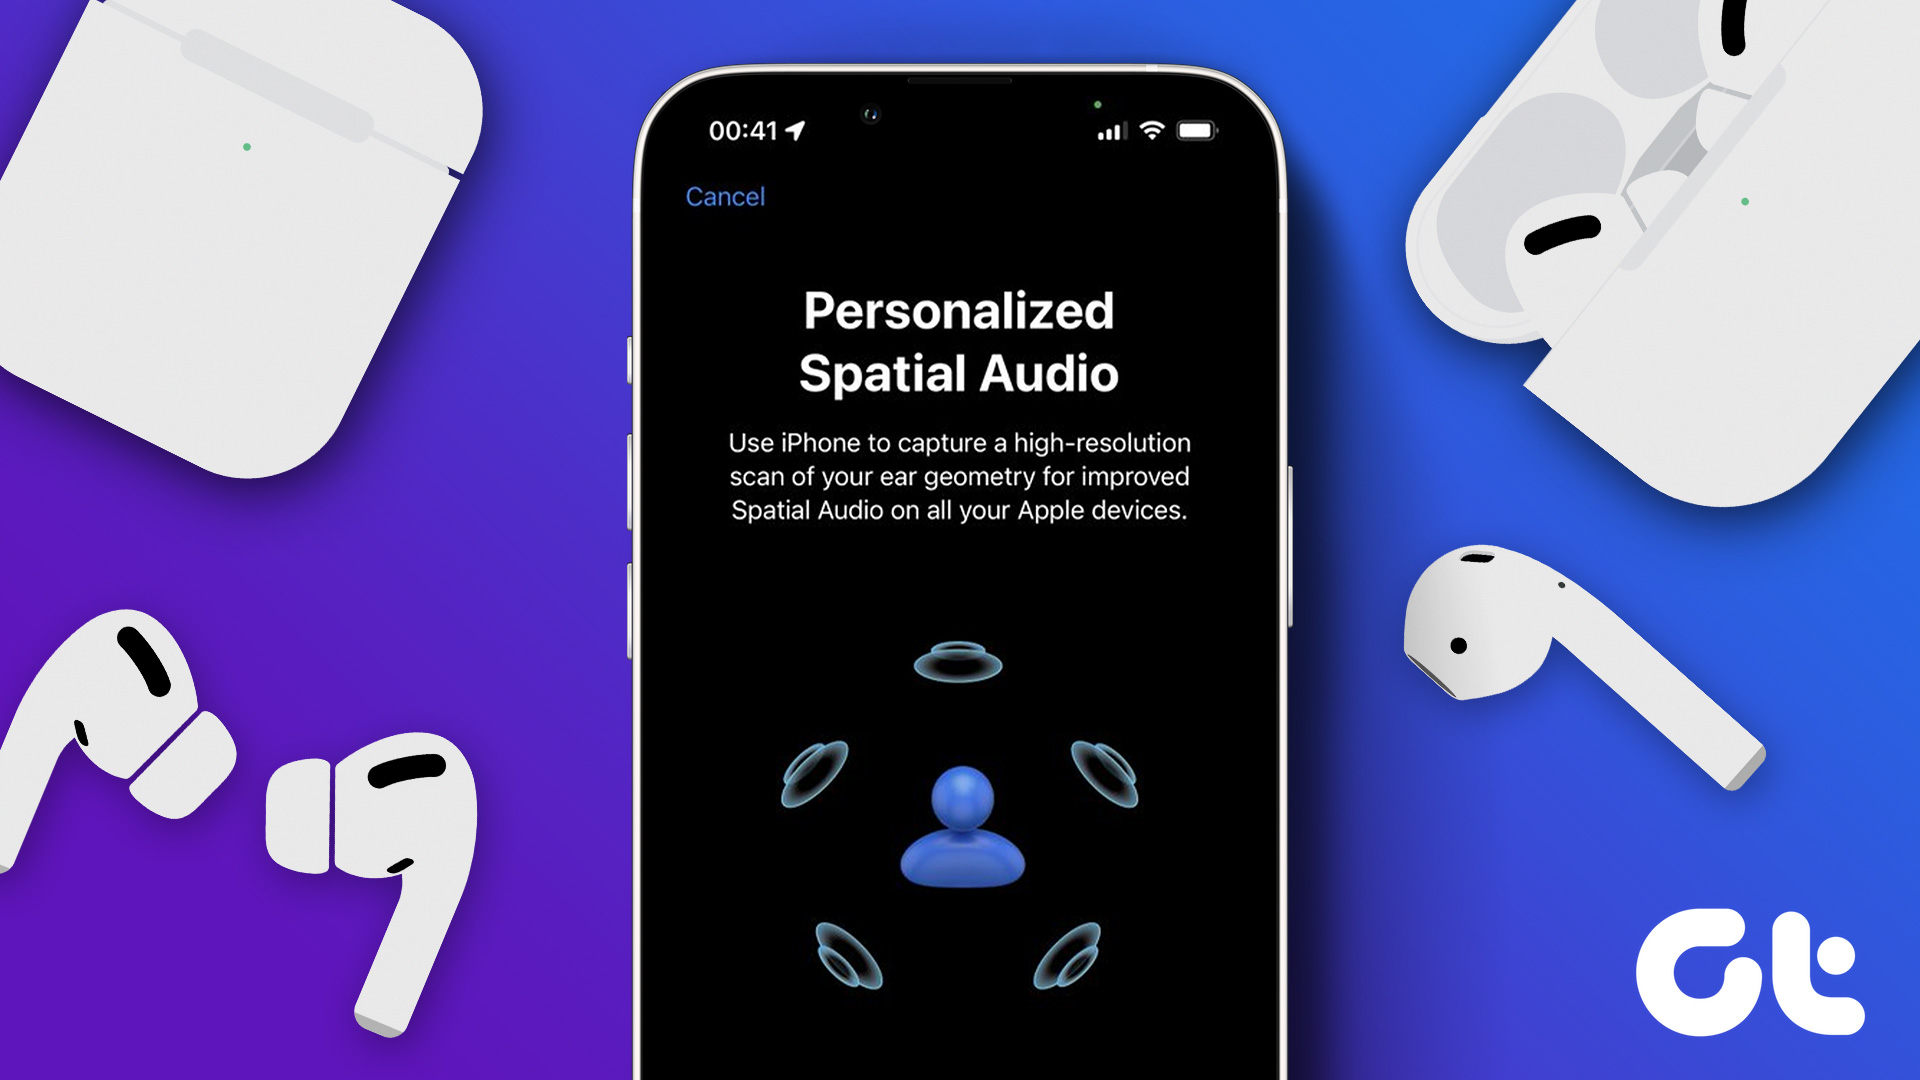
As Apple defines it, Personalized Spatial Audio is a technology that provides a three-dimensional audio experience when you move your head.
If you’ve wondered what spatial audio even is, it’s a listening experience that creates a surround sound effect in your headphones. You hear notes and sounds of music in all directions, creating a multidimensional effect.
Apple states that the way each person perceives audio is unique, making for a more immersive audio experience and offering spatial audio profile customization – and the way it works is quite interesting.
How does personalized spatial audio work?
Personalized spatial audio scans your ears and face profile on your iPhone to optimize audio output based on your unique ear shape. Analyzing your ear structure optimizes the audio based on all of the unique folds and contours of your ear.
Once that’s done, the audio adjusts to frequencies and the right intensity, accounting for the shift in sound profile as it enters your ear. The goal is to ensure you get the best experience when listening to spatial audio.
Setting up this feature was a fairly tedious process, however, and it took us almost three attempts to register the right ear. When we finally completed the process, the music experience was unlike anything else. We encourage you to try it too. The good thing is you can test it first before setting up the feature to make sure.
What you need to use personalized spatial audio
You must have an iPhone with a TrueDepth camera running iOS 16 to set up personalized spatial audio. Once set up, you can access the feature on any of the devices listed below by signing in with your Apple ID.
- An iPhone or iPod touch with iOS 16 or later, an iPad with iPadOS 16.1 or later, or an Apple Watch with watchOS 9 or later, an Apple TV with tvOS 16 or later, or a Mac with Apple Silicon and macOS Ventura
- An Airpods 3rd Gen, Airpods Pro, Airpods Pro 2 or Airpods Max.
- Beats Fit Pro is the only other compatible audio device.
How to get a quick demo of personalized spatial audio on iOS 16
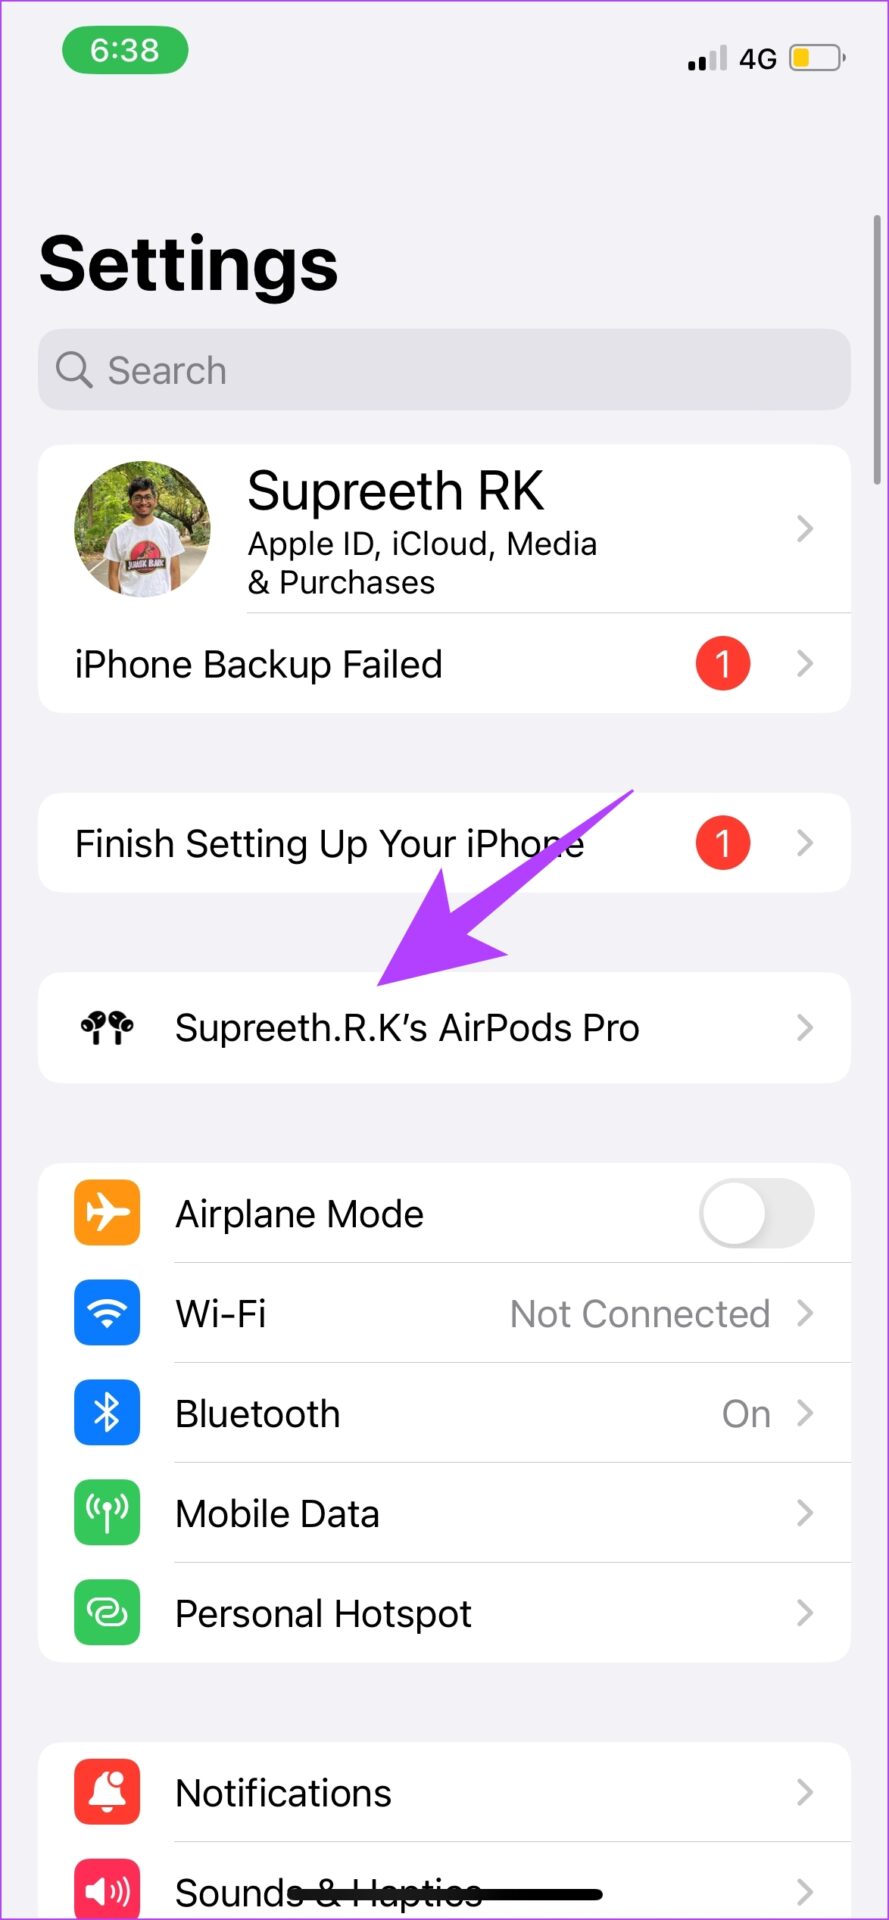
Step 1: Open the Settings app.
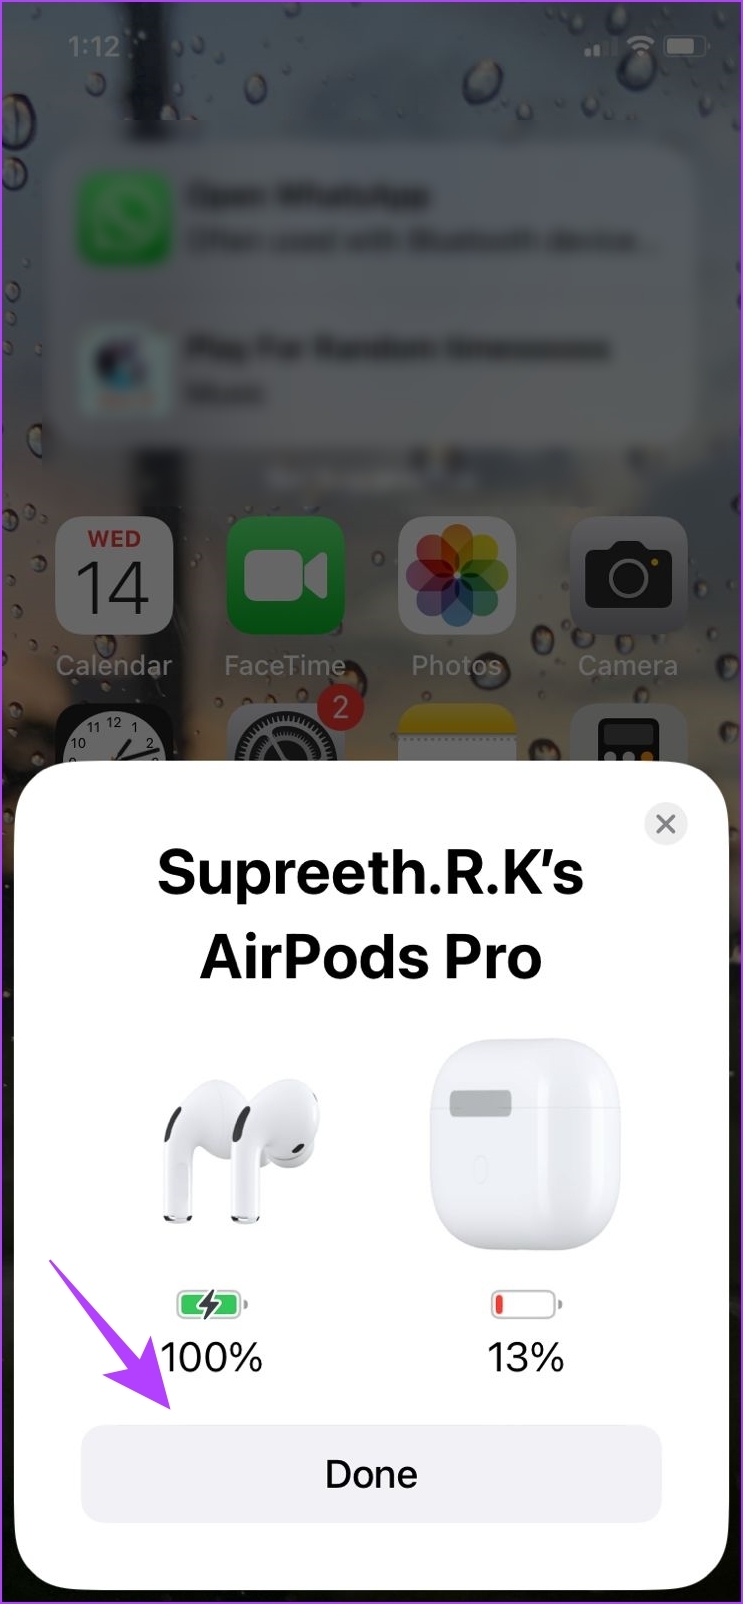
Step 2: Select your AirPods.

Step 3: Select “See and hear how it works…” in the “Spatial Audio” section.
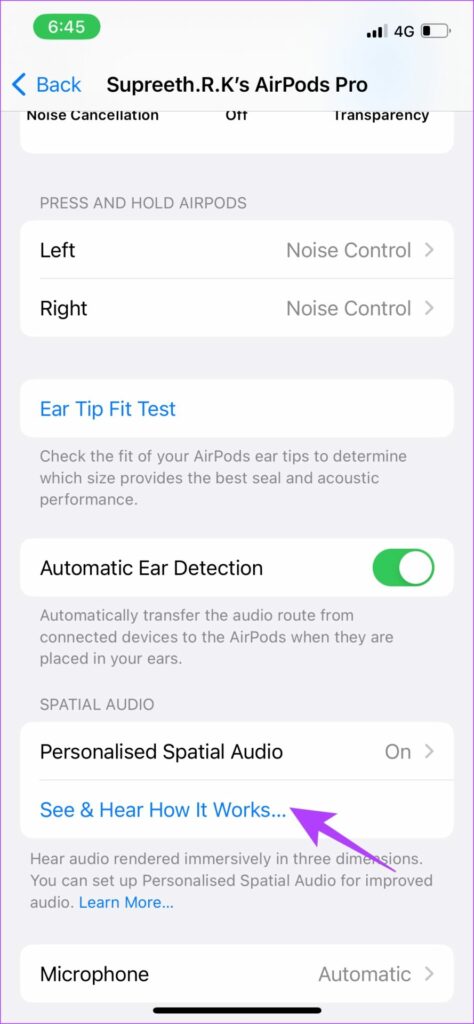
Step 4: You get a demo and comparison of stereo audio and spatial audio. Click Done after listening to the demo.

Now that you’ve experienced the difference, we’re pretty sure you won’t want to turn back. Here’s how you can set up Personalize Spatial Audio on your iPhone and AirPods and listen to your favorites.
How to set up personalized spatial audio on iPhone with AirPods
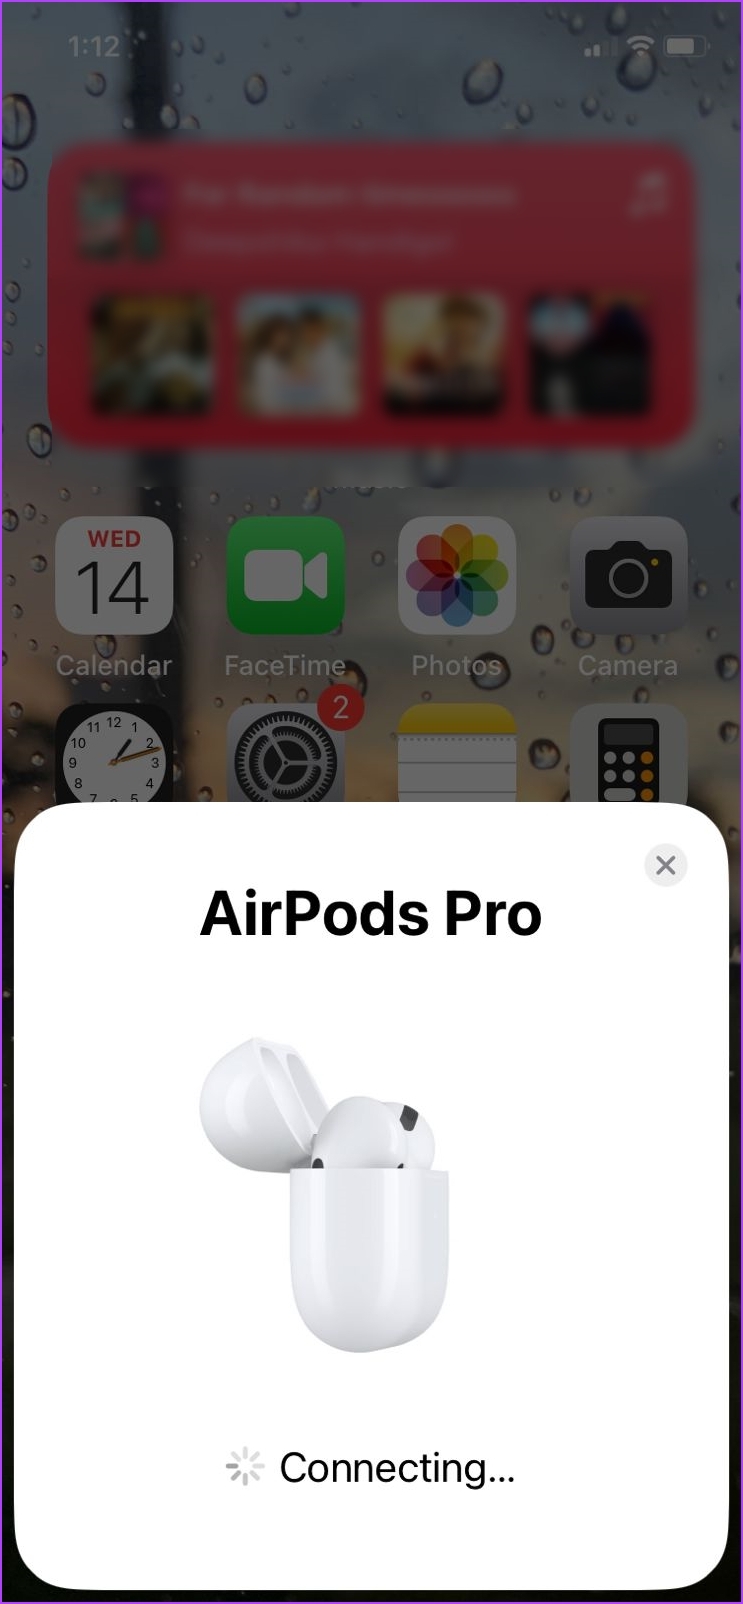
Step 1: First, connect your AirPods to your iPhone. To do this, place the AirPods case close to your iPhone with the lid open.
Step 2: Now press and hold the button on the back of the charging case as shown on your iPhone.

Step 3: Wait for the AirPods to connect. Once connected, tap Done.
Step 4: Open the Settings app and select the connected AirPods.
Step 5: Choose Personalized Spatial Audio. On the next screen, select “Personalize spatial audio…” again.


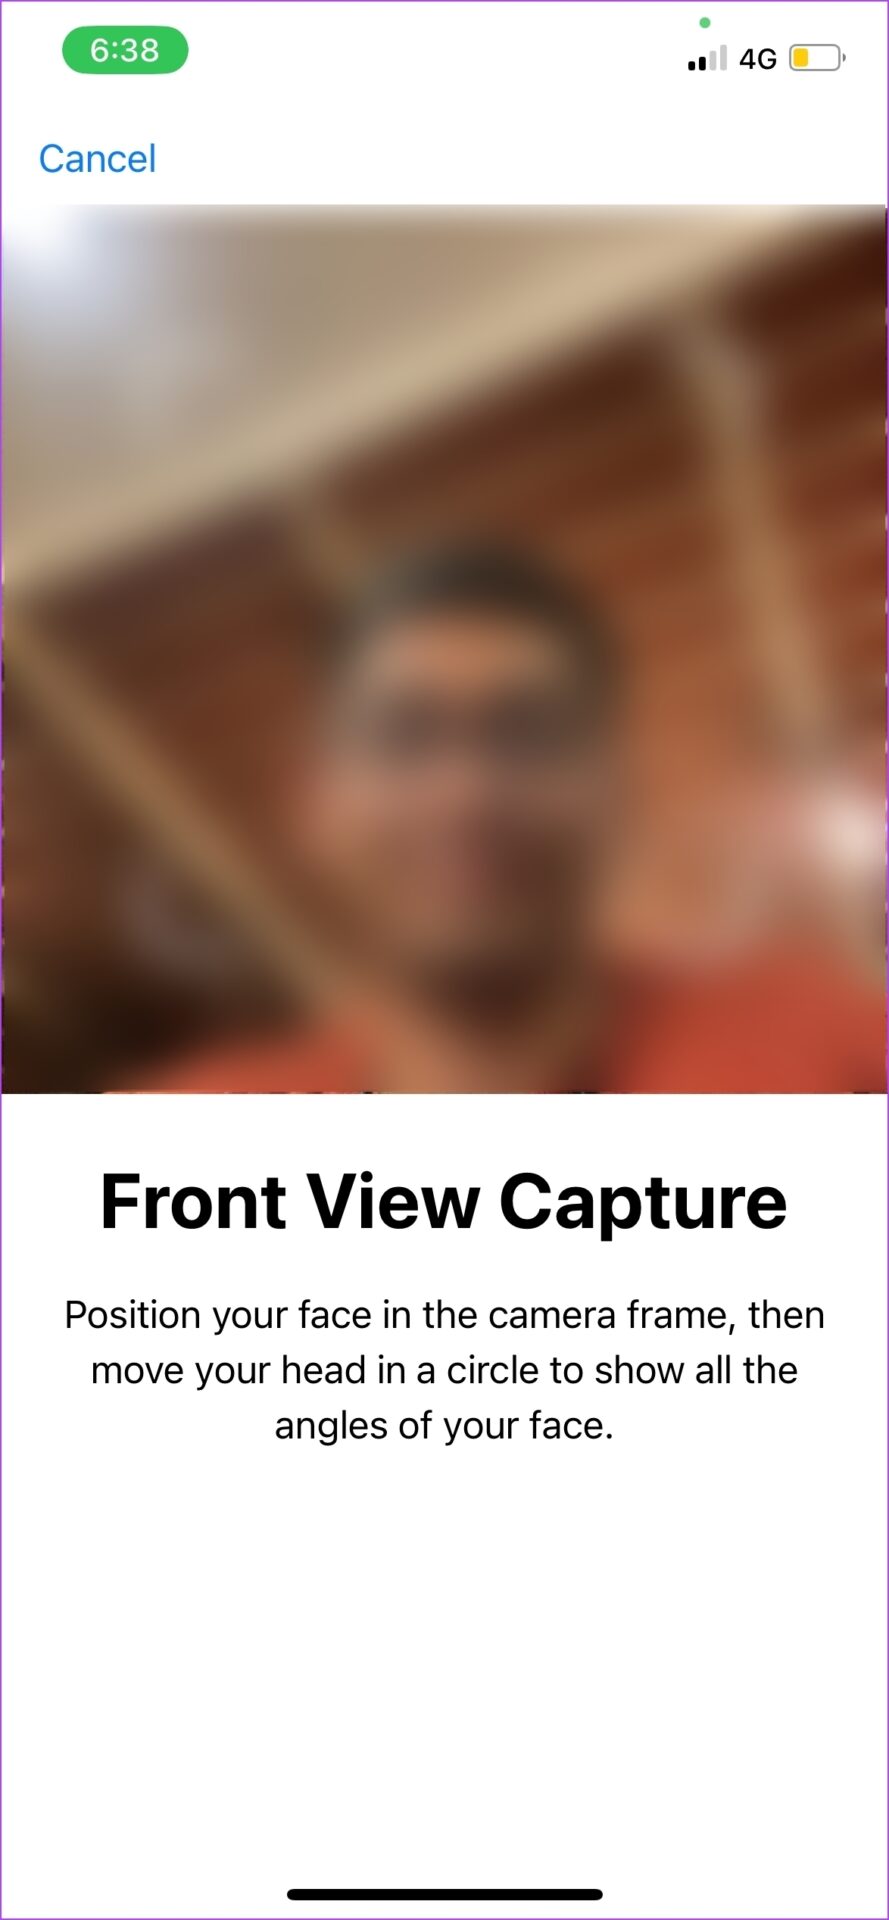
Step 6: Click Next to start scanning.

Step 7: Position the front profile of your face first. Follow the prompts to turn your head and register your profile.
Step 8: Next, capture the profile of your right ear and follow the prompts to move your head to register the profile. Repeat the same for your left ear profile.


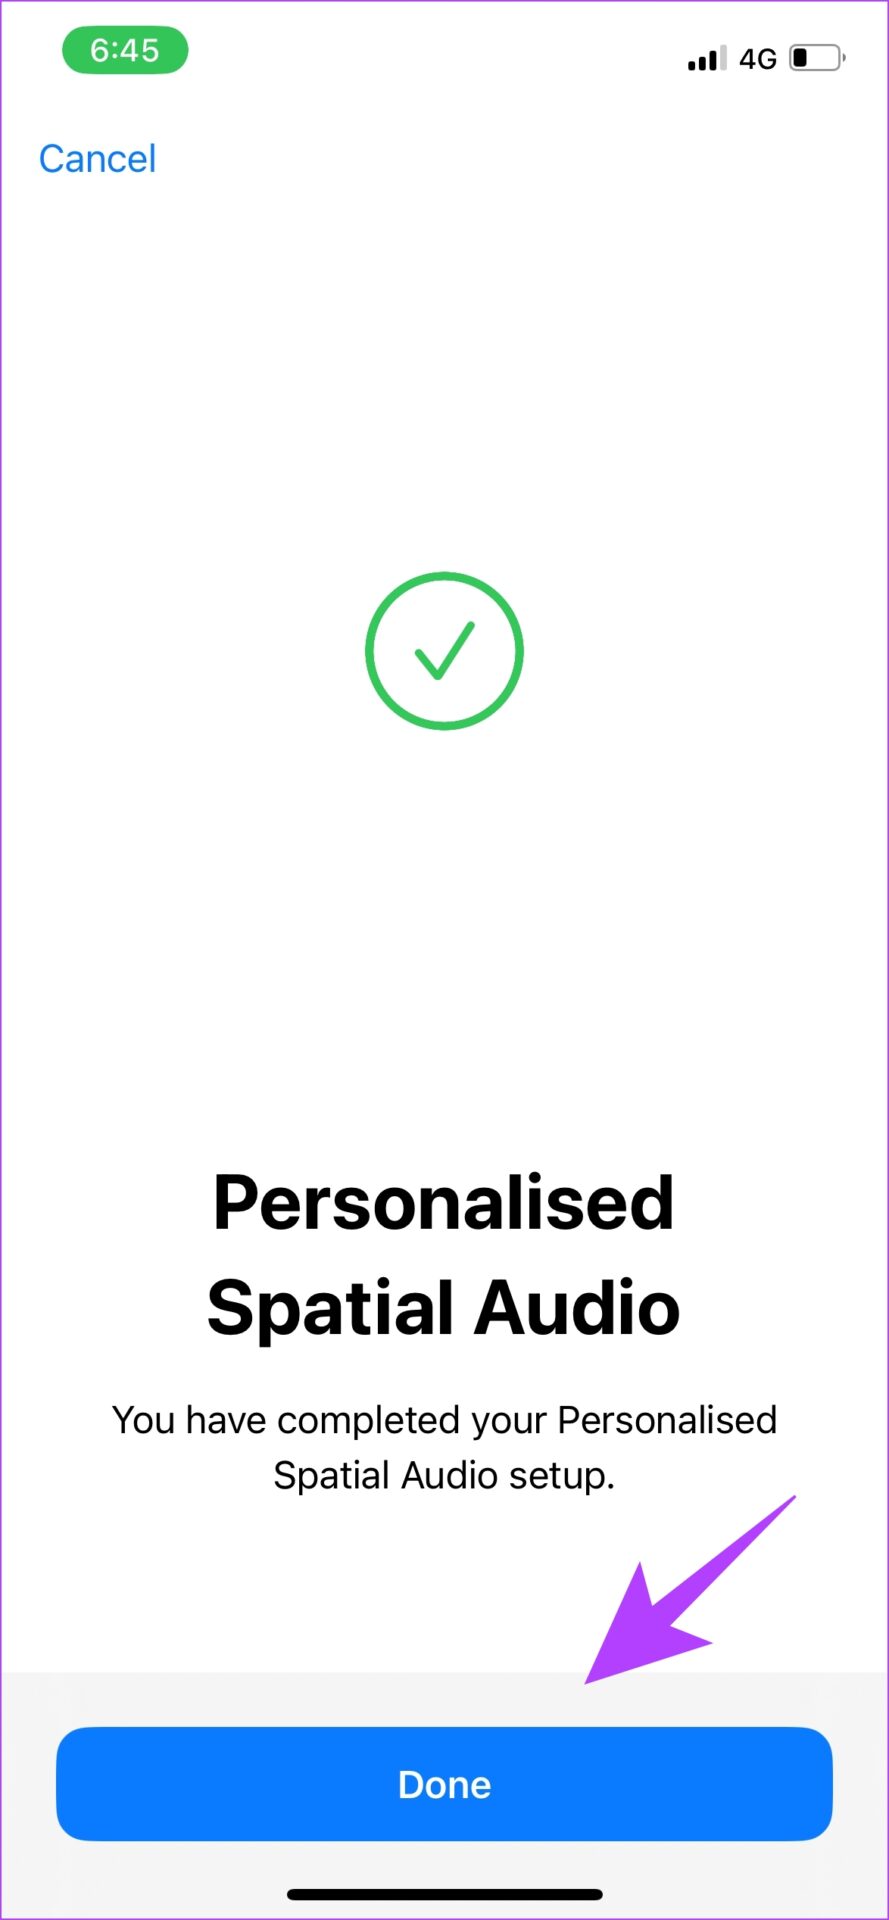
Step 9: After registration you will receive a confirmation message. Tap Done.
As previously mentioned, we had to go through multiple attempts to register the ear profiles. Don’t worry if you face the same issue and get the error message “Personal spatial audio could not be set up”. We have a few tips that helped us get it right.
Fix the error “Personal spatial audio could not be set up”.
- Scan your face without many objects in the background.
- Take off your glasses or similar size facial accessories.
- Make sure your hair doesn’t get in the way of your ears.
- Place your phone 10-20 meters away from your face.
- When asked to move your head, do so slowly and gently.
When you’re done, go ahead and hear finely tuned spatial audio made for your ears.
Here’s how to get the best spatial audio experience with Apple Music
Apple Music has had Hi-Res Lossless audio for a year now, and we’re sure a personalized experience would be even better. So you can listen to music best suited for spatial audio. To do this, some options must be activated in the settings.
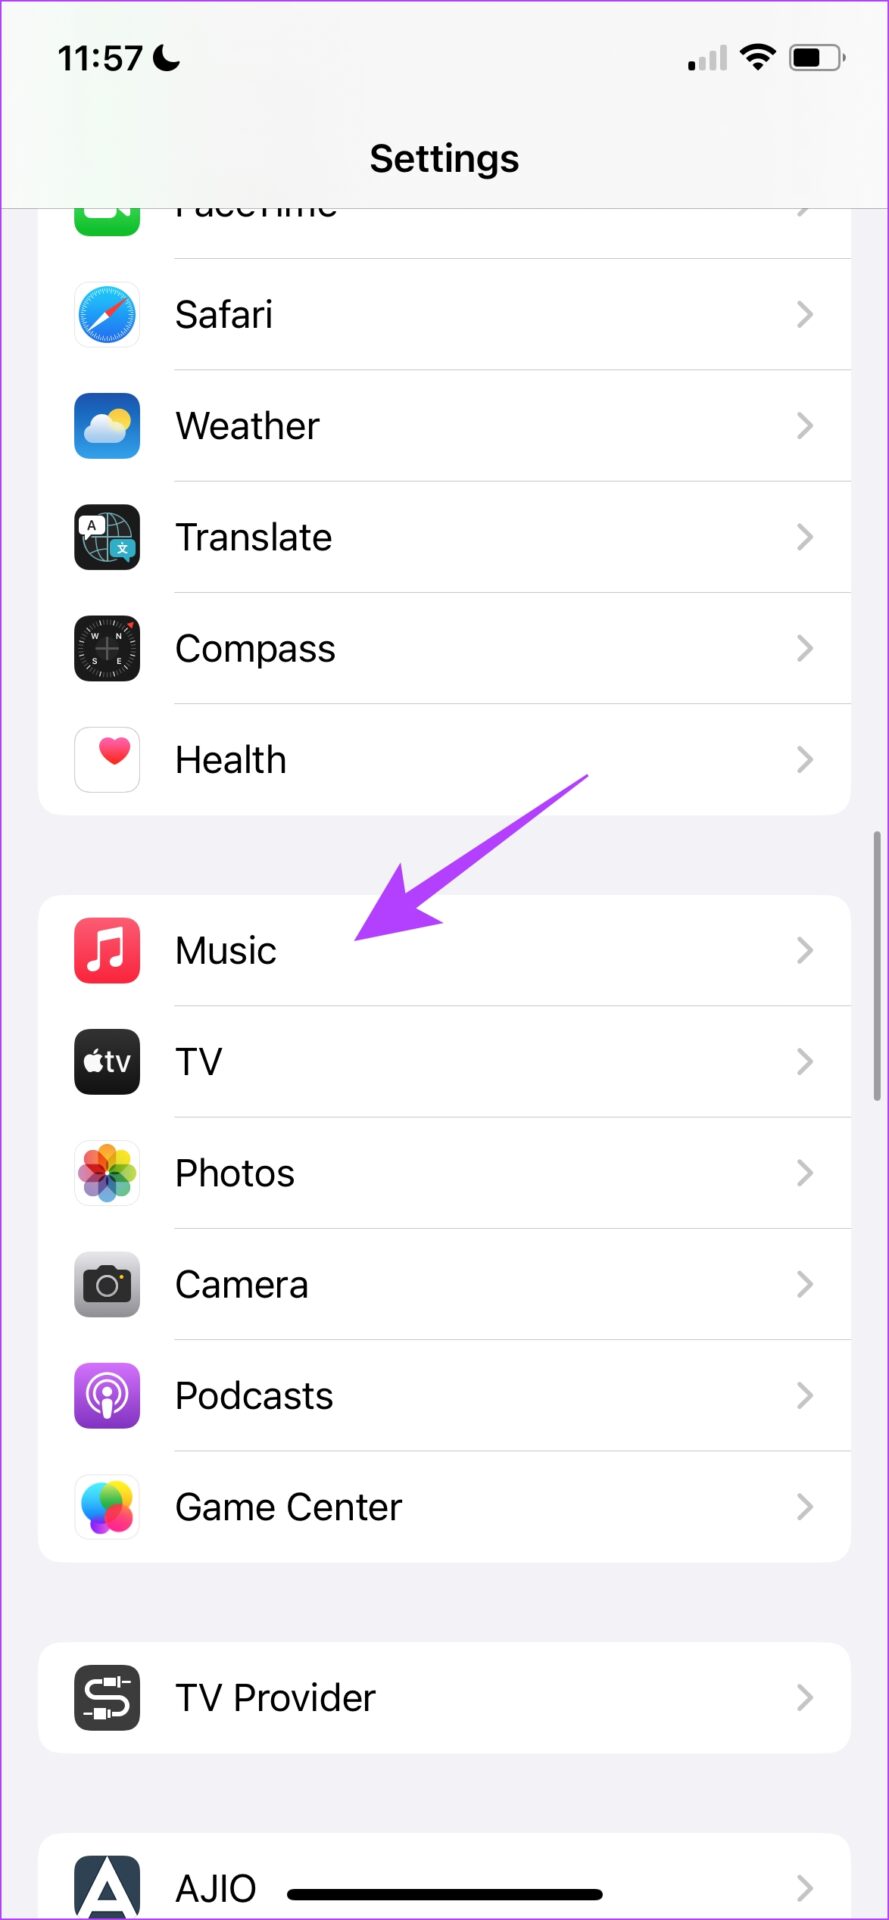
Step 1: Open the Settings app and tap Music.
Step 2: Choose audio quality.

Step 3: Turn on the switch for lossless audio.

step 4: On the same screen, tap any streaming mode and select Hi-Res Lossless if not already done.
note: Listening to Hi-Res lossless music consumes more data than the High-Efficiency option.


Step 5: Now open Apple Music.

Step 6: Search for Spatial Audio in the search bar. You’ll find a range of playlists tuned to provide an immersive spatial audio experience.

Step 7: The song being played carries a tag indicating that it has lossless spatial audio.

Now that you understand how to enable and use this feature, you probably have some questions about its availability and more. For answers, proceed to the FAQ section.
Frequently asked questions about Apple’s personalized spatial audio
Few apps currently support spatial audio features. Popular apps include Apple Music, Netflix, Apple TV, Hulu, HBO Max, Clubhouse, etc.
No, neither Spotify nor YouTube currently offer spatial audio. However, we hope that the developers will work on using the personalized spatial audio feature.
Yes, FaceTime supports calls with personalized spatial audio.
On your device, go to Settings > select Airpods by your name > “Personalized spatial audio” > tap “Stop using personalized spatial audio”.
Enjoy spatial audio tuned to your ears
That’s all you need to know about using personalized spatial audio on iPhone. For best results, we recommend using Apple Music. It’s amazing how Apple improves the experience with software updates like this. The AirPods started a revolution in wireless headphones, and we’re excited to see how the competition reacts to such a feature.