How to Fix Game Stuttering on Windows 11
It’s fun playing games on your PC until the game stutters and crashes, leaving you both frustrated and confused.
Windows 11 users faced similar issues with most of the games installed on their computers stuttering for no apparent reason. Don’t worry because in this guide we will examine the possible causes of the problem and discuss troubleshooting methods that you can use in case you encounter it.
What Causes Games to Stutter on Windows 11?
Before we move on to the troubleshooting methods, it is important to determine the source of the problem on your Windows device. It helps you to understand why this problem occurs and allows you to apply the right troubleshooting methods and fix the problem quickly.
Here are some reasons why your Windows 11 games may stutter, freeze or lag:
- First, the graphics driver could be corrupted or outdated.
- You haven’t updated your Windows operating system for a while.
- Finally, some relevant gaming services cause problems by consuming resources.
Whatever the reason may be in your case, hopefully the methods mentioned below will help you to solve the problem in no time.
1. Update your graphics card driver
One of the most common reasons for gaming problems is outdated or corrupted graphics card drivers. Ideally, you should always keep your drivers up to date.
If you have a graphics card suite on your PC, your drivers should update automatically. If not, you can manually update the drivers in Device Manager.
Here’s how you can do that:
- Type device manager in Windows search and click Open.
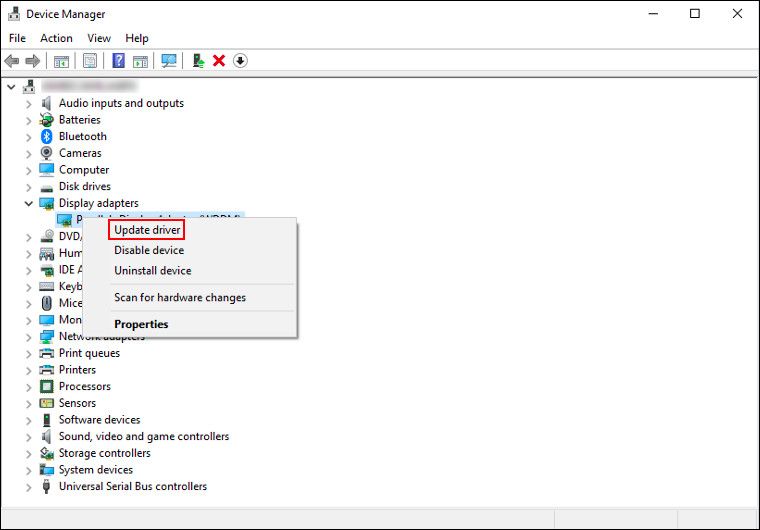
- In the window that opens, expand the display adapter section and right click on your graphics card driver.
- Choose update drivers from the context menu.
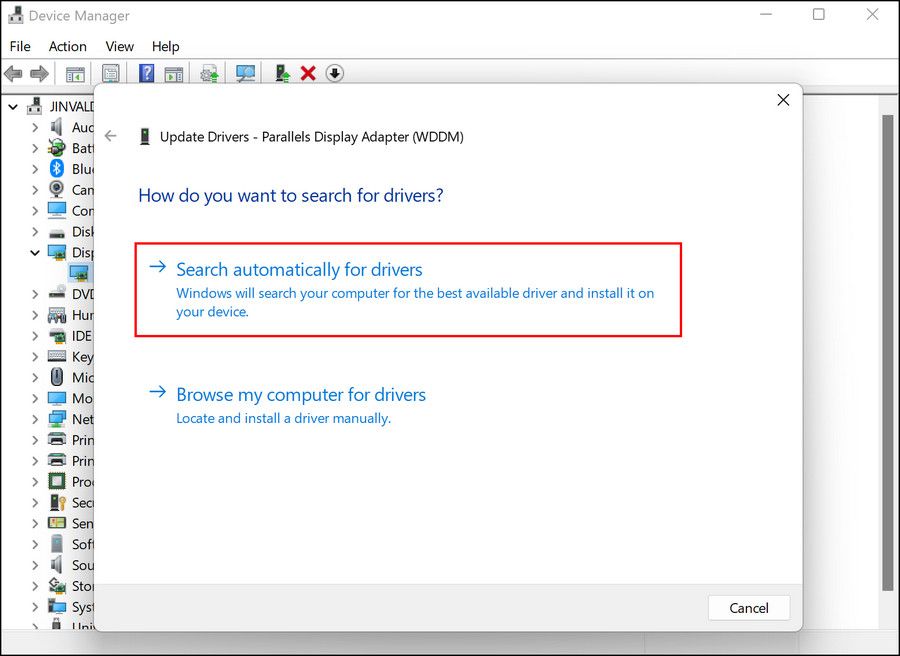
- Now click Search for drivers automatically and wait for Windows to find the available updates.
- Then install the ones found and check if the problem is resolved.
If Windows can’t find new drivers, we have specific guides on how to update AMD graphics card drivers and Nvidia graphics card drivers that may find a newer version.
2. Clean install your graphics driver
If you’re sure that the problem is related to the driver in question and the update doesn’t work, you can try a clean install of the graphics card driver and see if that helps.
Reinstalling uninstalls the previous driver and reinstalls the latest compatible version from scratch. Just press Win + S, type “device manager” and click on the result. Then, in the Device Manager window, right-click the problematic driver (it should be under display adapter) and choose Uninstall.
Once you have uninstalled the driver, go to the manufacturer’s official website and download the latest version from there. This process may take a while, so stay tuned.
3. Edit the registry
Microsoft bundled some systems in Windows 11 to help you play. Unfortunately, most of these services require quite a lot of resources to work properly, which can cause problems if your PC isn’t specifically designed for gaming.
In this case, it is best to disable these features so that you can play without problems.
It has been reported by several users that disabling the Game DVR feature of Windows 11 fixed the problem. Game DVR allows you to record gameplay. So if you don’t plan on doing this in the future, we recommend you disable this feature and see if it helps you.
We will use the Windows registry editor to make this change. However, before proceeding, we strongly recommend backing up the registry just to be safe.
After creating the backup, do the following:
- Press victory + R to open Run.
- Type “regedit.msc” in Run and press Enter.
- Once in the registry editor, navigate to the location mentioned below:
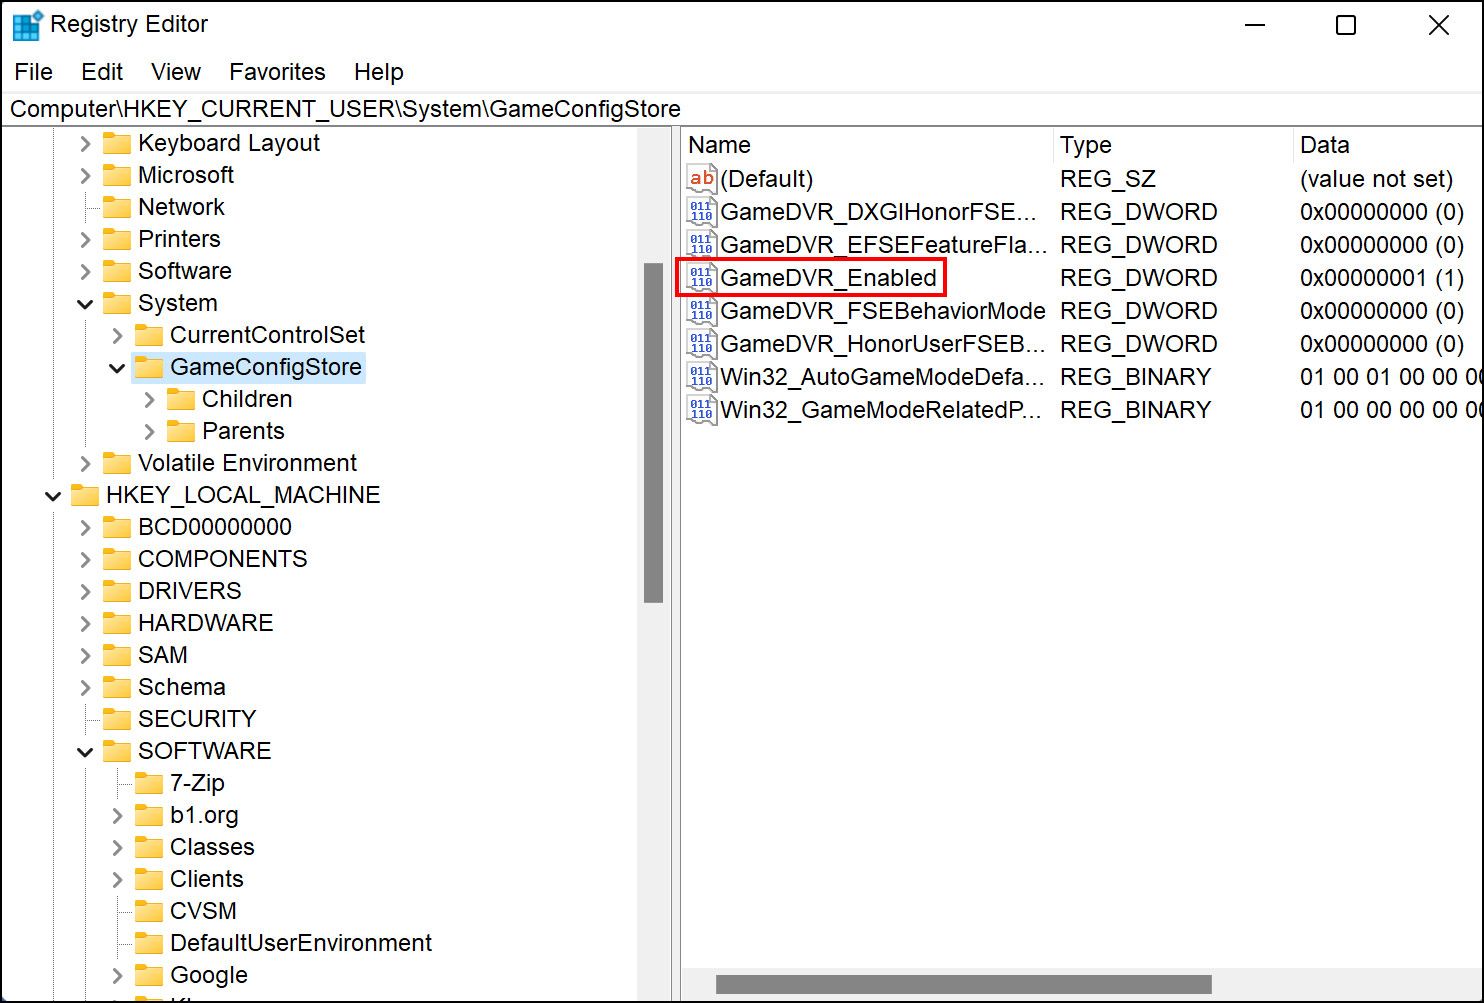
Computer\HKEY_CURRENT_USER\System\GameConfigStore - Go to the right side of the window and double click the GameDVR_Enabled Key.
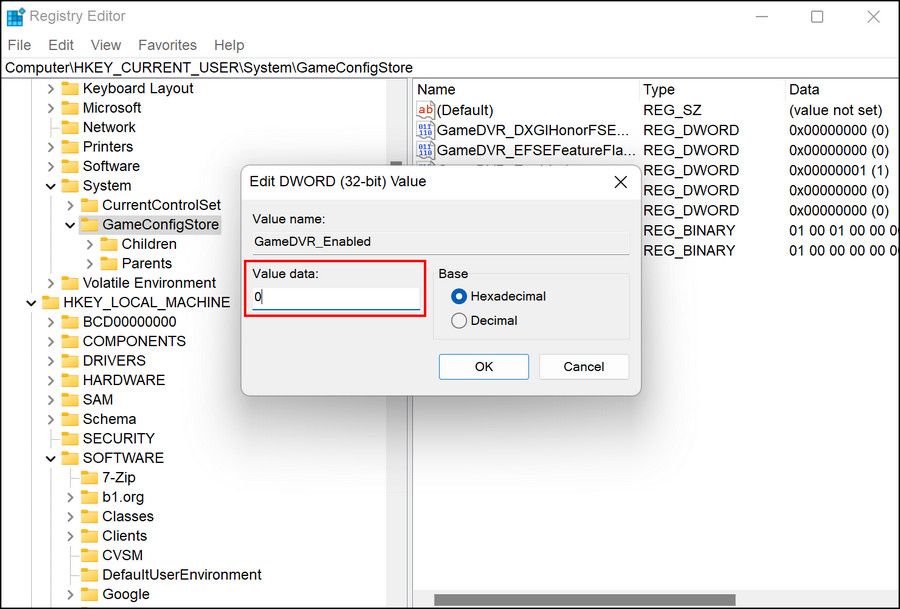
- In the following dialog, under Value data, enter 0 and click Enter.
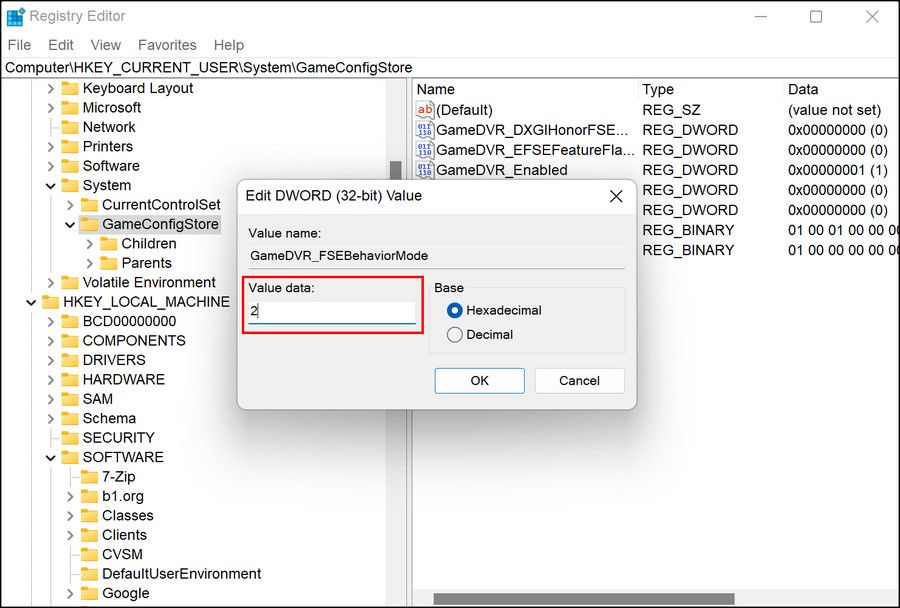
- Now look for the GameDVR_FSEBehaviourMode In the same window, type and double click on it.
- Change the value to 2 and click Enter.
- Next, navigate to the following location in Registry Editor.
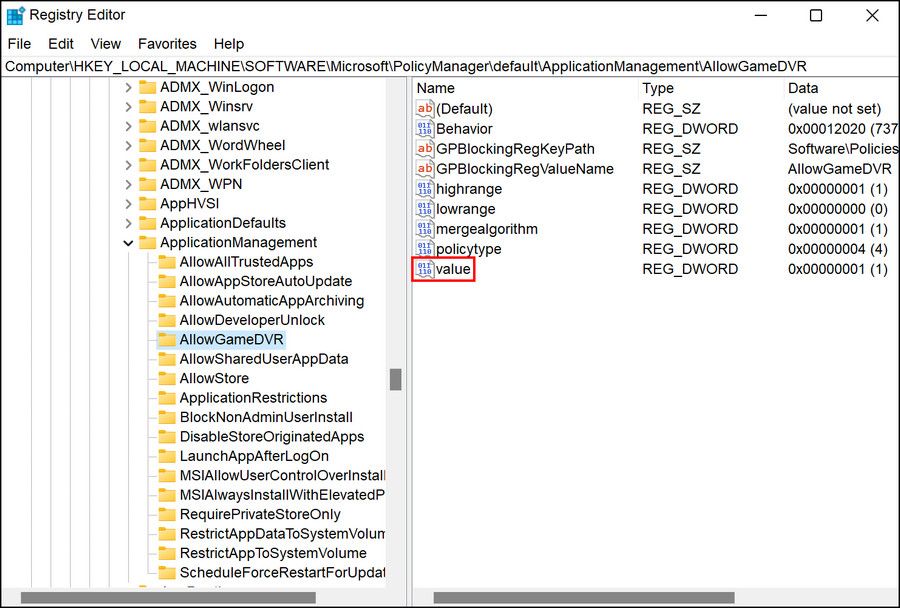
Computer\HKEY_LOCAL_MACHINE\SOFTWARE\Microsoft\PolicyManager\default\ApplicationManagement\AllowGameDVR - After reaching the location, move to the right side of the window and double click on the value key.
- Change the value to 0 and make sure the base is set to Hexadecimal.
- click Enter to make the changes, and then close Registry Editor.
- Finally, restart your PC and as it restarts, check if the problem is resolved.
4. Update Windows 11
This may seem irrelevant to the issue, but keeping your Windows up to date is important to ensure your games and other programs are running at their best.
So if you haven’t installed the latest updates on your system for a while, we strongly recommend that you take the time to install all available system updates. Not only do you get new features with the latest updates, but you don’t have to worry about issues like incompatibilities, security vulnerabilities, or malware attacks.
Check out our guide to managing updates in Windows 10. Don’t worry; the steps are the same for Windows 11.
5. Disable the High Precision Event Timer Device
There is also a chance that this issue occurs due to the High Precision Event Timer device, which has a bad reputation for affecting a game’s framerate.
Here’s how you can disable it to fix the problem:
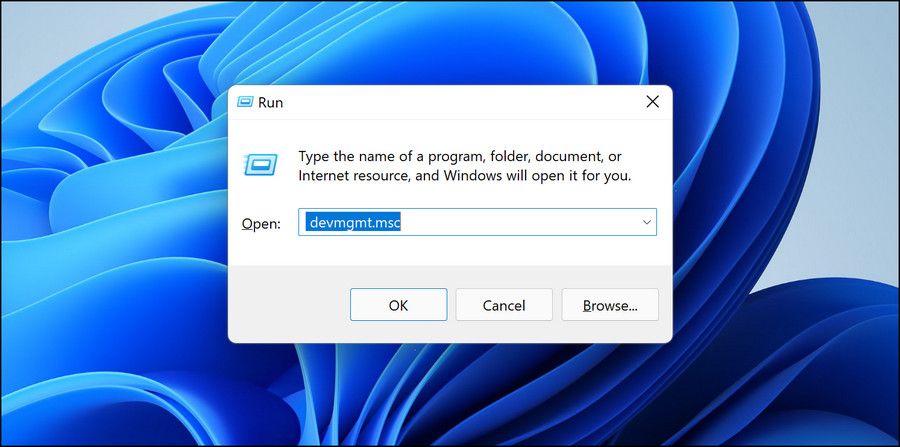
- Press Win + R to open Run.
- Type devmgmt.msc in the text box and press Enter.
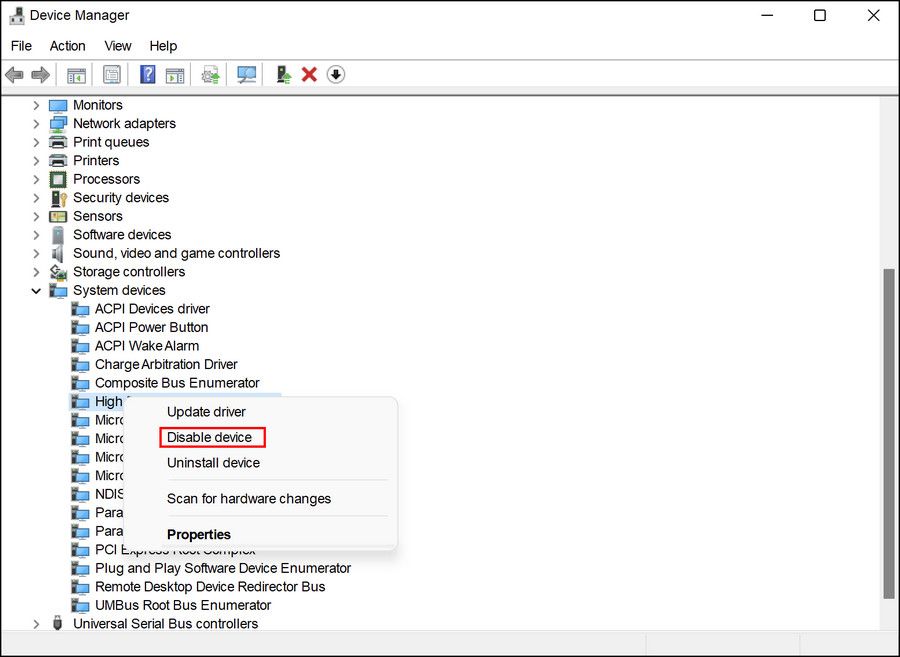
- In the following dialog, expand the system devices and right-click High Precision Event Viewer from the list of available options.
- Choose disable device.
- If a confirmation prompt appears, click Yes Continue.
You can now close Device Manager and see if you can now play the game without any problems.
Enjoy the best gaming experience on Windows 11
Games that crash, especially when you’re about to complete a goal, aren’t fun. You should be able to fix the game stuttering issue by following the troubleshooting methods listed above. If the error appears again, we recommend that you reinstall the game from scratch and see if that makes a difference.
