How to use Samsung Expert RAW to get the best photos
At the end of last year, Samsung released a new app for the Galaxy S21 Ultra called Expert RAW. This app gives users complete control over the device cameras, similar to Pro mode, but with an added benefit: the RAW photos it outputs still benefit from multi-frame HDR. These can then be imported into an app like Lightroom where you can use all this RAW data to tweak the image and get the look you want.
Using Expert RAW might seem daunting for newcomers, but once you’ve used it a few times, it quickly becomes second nature.
The apps you need
Before you begin, you need to download Expert RAW and an app that can edit RAW image files. Expert RAW currently supports the Samsung Galaxy S21 Ultra, S22 series, and Z Fold 3. The app is said to be available for the S20 Ultra, Note 20 Ultra, and Z Fold 2, but that addition has been delayed.
We recommend Adobe Lightroom as the image editing program. If you download it from the Galaxy Store rather than the Play Store, you get a version that allows you to edit Expert RAW images without an Adobe subscription, which is a great deal. This is the app Samsung has in mind when it comes to Expert RAW, so it’s best to stick with it. You can download both apps from the Galaxy Store using these links:
Download Expert RAW from the Galaxy Store
Download Adobe Lightroom from the Galaxy Store
Shoot in Expert RAW
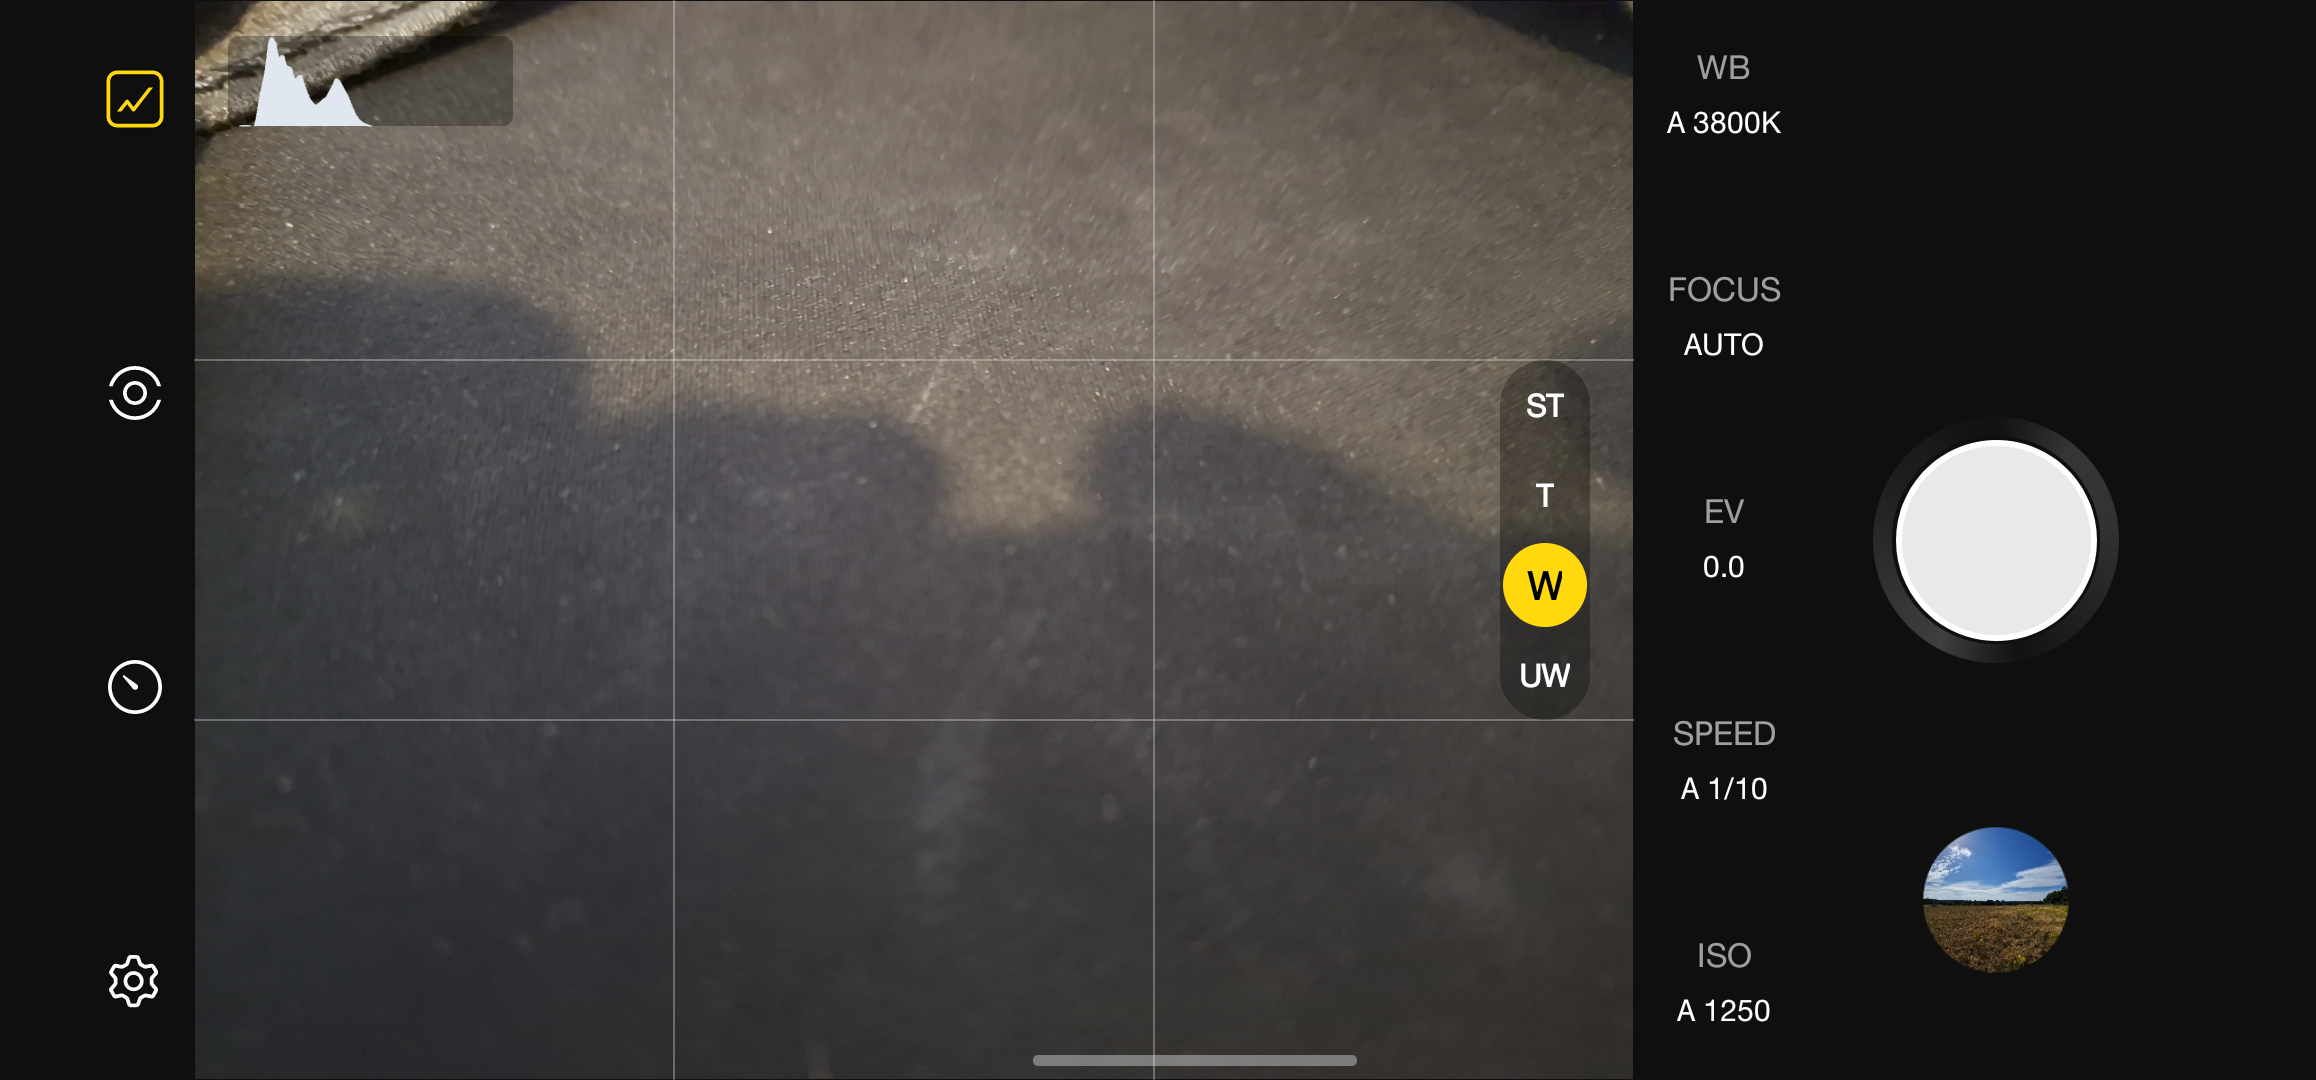
When you open Expert RAW, you’ll find an interface similar to Pro mode in Samsung’s regular camera app. Everything defaults to Auto, with the phone changing shutter speed, focus, white balance and ISO for you. You’ll most likely use this most of the time, as we’ve found the app’s automatic adjustments to be reliable.
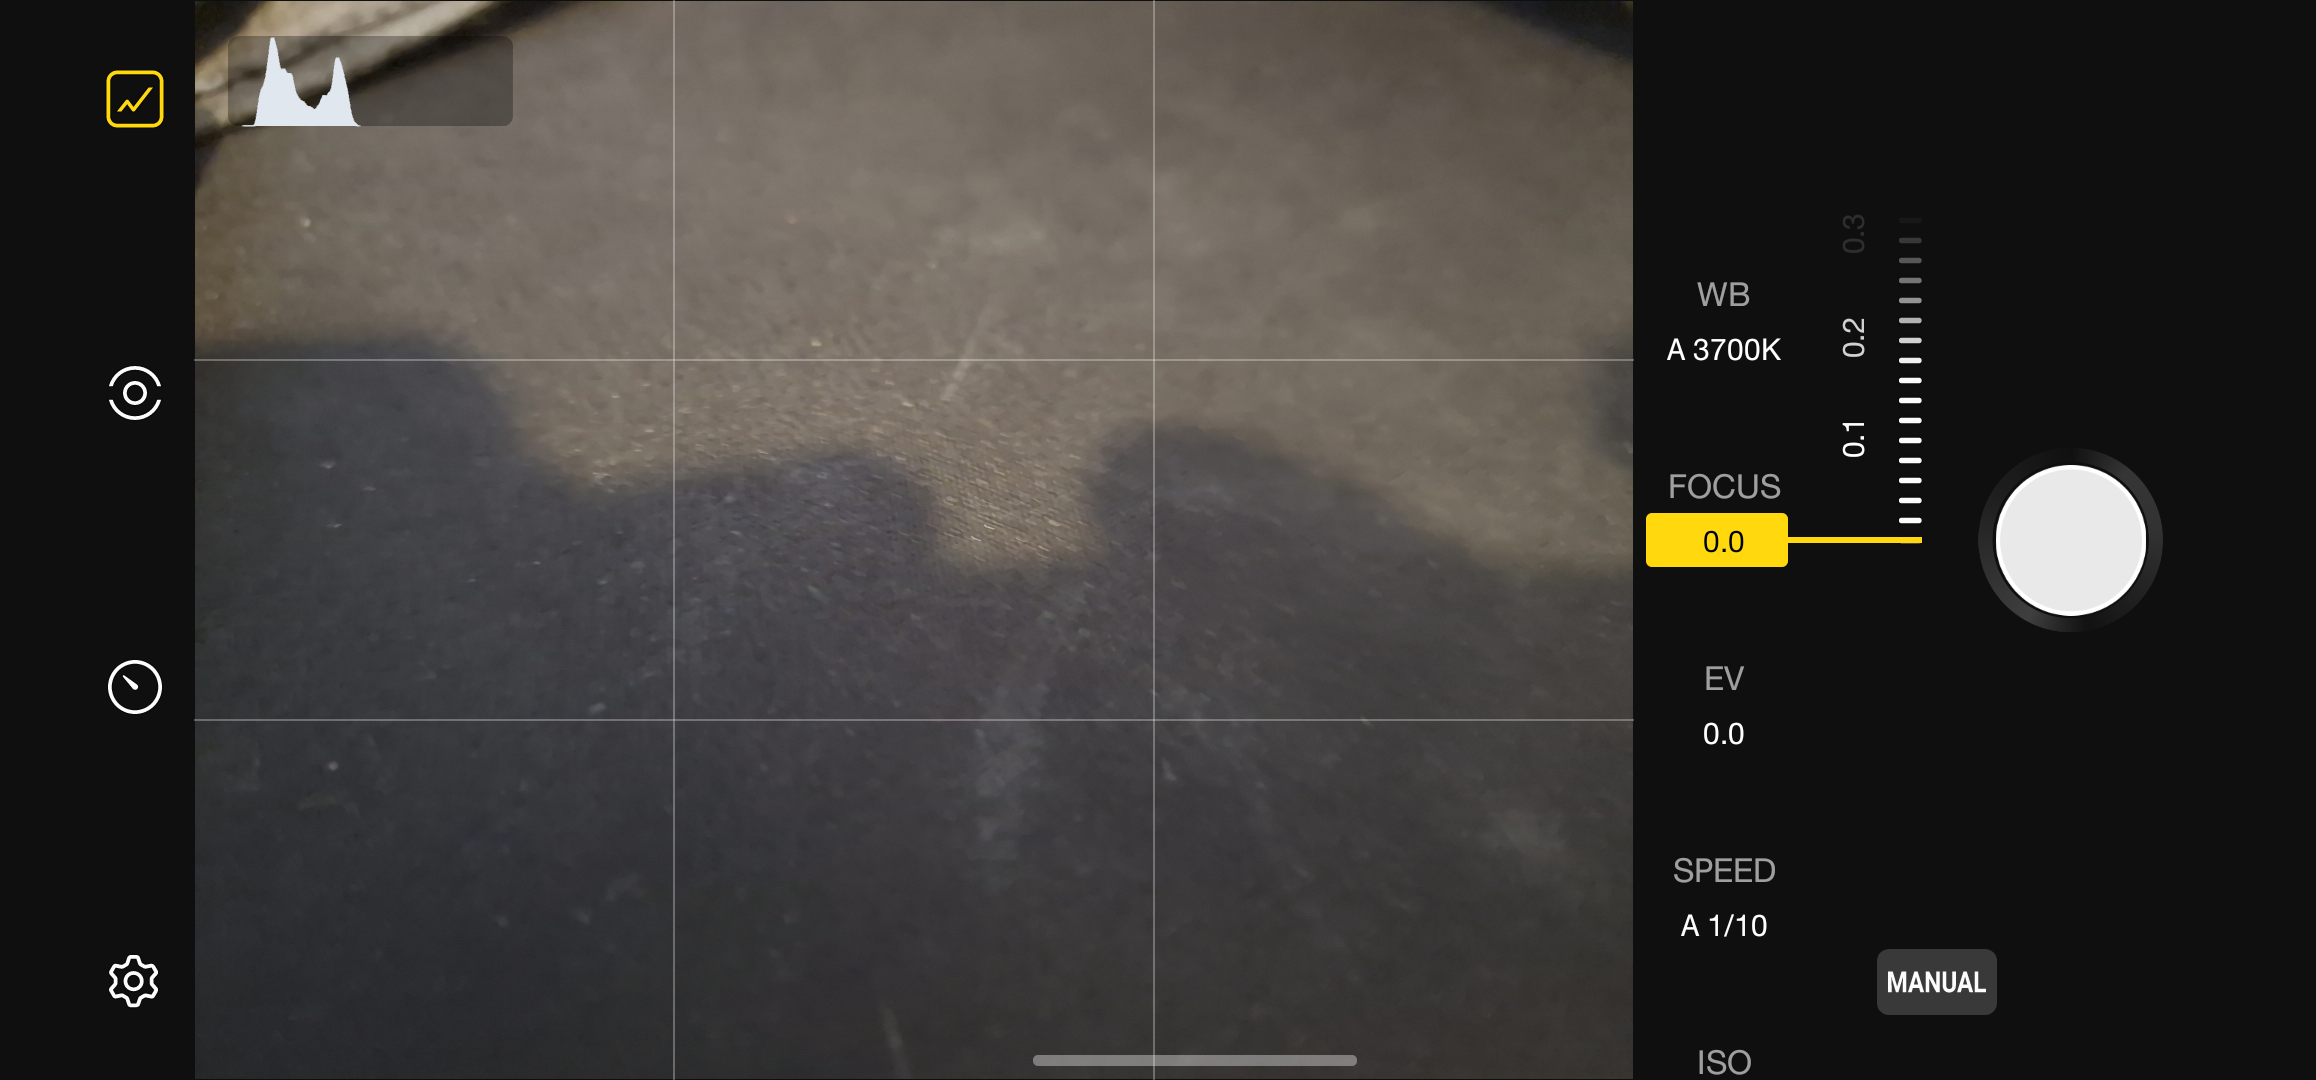
If you want to tweak any of these settings, tap the appropriate option on the right side of the screen, then drag the slider to the setting you want. When adjusting focus, the device paints a green marker over the part of the image you’re focusing on, which is handy when you’re trying to get pin-sharp focus on a small subject.
If you want to put any of these options back into automatic mode, tap on it again and then press the Manual button at the bottom of the screen. This re-enables the automatic settings for that parameter.
You have access to all rear cameras, but you cannot use Space Zoom. On the S21 Ultra and S22 Ultra you have a maximum of 10x zoom, which should be more than enough for most situations.
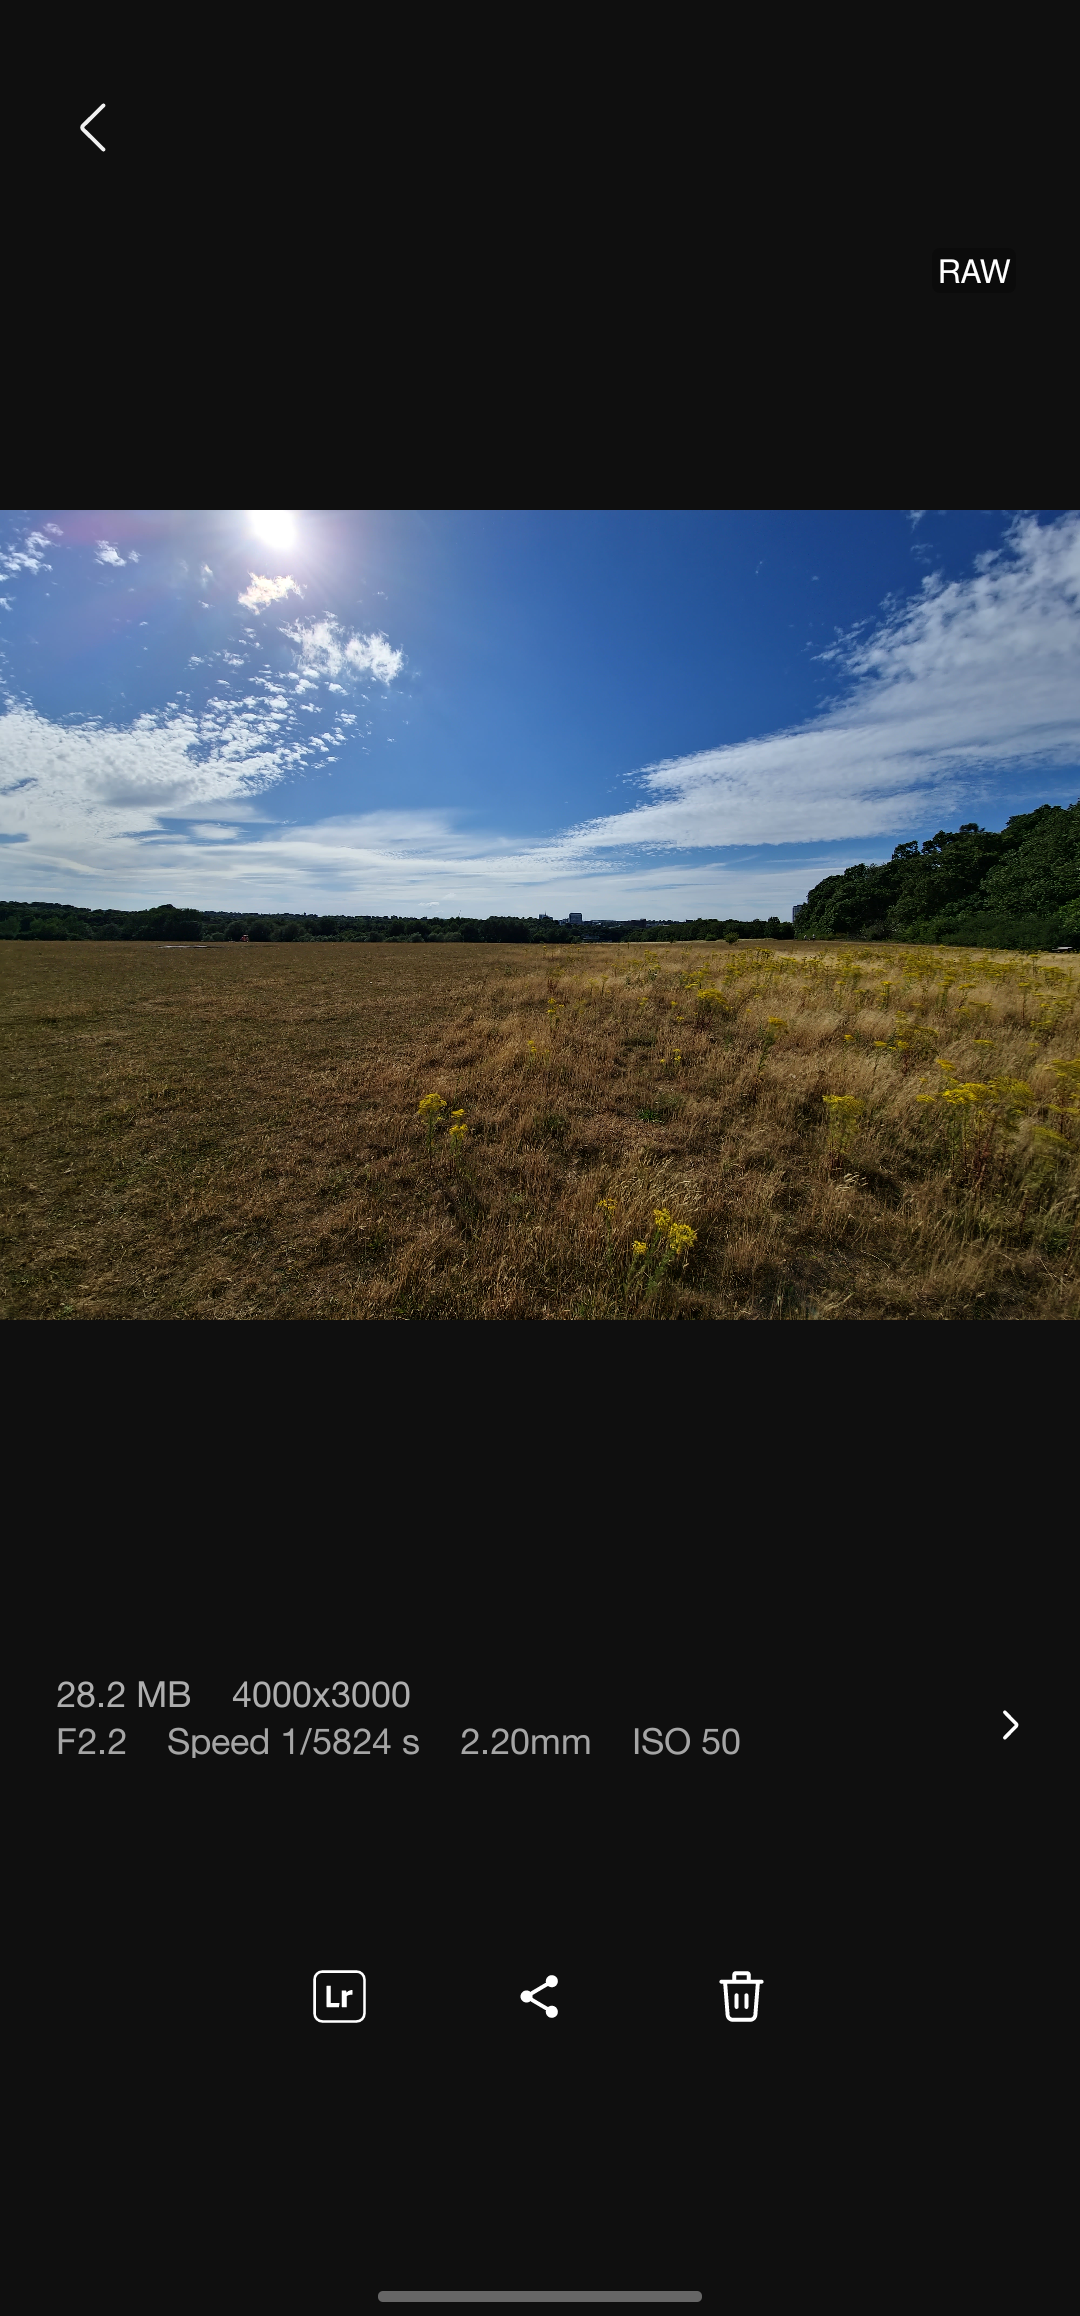
Once you’ve taken your photo, two versions are saved: a normal JPEG and a RAW file. A future update will add the ability to save images in RAW only, but that’s not available at the time of writing this article. You can tell which image is which thanks to the RAW indicator in the top right corner of the screen.
Below the photo you will find a Lightroom button that imports the photo for editing, a share button and the delete option. If you want to edit the photo you just took, press light room Button.
Editing in Lightroom
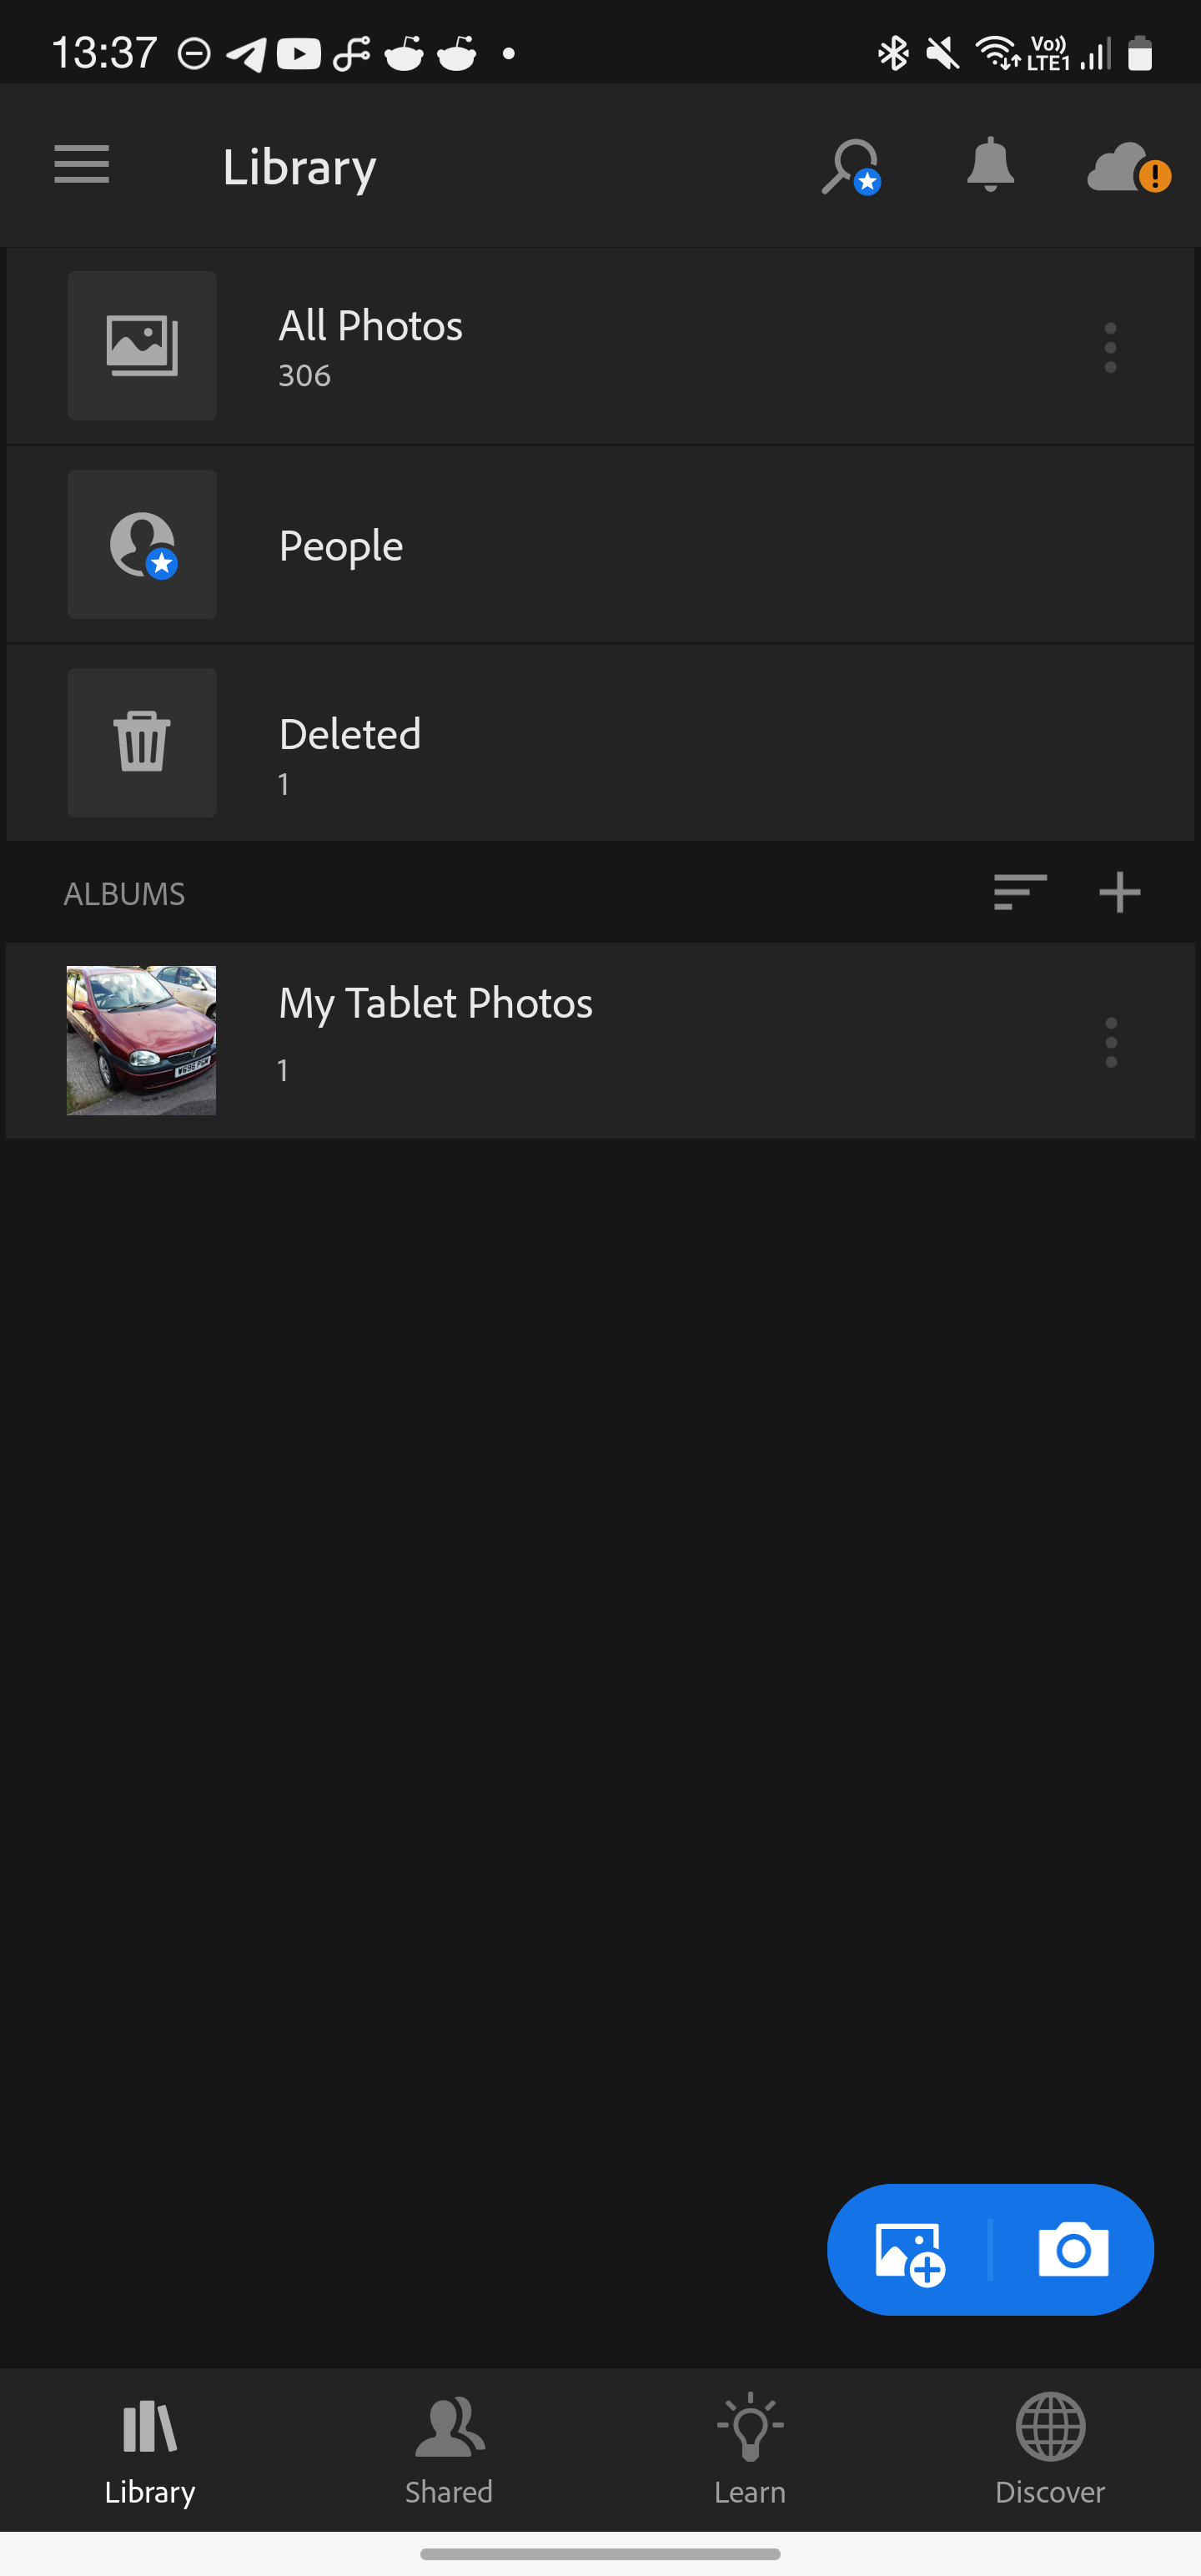
After tapping the Lightroom button, the photo will be imported and the app will open to the library page. It may take about ten seconds for Adobe to correctly import the image. So be patient if it doesn’t appear right away. When everything is ready, tap All fotos button above and then click on the image.
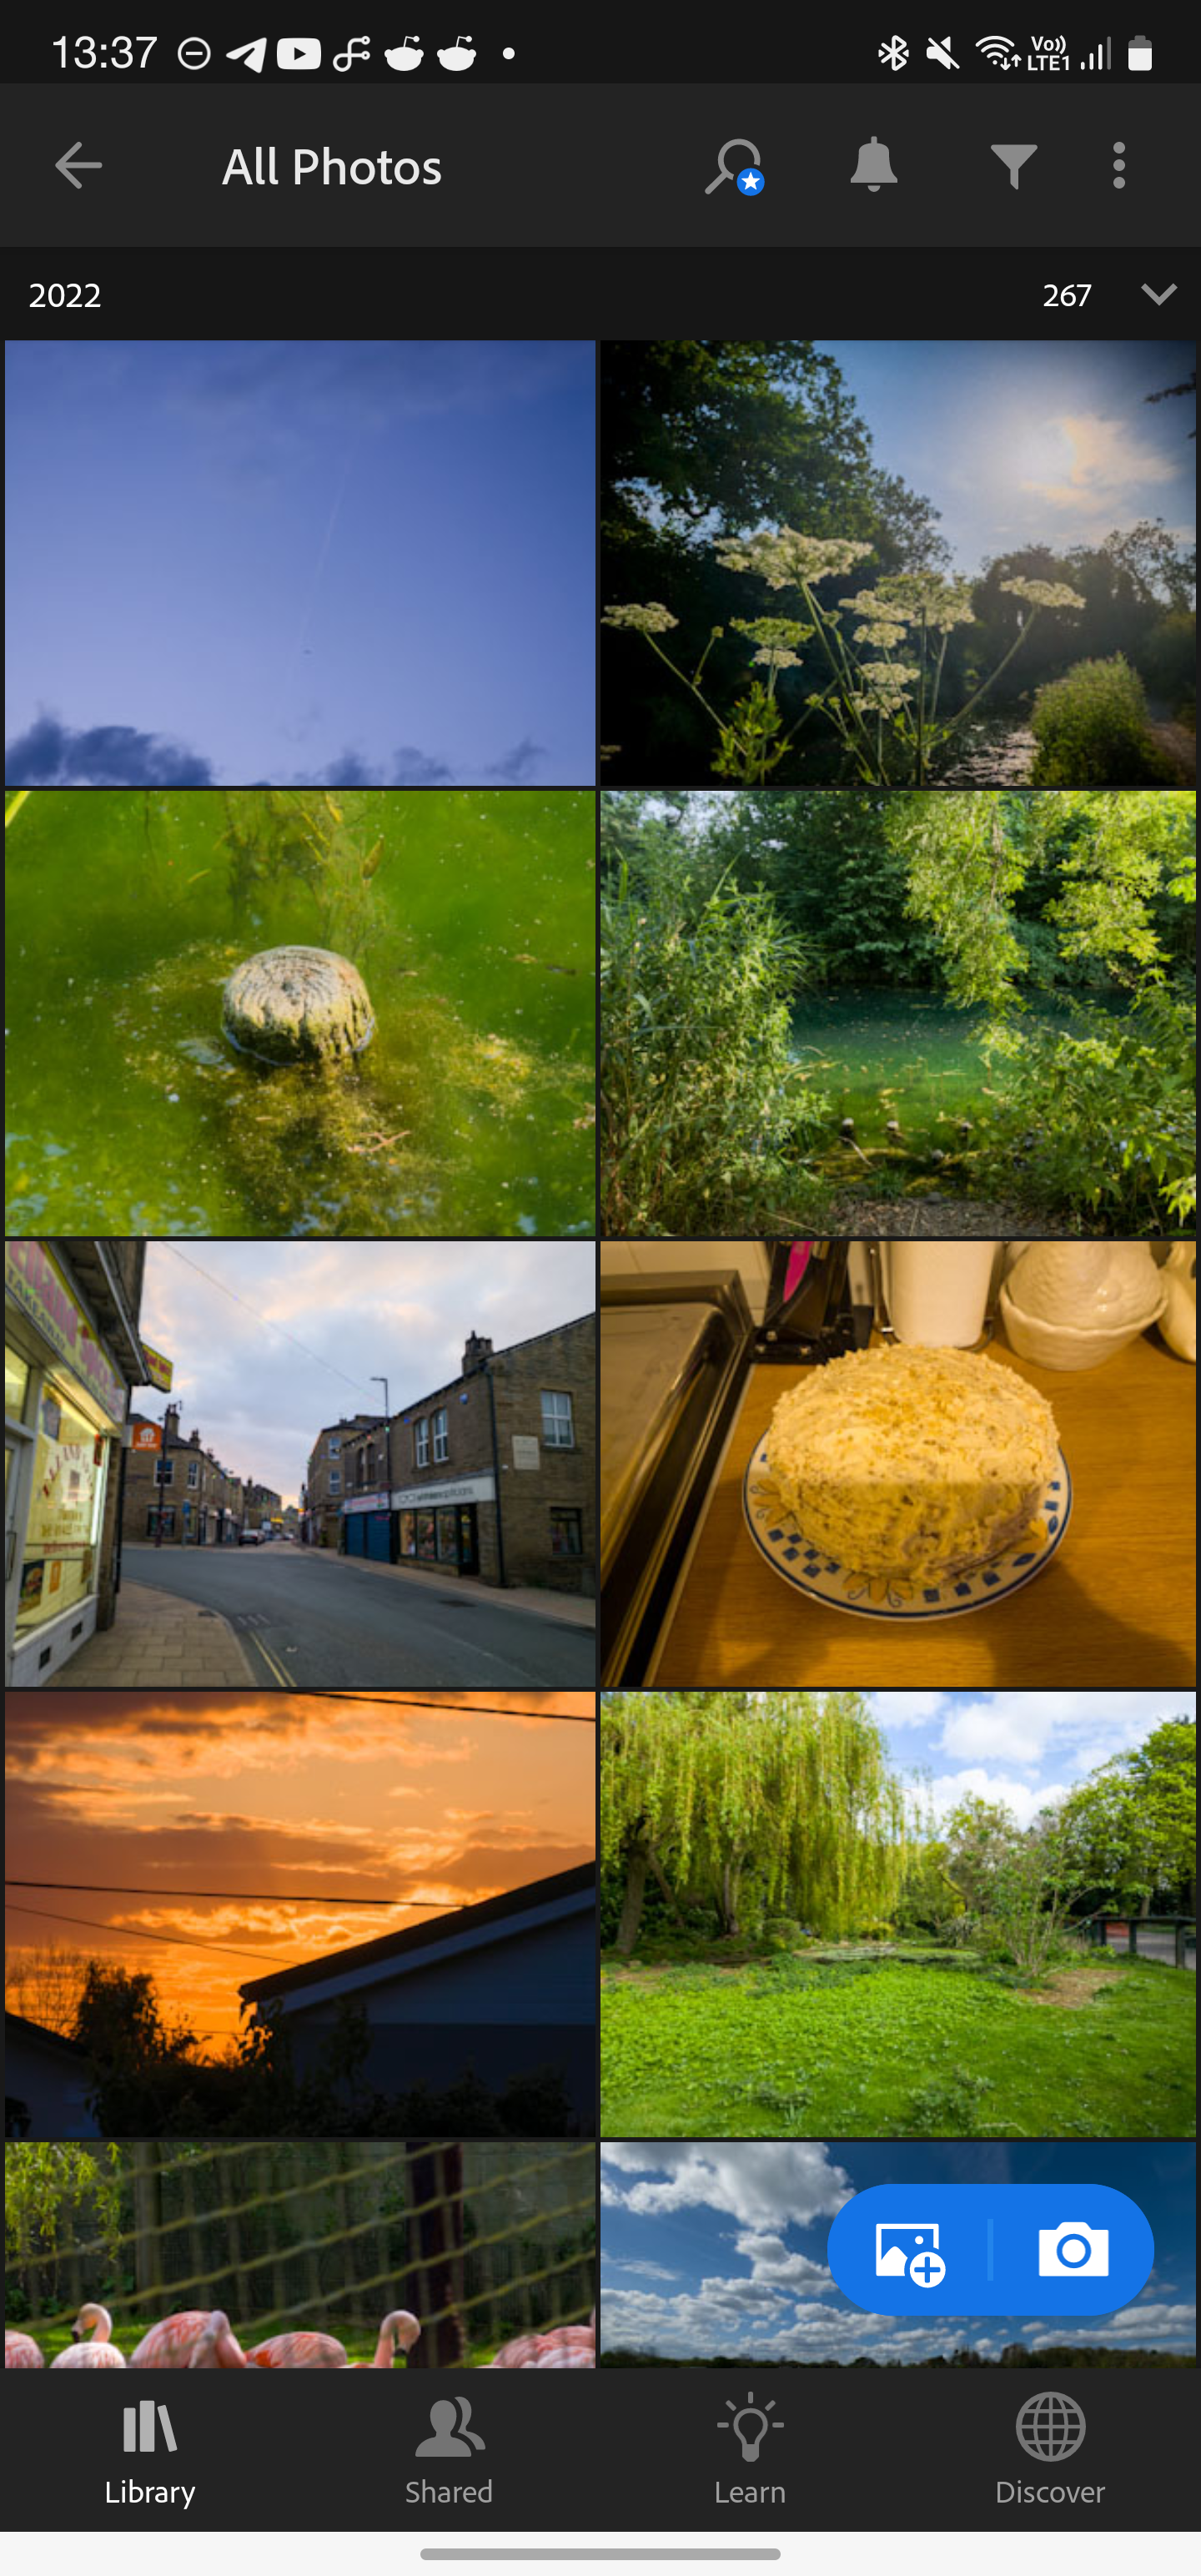
The editor has many options to get the look and style you want. Auto mode works well most of the time, but there are some edge cases where things go wrong. You can adjust the settings yourself even if you use the automatic mode first.
Lightroom is usually a paid app, but if you use Expert RAW you can use many of its features for free. The only things that are still taboo are masking, healing, and geometry. Everything else is available, including the optics menu.
In the optics menu you will find a switch to activate the lens correction. Turn this on and click on your phone’s name below it. Here you can browse through a huge list of Samsung devices that Adobe has lens profiles for. Locate your phone, in this case an S22 Ultra, and select the appropriate camera.
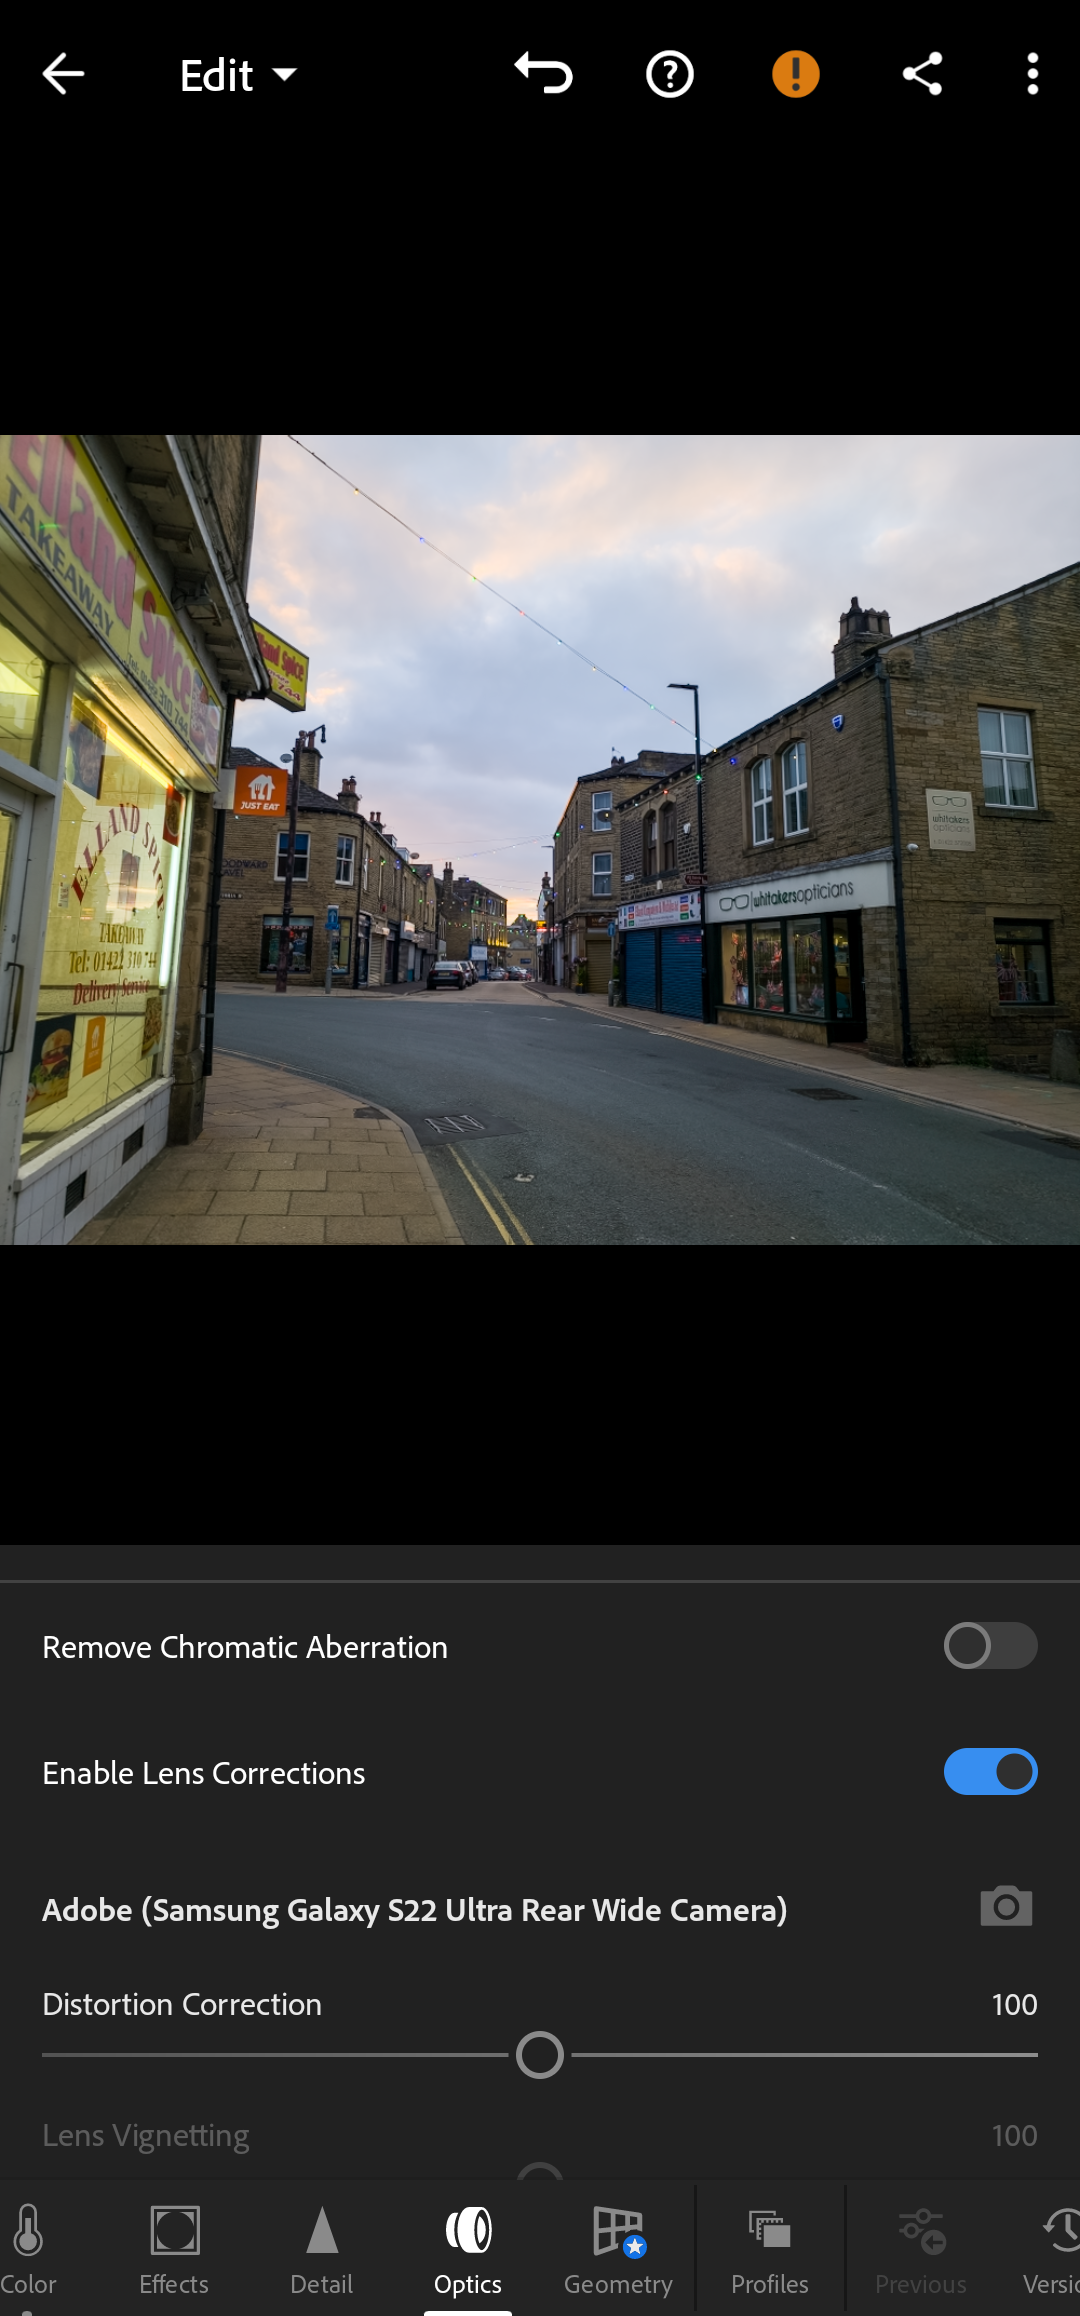
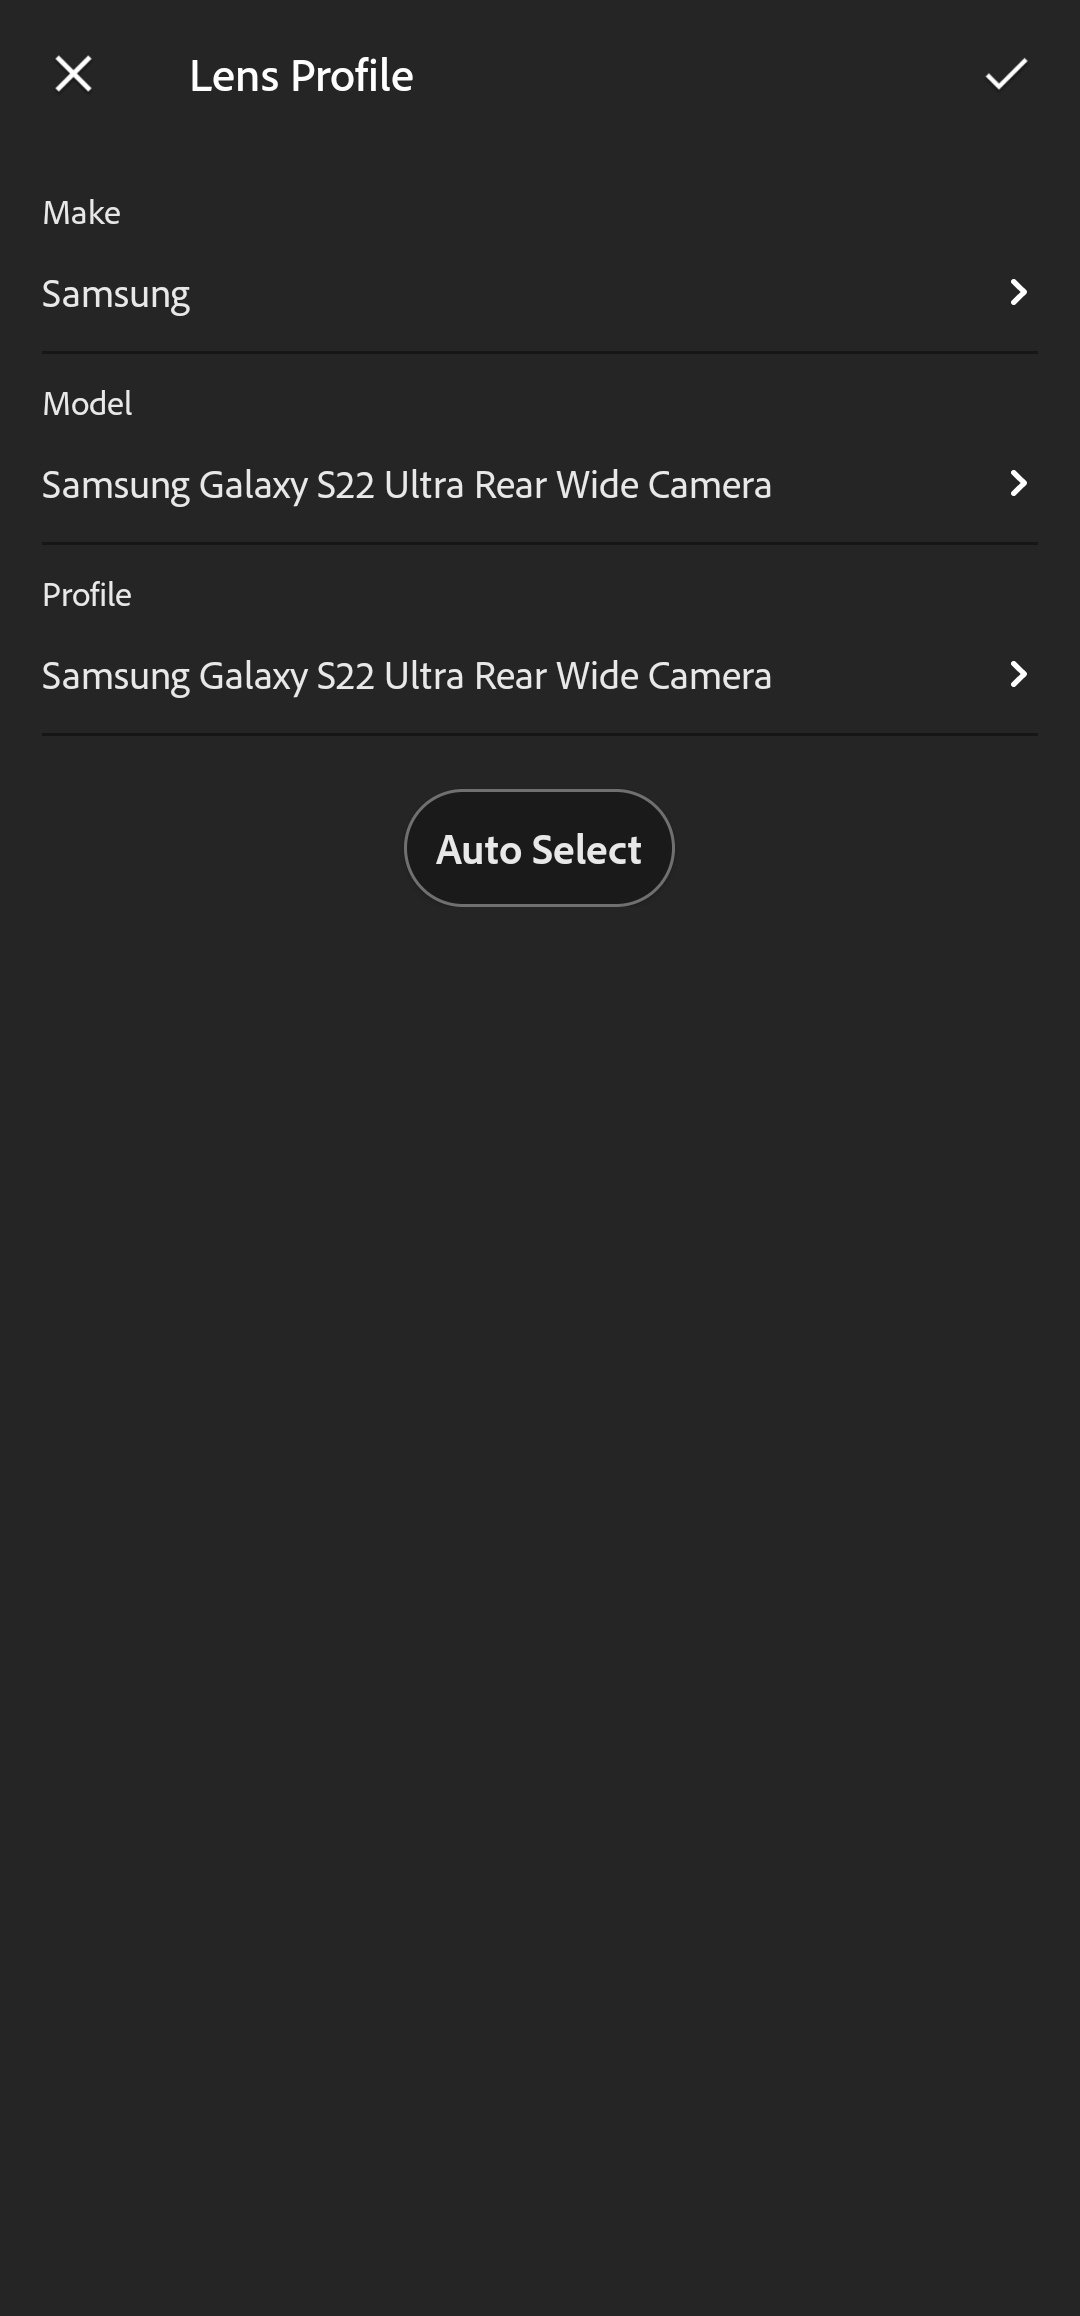
After that, the app corrects the lens distortions based on the technical specifications of your camera lens and does an excellent job. The differences are small but noticeable, and you can change the lens correction yourself if you prefer.
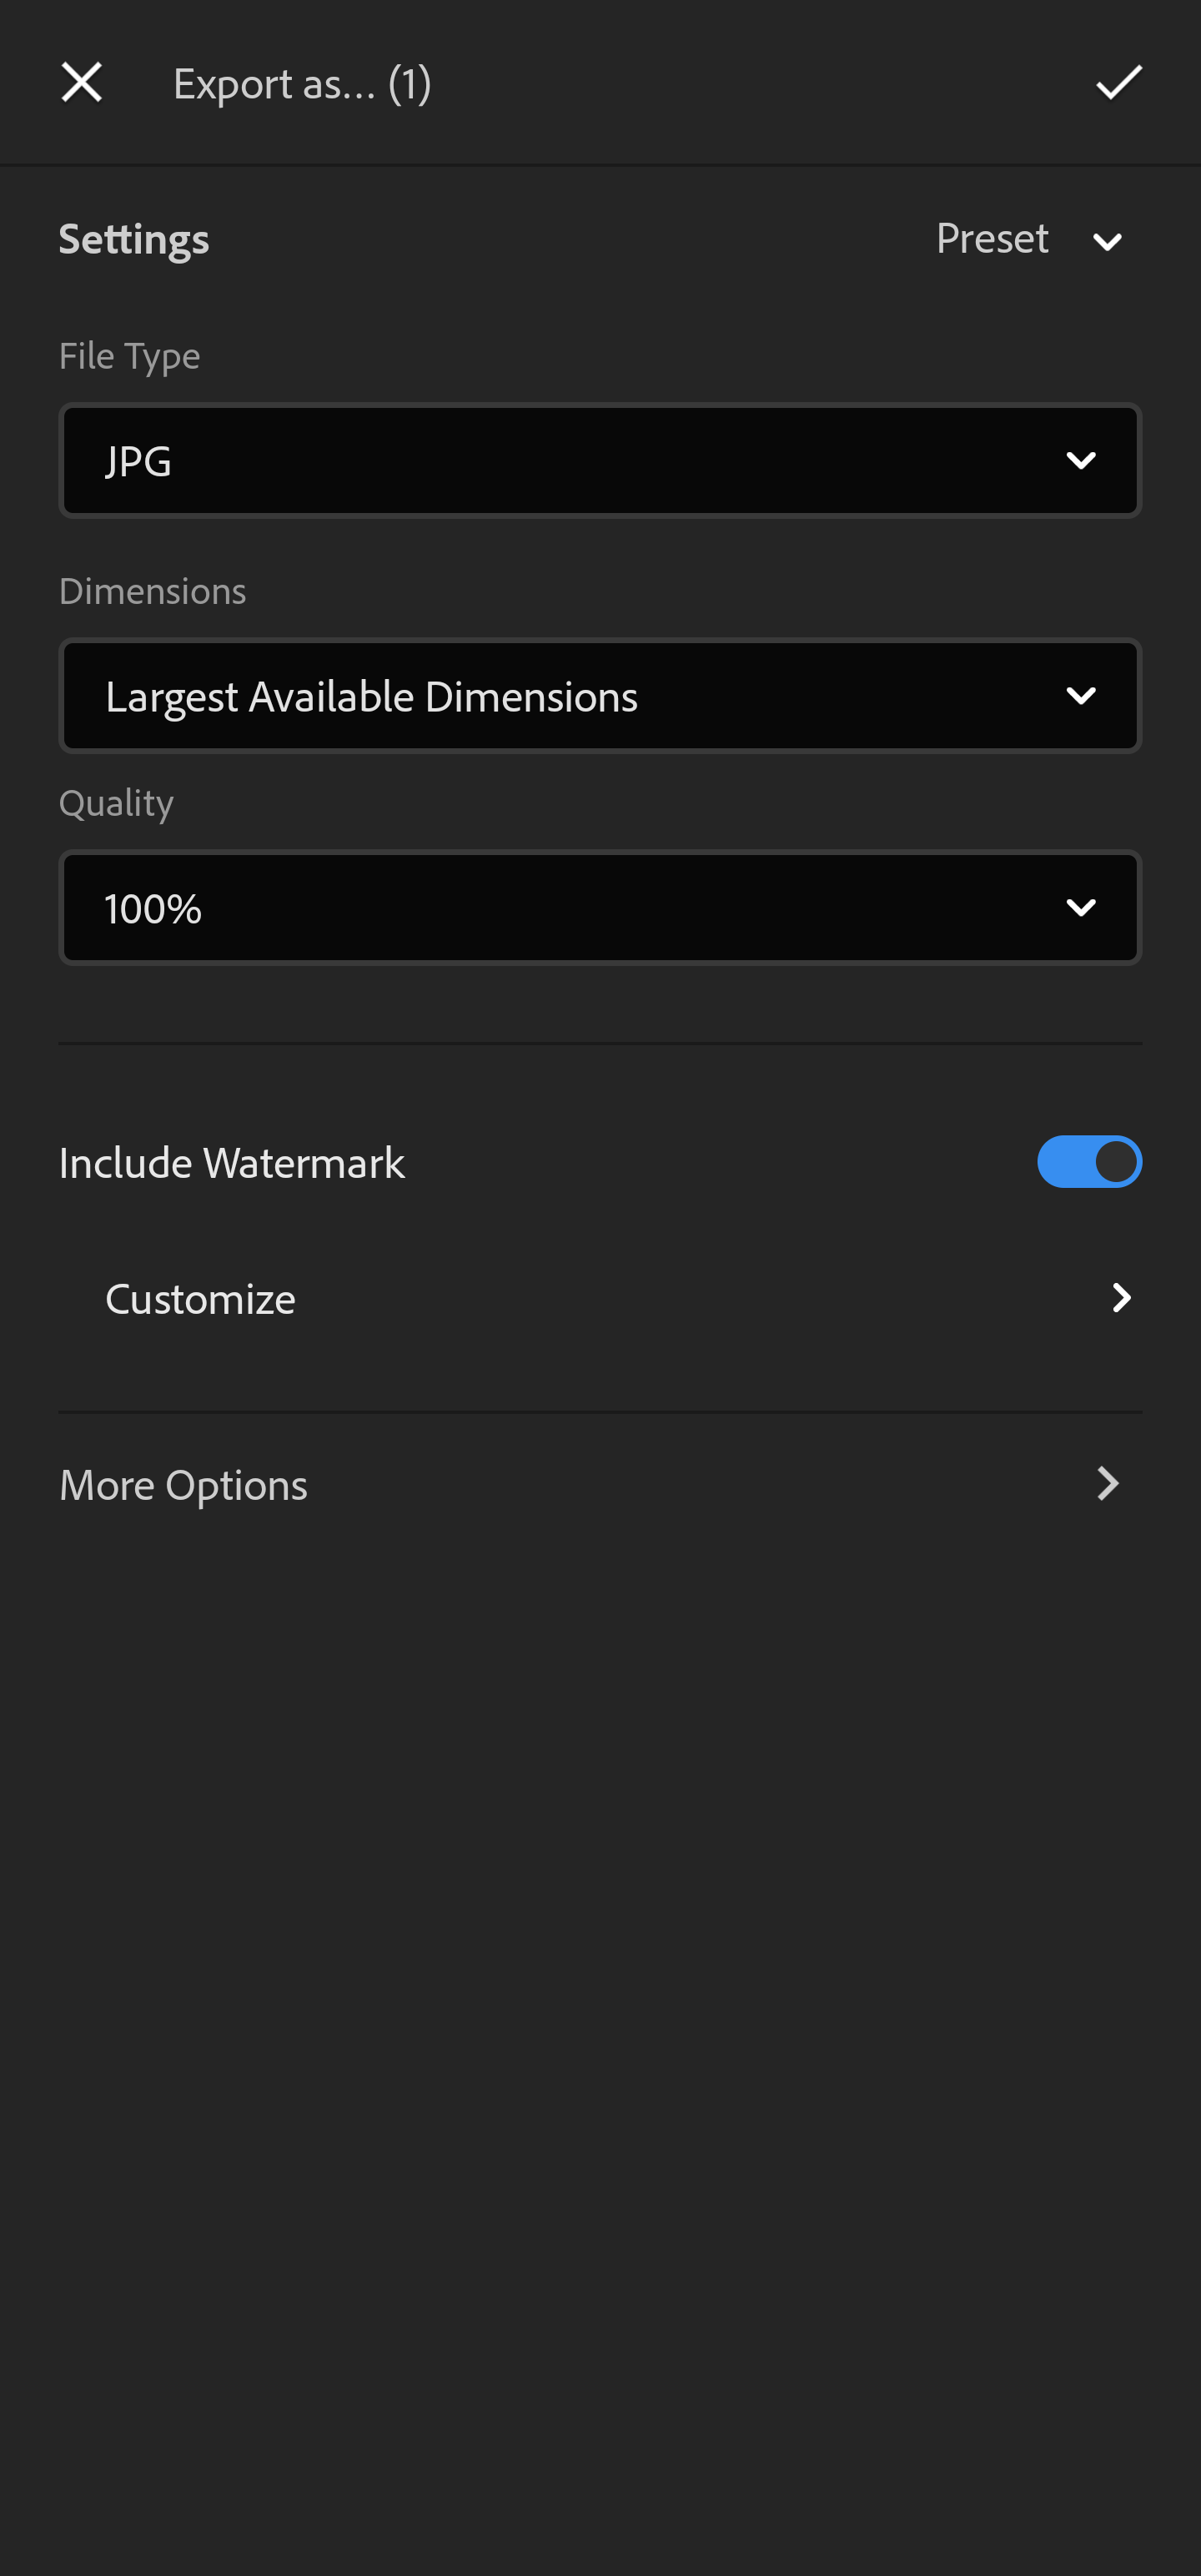
When your photo looks just right, click Split button at the top of the screen and then select Export. You can choose the file type, change the dimensions and compress the image. You might want to try the watermark feature in this menu. You can add an “Expert RAW” watermark so you can see which images are from here and which are from the regular camera.
Do the photos look better?
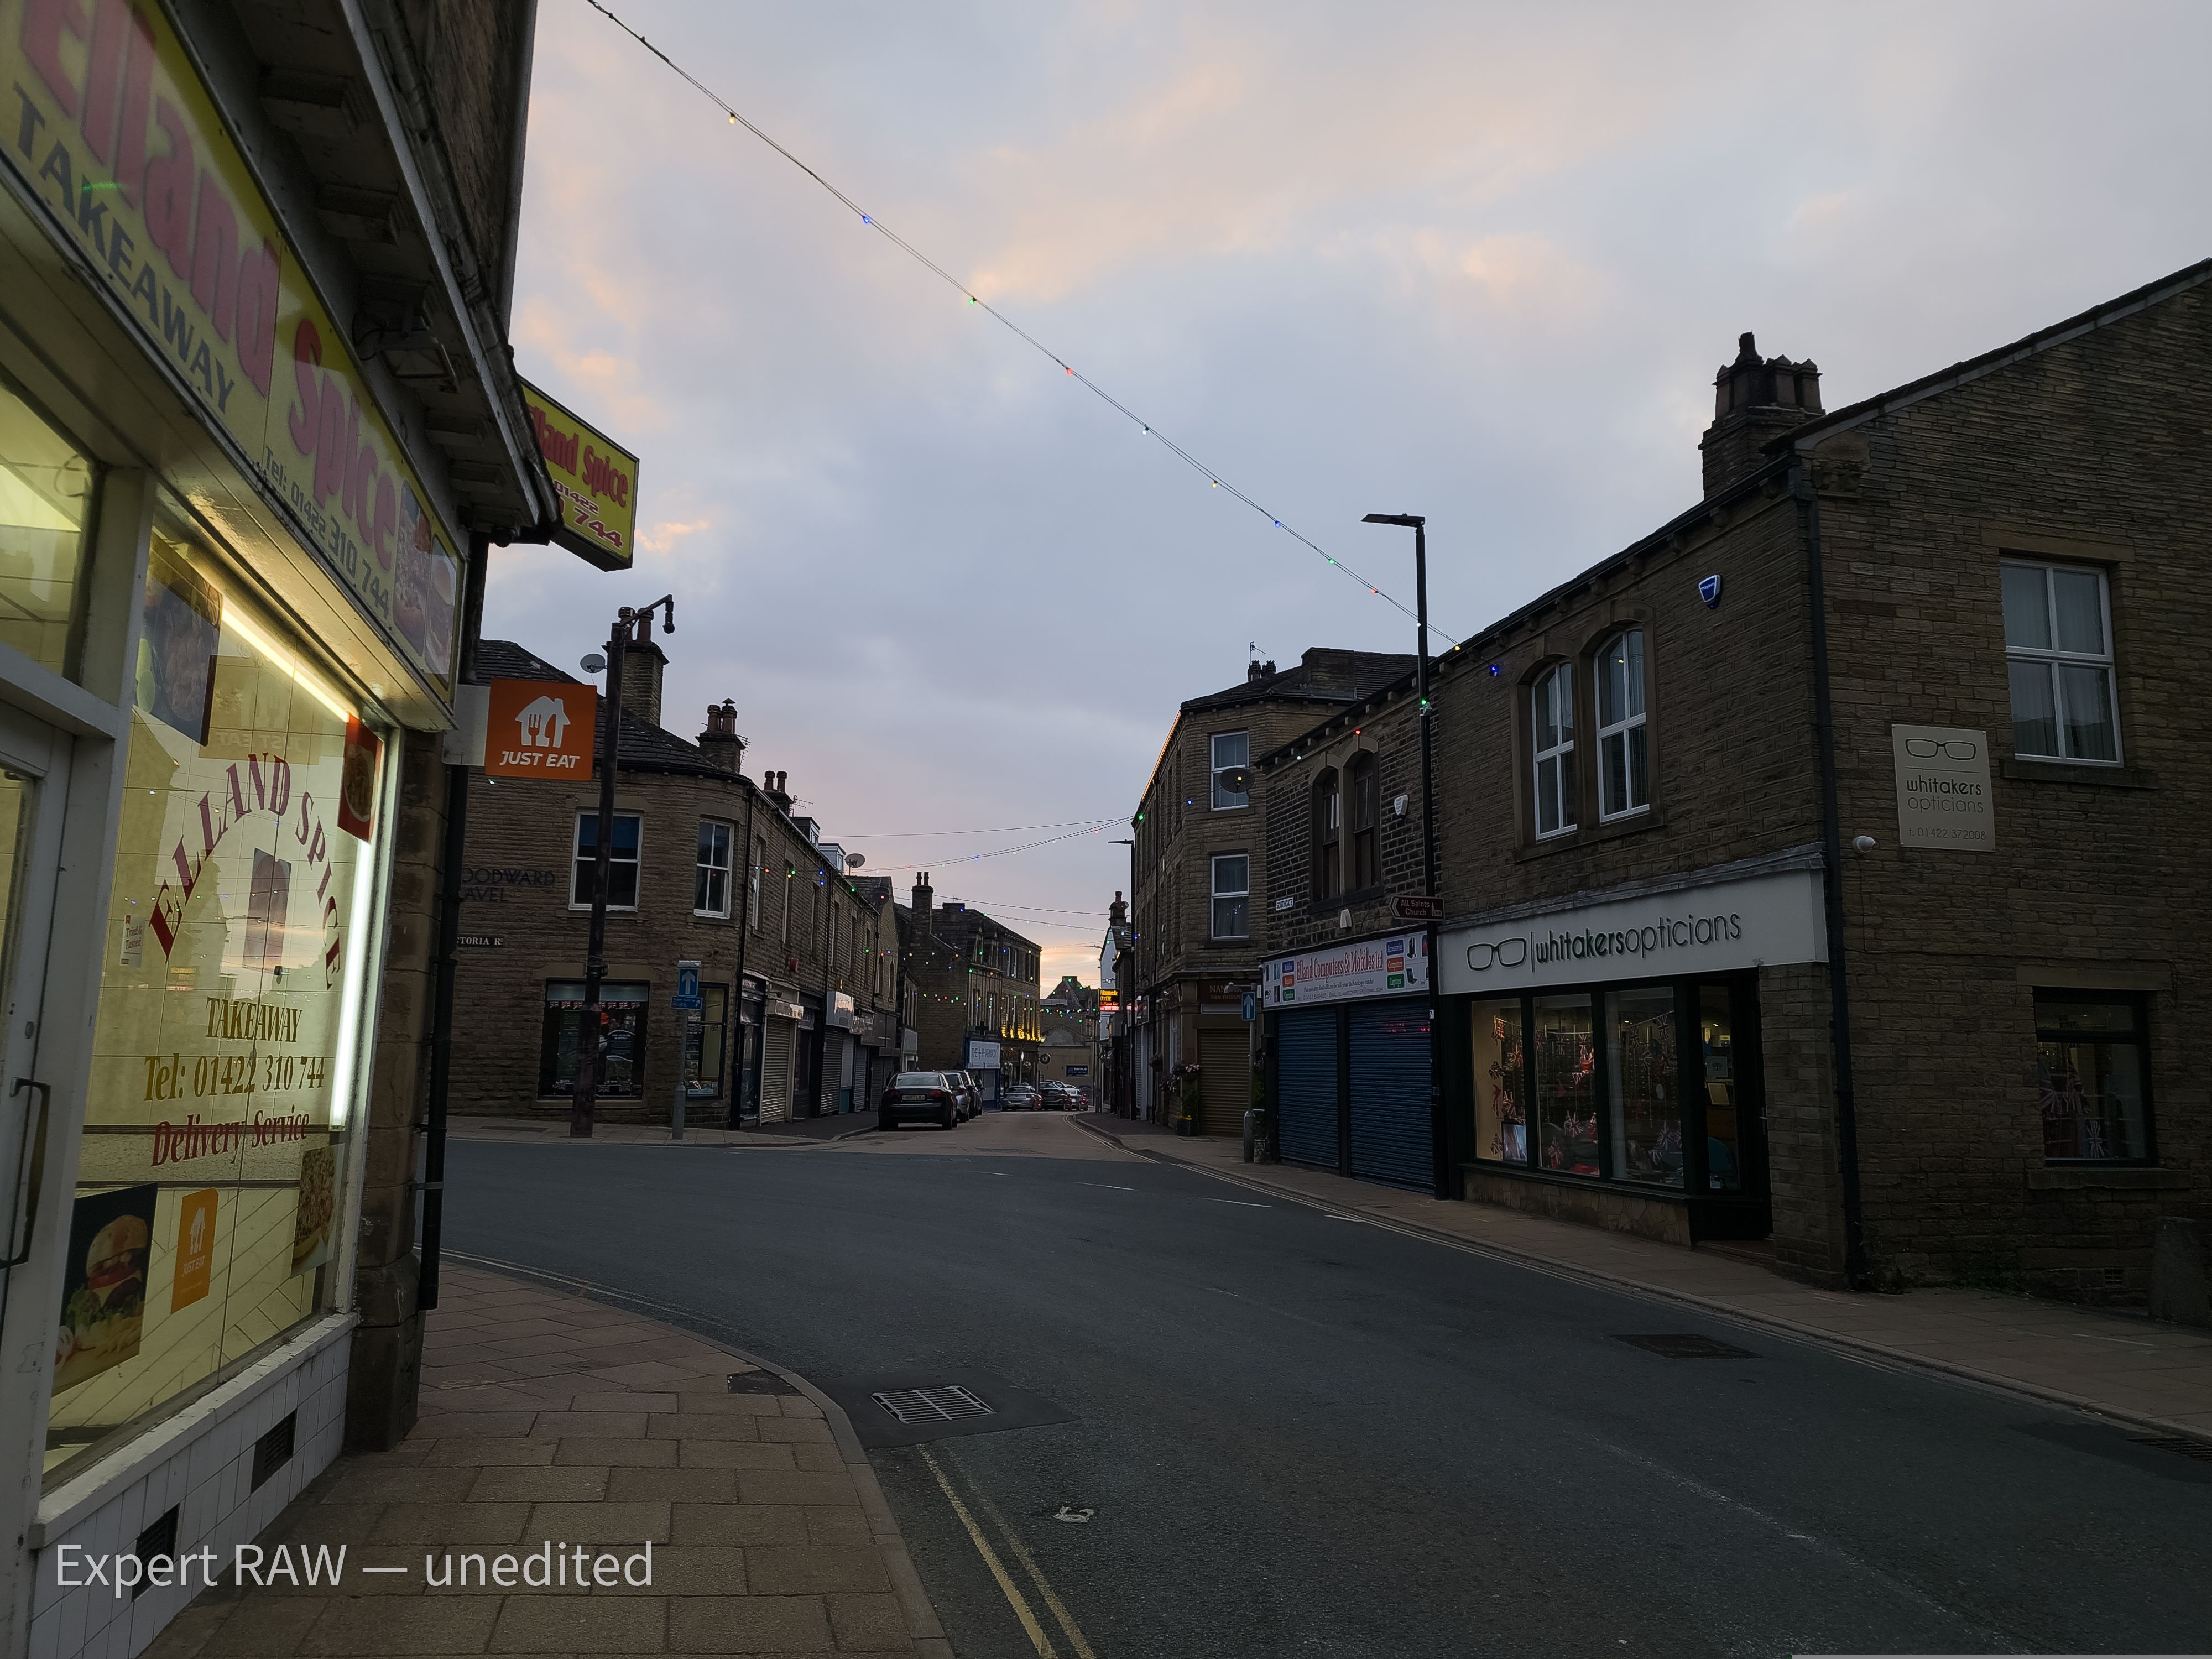
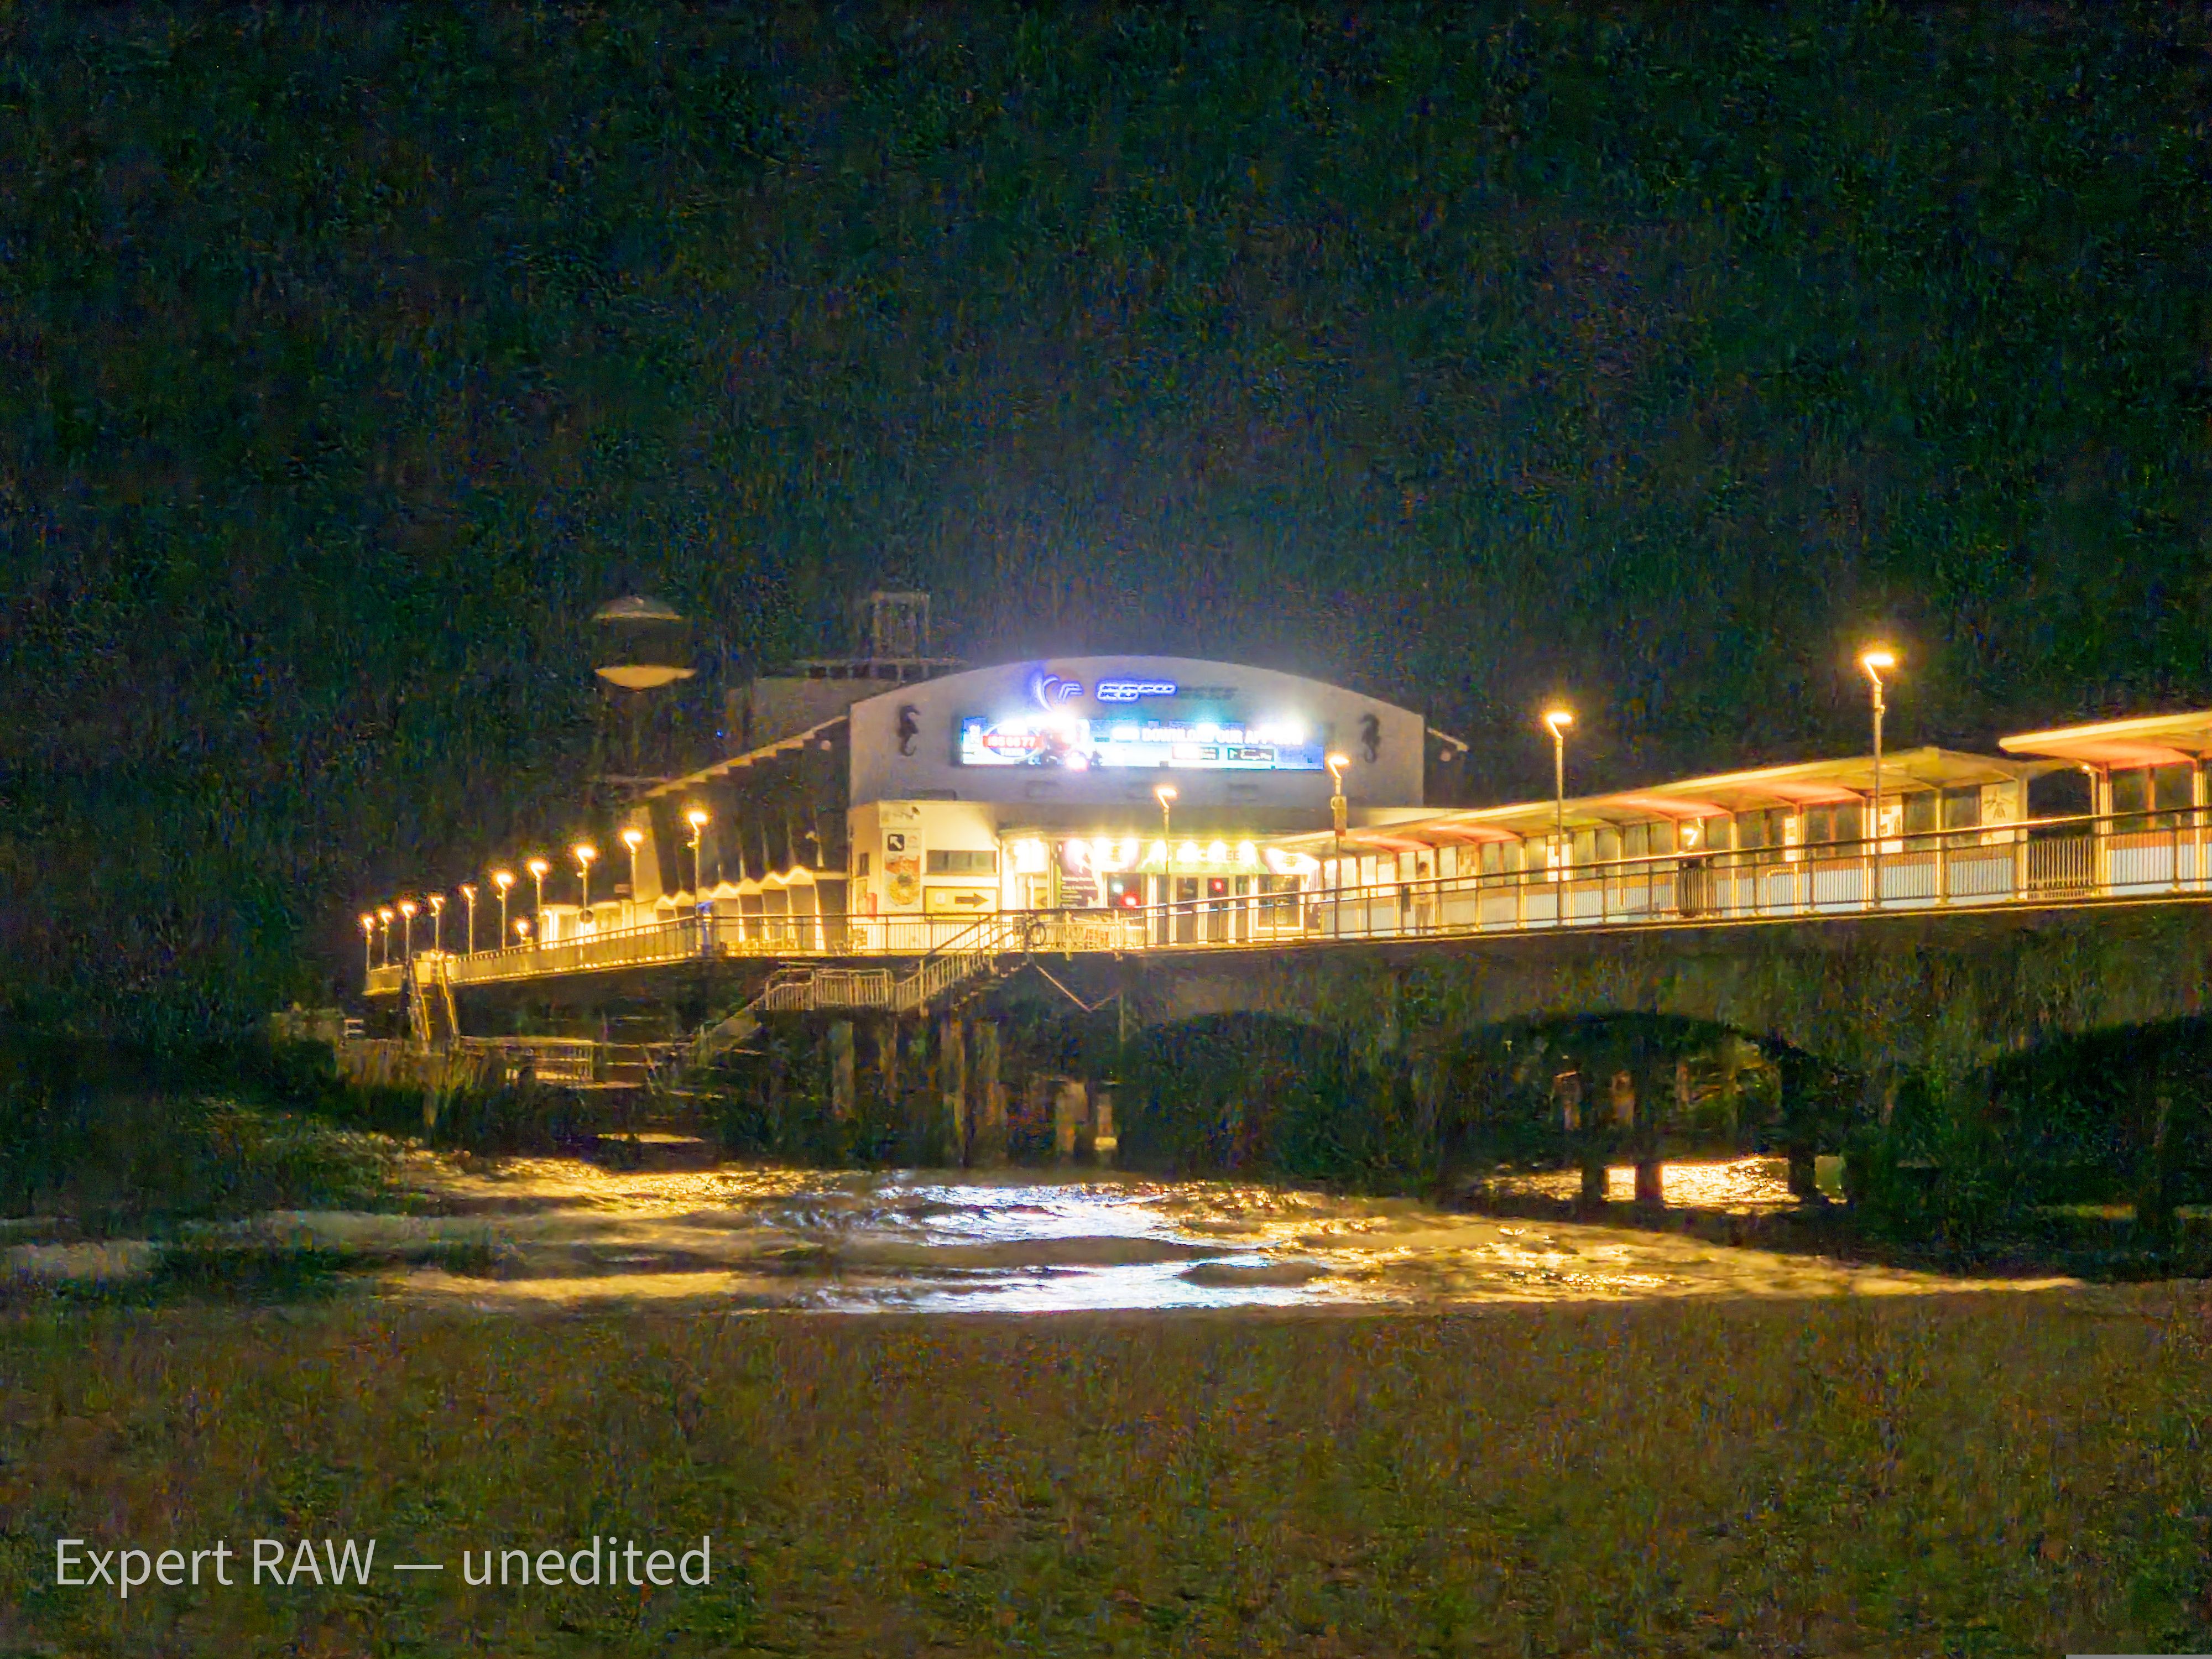
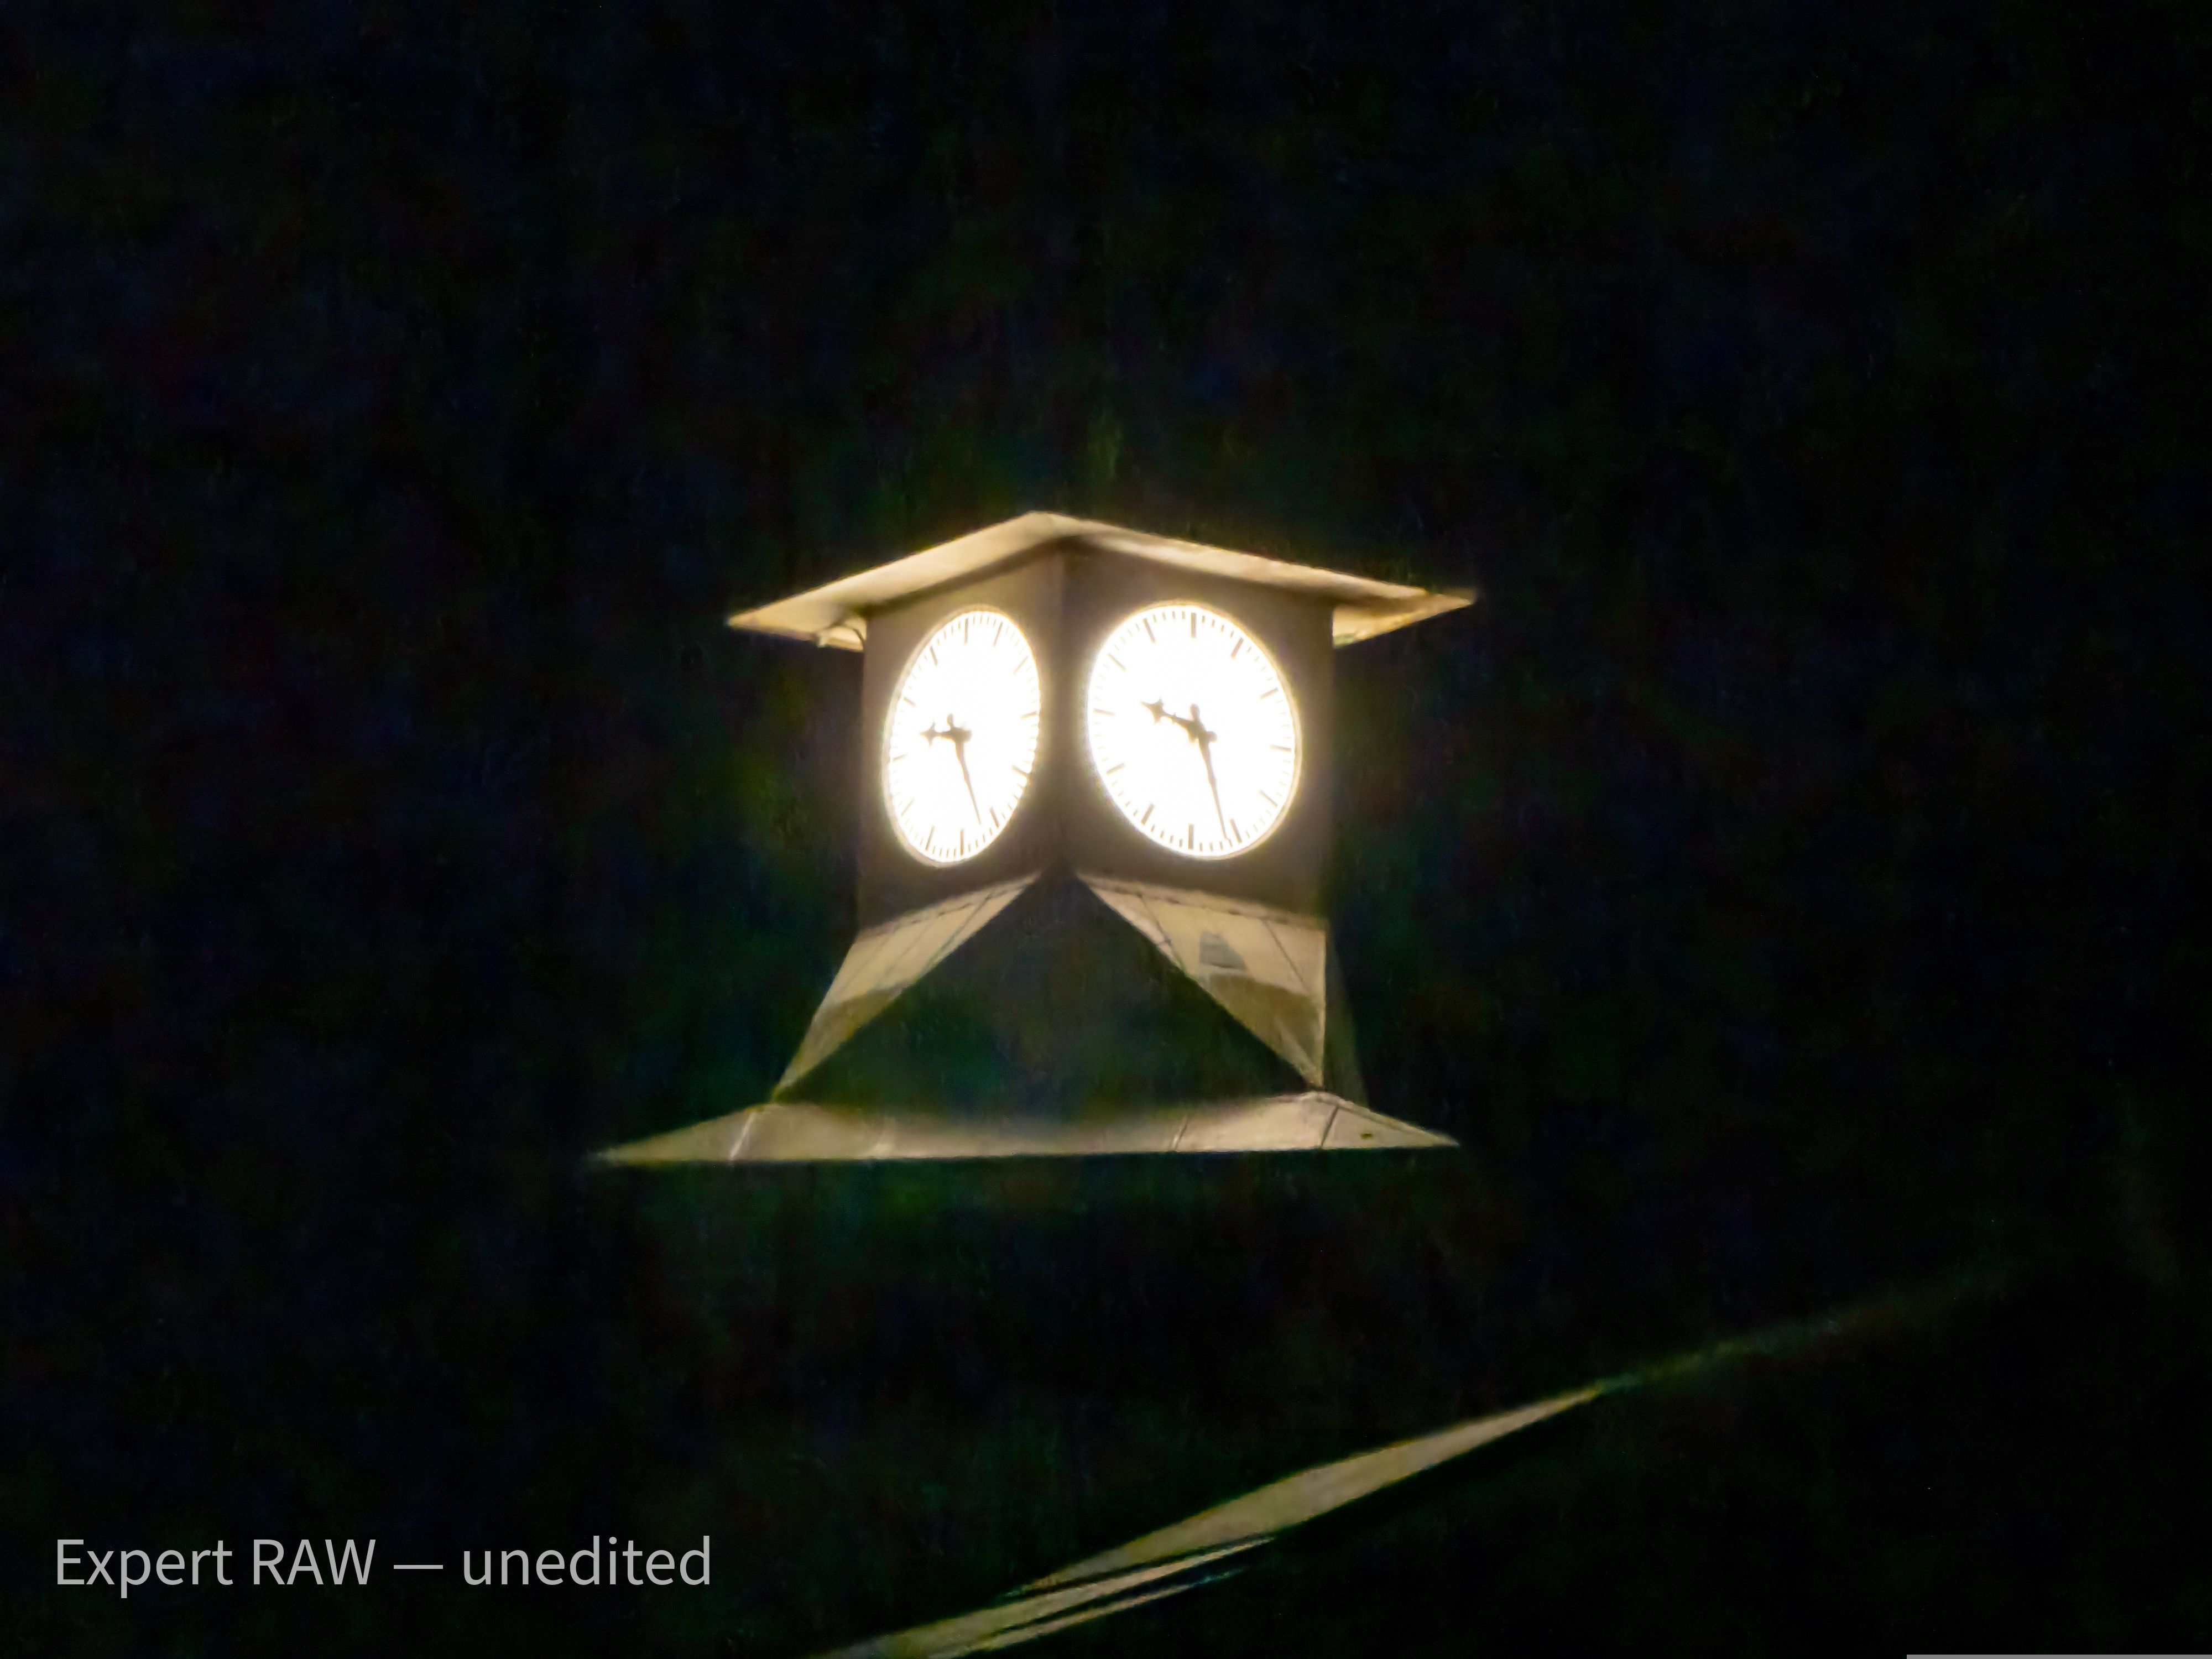
The images below are examples of using Expert RAW. The left images are unedited, the right ones are edited. Each photo is watermarked to make this clear.
With the cakes and the city street, the differences are small. Lighting was a challenge, with dim, faded lighting in the cafe and an overcast sunset on the street. All that was needed for these images was color correction and adjustment of highlights, shadows and saturation. The difference isn’t big, but the edited images look better visually. It’s always better to edit them in RAW than in JPEG from the regular camera app.

.jpg)
.jpg)
If you head over to the pier and clock tower, you can see what editing in Expert RAW is really capable of. The original photos had exaggerated highlights and terrible grain in the shadows. Pulling down the highlights, removing as much grain as possible, and balancing the shadows and exposure results in dramatic and pleasing photos. Both were captured in pitch black darkness with only the illuminated clock and pier lights helping us see where we were going.
Shooting them in Expert RAW and then balancing everything in Lightroom produces a usable image without the need for a tripod, which an S21 Ultra’s night mode could never have done (these were taken before the phone was updated).
.jpg)
.jpg)
Should You Use Expert RAW?
Depends on. If you want a nice snap for Instagram and don’t take photos in tricky lighting, it doesn’t make much sense. But if you are interested in photography and like to keep a library of photos to look back on as memories, then give it a try. It’s not difficult to get used to, and some photos you create will look stunning.
Expert RAW is an excellent introduction to the realm of photography, and the ability to do it on a phone rather than an expensive camera makes it all the more accessible. Ready to get started? We have more tips on taking and editing RAW photos on Android.

